Category: Herbs

  • How to Grow Basil from Seed: Complete UK Beginner’s Guide

    How to Grow Basil from Seed: Complete UK Beginner’s Guide

    Basil is one of the most rewarding herbs you can grow at home, and starting from seed gives you access to far more varieties than any garden centre stocks. Whether you have a sunny windowsill, a greenhouse, or a sheltered patio, this guide walks you through every stage from sowing to harvest — tailored specifically for UK growing conditions.

    Quick Answer: Sow basil seeds indoors from late March to early May in the UK. Surface-sow onto moist compost at 15–20°C, keep in bright light, and expect germination in 7–14 days. Transplant outdoors after the last frost (typically late May to early June). Basil is rated RHS hardiness H1c — it will not survive frost and needs warmth to thrive.

    Why Grow Basil from Seed

    A packet of basil seeds costs around £1–£3 and contains hundreds of seeds. Compare that with £1.50–£2 for a single supermarket pot plant (which often collapses within a week because it has been grown fast under artificial light and overcrowded into a tiny pot).

    Starting from seed also gives you variety choice. Most garden centres stock generic sweet basil and perhaps one purple variety. Seed catalogues from UK suppliers like Chiltern Seeds, Kings Seeds and Thompson & Morgan offer dozens of cultivars — lemon basil, Thai basil, Greek bush basil, cinnamon basil, and more.

    Finally, growing from seed puts you in control of timing. You can sow successionally from March through to June for a continuous supply, rather than depending on whenever the garden centre happens to have stock.

    Best Basil Varieties for UK Growers

    All basil cultivars carry an RHS hardiness rating of H1c (heated greenhouse, minimum 5–10°C). None are frost-hardy. Here are the best types to try:

    Sweet Basil (Genovese type)

    The classic Italian basil with large, glossy leaves and strong clove-anise aroma. ‘Genovese’ is the benchmark cultivar for pesto. ‘Aroma 2’ holds an RHS Award of Garden Merit (AGM) and offers excellent disease resistance — a reliable first choice for UK beginners. ‘Salvo’ (also AGM) is another dependable performer that handles our cooler summers well.

    Greek / Bush Basil

    Compact, bushy plants with tiny leaves and a neat, dome-shaped habit. Ideal for containers and windowsills. ‘Pluto’ carries an RHS AGM and stays particularly tidy at around 20–25cm tall. Greek basil is naturally more branching, so it needs less pinching out than tall sweet basil types.

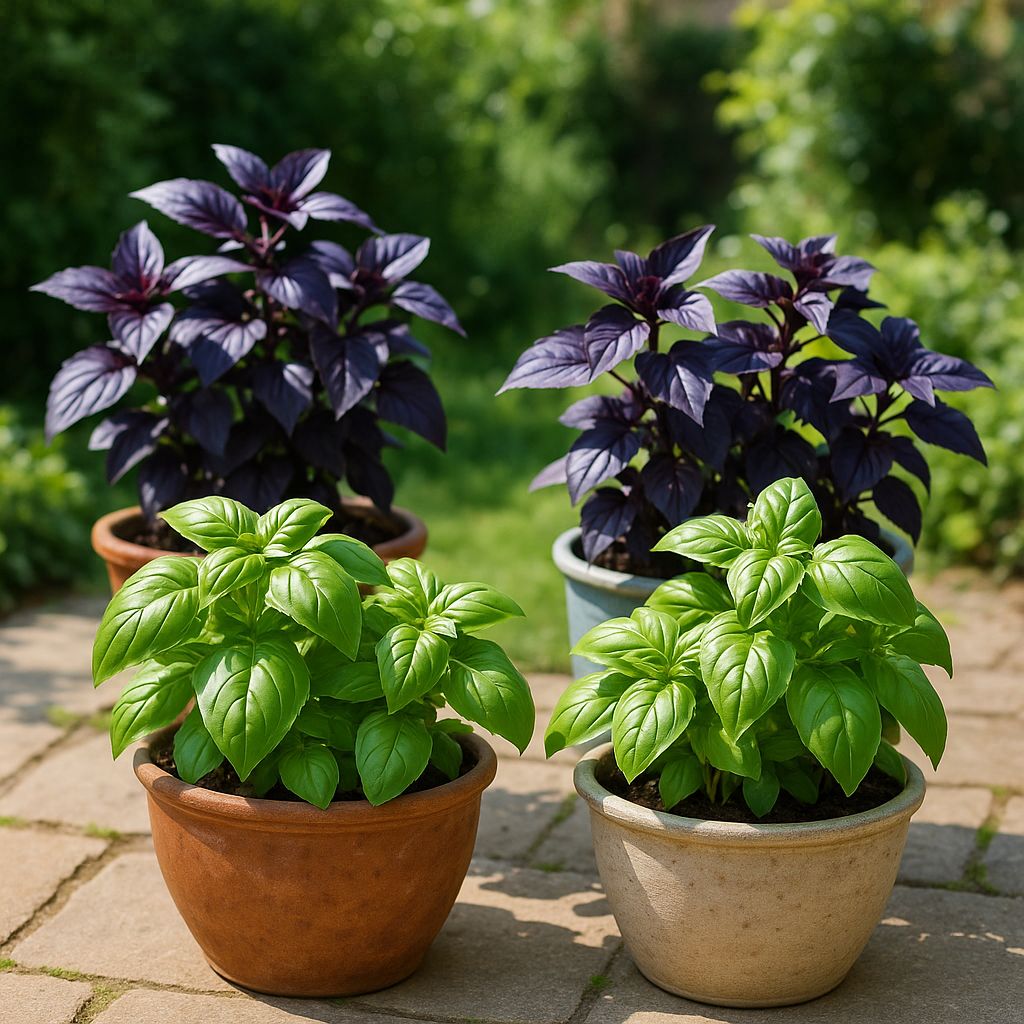
    Purple / Red Basil

    Red-leaved basil has received an RHS AGM, and cultivars like ‘Dark Opal’ and ‘Purple Ruffles’ add striking colour to salads and herb beds. The flavour is slightly more peppery than sweet basil. Purple basil can be slightly slower to germinate, so give it a little extra warmth.

    Lemon Basil

    Bright citrus aroma, wonderful in Thai and Vietnamese dishes or steeped in cold water. ‘Lemonade’ and ‘Mrs Burns’ Lemon’ both carry RHS AGM status. They grow slightly taller than sweet basil and benefit from regular pinching.

    Thai Basil

    Distinctive anise-liquorice flavour with attractive purple stems and flower spikes. More heat-tolerant than sweet basil but equally tender. Good for stir-fries and curries. Grow in the warmest, most sheltered spot you have.

    Cinnamon Basil

    Warm, spicy scent with purple-tinged stems. An interesting addition to fruit salads and baking. Grows well alongside sweet basil with the same care requirements.

    Month-by-Month UK Growing Calendar

    Month Activity Notes
    January Too early. Plan varieties and order seeds.
    February Order seeds if not done. Clean pots and trays.
    March Sow indoors Late March, on a warm windowsill or in a heated propagator at 15–20°C.
    April Sow indoors Main sowing window. Prick out seedlings from March sowings.
    May Sow indoors / Harden off Last indoor sowings. Begin hardening off earlier batches from mid-May.
    June Transplant outdoors / Sow direct (south only) Plant out after last frost. In the south, try a direct outdoor sowing in a sheltered spot.
    July Harvest Regular picking encourages bushy growth. Pinch out flower buds.
    August Harvest Peak harvest month. Make pesto and freeze in ice-cube trays.
    September Harvest / Bring indoors Move pots inside before night temperatures drop below 10°C.
    October Indoor plants only Windowsill plants continue if kept warm and bright.
    November Indoor plants only Growth slows significantly. Reduce watering.
    December Plants rarely survive low winter light. Start fresh in spring.

    How to Sow Basil Seeds Step by Step

    1. Fill a seed tray or small pots with fine-grade seed compost. Water the compost before sowing so the surface is evenly moist but not waterlogged. A good peat-free seed compost works well.
    2. Surface-sow the seeds. Basil seeds need light to germinate, so scatter them thinly on the compost surface and press them gently in with your palm or the bottom of a pot. Do not cover them with compost.
    3. Cover with cling film or a clear propagator lid to hold in humidity. Remove or vent daily to prevent mould.
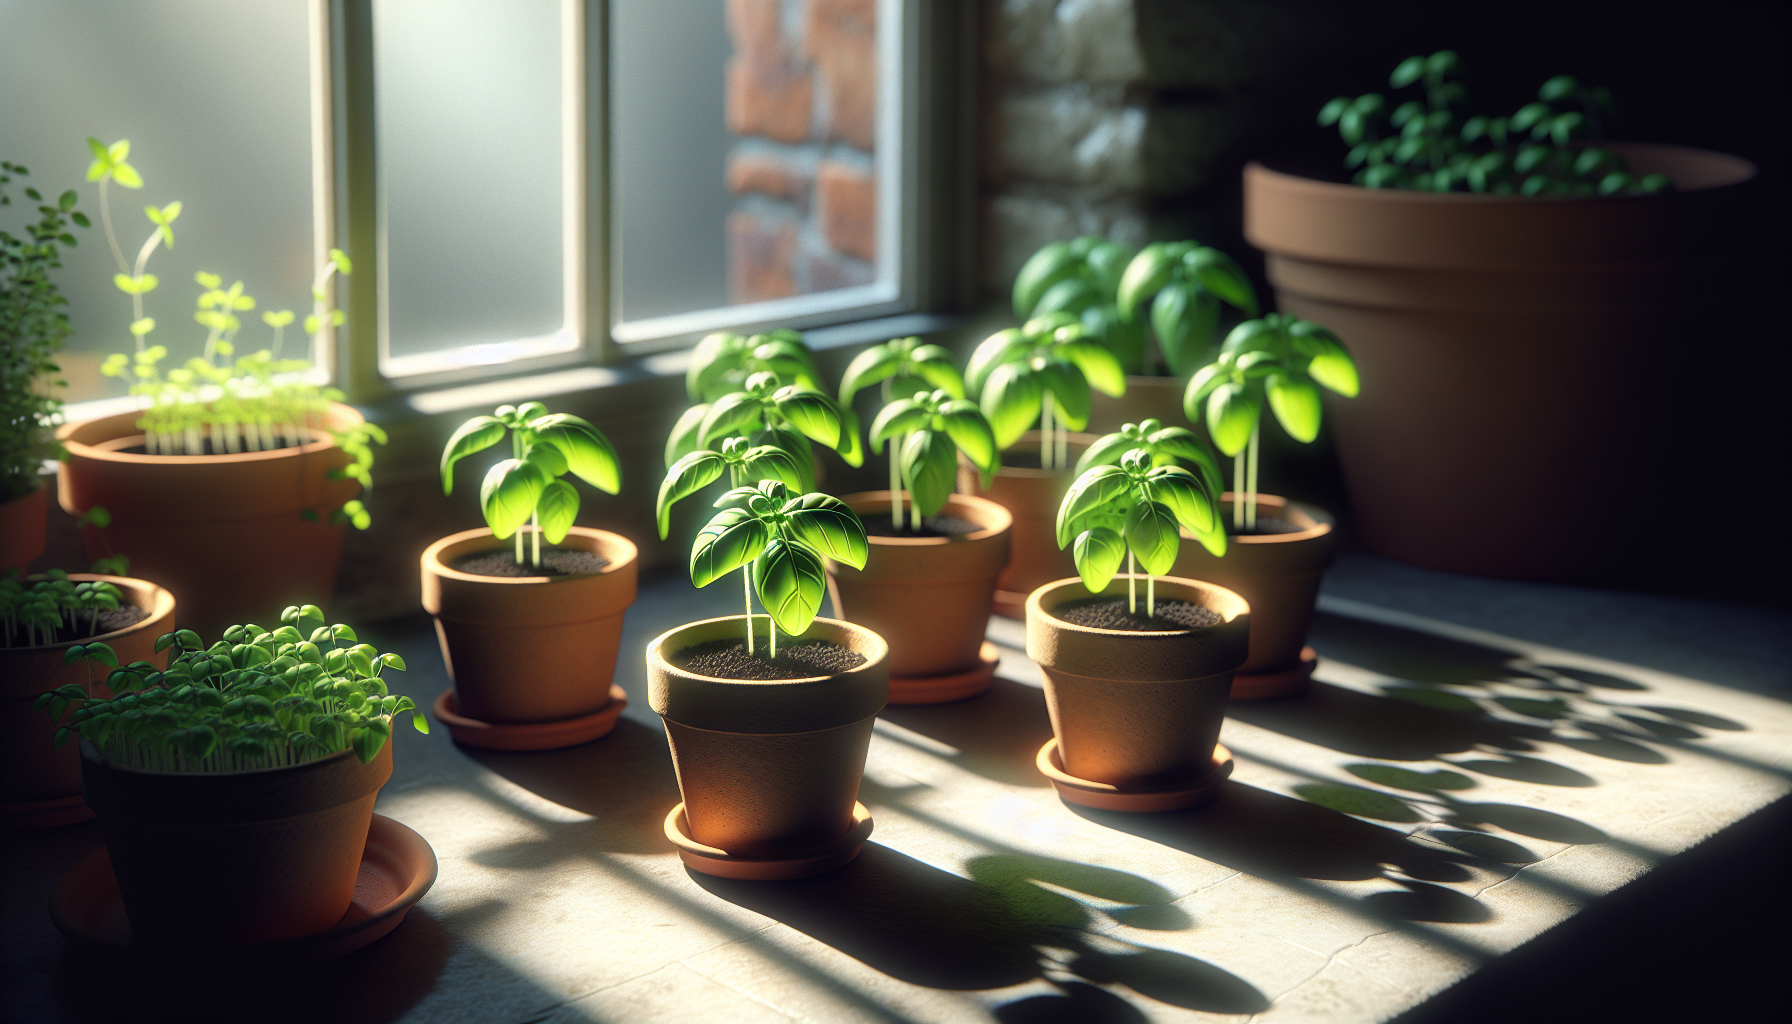
    4. Provide warmth. Basil germinates best at 15–20°C. A warm windowsill above a radiator works, or use a heated propagator. Below 12°C, germination is patchy and slow.
    5. Ensure bright light. Place on the brightest windowsill you have (south-facing is ideal). Seedlings that stretch towards the light become leggy and weak.
    6. Wait 7–14 days. Germination typically takes one to two weeks at the right temperature. Remove the cover as soon as most seedlings emerge.

    Tip: Sow a small batch every three to four weeks from March to May. This gives you young, productive plants throughout the summer rather than one batch that bolts in August.

    Growing On and Transplanting

    Pricking Out

    When seedlings develop their first pair of true leaves (the second set of leaves, after the rounded seed leaves), carefully transplant them into individual 7–9cm pots filled with multipurpose compost. Handle seedlings by their leaves, never the stem — a damaged stem is fatal, but a plant can grow a new leaf.

    Hardening Off

    From mid-May, begin moving plants outdoors for a few hours each day, gradually increasing the time over seven to ten days. Bring them in each evening. This acclimatises them to outdoor temperatures, wind and direct sunlight.

    Planting Out

    Transplant into final positions after the last frost — typically late May to early June in most of England and Wales, and mid-June in Scotland and northern areas. Choose a warm, sheltered spot in full sun. Space plants 20–30cm apart.

    If you are growing basil in containers (which most UK growers do for flexibility), see the next section for specific advice on growing basil in pots.

    Container Growing

    Basil is one of the best herbs for container growing, and for most UK gardeners a pot on a sunny patio or windowsill is the most practical approach.

    • Pot size: Minimum 15cm diameter for a single plant. A 20–25cm pot is better and gives the roots more room to develop. For a bushy display, plant three seedlings in a 30cm pot. See our guide to choosing the right pots.
    • Compost: Use a quality peat-free multipurpose compost mixed with a handful of perlite or horticultural grit for drainage. Basil hates sitting in soggy compost.
    • Drainage: Every pot must have drainage holes. Stand pots on feet or gravel so water flows freely. Empty saucers after heavy rain.
    • Windowsill growing: A bright, south-facing windowsill works year-round (though growth slows dramatically in winter). Rotate the pot a quarter-turn every few days so the plant does not lean towards the light.

    Container-grown basil dries out faster than plants in beds, so check the compost daily in hot weather. For more herb container ideas, read our guide to the best herbs to grow in containers.

    Ongoing Care — Watering, Feeding and Pinching Out

    Watering

    Water basil in the morning so the foliage dries before evening — persistently wet leaves invite fungal diseases. Keep the compost consistently moist but never waterlogged. In hot spells, container plants may need watering twice a day.

    Feeding

    Basil is not a heavy feeder. A dilute liquid feed (half-strength general-purpose or tomato feed) every two to three weeks from June onwards is sufficient. Over-feeding produces lush growth with less aromatic flavour.

    Pinching Out

    This is the single most important care task. Once a stem has three pairs of leaves, pinch or snip the growing tip just above the second pair. This forces two new side shoots to develop, creating a bushier, more productive plant. Repeat whenever stems reach three pairs of leaves.

    Remove flower buds as soon as they appear. Once basil flowers, the leaves turn bitter and the plant channels energy into seed production rather than leaf growth. If you want to save seed, let one or two stems flower at the end of the season.

    Harvesting and Storing Basil

    Start harvesting once plants are about 15cm tall and have several sets of leaves. Always harvest from the top down — this is the same as pinching out and keeps the plant producing.

    Fresh Use

    Pick leaves or stem tips as needed. Basil is best used fresh, added at the end of cooking to preserve its volatile oils.

    Freezing (Best Preservation Method)

    Blend leaves with a splash of olive oil and freeze in ice-cube trays. These basil cubes drop straight into soups, pasta sauces and stews. Alternatively, lay whole leaves flat on a baking tray, freeze until solid, then transfer to a freezer bag.

    Drying

    Dried basil loses much of its flavour compared with fresh or frozen, but it works in slow-cooked dishes. Hang small bunches upside down in a warm, airy place for one to two weeks, then crumble into jars.

    Pesto

    The classic way to preserve a glut. Blend fresh basil with pine nuts, Parmesan, garlic and olive oil. Pesto freezes well in small containers or ice-cube trays for up to six months.

    Common Problems and Pests

    Damping Off

    Seedlings collapse at soil level, often overnight. Caused by fungal pathogens in cool, wet, poorly ventilated conditions. Prevention: Use clean pots, fresh compost, water from below, provide good air circulation and avoid overwatering. There is no cure once it strikes — discard affected seedlings and start again.

    Cold Damage

    Basil blackens and wilts at temperatures below about 5°C. Even a single cool night can set plants back significantly. Keep an eye on weather forecasts in May and June and be ready to bring pots indoors or cover outdoor plants with fleece if a late cold snap is forecast.

    Aphids

    Greenfly cluster on soft shoot tips. A strong jet of water dislodges them, or use a soft-soap spray. Encourage natural predators like ladybirds and lacewings.

    Slugs and Snails

    Mainly a problem for young plants at ground level. Container growing largely avoids this. Copper tape around pots, organic slug pellets (ferric phosphate) and evening patrols are all effective.

    Basil Downy Mildew

    Yellow patches on leaf tops with grey-purple fuzz underneath. Increasingly common in the UK. Prevention: Space plants well for airflow, water at the base (not overhead), and remove affected leaves immediately. Resistant varieties like ‘Aroma 2’ (AGM) offer some protection. Severely affected plants should be destroyed, not composted.

    Companion Planting

    Basil and tomatoes are the classic companion pairing — both in the garden and on the plate. There is some evidence that basil’s strong scent can confuse or deter whitefly, a common tomato pest, although the effect is modest. More practically, the two plants share identical growing requirements: full sun, warm temperatures, consistent moisture and rich soil. Growing them side by side in a greenhouse or sunny patio makes efficient use of your best growing spots.

    Peppers, aubergines and courgettes are similarly good neighbours. Basil also grows well alongside other Mediterranean herbs, though rosemary and thyme prefer drier conditions, so keep them in separate pots rather than the same container.

    Avoid planting basil near sage or rue, which are traditionally considered poor companions, and keep it away from mint — not because they clash, but because mint will overwhelm everything in its path.

    Frequently Asked Questions

    When should I sow basil seeds in the UK?
    Sow indoors from late March to early May. The compost temperature needs to be at least 15°C for reliable germination. Direct outdoor sowing is only realistic from early June in sheltered, southern gardens.
    Can I grow basil outside in the UK?
    Yes, but only during summer. Basil is rated RHS hardiness H1c and will not tolerate frost. Plant out after the last frost (late May to early June) in a warm, sheltered, sunny spot. Most UK growers keep basil in pots so it can be moved indoors when temperatures drop.
    Why are my basil seedlings leggy and thin?
    Insufficient light. Basil needs bright light from the moment it germinates. Move seedlings to your brightest windowsill or use a grow light. Sowing too thickly also forces seedlings to compete for light — thin them early.
    How long does basil take to grow from seed to harvest?
    Approximately six to eight weeks from sowing to first harvest. This varies with temperature and light — plants grown in a warm greenhouse will be ready sooner than those on a cool windowsill.
    Can I save seed from my basil plants?
    Yes. Let one or two stems flower and set seed at the end of the season. Once the flower spikes turn brown and dry, cut them off, shake the seeds into a paper bag, and store in a cool, dry place. They remain viable for about three to five years.

    What Next

    Now that you have basil covered, explore more herb-growing guides:

    Affiliate Disclosure: plantsandgardening.com is a participant in various affiliate programmes. Some links in this article may be affiliate links, meaning we earn a small commission if you make a purchase through them — at no extra cost to you. This helps us keep producing free gardening guides. We only recommend products we genuinely believe are useful for UK gardeners.
    About the Author

    John Kitcher is the lead gardening writer at Plants and Gardening. He grew up mucking in on his grandfather’s Devon allotment and has spent the last fifteen years growing fruit, veg and ornamentals across three very different UK gardens — a windy coastal plot in North Cornwall, a shaded London back garden, and now a clay-heavy smallholding in the Midlands. He trials every technique covered here in his own beds and containers before writing about it, cross-references against RHS and Kew guidance, and has a soft spot for heritage tomato cultivars and anything that survives a British winter without complaint.

    Got a question about something we’ve written? Drop a comment — we read every one.

  • How to Grow Parsley: Complete UK Beginner’s Guide

    How to Grow Parsley: Complete UK Beginner’s Guide

    Last updated: 7 April 2026

    Quick Answer: Sow parsley seeds indoors from February to March, or directly outdoors from April to June, into moist, well-drained compost. Seeds are notoriously slow to germinate — expect 2 to 4 weeks. Parsley thrives in partial shade to full sun and grows brilliantly in containers. It is a biennial herb, producing leaves in its first year and flowering in its second, so most gardeners grow it as an annual and re-sow each spring.

    Parsley (Petroselinum crispum) is one of the most useful herbs you can grow in a UK garden. It works in almost every savoury dish, it grows happily in pots on a windowsill or patio, and once established, it keeps producing fresh leaves for months. Whether you have a sprawling veg patch or a single container by the back door, parsley is a superb choice for beginners.

    Below, you will find everything you need to grow parsley successfully in the UK — from choosing the right variety and sowing your first seeds through to harvesting, troubleshooting problems, and keeping plants going over winter. If you are already growing other herbs, this guide pairs well with our articles on growing basil, mint, and rosemary.

    Why Grow Parsley?

    Parsley earns its place in any herb collection for several reasons:

    • Versatile in the kitchen. Flat-leaf parsley delivers bold flavour to tabbouleh, chimichurri, soups, and stews. Curly parsley works as a garnish, in sauces, and in classic parsley sauce for fish or ham.
    • Nutritionally dense. Parsley is rich in vitamins C, K, and A, plus iron and folate — far more than a decorative garnish.
    • Pollinator-friendly. If you let a second-year plant flower, its umbels attract hoverflies, bees, and beneficial wasps to your garden.
    • Easy to grow in containers. Parsley has a compact root system that makes it ideal for pots, window boxes, and raised beds — perfect if space is limited. See our guide to the best containers for beginners for pot recommendations.
    • Long harvest season. With successional sowing, you can harvest fresh parsley from late spring through to early winter.

    Best Parsley Varieties for UK Gardens

    There are two main types of parsley, and several named cultivars worth seeking out.

    Flat-Leaf (Italian) Parsley

    Flat-leaf parsley (Petroselinum crispum var. neapolitanum) has smooth, deeply divided leaves and a stronger, more rounded flavour than curly types. It is the preferred choice for cooking. Popular cultivars include ‘Giant of Italy’ and ‘Gigante di Napoli’, both vigorous growers that reach 45–60 cm tall.

    Curly-Leaf Parsley

    Curly parsley has densely crimped leaves and a milder, slightly peppery taste. It holds up well as a garnish and adds texture to salads. Several curly cultivars have earned the AGM from the Royal Horticultural Society, recognising reliable performance in UK growing conditions:

    Cultivar RHS AGM RHS Hardiness Notes
    ‘Bravour’ Yes H6 (hardy to −20 °C) Exceptionally hardy, vigorous growth, dark green leaves
    ‘Curlina’ Yes H4 (hardy to −10 °C) Compact habit, densely curled leaves — ideal for containers
    ‘Envy’ Yes H4 (hardy to −10 °C) Tightly curled, uniform plants, good disease resistance
    ‘Moss Curled’ Yes H6 (hardy to −20 °C) Classic variety, widely available from UK seed suppliers
    Tip: If you want maximum hardiness for overwintering, choose ‘Bravour’ or ‘Moss Curled’ — both rated H6 by the RHS, meaning they tolerate temperatures down to −20 °C.

    For beginners, ‘Moss Curled’ is widely stocked by UK seed suppliers (Thompson & Morgan, Suttons, Mr Fothergill’s) and performs reliably across the country. For cooking, a flat-leaf variety like ‘Giant of Italy’ gives the strongest flavour.

    Choosing Containers and Compost

    Parsley grows extremely well in containers. Here is what you need:

    • Pot size: A minimum depth of 20 cm. Parsley has a long taproot, so deeper pots (25–30 cm) produce healthier plants. A single plant does fine in a 15 cm pot; for a continuous supply, use a 30–40 cm trough and sow several plants.
    • Drainage: Essential. Choose pots with drainage holes and add a 2 cm layer of crocks or gravel at the base.
    • Compost: Use a good-quality peat-free multipurpose compost. Parsley prefers a slightly rich, moisture-retentive mix. Mixing in a handful of perlite improves drainage without sacrificing moisture. Read our guide to the best compost for containers for detailed recommendations.

    Parsley also grows well in the ground, in borders, raised beds, or alongside vegetables. It tolerates partial shade — in fact, a spot that gets morning sun and afternoon shade suits it perfectly during hot summers.

    Sowing Parsley from Seed

    Parsley has a reputation for slow, erratic germination — but a few simple techniques dramatically improve results.

    When to Sow

    Method Timing Temperature
    Indoors (seed trays/modules) February – March 18–21 °C
    Direct sow outdoors April – June Soil above 10 °C
    Successional sowing (for continuous harvest) Every 4–6 weeks, April – July

    Step-by-Step Sowing Guide

    1. Soak the seeds. Place parsley seeds in a bowl of warm water (not boiling) and leave them to soak for 12–24 hours. This softens the hard seed coat and can cut germination time in half.
    2. Fill modules or small pots with moist peat-free compost. Firm gently.
    3. Sow 2–3 seeds per module, pressing them lightly into the surface. Cover with a thin layer of vermiculite or sieved compost — no deeper than 5 mm. Parsley needs some light to germinate.
    4. Water with a fine rose to avoid disturbing the seeds.
    5. Cover with a clear lid or cling film to retain humidity. Place on a warm windowsill or in a propagator at 18–21 °C.
    6. Be patient. Germination takes 14–28 days. Keep the compost consistently moist but not waterlogged.
    7. Thin to one seedling per module once the first true leaves appear. Snip the weaker seedlings at soil level rather than pulling them out.
    8. Harden off and plant out once seedlings have 3–4 true leaves and all risk of hard frost has passed (typically mid-April to May, depending on your region). Space plants 15–20 cm apart.
    Tip: If direct sowing outdoors, water the drill thoroughly before sowing. Parsley seeds need consistent moisture to germinate — dry soil is the most common reason for failure.

    Ongoing Care: Watering, Feeding, and Pruning

    Watering

    Parsley likes consistently moist soil. In containers, check daily during warm weather — the compost should feel damp 2 cm below the surface. Water at the base of the plant, not over the leaves, to reduce the risk of fungal diseases. Mulching around outdoor plants with garden compost helps retain moisture.

    Feeding

    Parsley is a moderately hungry herb. Feed container-grown plants every 2–3 weeks with a balanced liquid feed (such as seaweed extract) from June onwards. Plants in rich garden soil rarely need additional feeding in their first year.

    Pruning and Maintenance

    Regular harvesting is the best form of pruning. If you notice flower stems forming in the second year (parsley is a biennial), pinch them out promptly to prolong leaf production. Once a plant is fully bolting, the leaves turn bitter — at that point, let it flower for the pollinators and sow fresh seed for next year.

    Remove any yellowing or damaged leaves from the base of the plant to improve air circulation and reduce the risk of disease.

    How to Harvest Parsley

    Start harvesting once plants have at least 8–10 stems. The key technique is to cut whole stems from the outside of the plant, working inwards. This encourages new growth from the centre.

    • Use sharp scissors or secateurs to cut stems at the base, close to soil level.
    • Never strip all the leaves from a single plant — always leave at least a third of the foliage so the plant can recover.
    • Harvest regularly, even if you do not need the parsley immediately. This keeps the plant productive and prevents it from becoming leggy.
    • Parsley is best used fresh, but it freezes well. Chop leaves finely, pack into ice-cube trays, top up with water, and freeze. Drop frozen cubes directly into soups, stews, and sauces.
    Tip: Morning is the best time to harvest herbs — essential oils are at their most concentrated before the heat of the day.

    Common Problems and How to Fix Them

    Slow or No Germination

    The most common issue. Parsley seeds have a hard coat and contain germination inhibitors. Pre-soaking seeds for 12–24 hours, maintaining warmth (18–21 °C), and keeping the compost consistently moist will solve most germination failures. Use fresh seed — parsley seed viability drops sharply after one year.

    Yellowing Leaves

    Usually caused by overwatering, poor drainage, or nutrient deficiency. Check that pots drain freely. If the compost is waterlogged, repot into fresh compost with added perlite. A liquid seaweed feed often greens plants up within a fortnight.

    Carrot Fly

    Parsley belongs to the same family as carrots (Apiaceae) and is susceptible to carrot fly (Chamaepsila rosae). The larvae tunnel into roots, weakening the plant. Protect with fine mesh (Enviromesh) draped over plants, or grow in containers raised at least 60 cm off the ground — carrot fly is a low-flying insect and rarely reaches elevated pots.

    Aphids

    Greenfly occasionally colonise parsley stems, especially in warm, sheltered spots. Blast them off with a strong jet of water, or introduce ladybird larvae as a biological control. Avoid chemical pesticides on herbs you intend to eat.

    Powdery Mildew

    A white, powdery coating on leaves, most common in late summer when nights are cool and days are warm. Improve air circulation by spacing plants adequately, water at the base rather than overhead, and remove affected leaves promptly. Resistant cultivars like ‘Envy’ are less prone to mildew.

    Bolting

    As a biennial, parsley flowers in its second year and then dies. In hot summers, first-year plants may bolt prematurely if stressed by drought or heat. Keep soil consistently moist and provide afternoon shade during heatwaves. Once a plant bolts fully, the leaves become bitter — replace it with a fresh sowing.

    Overwintering Parsley

    Parsley is biennial, so first-year plants will survive most UK winters and produce a flush of leaves in early spring before flowering. Here is how to keep them going:

    • Outdoor plants: Apply a thick mulch of straw or leaf mould around the base in late autumn. In colder regions (Scotland, northern England, exposed sites), cover with a cloche or fleece from November onwards.
    • Container plants: Move pots to a sheltered spot against a south-facing wall, or bring them into an unheated greenhouse, porch, or cold frame. Hardy cultivars like ‘Bravour’ and ‘Moss Curled’ (both RHS H6) tolerate down to −20 °C, but waterlogged compost in freezing conditions will kill roots faster than the cold itself.
    • Windowsill: A pot of parsley on a bright kitchen windowsill will produce leaves through winter, though growth slows considerably. Reduce watering and stop feeding until March.

    For an unbroken supply of fresh leaves year-round, the simplest approach is to sow a fresh batch each spring and allow the previous year’s plants to flower and set seed.

    Frequently Asked Questions

    How long does parsley take to germinate?
    Parsley typically takes 14–28 days to germinate, which is slower than most common herbs. Soaking seeds in warm water for 12–24 hours before sowing can reduce this to 10–14 days. Consistent warmth (18–21 °C) and moisture are essential — do not let the compost dry out during this period.
    Can I grow parsley indoors all year round?
    Yes, parsley grows well on a bright windowsill that receives at least 4–6 hours of light daily. Growth will slow in winter due to shorter days, but a south-facing window usually provides enough light. If your windowsill is dark, a small LED grow light makes a significant difference. Use a pot at least 20 cm deep and keep the compost evenly moist.
    Is flat-leaf or curly parsley better?
    Both are excellent — it depends on how you use them. Flat-leaf parsley has a stronger, more complex flavour and is the standard choice for cooking. Curly parsley has a milder taste and works beautifully as a garnish or in fresh salads. Many gardeners grow both. If you only have space for one, flat-leaf is the more versatile option in the kitchen.
    Why has my parsley turned yellow?
    The most likely causes are overwatering (check drainage), underwatering (check the compost is moist), or nutrient deficiency (apply a balanced liquid feed). Yellowing lower leaves on an otherwise healthy plant can simply mean the plant is redirecting energy to new growth — remove the yellow leaves and monitor.
    Can I save parsley seeds from my own plants?
    Absolutely. Allow second-year plants to flower and set seed. Once the seed heads turn brown and dry (usually late summer), cut them off and shake the seeds into a paper bag. Store in a cool, dry, dark place. Use within one year for best germination rates — parsley seed viability declines rapidly compared to other herbs.

    What Next?

    Once you have parsley established, you are well on your way to building a productive herb collection. Here are some logical next steps:

    • Expand your herb garden. Parsley pairs well with basil, mint, and rosemary in the kitchen — and they are equally straightforward to grow. See our guides to growing basil, growing mint, and growing rosemary.
    • Explore container growing. If you are growing parsley in pots, our roundup of the best herbs for containers covers what else thrives in confined spaces.
    • Improve your plant care knowledge. Visit our plant care hub for general guidance on feeding, watering, pest control, and seasonal maintenance.

    For authoritative advice on parsley cultivation, including pest and disease identification, the RHS parsley growing guide is an excellent reference.

    Affiliate Disclosure: Some links on this page may be affiliate links. If you purchase a product through one of these links, plantsandgardening.com may earn a small commission at no extra cost to you. We only recommend products we genuinely believe are useful for UK gardeners. This does not affect our editorial independence or the advice given above.

    About the Author

    John Kitcher is the lead gardening writer at Plants and Gardening. He grew up mucking in on his grandfather’s Devon allotment and has spent the last fifteen years growing fruit, veg and ornamentals across three very different UK gardens — a windy coastal plot in North Cornwall, a shaded London back garden, and now a clay-heavy smallholding in the Midlands. He trials every technique covered here in his own beds and containers before writing about it, cross-references against RHS and Kew guidance, and has a soft spot for heritage tomato cultivars and anything that survives a British winter without complaint.

    Got a question about something we’ve written? Drop a comment — we read every one.

  • How to Grow Rosemary in Pots: Complete UK Beginner’s Guide

    How to Grow Rosemary in Pots: Complete UK Beginner’s Guide

    Quick Answer: Rosemary grows extremely well in containers, provided you use a large pot (at least 30 cm diameter) with excellent drainage, a gritty free-draining compost, and a sunny south- or west-facing spot. Water only when the top 2–3 cm of compost feels dry, and feed sparingly in spring. Harvest little and often from spring to autumn. In most UK regions, bring containerised rosemary under cover in a cold winter to protect the roots.

    Rosemary is one of the most rewarding herbs you can grow in a container. It thrives in exactly the conditions a pot can provide — sharp drainage, restricted roots. It also wants a warm, sunny spot on a patio or windowsill. Whether you have a small balcony or a large south-facing terrace, a pot of rosemary will reward you. You’ll get months of fragrant harvests and a cloud of blue-purple flowers that pollinators love.

    This guide covers everything a UK beginner needs to know. You’ll learn the best varieties, which pot to choose, and the right compost mix. It also shows how to keep your plant looking its best through winter.

    A quick note on naming: rosemary was reclassified botanically in 2017 and is now correctly known as Salvia rosmarinus rather than the older Rosmarinus officinalis. You will find it sold under both names in UK garden centres. Either is correct — the plant is identical.

    Why containers work so well for rosemary

    In its native Mediterranean habitat, rosemary grows in thin, stony soils on sun-baked hillsides where rain drains away almost instantly. UK garden borders, by contrast, tend to hold moisture — particularly on clay-heavy soils — which makes root rot the single biggest killer of garden-grown rosemary in this country.

    A container solves this problem at a stroke. You control the compost, the drainage, and the position of the plant. Move it into shelter during a particularly wet or cold spell. You can also push it into the sunniest corner of your patio. That maximises the heat and light it craves.

    Container growing also suits the realities of many UK gardens. It works for a terrace flat with no border. It suits a north-facing garden where only the patio catches direct sun. And it fits a rented property where you cannot plant permanently into the ground. Rosemary in a pot travels with you.

    According to the RHS, rosemary is best grown in a sheltered, sunny position. It needs well-drained soil — conditions a thoughtfully chosen container replicates reliably. It is fully hardy in most of the UK (RHS hardiness rating H4, surviving down to around −10 °C). However, container-grown plants are more vulnerable to hard frost than those in open ground. Their roots have no insulating soil mass around them.

    Choosing the right variety

    The species Salvia rosmarinus (common rosemary) is the safest and most widely available starting point — robust, strongly flavoured, and tolerant of most UK conditions. Beyond the species, there are dozens of named cultivars with different habits, flower colours, and growth rates. Here are the ones most commonly found in UK garden centres and most suited to pot growing:

    ‘Miss Jessopp’s Upright’

    The most popular named cultivar in the UK. As the name suggests, it has an erect, columnar habit that keeps it compact and tidy without much intervention. It grows to around 1.2–1.5 m in open ground but stays significantly smaller in a container. Pale blue flowers, excellent flavour. An ideal choice for a formal patio scheme or a smaller pot.

    ‘Tuscan Blue’

    A vigorous, upright variety with deep blue-violet flowers and broad, dark green leaves. It has a slightly tender constitution compared with ‘Miss Jessopp’s Upright’, so it benefits most from being brought under cover during cold winters. Strongly aromatic and a favourite for culinary use. Grows readily in a generously sized container.

    ‘Prostratus’ (trailing rosemary)

    ‘Prostratus’ is the trailing or creeping form of rosemary, with a low, spreading habit that makes it particularly attractive in a tall pot or on a raised planter where stems can cascade over the edge. It is less frost-hardy than upright varieties (RHS hardiness rating H3), so in most UK regions it should be treated as a plant to protect or bring indoors from November to March. Flowers are pale blue-lilac.

    Common rosemary (Salvia rosmarinus)

    If you are buying from a supermarket herb section or a garden centre without named cultivars, the unnamed common rosemary is a perfectly sound choice. It may be slightly variable in habit but is generally very hardy and strongly flavoured. Look for a stocky, bushy plant with good colour in the stems and no yellowing leaves.

    A note on cultivar labelling: Availability of specific named cultivars varies widely between garden centres and online suppliers in the UK. If you cannot find a named variety, a healthy unnamed rosemary plant will perform excellently in a container.

    Containers and compost

    Choosing a container

    Drainage is non-negotiable. Whatever pot you choose, it must have at least one large drainage hole in the base — ideally several. If a pot you love lacks drainage holes, use it as a decorative outer sleeve and place a plastic pot with drainage inside it, leaving an air gap at the bottom.

    Minimum size: A pot at least 30 cm (12 in) in diameter and 30 cm deep. Rosemary develops a deep root system and will become stressed and dry out rapidly in anything smaller. For ‘Tuscan Blue’ or an established common rosemary, a 40–45 cm pot will give you several years before repotting is needed.

    Material matters: Terracotta is the traditional choice and works extremely well — it is porous, which helps prevent waterlogging and keeps roots cool. The drawback is weight: a large terracotta pot is very heavy once filled with compost and can crack in a hard frost if left outside wet. Lightweight plastic pots are a practical alternative for balconies or if you need to move plants frequently. Avoid glazed ceramic pots with only one small hole — they drain too slowly for rosemary.

    For more guidance on selecting the right pots for herb and vegetable growing, see our guide to the best containers and pots for beginners.

    The right compost

    Standard multipurpose compost is too moisture-retentive for rosemary on its own. You need to improve drainage significantly. The RHS recommends mixing compost with horticultural grit to create a free-draining growing medium for Mediterranean herbs.

    Recommended mix:

    • 60% loam-based compost (such as John Innes No. 2 or No. 3) or a good-quality multipurpose compost
    • 40% horticultural grit or perlite

    The loam-based component provides stability and nutrients that release slowly; the grit ensures rapid drainage and aeration around the roots. Do not use builder’s sand — the particles are too fine and can actually impede drainage.

    Add a layer of crocks (broken pot fragments) or gravel over the drainage holes before filling, to prevent compost from blocking them.

    For a deeper look at composts for container gardening, visit our guide to the best compost for container gardening.

    How to plant rosemary in a pot

    The best time to pot up rosemary in the UK is late spring — May is ideal — when the risk of hard frost has passed and the plant has a long warm season ahead of it to establish. You can also plant in early autumn (September) to allow root development before winter, but keep the plant in a sheltered spot until spring.

    1. Prepare the pot. Add crocks over the drainage holes, then part-fill with your grit-compost mix, leaving enough room for the rootball.
    2. Remove the plant from its nursery pot. Gently tease out any circling roots if the plant is pot-bound.
    3. Position the plant. The top of the rootball should sit approximately 2–3 cm below the rim of the pot, to allow for watering without overflow.
    4. Fill in around the rootball with more compost mix, firming gently to remove air pockets but not compacting heavily.
    5. Water in well. Give the pot a thorough watering until water drains freely from the base. This is the one time you water generously — establishment watering.
    6. Add a grit mulch. A 1–2 cm layer of horticultural grit on the surface helps retain warmth around the crown, improves drainage around the base of the stems, and deters vine weevil slightly.
    7. Place in full sun. A south- or west-facing position receiving at least 6 hours of direct sunlight per day is ideal. Rosemary will tolerate partial shade but will grow more slowly and be less aromatic.

    Ongoing care: watering, feeding and pruning

    Watering

    Overwatering kills more container rosemary than any other cause. The golden rule: water only when the top 2–3 cm of compost feels dry to the touch. Push your finger into the compost — if it feels damp, wait another day or two.

    In a typical UK summer, this might mean watering once or twice a week during warm, dry spells and not at all during cool, rainy periods. In winter, water very sparingly — once every two to three weeks is usually sufficient, just enough to prevent the compost from drying out completely.

    Always water at the base of the plant, not over the foliage, and water in the morning rather than the evening so that any moisture on the stems evaporates during the day.

    Feeding

    Rosemary is a light feeder by nature — excessive nitrogen encourages lush, weak growth that is less aromatic and more prone to disease. Apply a balanced liquid fertiliser (such as a general-purpose feed at half strength, or a tomato feed for the potassium) no more than once a month from April to August. Do not feed from September to March when the plant is resting.

    If you used a loam-based compost, the slow-release nutrients will sustain the plant for the first season with little additional feeding needed.

    Pruning

    Regular light pruning keeps rosemary bushy and prevents the woody, leggy growth that makes older plants difficult to manage. The RHS recommends pruning after flowering — typically from late spring to early summer in the UK — cutting back the flowered shoots by up to one-third.

    Never cut back into old wood (the thick, pale brown woody stems). Rosemary does not regenerate reliably from old wood the way many other shrubs do. Always leave green, leafy growth on every stem you cut.

    A light trim in late August or early September helps maintain shape going into autumn without stimulating tender new growth that could be damaged by early frosts.

    Harvesting your rosemary

    You can begin harvesting from an established rosemary plant at any point from spring through to early autumn. The flavour is strongest just before flowering, when the aromatic oils are most concentrated.

    How to harvest: Use clean, sharp secateurs or scissors. Cut stems from the growing tips — the soft green growth at the end of each branch — removing no more than one-third of any individual stem. Take from multiple stems rather than stripping one branch entirely. This encourages bushy regrowth.

    For culinary use, strip the leaves from the woody stem by running your fingers from tip to base (against the direction of growth). Fresh rosemary keeps well in a glass of water on the kitchen windowsill for a week, or sealed in a damp cloth in the fridge for up to two weeks.

    To dry rosemary, hang small bunches upside down in a warm, well-ventilated spot out of direct sunlight for two to three weeks. Store dried rosemary in an airtight jar away from heat and light — it retains good flavour for 6–12 months.

    Avoid heavy harvesting in late autumn and winter. The plant needs its foliage to photosynthesise and store energy through the colder months.

    Common problems and how to fix them

    Yellow leaves and root rot

    Cause: Overwatering or poor drainage. Fix: Check that drainage holes are clear. Allow the compost to dry out significantly before watering again. In severe cases, remove the plant from the pot, trim away any black or mushy roots with clean scissors, repot into fresh gritty compost, and hold back on watering for 10–14 days.

    Leggy, sparse growth

    Cause: Insufficient light, or not pruning regularly enough. Fix: Move the pot to a sunnier position. Trim back the growing tips to encourage branching. Note that a very old rosemary that has become excessively woody may be difficult to rejuvenate — taking cuttings and starting fresh is often more productive.

    Powdery mildew

    Cause: Poor air circulation combined with dry roots and humid conditions — an unusual combination, but it does occur in sheltered spots. Fix: Improve airflow around the plant. Avoid overhead watering. Remove affected growth. The RHS recommends organic fungicide sprays based on plant extracts as a first-line treatment.

    Rosemary beetle

    Cause: Chrysolina americana, a distinctive striped beetle (green and purple metallic stripes) that feeds on rosemary, lavender, and sage. The larvae also feed on the foliage. Fix: Inspect the plant regularly from late summer onwards. Pick off beetles and larvae by hand and drop into soapy water. Shake the plant over a sheet to dislodge larvae. No pesticide is currently approved specifically for this pest on edible herbs in the UK; hand removal is the recommended approach.

    Frost damage

    Cause: Exposure to temperatures below −10 °C, or prolonged cold and wet. Container plants are particularly vulnerable because the roots are exposed. Fix: See the overwintering section below. Lightly frost-damaged plants often recover if you wait until late spring — do not prune off apparently dead growth until May, as new buds may still emerge.

    Overwintering rosemary in containers

    Common rosemary (Salvia rosmarinus) is rated H4 by the RHS, meaning it is generally hardy down to around −10 °C in open ground. However, pot-grown rosemary is a different matter: the roots are surrounded only by compost rather than a large mass of insulating soil, and they can freeze solid in a severe UK winter.

    The level of protection you need depends on where you are in the UK:

    • South and South-West England, coastal Wales, western Scotland: Most winters, an established rosemary in a reasonably sized pot will survive outdoors with no protection. Move it against a south-facing wall to benefit from reflected warmth.
    • Central and Northern England, most of Wales, eastern Scotland: In cold winters (below −5 °C for several nights running), move the pot into an unheated greenhouse, cold frame, or a sheltered porch. The goal is frost-free, not warm.
    • Northern Scotland, exposed upland sites: Bring containers under cover routinely from November to March.
    • ‘Prostratus’ everywhere: This trailing variety is significantly less hardy and should be brought inside or into a frost-free greenhouse in all but the mildest parts of the UK.

    What to do in autumn:

    1. Stop feeding from September onwards.
    2. Reduce watering significantly.
    3. Give the plant a light trim to tidy it but do not hard prune — save that for spring.
    4. Wrap the pot (not the plant) in bubble wrap or hessian to insulate the root zone if leaving outdoors.
    5. Raise the pot onto pot feet to maintain drainage if rain is heavy.

    Do not bring rosemary into a centrally heated living room — the dry, warm air is harmful and the low light levels will weaken the plant quickly. An unheated greenhouse, cold frame, or north-facing shed window is far better.

    Frequently asked questions

    How often should I water rosemary in a pot?

    During warm weather, check the compost every two to three days and water when the top 2–3 cm feels dry. In cool or wet weather, you may not need to water at all. In winter, water only once every two to three weeks, just enough to stop the compost from drying out completely. Overwatering is the most common cause of rosemary death in containers.

    Why is my rosemary going brown in the middle?

    Browning in the centre of the plant is usually caused by one of two things: lack of airflow (which can lead to botrytis or mildew) or the natural die-off of old wood. Gently remove dead material from the centre of the plant to improve airflow. If new growth at the tips is still green and healthy, the plant is likely fine — rosemary naturally becomes woody and bare in the centre over time.

    Can I grow rosemary indoors on a windowsill?

    Rosemary can be grown indoors on a sunny south-facing windowsill, but it is not ideal for long-term indoor cultivation. The plant needs maximum light (at least 6 hours of direct sun), good airflow, and careful watering — conditions that are difficult to maintain in most UK homes. Indoor plants are also much more prone to powdery mildew. A covered porch, conservatory, or cold greenhouse is better than a heated living room. A windowsill works best for short-term winter protection, not as a permanent growing position.

    When is the best time to take rosemary cuttings?

    The RHS recommends taking semi-ripe cuttings from rosemary in mid to late summer (July to August). Select healthy, non-flowering shoot tips of 8–10 cm, strip the lower leaves, dip the cut end in hormone rooting powder, and insert into a gritty compost mix. Keep in a warm, bright spot and protect from direct midday sun. Roots usually develop within 4–6 weeks. Taking cuttings is the best way to propagate rosemary, as seed-grown plants are variable in quality and flavour.

    My rosemary is in a pot — does it need repotting?

    Rosemary in a container benefits from repotting every two to three years, or when you can see roots emerging from the drainage holes. Spring is the best time. Move up one pot size at a time — a sudden move to a much larger container can actually encourage root problems by leaving too much wet compost around the roots. Refresh the compost fully at repotting time and inspect the roots, trimming any that are circling or congested.

    What next?

    If this guide has given you the confidence to start growing rosemary in a pot, here are some natural next steps to build your container herb garden:

    • Grow more herbs in containers: Rosemary pairs beautifully with thyme, sage, and oregano — all Mediterranean herbs that share the same sunny, free-draining conditions. Our guide to the best herbs to grow in containers covers which varieties work best together and how to arrange them.
    • Try basil: For something a little more challenging but very rewarding, learn how to grow basil in a pot — the companion herb to rosemary in any kitchen garden, though it needs completely different care (warmth, moisture, and no frost tolerance at all).
    • Expand into plant care: Understanding the fundamentals of plant health will help you with every container plant you grow. Visit our plant care hub for guides on watering, feeding, pest control, and seasonal maintenance.
    • Find the right containers: If you are just starting out, choosing the right pot makes a significant difference to how easy herb growing becomes. Browse our recommendations for the best containers and pots for beginners, covering materials, sizes, and drainage features to look for.
    • Choose the best compost: Using the right growing medium is just as important as choosing the right pot. Our container compost guide explains the differences between multipurpose, loam-based, and specialist composts, and which to use for herbs, vegetables, and flowers.

    The bottom line

    Rosemary is one of the most forgiving and longest-lived herbs you can grow in a pot — once established and given the right conditions, a healthy plant can thrive for ten years or more, providing fragrant harvests every season and brightening the patio with its flowers every spring. Start with a healthy plant, get the drainage right, and resist the urge to overwater, and you will have a dependable kitchen herb for years to come.

    About the Author

    John Kitcher is the lead gardening writer at Plants and Gardening. He grew up mucking in on his grandfather’s Devon allotment and has spent the last fifteen years growing fruit, veg and ornamentals across three very different UK gardens — a windy coastal plot in North Cornwall, a shaded London back garden, and now a clay-heavy smallholding in the Midlands. He trials every technique covered here in his own beds and containers before writing about it, cross-references against RHS and Kew guidance, and has a soft spot for heritage tomato cultivars and anything that survives a British winter without complaint.

    Got a question about something we’ve written? Drop a comment — we read every one.

  • How to Grow Mint in Containers: Complete UK Beginner’s Guide

    How to Grow Mint in Containers: Complete UK Beginner’s Guide

    Quick Answer: Grow mint in a pot at least 30 cm wide, filled with a peat-free multipurpose compost mixed with a little horticultural grit. Plant one variety per container, water regularly and harvest often — this keeps the plant bushy and prevents bolting. Mint grown in containers never escapes into your borders, which is exactly why most UK gardeners prefer pots.

    Mint is one of the most satisfying herbs to grow in the UK — it thrives in our cool, moist climate, grows back reliably year after year, and rewards even the most hands-off gardener with an abundant harvest. The catch? Mint is an aggressive spreader. Left in open ground it will colonise your entire bed within a season. The solution every experienced UK gardener uses is simple: keep it in a container.

    This guide covers everything a beginner needs to know, from choosing varieties and pots through to harvesting, problem-solving and getting your mint safely through winter.

    Why You Should Always Grow Mint in Containers

    Mint spreads through underground stems called stolons (or runners). A single plant can extend 60 cm or more in a single growing season, popping up new shoots wherever a stolon reaches. In open ground, this means mint quickly crowds out neighbouring plants and becomes almost impossible to eradicate.

    Growing mint in containers solves this completely. The pot walls act as a physical barrier, keeping roots — and the plant — exactly where you want them. You get the fresh harvest without the takeover.

    There is a secondary benefit too: pots let you position mint precisely. A container by the back door means fresh leaves within arm’s reach every time you’re cooking. On a sunny windowsill, a small pot keeps mint available all year with minimal effort.

    Mint is far from the only herb that does well in containers. See our guide to the best herbs to grow in containers for ideas on building a productive patio herb garden around your mint.

    Choosing the Right Mint Variety

    The Mentha genus contains dozens of species and hundreds of cultivars. Most of them will thrive in UK conditions; the choice comes down to flavour, fragrance and what you plan to use your harvest for.

    Spearmint (Mentha spicata)

    The classic kitchen mint and the one most commonly found in supermarket bunches. It has bright green, crinkled leaves with a clean, sweet flavour that works beautifully in mint sauce, new potatoes, and summer drinks. It is vigorous and easy to grow — a sensible first choice for beginners.

    Peppermint (Mentha × piperita)

    A natural hybrid with a stronger, more intense menthol hit. Use it in herbal teas, chocolate desserts or homemade cordials. The leaves are slightly darker than spearmint and the plant can reach up to 90 cm in the ground, so choose a deeper container.

    Moroccan Mint

    Milder and sweeter than spearmint, Moroccan mint is the traditional base for Maghrebi mint tea. It has a slightly spicy, almost floral note and is particularly attractive to pollinators when it flowers. A good choice if you want a less assertive flavour in cooking.

    Chocolate Mint

    A novelty variety with a genuine cocoa-like scent when the leaves are crushed. The dark reddish stems make it ornamental as well as useful. Slower-growing than spearmint, so it suits a smaller pot.

    Apple Mint (Mentha suaveolens)

    Soft, downy grey-green leaves with a mild, fruity flavour. Apple mint makes an excellent mint sauce and is less overpowering for beginners who find standard spearmint too sharp. The woolly leaves are distinctive and attractive.

    Pineapple Mint (Mentha suaveolens ‘Variegata’)

    A variegated form of apple mint with cream-splashed leaves and a light pineapple fragrance. It holds the RHS Award of Garden Merit (AGM), which means it has been independently trialled by the RHS and confirmed to be reliably garden-worthy in UK conditions. It is more compact than many mints, making it excellent for window boxes and smaller pots.

    One pot, one variety: Different mints cross-pollinate and can lose their distinctive flavour over time if grown together. Keep varieties in separate containers.

    Containers, Pots and Compost

    Mint is not fussy about pot material — terracotta, plastic, glazed ceramic and fabric pots all work. What matters is size and drainage.

    Pot size

    A minimum diameter of 30 cm (12 inches) gives the roots enough room to spread and reduces how often you need to water. Deeper is better: at least 25 cm depth prevents roots from circling at the base too quickly. Window boxes work well for multiple small plants, but keep spearmint or peppermint out — their vigour means they need a dedicated pot.

    Drainage

    Mint needs consistently moist soil, but sitting in waterlogged compost causes root rot. Every container must have drainage holes. If yours doesn’t, drill several before planting. Elevate pots slightly on pot feet or bricks to stop the drainage holes from blocking.

    Compost

    A peat-free multipurpose compost is ideal. Mix in around 20% horticultural grit or perlite to improve drainage and prevent compaction. Avoid using garden soil in pots — it compacts too densely in a container and often carries weeds or disease.

    For more detail on getting your growing medium right, read our guide to the best compost for container gardening.

    If you’re still deciding which pot to buy, our roundup of the best containers for beginners covers sizes, materials and where to buy in the UK.

    How to Plant Mint in a Pot

    The best time to plant mint outdoors is from late April through to September, once the risk of a hard frost has passed. You can plant earlier if you keep the pot in a frost-free greenhouse or on a sheltered windowsill indoors.

    Starting from a garden centre plant

    This is the quickest route to a productive harvest. Most UK garden centres stock pot-grown spearmint and peppermint from spring onwards, usually priced between £2 and £4.

    1. Fill your container to within 5 cm of the rim with compost mix.
    2. Water the compost and allow it to drain fully before planting.
    3. Gently ease the mint from its original pot, tease out any tightly circling roots, and place it in the centre of the new container.
    4. Backfill with compost, firming lightly. The base of the stem should sit at the same depth as it was in the original pot — do not bury the crown.
    5. Water well and place in a bright, partially shaded position.

    Starting from cuttings

    Mint roots remarkably easily from stem cuttings. Take a cutting around 10–15 cm long, remove the lower leaves, and place it in a glass of water on a bright windowsill. Roots will appear within one to two weeks. Once roots are 3–5 cm long, pot up into compost as above.

    Dividing an existing plant

    If you already have a mint plant that has become congested, division is the most productive way to make new plants. In early spring or autumn, knock the root ball out of its pot and pull it apart into sections, each with several roots attached. Pot up each section individually.

    Ongoing Care: Watering, Feeding and Pruning

    Watering

    Mint is a moisture-loving plant, and containers dry out faster than open ground. During the growing season (April to October), check the compost every one to two days in warm weather — push a finger 2–3 cm into the surface. If it feels dry, water thoroughly until water drains from the base of the pot.

    In prolonged summer heat, you may need to water daily. Conversely, during cool, damp periods in spring and autumn, reduce watering to avoid waterlogging. Mint grown indoors on a windowsill dries out faster than outdoor pots in shadier positions — adjust accordingly.

    Feeding

    Mint in a container depletes compost nutrients faster than plants in the ground. From May to August, apply a balanced liquid fertiliser (such as a general-purpose liquid feed at half the recommended strength) once every two to three weeks. Avoid high-nitrogen feeds, which produce lush but flavourless growth.

    Repot into fresh compost every one to two years, or when you see a dense mat of roots escaping from the drainage holes.

    Pruning and pinching out

    Regular harvesting is itself a form of pruning, but deliberate pruning helps maintain a bushy, productive plant. Pinch out the growing tips once plants reach around 20 cm tall — this encourages the plant to branch outward rather than growing tall and leggy.

    When mint begins to flower (usually July to August), cut the flowering stems back hard to just above a pair of leaves. Flowering diverts energy from leaf production and can reduce flavour intensity. Left unchecked, a mint that has set seed often loses vigour the following year.

    After the first hard frost, cut the plant back to around 5 cm above the compost surface. This removes tired and potentially diseased growth and prepares the plant for winter dormancy.

    Harvesting Mint

    You can begin harvesting as soon as the plant is established and growing strongly — typically four to six weeks after planting a young bought plant. The key rule is: never remove more than one-third of the plant at a time. Cropping too hard weakens the root system and slows regrowth.

    How to harvest

    Pinch or cut stems just above a leaf node (the point where a leaf joins the stem). The plant will send out two new shoots from below the cut, creating a progressively bushier and more productive plant with each harvest.

    Harvest in the morning after any dew has dried, when the essential oil content — and therefore the flavour — is at its peak.

    Storing your harvest

    Fresh mint keeps for up to a week in a glass of water in the fridge, loosely covered with a plastic bag. For longer storage, leaves can be dried by hanging small bundles upside down in a warm, airy place for one to two weeks, then crumbling into an airtight jar. Alternatively, freeze whole leaves on a tray and then transfer to a freezer bag — they are perfect for use in cooking straight from frozen.

    Common Problems and How to Fix Them

    Mint rust

    The most serious disease affecting UK-grown mint. Caused by the fungus Puccinia menthae, it appears as orange-brown powdery pustules on the undersides of leaves, with yellow spots on the upper surface. The RHS advises removing and binning (not composting) affected growth immediately. There is no approved fungicide for home use — the only organic control is to cut the plant back hard and allow clean regrowth. Improve air circulation around pots and avoid wetting foliage when watering.

    Aphids

    Clusters of greenfly or blackfly on new growth in spring and early summer. Remove them by squashing by hand, applying a strong jet of water, or using an organic insecticidal soap spray. Aphid infestations are usually minor and rarely kill an otherwise healthy mint plant.

    Leggy, pale growth

    A sign of insufficient light. Mint prefers partial shade but needs at least three to four hours of bright, indirect light daily. Move the pot to a brighter position. Leggy plants can be cut back hard and will regrow more compactly in better light.

    Yellowing leaves

    Can indicate overwatering (check drainage holes are clear), a nitrogen deficiency (start a fortnightly liquid feed), or simply natural leaf ageing at the base of the plant. If the whole plant yellows rapidly, check for root rot — roots should be pale and firm, not brown and mushy.

    Wilting despite regular watering

    If the compost feels moist but the plant still wilts, the roots may have become so congested that they can no longer take up water efficiently. Knock the plant out and check: if the root ball is a solid, tangled mass, divide the plant or repot into a larger container with fresh compost.

    Overwintering Mint in Pots

    Mint is a hardy perennial across most of the UK (RHS hardiness rating H6 — hardy in all of the UK, surviving to -20°C). It dies back to ground level in winter and regrows from the root system in spring.

    Container-grown mint needs a little extra care in winter because pot-bound roots are more exposed to freezing temperatures than roots insulated by the ground.

    Steps for overwintering success

    1. After the first hard frost, cut top growth back to 5 cm above the compost.
    2. Move pots to a sheltered spot: against a south-facing wall, inside an unheated greenhouse or cold frame, or into a garage or shed with some natural light.
    3. Wrap terracotta pots in bubble wrap or hessian to prevent the compost from freezing solid and cracking the pot.
    4. Water sparingly during winter — just enough to stop the compost from drying out completely. The plant is dormant and needs very little moisture.
    5. Bring pots back out into the open once night temperatures stay reliably above -5°C, usually from March onwards in most parts of England and Wales (later in Scotland and Northern Ireland).

    If you want year-round mint on a kitchen windowsill, bring one pot indoors in October before it dies back. In a warm, well-lit kitchen it will continue producing leaves through winter, though growth will be slower.

    Frequently Asked Questions

    Can I grow mint in a small pot or window box?
    Yes, with caveats. A small pot (under 20 cm) will need watering daily in warm weather and will need dividing or repotting annually. Compact varieties like pineapple mint (‘Variegata’) or chocolate mint suit smaller containers better than vigorous spearmint or peppermint.
    Does mint need full sun or shade?
    Mint performs best in partial shade — around three to four hours of direct sun per day, with shade during the hottest part of the afternoon. Full sun causes the compost to dry out too quickly and can scorch the leaves. Deep shade produces leggy, flavourless growth. A north-facing wall in the south of England, or east-facing elsewhere, is often ideal.
    How do I stop mint taking over even in a pot?
    Check the pot every spring and cut away any stolons (horizontal runners) that have crept over the rim and into surrounding soil. Repot every one to two years, discarding the outermost, most congested roots. Keep pots on hard standing (paving or gravel) rather than directly on soil — stolons can work their way through drainage holes into the ground beneath.
    My mint has flowered — is it ruined?
    Not at all. Cut the flowering stems back to healthy leaf growth straight away. The plant will produce a flush of fresh, flavoursome leaves within two to three weeks. Allowing mint to flower and set seed does reduce leaf production and can cause some loss of variety character (especially in hybrid varieties), so regular deadheading pays off.
    Can I grow mint from supermarket bunches?
    Often, yes. Place the cut stems in a glass of water on a bright windowsill. Many supermarket mint bunches root within one to two weeks, after which you can pot them up into compost. Success rate varies — choose the freshest bunch you can find, and use stems that still have their growing tips intact.

    What Next

    Once you have mint established in a pot, the logical next step is building a productive container herb garden around it. Basil is another herb that does exceptionally well when given the right container conditions — read our complete guide on how to grow basil in a pot in the UK for step-by-step planting, care and harvesting advice.

    If you’re thinking bigger than herbs alone, our plant care hub. For another container-friendly herb, see our guide to growing rosemary in pots covers care guides for a wide range of garden plants, from shrubs and perennials through to vegetables and fruit.

    For a full overview of which herbs thrive alongside mint on a patio or balcony, don’t miss our guide to the best herbs to grow in containers — it covers varieties, pot sizes and positioning for a complete patio herb setup.

    Ready to get growing?

    Pick up a pot-grown spearmint or peppermint from your local garden centre from April onwards. With a suitable container, good compost and regular harvesting, you’ll have fresh mint on the table within a few weeks — and a plant that keeps on giving for years.

    This guide follows RHS recommendations. For further reading, see the RHS advice pages on growing mint.

    Affiliate disclosure: Some links in this article are affiliate links. If you make a purchase through them, we may earn a small commission at no extra cost to you. We only recommend products we genuinely believe are useful for UK gardeners.
    About the Author

    John Kitcher is the lead gardening writer at Plants and Gardening. He grew up mucking in on his grandfather’s Devon allotment and has spent the last fifteen years growing fruit, veg and ornamentals across three very different UK gardens — a windy coastal plot in North Cornwall, a shaded London back garden, and now a clay-heavy smallholding in the Midlands. He trials every technique covered here in his own beds and containers before writing about it, cross-references against RHS and Kew guidance, and has a soft spot for heritage tomato cultivars and anything that survives a British winter without complaint.

    Got a question about something we’ve written? Drop a comment — we read every one.

  • How to Grow Basil in a Pot: A Complete UK Beginner’s Guide

    How to Grow Basil in a Pot: A Complete UK Beginner’s Guide

    As an Amazon Associate I earn from qualifying purchases.

    Basil thrives in pots on windowsills, balconies, and patios across the UK. With the right approach, you will harvest fresh, aromatic leaves from June through to the first frosts—and year-round if you grow indoors.

    This guide covers choosing pots and compost, keeping plants bushy, and solving common problems.

    Indoor or Outdoor Growing?

    Basil adapts to both, though each has advantages.

    Indoor Growing (Windowsill)

    A bright, south-facing windowsill suits basil perfectly. It needs warmth to thrive—minimum 10°C, ideally 15-20°C.

    Best for: Year-round supply, flats without outdoor space, starting plants early

    Pros:
    – Protected from cold winds and frost
    – Accessible by the kitchen
    – Produces leaves even in winter with enough light

    Cons:
    – Lower winter light slows growth significantly
    – Plants become leggy without strong sun
    – May need an LED grow light from November to February

    Outdoor Growing (Patio or Balcony)

    Outdoor basil develops stronger flavour from increased sun and grows more vigorous than indoor plants. However, basil is tender and killed by frost, so timing matters.

    Best for: Maximum harvests, strongest flavour, summer production

    Safe timing: Late May is safe for most of the UK. Southern regions can plant in late April; northern areas should wait until early June.

    Temperature needs: Frost-free conditions, ideally 15-25°C

    Pros:
    – More intense flavour from sun exposure
    – Larger plants and bigger yields
    – Natural air circulation reduces disease

    Cons:
    – Weather dependent
    – Slugs and snails—common in damp UK conditions

    The Hybrid Approach

    Many UK gardeners combine both methods: start seeds on a warm windowsill in March or April, then move plants outside after hardening off in late May. Bring favourites back indoors in October to extend the harvest.

    For a productive container garden, grow vegetables in pots alongside your herbs.

    What You Need

    Pot Size and Type

    Basil roots grow vertically more than horizontally, so depth matters.

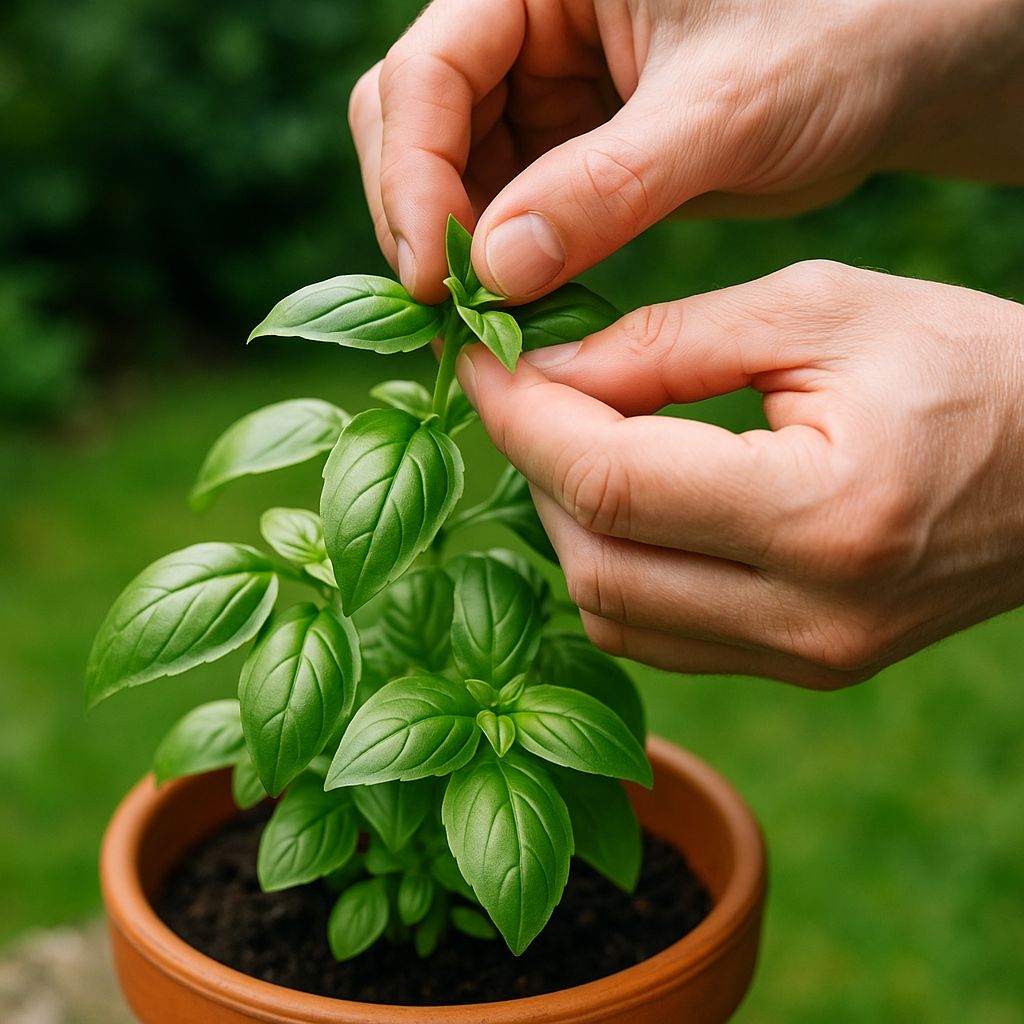
    Hands pinching the growing tip of a basil plant to encourage bushy growth

    Minimum: 15cm diameter and depth for one plant
    Ideal: 20-25cm diameter with at least 20cm depth

    A pot holding around 9 litres gives basil room to develop a strong root system, helping it access water during hot spells.

    Material: Terracotta breathes well and suits basil’s preference for good drainage. Plastic retains moisture longer if you forget to water. Drainage holes are essential—soggy compost kills basil.

    Compost

    Use a multi-purpose compost with added John Innes or a dedicated herb compost. See our guide to the best compost for containers. John Innes contains grit and loam that improve drainage and provide stable nutrients.

    Avoid heavy garden soil (too dense) and compost with water-retentive gels.

    Seeds Versus Young Plants

    Seeds: Cheaper with more varieties, but add 6-8 weeks before first harvest. Sow indoors from March to August.

    Young plants: Give instant results—ideal for beginners or late starters. Available from April, ready to harvest in 2-3 weeks.

    Planting Your Basil

    From Seed

    1. Fill your pot with compost, firming gently
    2. Sow thinly, 2-3cm apart
    3. Cover with 5mm of compost
    4. Water gently using a fine rose to avoid washing seeds away
    5. Place on a warm windowsill—18-21°C is ideal
    6. Seedlings emerge in 5-10 days
    7. When 5cm tall, thin to strongest plants, leaving 10cm between each

    From Young Plants

    1. Water the plant in its original pot 30 minutes before transplanting
    2. Fill the new pot with compost, leaving a hole the size of the root ball
    3. Gently remove the plant and place at the same depth
    4. Firm compost around the roots and water thoroughly
    5. Place in final growing position

    Month-by-Month Calendar (UK)

    Month Indoor Outdoor Key Tasks
    Jan-Feb Possible with grow lights Too cold Plan; order seeds
    Mar-Apr Sow on warm windowsill Prepare pots Start early indoors
    May Harvest from early sowings Sow after last frost Late May: safe to move plants outside
    Jun-Aug Full production Peak harvest Pinch flowers weekly; feed regularly
    Sep-Oct Bring indoors before frost Final harvests Take cuttings for winter
    Nov-Dec Maintain on windowsill N/A Reduce watering; harvest lightly

    Essential Care

    Watering: Check Soil, Don’t Follow Schedule

    Check the soil and water when needed. Stick your finger into the compost—if the top 2cm feels dry, water.

    Indoor pots: Every 5-7 days in cooler months; every 3-4 days in summer
    Outdoor pots: Every 1-3 days in summer, depending on weather

    Water at the base, not over leaves, preferably in the morning. This reduces evaporation and keeps foliage dry overnight, preventing fungal problems and slug attraction.

    Signs to watch:
    – Drooping leaves = underwatering. Check soil and water immediately.
    – Yellowing lower leaves = overwatering

    Pinching for Bushiness

    Regular pinching transforms a spindly plant into a compact, productive bush. It prevents flowering and encourages branching.

    When to start: Once your plant reaches 15cm tall with several sets of leaves

    How to pinch:
    1. Locate the growing tip at the top of the stem
    2. Pinch out just above a pair of leaves
    3. The plant produces two new shoots from that point
    4. Repeat every 2-3 weeks

    Use pinchings immediately in cooking—this encourages regular harvesting.

    Once you’ve mastered basil, try growing other herbs in containers—many respond to the same pinching technique, or read our dedicated guide on how to grow mint in containers.

    Feeding

    Plants in pots exhaust nutrients faster than those in the ground.

    When: 6 weeks after germination, or immediately with young plants
    Frequency: Every 2-4 weeks during growing season (March to September)
    What: Balanced liquid fertiliser with roughly equal NPK numbers (such as 10-10-10). Avoid high-potassium tomato feeds—they encourage flowering over leaf production.

    Stop feeding from October to March when growth slows.

    Light

    Basil needs at least 6 hours of direct sun daily, preferably 8 or more.

    Indoors: South-facing windowsill is ideal. Rotate the pot weekly to prevent leaning.
    Outdoors: Choose the sunniest, most sheltered spot.

    Leggy growth (tall with sparse leaves) means your plant needs more light.

    Common Problems

    Leggy Growth

    Cause: Insufficient light, lack of pinching, or both
    Fix: Move to brighter location and pinch growing tips. New growth will be bushier.
    Prevention: Choose the sunniest spot from the start and pinch regularly.

    Several basil varieties growing in pots on a sunny patio including green and purple basil

    Yellow Leaves

    Lower leaves yellow: Overwatering. Let compost dry more between waterings; check drainage holes.

    Upper leaves yellow: Nutrient deficiency or cold stress. Feed regularly and ensure nighttime temperatures stay above 10°C.

    Spotted or mottled yellow: Possible disease. Remove affected leaves and improve air circulation.

    Pests

    Slugs and Snails (Outdoor UK Problem)

    Active in cool, damp weather.
    Signs: Ragged holes, slime trails

    Control:
    – Check at dusk and remove by hand
    – Use copper tape around pots
    – Remove hiding places like debris
    – Crushed eggshells or sharp grit deter them

    Avoid salt (damages soil) and toxic slug pellets.

    Aphids

    Signs: Sticky leaves, curled young growth, ants farming for honeydew

    Control:
    – Tolerance is often the best first approach
    – Squash small colonies between finger and thumb
    – Spray with strong water jet to dislodge
    – Encourage ladybirds and hoverfly larvae
    – Weak castile soap solution for persistent infestations

    Harvesting

    When to Harvest

    Start once your plant reaches 15cm tall with several leaf pairs. The more you harvest, the more it produces—provided you leave at least two-thirds of the plant intact.

    Best time: Morning, after dew has dried but before heat of day

    How to Harvest

    Method 1: Pinch individual leaves as needed
    Method 2: Cut whole stems just above a leaf node. The plant branches from that point.

    Preserving Excess

    Short term: Stems in a glass of water on the counter—basil hates fridge cold
    Medium term: Wrapped loosely in damp kitchen paper, in fridge door for 2-3 days
    Long term: Pesto frozen in portions, or leaves frozen in olive oil in ice cube trays

    Extending the Season

    Taking Cuttings

    Basil roots easily from cuttings, letting you create new plants for free.

    When: June to August
    Method:
    1. Cut a 10cm stem tip, removing lower leaves
    2. Place in a glass of water on a windowsill
    3. Roots appear in 2-3 weeks
    4. Pot up when roots reach 3cm

    Overwintering

    Bring your best plant indoors before first frost. Reduce watering significantly—winter basil grows slowly and needs minimal moisture. Expect little growth from November to February, but the plant revives strongly in spring.

    Quick Reference

    Factor Guidance
    Optimal temperature 15-25°C
    Minimum temperature 10°C (no frost tolerance)
    Germination 5-10 days at 18-21°C
    First harvest 6-8 weeks from seed; 2-3 weeks from young plants
    Pot size (minimum) 15cm diameter and depth
    Pot size (ideal) 20-25cm diameter, 20cm+ depth
    Light 6+ hours direct sun daily
    Watering When top 2cm of compost is dry
    Feeding Every 2-4 weeks with balanced liquid feed
    Lifespan Annual, but extendable via cuttings
    Best UK varieties Genovese (classic), Greek (compact), Thai (spicy), Dark Opal (purple)

    Frequently Asked Questions

    Can I grow basil in the UK climate?

    Yes, very successfully. Basil thrives in British summers and grows brilliantly on windowsills year-round. The key is frost protection—it has zero tolerance for freezing temperatures.

    How long does basil take to grow from seed?

    Seedlings emerge within 5-10 days. First usable leaves in 6-8 weeks; full harvests from 10 weeks.

    Why is my basil drooping?

    Almost always underwatering. Check soil immediately—if the top 2cm is dry, water thoroughly. The plant should recover within hours.

    Can I grow basil indoors all year?

    Yes, on a sunny south-facing windowsill. Growth slows in winter due to lower light, but the plant survives and resumes vigorous growth in spring. An LED grow light helps maintain production from November to February.

    How do I make basil bushy?

    Pinch out growing tips regularly, just above a pair of leaves. This forces branching, creating a compact, productive shape.

    Why are my basil leaves turning yellow?

    Yellow lower leaves = overwatering. Yellow upper leaves = nutrient deficiency or cold stress. Check your watering routine and feed every 2-4 weeks.

    When should I plant basil outside?

    Late May is safe for most of the UK. Southern regions: late April. Northern areas: early June. Always check for late frosts before moving plants outside.

    How often should I water basil in pots?

    Check the soil. Water when the top 2cm feels dry. In summer, outdoor pots might need water every 2-3 days; in winter, indoor pots might only need water weekly.

    Can I use supermarket basil and keep it growing?

    Yes, with caution. Supermarket basil is typically several overcrowded plants in one pot. Divide gently into smaller clumps, pot each into its own 15cm pot with fresh compost, and water well. Some may not survive, but with care, several usually thrive.

    Should I let my basil flower?

    No. Once basil flowers, leaf production slows and flavour becomes bitter. Pinch off flower stems as soon as they appear.

    Final Thoughts

    Growing basil in pots is one of the most satisfying projects for UK beginners. Focus on three essentials: warm location, good drainage, and regular pinching—and you will enjoy fresh basil for months.

    Start with one plant on your windowsill, get comfortable checking soil and pinching tips, then expand your herb collection as confidence grows. For more ideas, read our beginner’s guide to starting a vegetable garden.

    About the Author

    John Kitcher is the lead gardening writer at Plants and Gardening. He grew up mucking in on his grandfather’s Devon allotment and has spent the last fifteen years growing fruit, veg and ornamentals across three very different UK gardens — a windy coastal plot in North Cornwall, a shaded London back garden, and now a clay-heavy smallholding in the Midlands. He trials every technique covered here in his own beds and containers before writing about it, cross-references against RHS and Kew guidance, and has a soft spot for heritage tomato cultivars and anything that survives a British winter without complaint.

    Got a question about something we’ve written? Drop a comment — we read every one.