Tag: beginner gardening

  • How to Get Rid of Slugs in the UK: What Actually Works

    How to Get Rid of Slugs in the UK: What Actually Works

    If slugs are shredding your seedlings overnight, here’s the short version. The methods that genuinely work are biological nematodes, encouraging natural predators, picking slugs off by torchlight, and — only as a last resort — ferric phosphate pellets. The popular barriers most of us were told to use (copper tape, eggshells, grit, wool pellets) were tested by the RHS and made no measurable difference. This guide explains what to do, in the right order, for a typical UK garden.

    It’s worth knowing up front: you will never get rid of every slug, and you don’t need to. Slugs are food for hedgehogs, frogs and birds, and most species barely touch living plants. The goal is to protect the few plants slugs love during the damp months — not to wage all-out war.

    Why slugs thrive in a UK garden

    Britain’s mild, wet climate is close to slug paradise. They feed at night and in wet weather, hide under pots, logs and dense foliage by day, and breed fastest when the soil is warm and damp — which is exactly why June to September is peak slug season. A humid summer evening after rain is when most damage happens.

    They do the most harm to soft, young growth: newly planted seedlings, lettuce and other salad leaves, hostas, courgettes, runner beans, dahlias and strawberries. Established, woody or aromatic plants are usually left alone. If you’re starting a vegetable garden this is the single most common reason beginners lose their first crops.

    Protect the plants most at risk first

    Before reaching for any control, concentrate your effort where it counts. A few simple habits prevent most damage:

    • Raise transplants before planting out. Slugs destroy tiny seedlings fastest. Grow plants on until they’re sturdier, then plant out — bigger plants shrug off light nibbling.
    • Water in the morning, not the evening. RHS research suggests a drier soil surface at night gives slugs less to glide over. Damp soil at dusk is an open invitation.
    • Tidy hiding places near vulnerable plants. Lift old pots, boards and leaf litter from around seedlings so slugs have nowhere cool and damp to shelter by day.
    • Use containers and raised beds for the most tempting crops. Slugs still climb, but a pot on a hard surface is far easier to defend than open ground. Our guides to growing vegetables in containers and choosing pots for beginners are a good place to start.
    Young vegetable seedlings with ragged holes from slug damage

    The methods that actually work

    1. Nematodes — the most effective slug control for most gardens

    If you only do one thing, do this. Nematodes are microscopic worms (the species Phasmarhabditis hermaphrodita) that occur naturally in UK soil. Watered on, they seek out slugs underground and stop them feeding, then kill them within a few days — without harming pets, children, hedgehogs, birds or worms. In the UK they’re sold as a living product, most widely under the name Nemaslug, as a sachet of powder you mix with water.

    They are brilliant — but only if you use them correctly, which is where most beginners come unstuck. The rules that matter:

    • Soil must be 5°C or warmer. Below that the nematodes aren’t active. In practice that means roughly mid-spring through to autumn in most of the UK.
    • Apply in the evening or on a dull day, and water it in. Nematodes are killed by sunlight and dry out easily — the soil needs to be moist before and after applying.
    • Keep the soil damp for the next couple of weeks. Dry soil shuts them down; water during dry spells.
    • It lasts around six weeks, then you reapply. For continuous protection through summer, plan to treat roughly every six weeks from spring onwards rather than as a one-off.
    • It’s a living product. Store the sachet in the fridge and use it before the date on the pack — old or warm nematodes simply won’t work.

    One honest limitation: nematodes target slugs, which spend most of their time in or on the soil. They’re far less effective against snails, which rest off the ground. If snails are your main problem, lean harder on the methods below.

    Watering nematodes into the soil with a watering can at dusk

    2. Encourage natural predators

    The cheapest, most sustainable slug control is a garden full of things that eat slugs: hedgehogs, frogs and toads, ground beetles, slow-worms, song thrushes and ducks. Encourage them and the slug population looks after itself over time. Leave a wild corner, add a small pond or a shallow water dish, cut a hedgehog-sized gap in fences, and avoid disturbing log piles. This fits the RHS’s current emphasis on predators, cultural controls and targeted biological control.

    3. Go on a torchlight slug patrol

    Low-tech but genuinely effective: on a warm, damp evening, head out an hour or two after dusk with a head torch and a tub, and pick slugs off your most vulnerable plants by hand. Do it a few nights running when seedlings are at their most tender and you’ll dramatically cut the local population. Relocate them to a wild area, or dispatch them quickly — whichever you’re comfortable with.

    4. Beer traps (useful, with limits)

    A shallow container sunk to ground level and part-filled with beer will attract and drown slugs. Beer traps do catch slugs, so they help. But they only draw slugs from a small radius, need topping up and emptying every few days, and can catch ground beetles (which are on your side) — so keep them close to vulnerable plants and check them often.

    Popular methods the RHS found don’t work

    Here’s where good advice parts company with most slug articles. The RHS put the popular home remedies to the test: in a trial led by entomologist Dr Hayley Jones, 108 lettuces were grown with and without the usual barriers, and the protected plants were eaten just as much as the unprotected ones (RHS slug and snail research). The beginner-practical version: don’t spend your first £20 on copper tape and wool pellets — put it into protecting seedlings and improving habitat instead. The barriers that didn’t earn their place were:

    • Copper tape
    • Horticultural grit
    • Pine bark mulch
    • Wool pellets
    • Eggshells

    The likely reason is that a slug’s thick protective slime lets it glide straight over sharp or scratchy surfaces, and even change its slime to cope. Eggshells may be worse than useless — slugs can eat them, so they can act as an attractant. Coffee grounds and salt are two more to skip: there’s no good evidence coffee grounds reliably deter slugs, and salt damages soil and your plants. The practical takeaway is that these barriers may waste time and money. If you’ve been ringing your pots with copper tape, that’s the effort to redirect.

    Slug pellets and the law: what’s banned now

    The rules changed and a lot of online advice hasn’t caught up. Metaldehyde slug pellets — the traditional blue pellets — are banned in the UK. The ban took full effect on 1 April 2022: it is now illegal to sell, supply, store or use them, because metaldehyde poses an unacceptable risk to wildlife such as hedgehogs and birds (and to pets). If you have an old tub in the shed, take it to a household hazardous-waste point rather than using it.

    The legal chemical option now is ferric phosphate (sometimes labelled iron phosphate) pellets. These are approved for use, including in organic gardening, and are far less harmful to wildlife. That said, the RHS’s position is that slug pellets “even organic ones” can still have negative effects on wildlife. We’d treat ferric phosphate as a last resort for a prized crop — used sparingly, scattered thinly per the pack instructions, not as your first move.

    A simple slug-control routine for beginners

    Pulling it together into something you can actually follow through the damp season:

    1. Spring: start encouraging predators (water, shelter, hedgehog gaps) and raise seedlings to a decent size before planting out.
    2. When soil is reliably above 5°C: apply nematodes, and reapply roughly every six weeks through summer for plants slugs love.
    3. Through summer: water in the morning, keep hiding places clear of your most vulnerable plants, and do a torchlight patrol after warm, wet evenings.
    4. If something precious is still being eaten: add beer traps close by, and only then consider a thin scatter of ferric phosphate pellets.

    Slugs are at their busiest in the months covered by our seasonal guides to what to plant in June, July and August — worth a read alongside this if you’re sowing now.

    What you’ll need and where to buy it (UK)

    Kept deliberately short and honest — these are the things the evidence actually supports, not the barriers we’ve just questioned:

    • Nematodes (e.g. Nemaslug): the centrepiece for most gardens. Sold by garden centres and online — buy fresh, in season, and store in the fridge until use.
    • A head torch: hands-free slug patrols after dark. Any decent rechargeable head torch does the job.
    • Ferric phosphate pellets: the only legal pellet, for last-resort use on a prized crop.
    • Beer-trap supplies: cheap and DIY — a few sunken tubs and the cheapest beer you can find, or a ready-made trap kit.
    • For predators: a simple hedgehog house, a shallow pond or water dish, and a bird feeder all pay off over time.

    In the UK you’ll find all of these at garden centres and retailers such as B&Q, Crocus, Wilko and Amazon UK. What we won’t be sending you out to buy: copper tape, wool pellets, grit barriers or eggshells — because the research says they won’t protect your plants.

    Frequently asked questions

    What is the fastest way to get rid of slugs?

    For an immediate dent in numbers, a torchlight slug patrol on a warm, damp evening — picking them off by hand for a few nights running — works fastest. For lasting control, apply nematodes once the soil is above 5°C.

    Do slug pellets still work, and are they legal?

    Traditional metaldehyde pellets are banned in the UK (since 1 April 2022) and must not be used. Ferric phosphate pellets are legal and effective, but are best kept as a last resort because even these can affect wildlife.

    Does copper tape keep slugs away?

    In RHS trials it made no measurable difference to plant damage. The same was true of eggshells, grit, bark mulch and wool pellets. Your time and money are better spent on nematodes and encouraging predators.

    Are slugs actually bad for the garden?

    Mostly no. Only a handful of species damage living plants; the rest help recycle dead material and feed hedgehogs, frogs and birds. The aim is to protect vulnerable plants during the damp months, not to eliminate slugs entirely.

    When should I apply nematodes?

    From mid-spring once the soil is reliably 5°C or warmer, applied in the evening or on a dull day and watered in. Reapply about every six weeks through summer for continuous protection.

    Sources

    What to do next

    Start tonight: clear hiding places from around your most vulnerable plants, switch to morning watering, and — if the soil is above 5°C — order nematodes to apply this week. Then build slug-friendly predators into the garden for the long term.

    For more on protecting the crops slugs love most, read our beginner guides to growing courgettes in containers, growing runner beans and growing strawberries in pots, or get the bigger picture in our guide to starting a vegetable garden.

    Found a method that works in your garden — or a slug battle you’re still losing? Tell us in the comments; we read every one and update our guides with what readers find works.

  • Best Containers and Pots for Beginners (UK Buyer’s Guide)

    Best Containers and Pots for Beginners (UK Buyer’s Guide)

    The right container transforms gardening from struggle to success. Too small and plants suffocate. Wrong material and compost dries in hours or waterlogs in minutes. This guide matches container types to your plants, budget, and gardening style.

    Whether you’re filling a patio with tomatoes or starting a windowsill herb collection, these recommendations come from years of UK container gardening experience.

    As an Amazon Associate I earn from qualifying purchases.

    Quick Comparison: Which Plant Pots Are Best for Beginners

    Container Size Material Best For Price
    Classic Terracotta 20–30cm Clay Herbs, Mediterranean plants ££
    Stewart Garden Plastic Various Plastic Vegetables, annuals £
    Timber Raised Bed 60×60cm Wood Deep-rooted vegetables £££
    Smart Pot Fabric 15–30L Geotextile Air-pruning, portability ££
    Glazed Ceramic 20–40cm Ceramic Ornamentals, patios £££

    Understanding Container Materials

    Terracotta (Clay)

    The classic. Porous, breathable, beautiful.

    Terracotta pot planted with fresh herbs on a sunny garden step

    Pros:
    – Breathes — roots get oxygen, hard to overwater
    – Insulates — protects roots from temperature swings
    – Beautiful — ages gracefully, traditional garden aesthetic
    – Stable — heavy enough not to blow over

    Cons:
    – Heavy — difficult to move, unsuitable for balconies with weight limits
    – Fragile — cracks in frost if poor quality
    – Expensive — –40 for medium pots
    – Dries quickly — needs more frequent watering

    Best for: Mediterranean herbs (thyme, rosemary, sage), permanent plantings, traditional gardens

    Winter care: Raise on feet to prevent frost damage. Soak thoroughly before hard frosts — dry terracotta cracks more easily.

    Plastic

    The practical choice. Lightweight, affordable, versatile.

    Pros:
    – Lightweight — easy to move, balcony-friendly
    – Affordable — –8 for equivalent terracotta sizes
    – Retains moisture — less frequent watering
    – Frost-resistant — won’t crack in UK winters
    – Variety — every colour, shape, and size

    Cons:
    – Can overheat — black pots cook roots in full sun
    – Less breathable — easier to overwater
    – Aesthetic — looks “cheap” to some gardeners
    – UV degradation — becomes brittle after 5+ years

    Best for: Vegetables, annuals, temporary plantings, balconies, renters

    Quality markers: Look for “UV-stabilised” and thick walls (3mm+). Cheap thin plastic cracks within a season.

    Wood

    The natural choice. Attractive, insulating, traditional.

    Pros:
    – Insulating — keeps roots cool in summer, warm in winter
    – Attractive — natural look improves gardens
    – Customisable — build any size or shape
    – Sustainable — if FSC-certified timber used

    Cons:
    – Maintenance — needs treating every 2–3 years
    – Expensive — –200 for raised beds
    – Heavy — permanent installations
    – Rot risk — untreated wood lasts 3–5 years only

    Best for: Raised beds, vegetable gardens, permanent features

    Timber treatment: Use wood-preserver-non-toxic non-toxic wood preserver on interior only — keep outside untreated for weathered look.

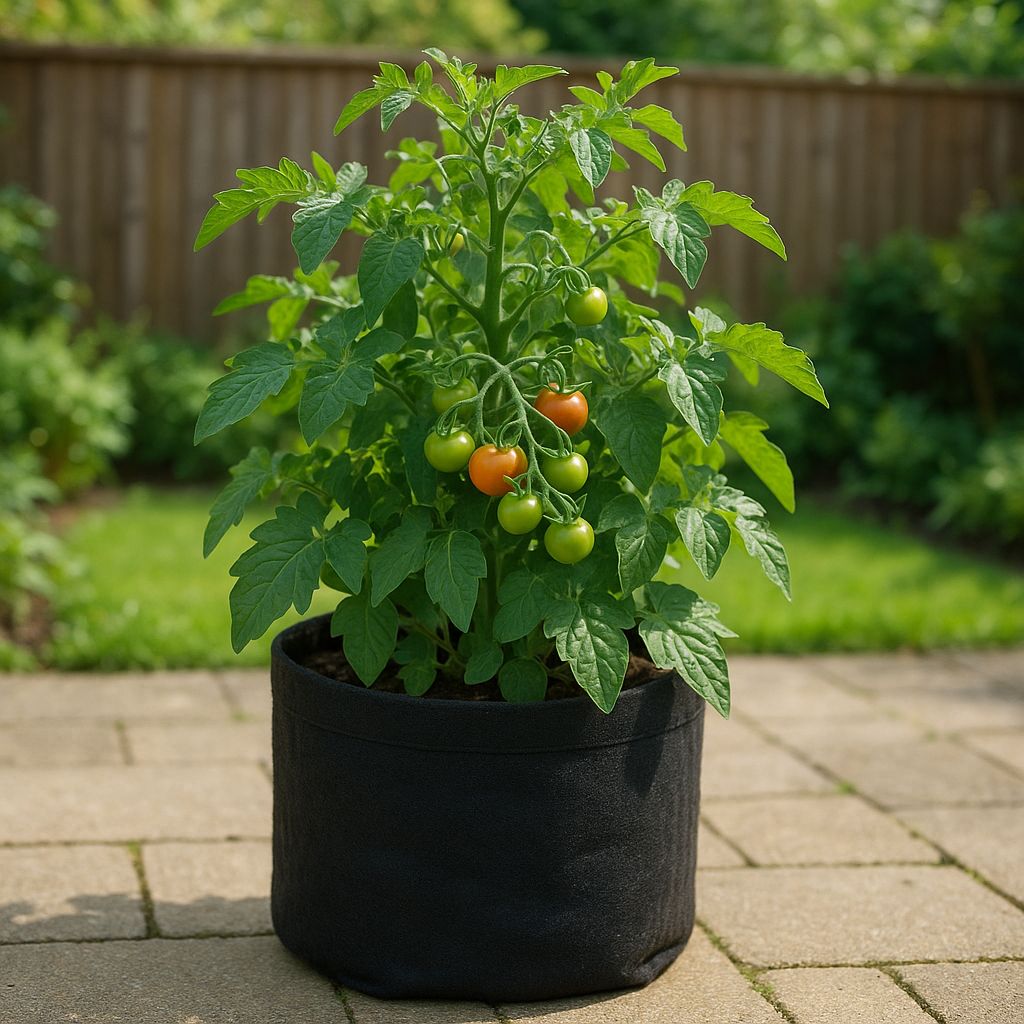
    Fabric (Geotextile)

    The modern choice. Air-pruning, lightweight, foldable.

    Pros:
    – Air-pruning — prevents root circling, better plant health
    – Lightweight — move filled containers easily
    – Foldable — stores flat when not in use
    – Breathable — excellent drainage, hard to overwater

    Cons:
    – Aesthetic — industrial look not for everyone
    – Dries quickly — needs more frequent watering
    – Limited lifespan — 3–5 seasons for quality brands
    – Supports needed — fabric bags sag when filled

    Best for: Vegetables, air-pruning benefits, portable gardens, storage concerns

    Glazed Ceramic

    The decorative choice. Colourful, finished, statement pieces.

    Pros:
    – Beautiful — colours and glazes enhance gardens
    – Non-porous — retains moisture well
    – Frost-resistant — quality glazes survive UK winters
    – Stable — heavy enough for top-heavy plants

    Cons:
    – Expensive — –60+ per pot
    – Heavy — permanent placement
    – Limited drainage — one hole often insufficient
    – Risk — poor quality glazes crack in frost

    Best for: Ornamentals, statement plants, patios where appearance matters

    Product Deep Dives

    Classic Terracotta Pot

    Best for: Mediterranean herbs, traditional gardens, long-term plantings

    Specifications:
    – Material: Fired clay
    – Wall thickness: 15–20mm
    – Drainage: Single hole (enlarge if needed)
    – Sizes: 10cm to 50cm+ diameter

    Why it works: The porous walls create perfect conditions for herbs that hate wet feet. Rosemary, thyme, and sage thrive where they’d rot in plastic.

    The frost factor: UK frost will crack cheap imported terracotta. Buy from reputable UK garden centres with frost-proof guarantees.

    Best setup: Add crocks-pottery crocks or pot-feet pot feet to base. Mix horticultural-grit grit into compost (30% by volume) for drainage.

    Stewart Garden Essential Plastic Pots

    Best for: Vegetables, beginners, budget-conscious

    Specifications:
    – Material: UV-stabilised polypropylene
    – Durability: 5+ years
    – Range: 9cm to 40cm diameter
    – Price: –8 per pot

    Why it works: Stewart has supplied UK gardeners for decades. Their plastic doesn’t go brittle in UV light — the common failure point in cheap rivals.

    The vegetable advantage: Standard sizes (20cm, 25cm, 30cm) match seed packet recommendations exactly. No guessing if your pot is large enough.

    Colour tip: Choose light colours (terracotta-effect, green) over black. Black plastic absorbs heat, stressing roots on hot days.

    Timber Raised Bed Kit

    Best for: Serious vegetable growing, permanent installations

    Specifications:
    – Material: FSC-certified timber
    – Typical size: 60×60×30cm or 120×60×30cm
    – Assembly: Slot-together or screw-fixed
    – Lining: Often includes membrane

    Why it works: Raised beds solve poor soil, drainage, and back pain in one. The 30cm depth handles tomatoes, carrots, and even dwarf fruit trees.

    The instant garden: One 120×60cm raised bed provides space for 4 tomato plants or 12 lettuce plants. Productive space in hours, not years.

    Site preparation: Place on level ground. Line base with weed-membrane weed membrane to prevent grass intrusion.

    Fill calculation: 120×60×30cm = 216 litres. Buy 3× 70L bags for one bed.

    Smart Pot Fabric Container

    Best for: Air-pruning benefits, vegetables, portability

    Specifications:
    – Material: Dense geotextile fabric
    – Sizes: 3.8L to 113L (1 to 30 US gallons)
    – Handles: Reinforced sewn handles
    – Durability: 5+ seasons

    Why it works: When roots reach the fabric edge, they stop (air-pruning) instead of circling. This creates a dense, fibrous root ball that absorbs nutrients efficiently.

    The result: Plants establish faster, grow larger, resist drought better than plastic-potted equivalents.

    Best for: Tomatoes, peppers, any container vegetable where maximum yield matters.

    Watering note: Fabric dries faster than plastic — check daily in summer.

    Glazed Ceramic Statement Pot

    Best for: Ornamentals, patios, design-conscious gardeners

    Specifications:
    – Material: Clay with coloured glaze
    – Frost resistance: Check rating (must say “frost-proof”)
    – Drainage: Usually one hole
    – Sizes: 15cm to 50cm+

    Why it works: Transforms functional container gardening into designed outdoor rooms. A glazed pot elevates a geranium to garden centre display quality.

    Quality check: Tap the pot — should ring, not thud. Thud indicates cracks or poor firing.

    The drainage fix: One hole is rarely enough. Drill 3–4 additional 10mm holes with ceramic drill bit before planting.

    Best for: Permanent displays where appearance matters as much as function.

    Container Sizes by Plant Type

    Herbs

    Herb Minimum Pot Ideal Pot Notes
    Basil 15cm 20cm Moisture-loving — plastic acceptable
    Rosemary 20cm 30cm Deep roots — terracotta preferred
    Mint 25cm 30cm Invasive — dedicated pot essential
    Parsley 15cm 20cm Biennial — replace annually
    Thyme 10cm 15cm Shallow roots — terracotta ideal

    Vegetables

    Vegetable Minimum Pot Ideal Pot Depth
    Lettuce 15cm 20cm 15cm
    Tomatoes 25cm 30cm 25cm
    Peppers 20cm 25cm 20cm
    Carrots 20cm 25cm 25cm+
    Potatoes 30cm 40cm 30cm
    Courgettes 30cm 45cm 30cm

    Ornamentals

    Plant Minimum Pot Ideal Pot Notes
    Bedding annuals 15cm 20cm Plastic fine
    Perennials 20cm 25cm Terracotta for permanence
    Shrubs 30cm 40cm Heavy pot for stability
    Small trees 40cm 50cm Drainage critical

    Essential Container Accessories

    Pot Feet

    Why: Prevents waterlogging, reduces frost damage, improves drainage

    Fabric grow bag with a healthy tomato plant growing on a patio

    Options:
    – Ceramic (decorative, expensive)
    – Plastic (cheap, functional)
    – Cork (natural, insulating)

    Use: One pot per foot, minimum 3 feet per pot. More for large containers.

    Crocks

    Why: Prevents compost washing out drainage holes, improves drainage

    Materials: Broken terracotta pots, gravel, purpose-made clay crocks

    Modern alternative: pot-mesh Plastic mesh — lighter, effective

    Saucers

    Why: Catches drainage water, protects surfaces

    Caution: Remove saucers in wet weather — sitting water causes root rot

    Plant Trolleys

    Why: Move heavy containers easily

    Best for: Large pots on patios, following sun seasonally, winter protection

    Container Buying Mistakes to Avoid

    Mistake 1: Pots Too Small

    Root-bound plants stop growing, become stressed, produce poorly.

    Solution: Go one size larger than minimum recommendations. A 30cm tomato pot beats a struggling 20cm pot.

    Mistake 2: No Drainage Holes

    Decorative pots often lack drainage. Water sits, roots rot, plants die.

    Solution: Drill holes with appropriate bit, or use as cachepot (decorative outer) with plastic pot inside.

    Mistake 3: Dark Colours on Hot Patios

    Black pots absorb heat, cooking roots on summer days.

    Solution: Choose light colours for full sun positions. Wrap black pots in hessian-wrap hessian to reflect heat.

    Mistake 4: Forgetting Weight Limits

    Balconies have weight restrictions. A 40cm terracotta pot weighs 15kg empty, 25kg+ filled.

    Solution: Check balcony limits. Use plastic or fabric for elevated spaces.

    Budget Container Setup for Beginners

    Starter kit (–50):
    – 4× 20cm plastic pots —
    – 2× 30cm plastic pots —
    – 6× pot-feet Pot feet —
    – 2× 70L compost —
    – horticultural-grit Horticultural grit —

    This kit starts: 4 herb plants + 2 tomato plants, with room to expand.

    Frequently Asked Questions

    Q: Can I grow vegetables in any container?

    A: Yes, if it has drainage holes and sufficient volume. A 2L yoghurt pot grows one lettuce. A 30cm pot grows a productive tomato.

    Q: Do containers need saucers underneath?

    A: Optional. Useful for patios (prevents staining) but remove in wet weather to prevent waterlogging.

    Q: How do I know if my pot is big enough?

    A: Check roots at drainage holes — if visible, pot on. Stunted growth despite feeding indicates root congestion.

    Q: Can I leave terracotta pots outside in winter?

    A: Quality UK frost-proof terracotta, yes. Cheap imported terracotta will crack. Raise on feet and soak before hard frosts.

    Q: What’s the best material for beginners?

    A: Plastic — affordable, forgiving, lightweight. Upgrade to terracotta for herbs once you’re confident.

    Your Container Buying Checklist

    – [ ] List what you want to grow (check size requirements)
    – [ ] Measure your space and check weight limits (balconies)
    – [ ] Choose material: Plastic (budget), terracotta (herbs), wood (vegetables), fabric (portable)
    – [ ] Count drainage holes — minimum 1, ideally 3–4
    – [ ] Buy pot feet — essential for all containers
    – [ ] Purchase compost: Calculate 70L per large pot
    – [ ] Add drainage: horticultural-grit Grit for terracotta, essential for all

    Ready to fill your pots? See our guides to best compost for container gardening and best herbs to grow in containers for what to plant.

    Sources: RHS Container Gardening, Which? Garden Product Reviews, Gardening Which?, Garden Design Magazine You might also like our guide to the best vegetables to grow in containers.

    About the Author

    John Kitcher is the lead gardening writer at Plants and Gardening. He grew up mucking in on his grandfather’s Devon allotment and has spent the last fifteen years growing fruit, veg and ornamentals across three very different UK gardens — a windy coastal plot in North Cornwall, a shaded London back garden, and now a clay-heavy smallholding in the Midlands. He trials every technique covered here in his own beds and containers before writing about it, cross-references against RHS and Kew guidance, and has a soft spot for heritage tomato cultivars and anything that survives a British winter without complaint.

    Got a question about something we’ve written? Drop a comment — we read every one.

  • Best Gardening Tools for Beginners (UK Buyer’s Guide)

    Best Gardening Tools for Beginners (UK Buyer’s Guide)

    As an Amazon Associate I earn from qualifying purchases.

    The right tools transform gardening from chore to pleasure. Attempting to dig with a cheap trowel that bends in heavy soil or prune with blunt secateurs that crush stems rather than cut them turns satisfying work into frustration.

    This guide covers essential tools for UK beginner gardeners — the 10 items that handle garden tasks without breaking the bank or requiring shed storage.

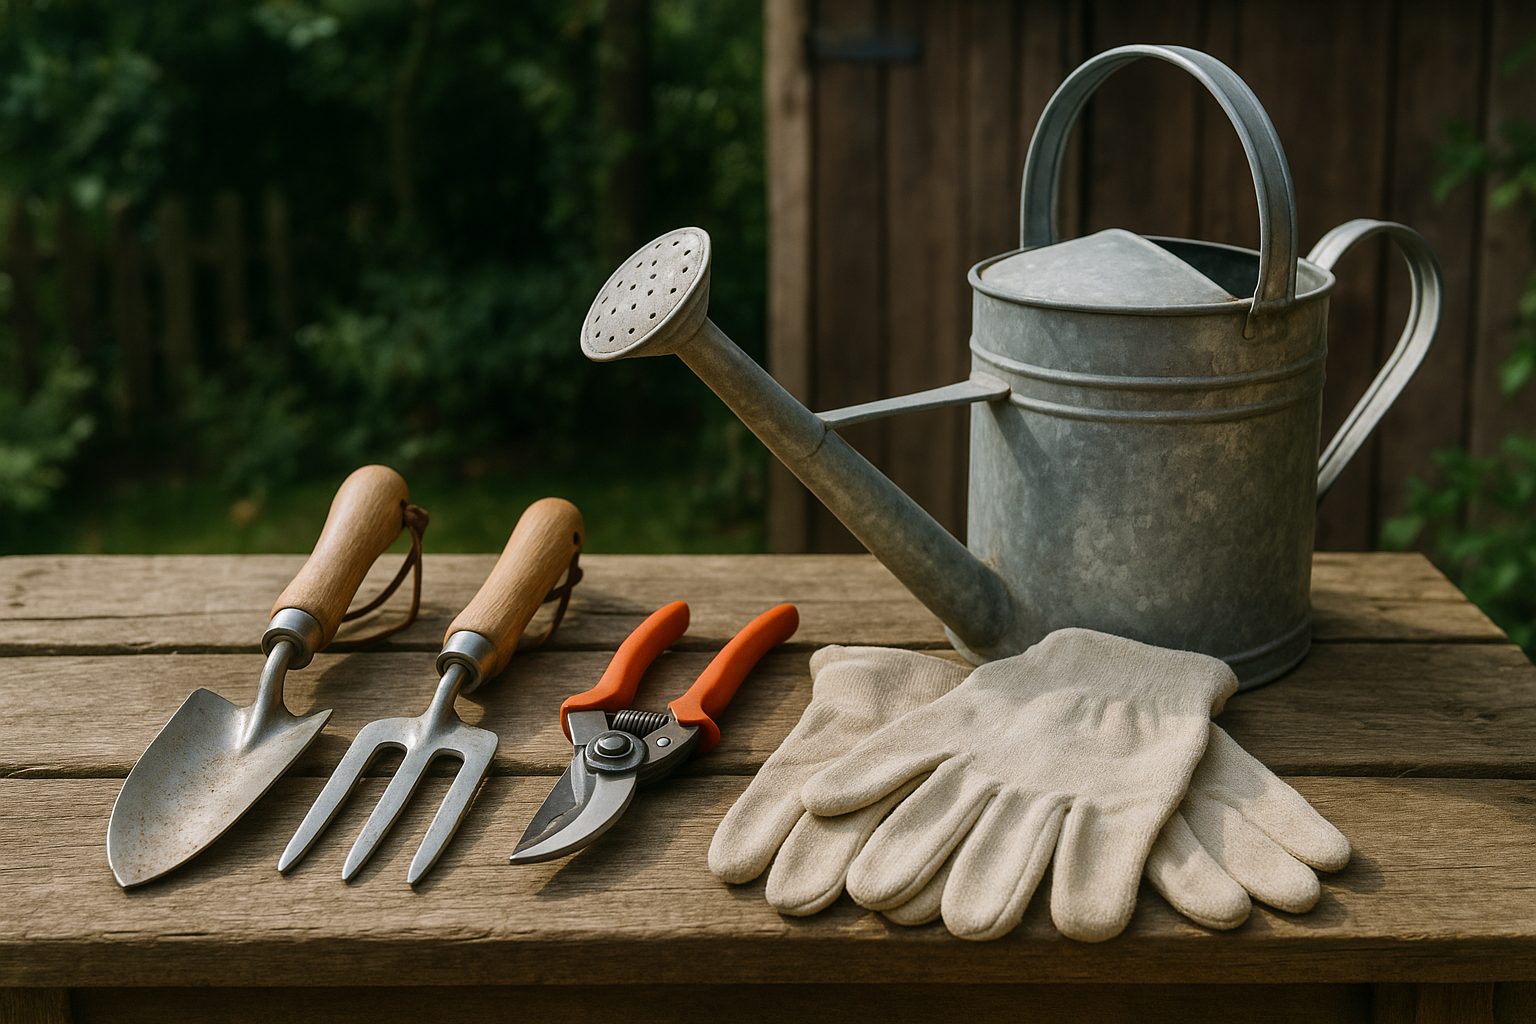
    Quick Comparison: Essential Tool Kit

    Tool Purpose Budget Pick Quality Pick
    Hand trowel Planting, weeding Spear & Jackson Basic S&J Stainless –15
    Fork Soil prep, weeding Wilkinson Sword S&J Neverbend –25
    Secateurs Pruning, deadheading Draper Bypass Felco 2 –45
    Watering can Gentle watering Haws Indoor Haws Professional –40
    Garden gloves Protection Showa Floreo Goldleaf Dry Touch –25
    Kneeler Comfort, protection Basic Foldable Burgon & Ball –30
    Hand fork Weeding, cultivating S&J Elements Wolf-Garten –20
    Pruning saw Thick branches pruningsaw-draper Draper 180mm Silky Gomtaro –45
    Garden line Straight sowing line-basic Simple Line Burgon & Ball –15
    Tool maintenance Cleaning, sharpening Basic Brush/Oil Draper Kit –20

    The Essential 10: Tools You Actually Need

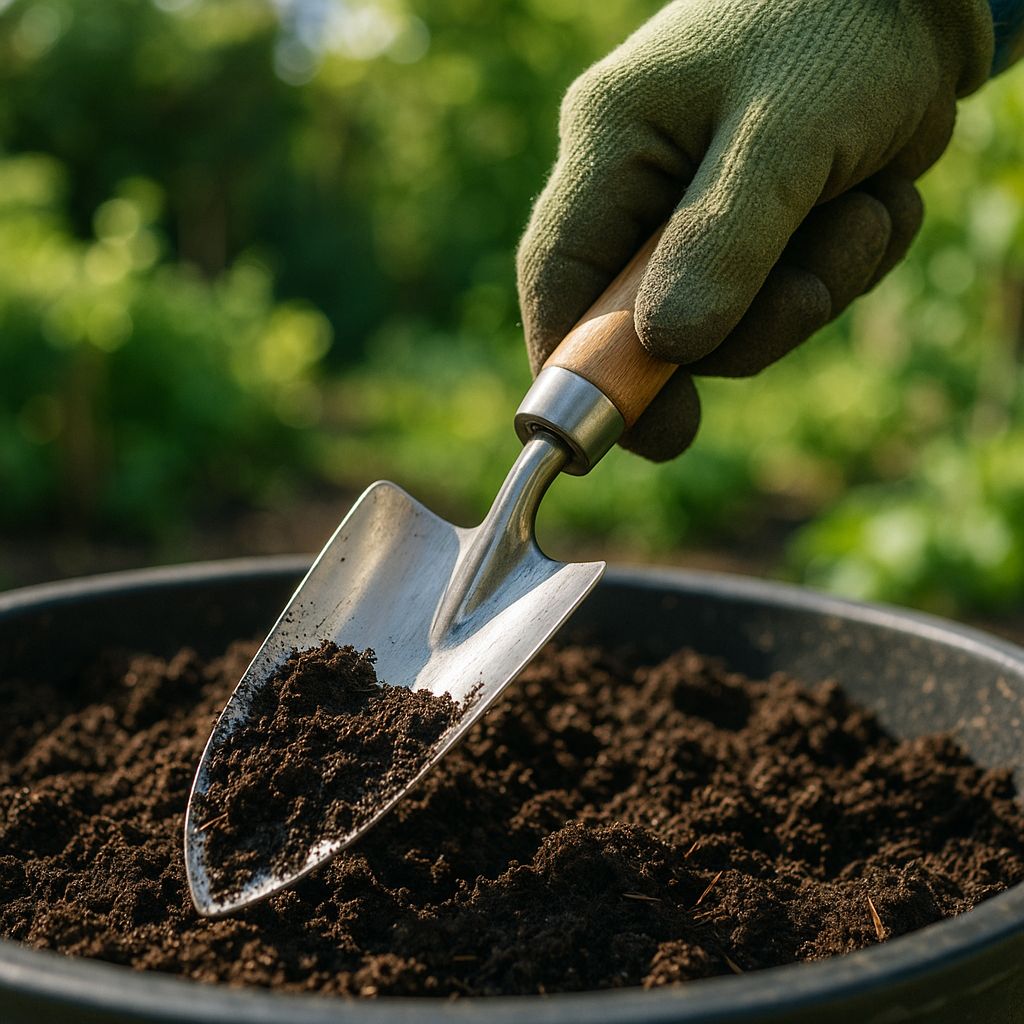
    1. Hand Trowel

    What it does: Transplant seedlings, dig planting holes, scoop compost, weed between plants

    Hand trowel digging into rich dark compost in a garden pot

    Why quality matters: Cheap trowels bend in heavy soil, snap at the handle join, rust within a season. A good trowel lasts decades.

    What to look for:
    – Stainless steel blade (doesn’t rust)
    – Hardwood or fibreglass handle (won’t split)
    – Tang extending into handle (strength)
    – Comfortable grip for extended use

    Budget choice: Spear & Jackson Elements — , perfectly adequate for occasional use

    Investment choice: Spear & Jackson Stainless Steel — , lasts 20+ years

    Avoid: Plastic trowels (flex, snap) and painted mild steel (rusts)

    2. Garden Fork (Border Fork)

    What it does: Loosen soil, lift weeds, break clods, aerate compost, dig up potatoes

    Why beginners need it: Digging with a trowel is exhausting. A fork multiplies your effort and saves your wrists.

    Border fork vs digging fork:
    Border fork: Smaller, lighter, easier for beginners — handles tasks
    Digging fork: Larger, heavier — for serious vegetable plots

    What to look for:
    – Socket construction (handle joins socket, not tang)
    – Forged steel head (strength)
    – Ash or fibreglass shaft
    – D-grip handle (ergonomic)

    Recommendation: Spear & Jackson Neverbend Professional — , lifetime tool

    Maintenance: Clean after use, oil wooden handle annually, sharpen tines if blunted

    3. Secateurs (Pruning Shears)

    What it does: Cut stems up to finger thickness, deadhead flowers, harvest vegetables, shape shrubs

    Bypass vs anvil:
    Bypass: Scissor action — clean cuts on living plants
    Anvil: Crushing action — only for dead wood

    Beginners need bypass. Anvil secateurs damage living tissue.

    What to look for:
    – Bypass blade design
    – Replaceable blade (Felco standard)
    – Spare parts availability
    – Comfortable hand size fit

    Budget choice: Draper Carbon Steel Bypass — , sharpens easily

    Investment choice: Felco Model 2 — , professional standard, 20+ year lifespan

    Maintenance: Clean after use, oil pivot weekly, sharpen monthly during growing season

    4. Watering Can

    What it does: Water plants gently without washing away soil or damaging seedlings

    Rose attachment: The perforated “rose” on the spout breaks water into fine droplets — essential for seedlings and delicate plants.

    Size matters:
    1–2 litres: Indoor plants, seedlings, conservatory
    5 litres: General garden use, patio containers
    9 litres: Large gardens, fewer refills

    Material choice:
    Plastic: Lightweight, affordable, won’t dent
    Metal (galvanised): Traditional, durable, heavy when full
    Haws (plastic or metal): The gold standard, balanced, precise rose

    Recommendation: Haws Professional 5L — , precise watering, lasts decades

    Budget alternative: Haws Indoor 1L for seedlings + cheap 5L plastic for general use

    5. Garden Gloves

    What they do: Protect hands from thorns, blisters, soil-borne bacteria, and keep nails clean

    Types for different tasks:

    Type Best For Features
    Nitrile-coated General gardening Dexterity, grip, water-resistant
    Leather Pruning roses, brambles Thorn protection, durability
    Cotton Light weeding, sowing Breathable, inexpensive
    Gauntlet Rose pruning Extended wrist/arm protection

    The beginner’s choice: Showa Floreo 370 — , nitrile-coated, dexterity for fine tasks, machine washable

    Premium option: Goldleaf Dry Touch — , leather palm, breathable back, professional quality

    Buy multiple pairs: Gloves get wet, muddy, lost. Having 3–4 pairs means you always have dry ones ready.

    6. Kneeler or Kneeling Pad

    What it does: Protects knees from hard ground, stones, and damp. Prevents back strain from bending.

    Types:

    Kneeling pad:
    – Simple foam or gel cushion
    – –15
    – Light, portable, hangs on shed hook

    Kneeler seat:
    – Flips from kneeler to seat
    – Handles for standing assistance
    – –35
    – Ideal for bad knees or back

    Recommendation: Burgon & Ball Kneeler — , flips to seat, handles, worth the investment for anyone over 40

    Budget choice: Basic foam kneeler — , perfectly adequate

    Your knees will thank you: Gardening without knee protection causes cumulative damage. Protect them from your first day.

    7. Hand Fork (Cultivator)

    What it does: Weed between plants, break soil crust, aerate surface, mix in fertiliser

    Why you need it: The fork handles soil between plants where a border fork won’t fit. Essential for weeding and soil maintenance.

    What to look for:
    – Three strong tines
    – Comfortable handle
    – Stainless or carbon steel

    Recommendation: Spear & Jackson Elements — , matches their trowel for consistent quality

    Alternative: Wolf-Garten multi-change — , interchangeable heads, ergonomic handle

    8. Pruning Saw

    What it does: Cut branches too thick for secateurs (over 2cm diameter)

    Why beginners need one: Even small gardens have overgrown shrubs, dead branches, or thick stems that need removal.

    Folding vs fixed:
    Folding: Safe storage, portable — –30
    Fixed blade: Faster cutting, professional use — –50

    Tooth design:
    Curved blade: Faster cutting on living wood
    Straight blade: Better for tight spaces

    Recommendation: Silky Gomtaro 210mm — , Japanese precision, cuts like a dream

    Budget choice: pruningsaw-draper Draper Folding Pruning Saw — , adequate for occasional use

    Safety: Always fold closed immediately after use. These blades are razor-sharp.

    9. Garden Line (Marking String)

    What it does: Mark straight rows for sowing vegetables, edging lawns, lining up hedges

    Why precision matters: Straight rows:
    – Look professional
    – Maximise space efficiency
    – Make weeding easier (you know where seedlings should be)
    – Improve air circulation between plants

    Types:
    Simple line: String on two sticks — , basic but functional
    Winding line: Retractable string in handle — , convenient
    Professional: Metal posts with sliding line — , most accurate

    Recommendation: Burgon & Ball Line and Pins — , traditional design, accurate, satisfying to use

    Alternative: Make your own with bamboo canes and garden twine —

    10. Tool Maintenance Kit

    What it does: Clean, sharpen, and protect your tools — extending life from years to decades

    Basic kit ():
    – Wire brush (cleaning soil off)
    – Linseed oil (wooden handles)
    – Multi-purpose oil (metal, mechanisms)
    – Old towel or rag

    Complete kit ():
    – Draper Sharpening Kit — stone, file, oil
    – Wire brush
    – Linseed oil
    – Multi-purpose oil
    – Camellia oil (premium blade protection)
    – Tool roll or rack

    The 5-minute rule: Spend 5 minutes cleaning and oiling tools after each use. They’ll last 20 years instead of 2.

    Tool Storage Solutions

    For Small Spaces (Balcony, Patio)

    Tool bag or bucket: –25
    – Keeps tools organised
    – Portable — take to planting spot
    – Protects from weather

    For Gardens with Shed

    Wall-mounted tool rack: –40
    – Tools visible and accessible
    – Air circulation prevents rust
    – Saves floor space

    Rail system (Gerdmans, etc.): –60
    – Flexible, expandable
    – Hooks for every tool type
    – Professional appearance

    Where to Buy: Shop Recommendations

    Garden centres (Dobbies, British Garden Centres, etc.):
    – Handle tools before buying
    – Check weight and balance
    – Immediate purchase
    – Higher prices but expert advice

    Bypass secateurs making a clean angled cut on a plant stem

    Online (Amazon, etc.):
    – Best prices, especially sets
    – Read reviews for quality issues
    – Can’t handle before buying
    – Easy returns if unsuitable

    Direct from manufacturers:
    – Burgon & Ball, Felco, Haws
    – Full range available
    – Expert customer service
    – Premium pricing

    Charity shops/car boot sales:
    – Vintage tools often better quality
    – Requires knowledge to assess condition
    – May need restoration
    – Bargain prices possible

    Budget Tool Kit (–70)

    The essentials without luxury:
    – Spear & Jackson trowel —
    – Wilkinson Sword border fork —
    – Draper secateurs —
    – Haws 1L + plastic 5L —
    – Showa gloves (3 pairs) —
    – Basic kneeler —
    – S&J hand fork —

    Total: for quality basics that last 5+ years

    Add later as budget allows: Pruning saw, kneeler seat, premium secateurs

    Frequently Asked Questions

    Q: Can I buy tool sets to save money?

    A: Often false economy. Sets include tools you’ll never use while omitting essentials. Buy individual quality pieces as needed.

    Q: Should I buy stainless steel or carbon steel?

    A: Stainless for casual gardeners (no rust). Carbon steel for serious use (holds edge better, easier to sharpen).

    Q: How do I know if a tool is good quality?

    A: Check weight (quality steel is heavy), look for forged not stamped construction, check country of manufacture (UK, Germany, Japan, Sweden for premium).

    Q: Can I share tools with neighbours?

    A: Yes, but mark them clearly. Tools have a habit of “walking” between gardens.

    Q: What tools can I skip as a beginner?

    A: Spade (use fork), hoe (hand weed instead), wheelbarrow (bags for small gardens), lawn mower (no lawn in containers).

    Your Tool Buying Checklist

    – [ ] Prioritise: Trowel, fork, secateurs, watering can first
    – [ ] Set budget: –100 for basics, + for premium kit
    – [ ] Check ergonomics: Handle tools in shop if possible
    – [ ] Plan storage: Where will they live? Shed, garage, balcony box?
    – [ ] Buy maintenance kit: investment saves s in replacements
    – [ ] Consider gifts: Quality tools make excellent presents for new homeowners

    Ready to start gardening? See our guides to starting your first vegetable garden and best containers for beginners for what to fill with your new tools.

    Sources: RHS Tool Reviews, Which? Garden Tools, Gardening Which?, Royal Horticultural Society Tool Maintenance Guides You might also like our guide to the best compost for container gardening.

    About the Author

    John Kitcher is the lead gardening writer at Plants and Gardening. He grew up mucking in on his grandfather’s Devon allotment and has spent the last fifteen years growing fruit, veg and ornamentals across three very different UK gardens — a windy coastal plot in North Cornwall, a shaded London back garden, and now a clay-heavy smallholding in the Midlands. He trials every technique covered here in his own beds and containers before writing about it, cross-references against RHS and Kew guidance, and has a soft spot for heritage tomato cultivars and anything that survives a British winter without complaint.

    Got a question about something we’ve written? Drop a comment — we read every one.