Tag: patio gardening

  • How to Grow Tomatoes in Pots: Complete UK Container Guide

    How to Grow Tomatoes in Pots: Complete UK Container Guide

    Quick answer: You can grow tomatoes in containers in any UK garden, balcony or patio. Use a pot at least 30 cm wide (10 litres) for bush varieties or 40 cm+ for cordons, fill with peat-free multi-purpose compost mixed with perlite, sow indoors from late February, plant outside after the last frost in late May or June, and feed weekly with a high-potash tomato fertiliser once the first truss sets. Most container tomatoes crop from July through October.

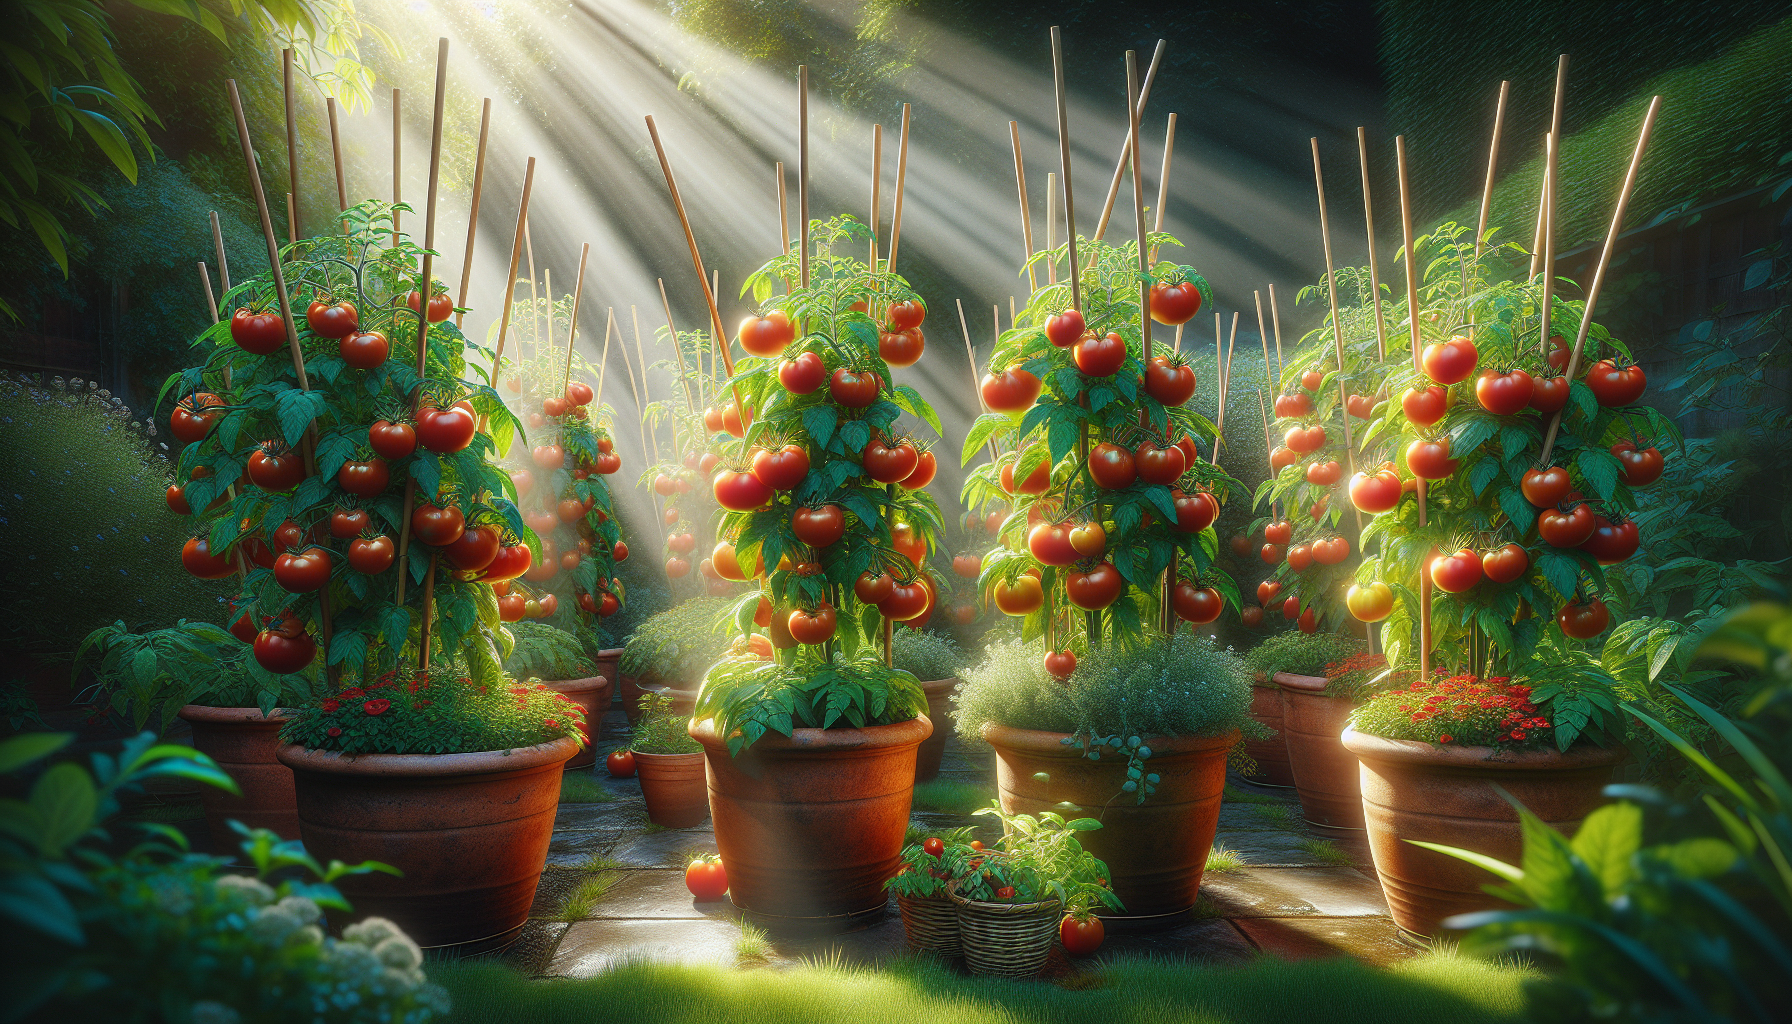
    Growing tomatoes in containers is one of the most rewarding things you can do as a UK gardener — even if your “garden” is a south-facing doorstep. Pots give you total control over compost quality, drainage and warmth, which means healthier plants and earlier harvests compared with open ground in our sometimes reluctant summers.

    This guide covers everything: the best varieties for pots, a month-by-month calendar, container choices, planting, feeding, troubleshooting and harvesting. Whether you are a complete beginner or an experienced grower switching to containers, you will find practical, RHS-backed advice below.

    Why Grow Tomatoes in Containers

    Containers are not a compromise — for tomatoes in the UK climate, they often outperform open ground. Here is why.

    • Warmth control. Dark-coloured pots on a sunny patio absorb heat and warm the root zone faster than border soil. Tomatoes are warm-season crops native to Central and South America, so every extra degree counts in a British summer.
    • Space efficiency. A single 40 cm pot on a balcony can produce 4–5 kg of cherry tomatoes over a season. You do not need an allotment.
    • Mobility. You can wheel pots into a greenhouse, porch or against a south-facing wall when night temperatures drop. This extends the cropping season by two to three weeks at each end.
    • Soil control. Container compost drains freely, holds consistent moisture and carries no soil-borne diseases. If you have had blight or verticillium wilt in your borders, pots give you a clean start each year.
    • Perfect for beginners. Fewer variables make container growing more predictable. If you are starting a vegetable garden for the first time, tomatoes in pots are one of the best entry points.

    Best Tomato Varieties for Containers UK

    Tomato varieties fall into two growth habits, and container success depends on matching the right habit to the right pot.

    Bush (Determinate) Varieties — Best for Smaller Pots

    Bush tomatoes stop growing at a set height, need no staking and produce their crop in a concentrated flush. They are ideal for pots from 30 cm wide, hanging baskets and windowboxes.

    • ‘Tumbling Tom Red’ — a trailing cherry variety bred for hanging baskets and the edges of raised beds. Heavy cropper with sweet, bite-sized fruits.
    • ‘Totem’ — very compact (30–40 cm tall), bred specifically for patio containers. Produces good-sized salad tomatoes on a dwarf plant.
    • ‘Gold Nugget’ (RHS AGM) — early, reliable bush cherry with golden-yellow fruits. One of the earliest to ripen outdoors in the UK, which is valuable in shorter growing seasons.
    • ‘Roma’ — a determinate plum type for sauces and passata. Meaty, low-moisture flesh.

    Cordon (Indeterminate) Varieties — Best for Larger Containers

    Cordons keep growing upward all season and need a cane or stake for support, plus regular side-shoot removal. They crop over a longer period and generally produce more fruit per plant — but they need a pot of at least 40 cm and a sturdy support.

    • ‘Sungold’ (RHS AGM) — widely regarded as the best-tasting cherry tomato. Intensely sweet orange fruits. Vigorous grower; give it a tall cane and plenty of feed.
    • ‘Shirley’ (RHS AGM) — a classic medium-sized cordon with excellent disease resistance. Reliable in cooler UK summers and a strong choice for unheated greenhouses or sheltered patios.
    • ‘Gardener’s Delight’ — one of the UK’s most popular cherry tomatoes for flavour. Produces long trusses of small, tangy-sweet red fruits throughout summer.
    • ‘Moneymaker’ — a heritage variety still widely grown. Medium-sized, reliably productive fruits. Not the most flavoursome modern option, but forgiving for beginners.
    • ‘Tigerella’ (RHS AGM) — distinctive red-and-yellow striped fruits with a tangy flavour. A reliable cropper and a talking point at the table.
    • ‘Sweet Aperitif’ (RHS AGM) — exceptionally sweet red cherry, often topping RHS taste trials. Vigorous cordon that crops heavily in a good summer.
    • ‘Marmande’ (RHS AGM) — a beefsteak type producing large, ribbed fruits perfect for slicing. Needs a large container (45 cm+) and a warm, sheltered spot.
    • ‘Floridity’ (RHS AGM) — a productive plum tomato with firm, flavourful fruits. Excellent for roasting and sauces.

    For a full guide to starting your own plants, see our tomato seed-sowing guide.

    Month-by-Month Growing Calendar

    This calendar assumes an average UK location (roughly RHS hardiness rating H3–H4 areas). Northern Scotland and exposed highland gardens should shift everything about two weeks later.

    Month Task
    February Sow seeds indoors on a warm windowsill or in a heated propagator at 18–21 °C. Use small pots or module trays filled with seed compost. Cover lightly and keep moist.
    March Seedlings emerge in 7–14 days. Move to the brightest windowsill or a grow light. When the first true leaves appear, prick out into individual 9 cm pots.
    April Pot on into 12–15 cm pots as roots fill the smaller ones. Begin hardening off in a cold frame or sheltered outdoor spot during the day if temperatures exceed 10 °C.
    May Continue hardening off. In southern England, plant out into final containers from mid-May under fleece. Further north, wait until late May or early June. Have fleece ready for late frosts.
    June Plant out into final containers if not done in May. Insert canes or supports for cordon types. Begin pinching out sideshoots on cordons. Water regularly.
    July First trusses set fruit. Start weekly liquid feeding with a high-potash tomato fertiliser (e.g., Tomorite). Water daily in warm weather — sometimes twice on hot days. First cherry tomatoes may ripen by late July.
    August Peak harvest month. Pick fruits as they fully colour. Remove any yellowing lower leaves to improve airflow. “Stop” cordon plants by pinching out the growing tip after 4–5 trusses to redirect energy into ripening.
    September Continue harvesting. Remove any leaves shading ripening trusses. Move pots to the warmest, most sheltered spot (against a south-facing wall). Reduce watering slightly as growth slows.
    October Final harvest. Pick any remaining green tomatoes and ripen indoors in a paper bag with a banana (the ethylene gas speeds ripening). Clear spent plants and compost the foliage unless blight was present.

    Choosing Containers and Compost

    Container Size

    This is the single most common mistake. Too-small pots dry out in hours, restrict roots and slash yields. The RHS recommends a minimum of 23 cm (9 in) pots for tomatoes, but for container growing outdoors you should go bigger.

    • Bush varieties: minimum 30 cm diameter / 10 litres. A 15-litre pot is better.
    • Cordon varieties: minimum 40 cm diameter / 20 litres. Larger is always better — a 30–40 litre pot gives the most consistent results.
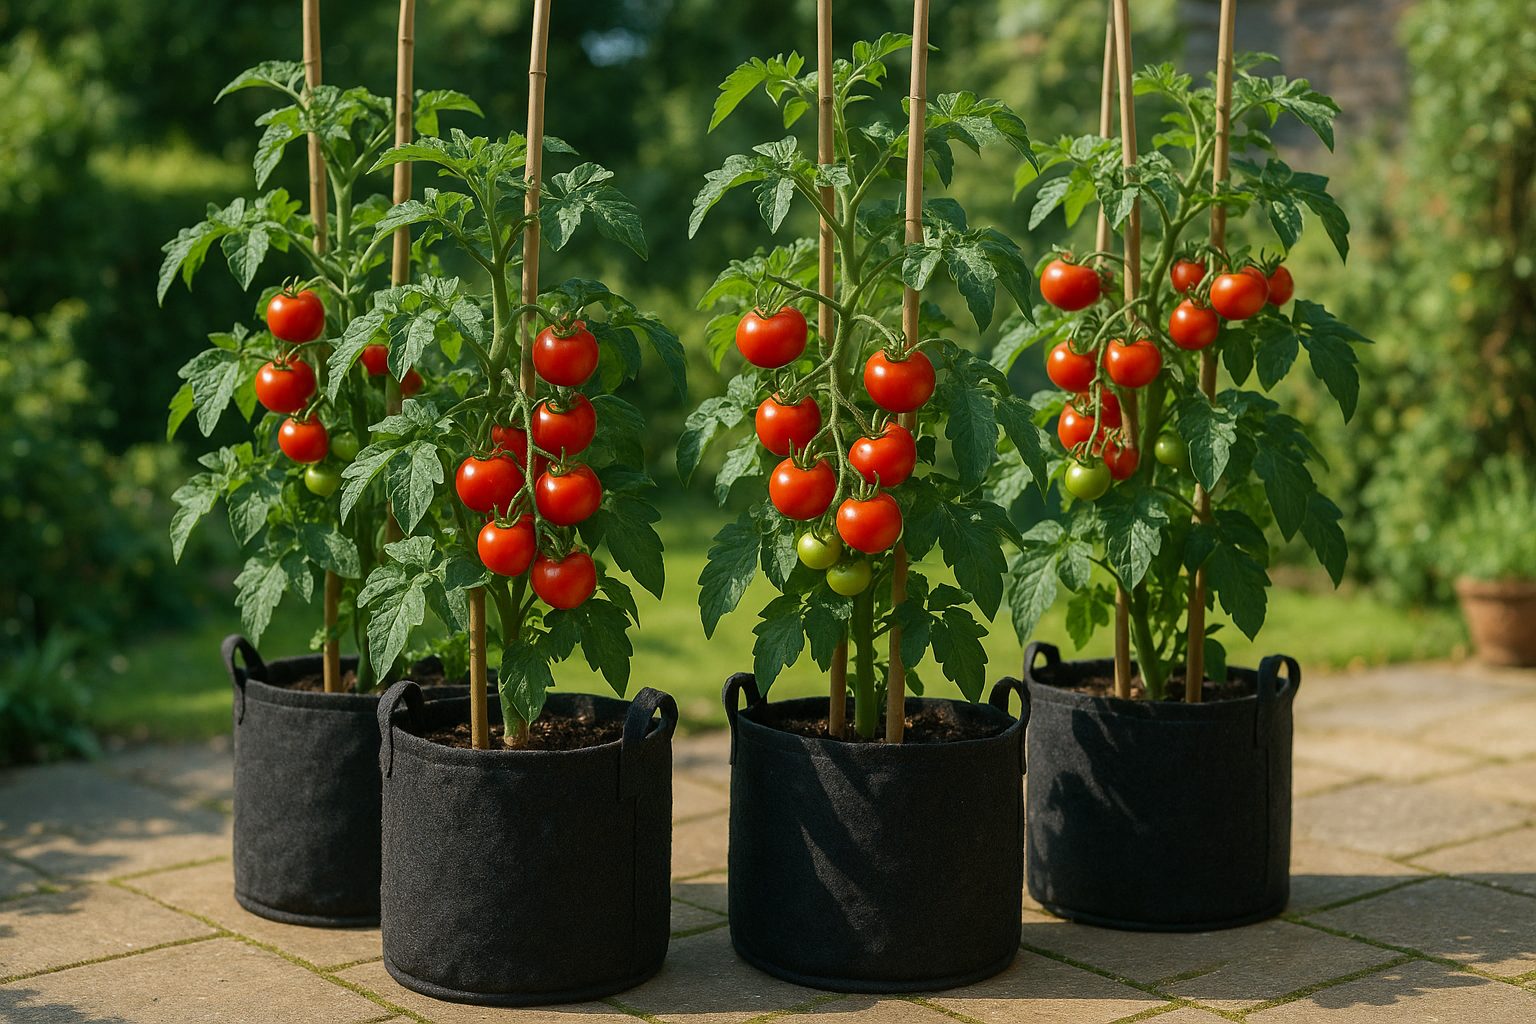
    • Grow bags: a standard grow bag (35–40 litres) supports two cordon plants or three bush plants. Stand the bag in a tray to catch runoff and cut drainage slits in the bottom corners.

    Dark-coloured pots absorb more heat, which tomatoes appreciate. Fabric grow bags (available from Amazon and Wilko) are lightweight and provide excellent drainage and air-pruning of roots. Terracotta looks beautiful but dries out faster than plastic — line the inside with a piece of bin liner (with drainage holes at the bottom) to slow moisture loss.

    For a full comparison of pots and planters, see our guide to the best containers for beginners.

    Drainage

    Every container must have drainage holes. If your decorative pot lacks them, drill or punch at least four 10 mm holes in the base. Stand pots on “pot feet” or a couple of bricks to ensure water escapes freely — waterlogged roots are a death sentence for tomatoes.

    Compost

    Use a good-quality peat-free multi-purpose compost mixed with roughly 20% perlite or horticultural grit for drainage. Avoid garden soil — it compacts in containers, drains poorly and may harbour diseases.

    Some growers add a slow-release fertiliser (such as Osmocote) at planting time to supplement liquid feeds later. This is optional but helpful if you occasionally forget a weekly feed.

    How to Plant Tomatoes in Containers

    When to Plant Out

    Tomatoes are frost-tender — a single night below 0 °C will kill an unprotected plant. In most of England and Wales, the last frost date falls between mid-May and early June. In Scotland and northern England, early to mid-June is safer.

    The RHS advises not to plant tomatoes outdoors until night temperatures are reliably above 10 °C. If in doubt, keep plants in their intermediate pots for another week rather than risk a late frost.

    How to Plant

    1. Fill your container with compost to about 5 cm below the rim (this gap prevents water overflowing when you irrigate).
    2. Bury the stem deep. Tomatoes root along buried stems, which produces a stronger root system. Remove the lowest pair of leaves and plant the seedling up to the next leaf node — roughly 5–8 cm deeper than it sat in the previous pot.
    3. Water in thoroughly until water runs from the drainage holes. This settles the compost around the roots and eliminates air pockets.
    4. Insert a cane or support immediately for cordon varieties. Pushing a cane in later risks damaging established roots. A 1.5 m bamboo cane is usually sufficient for outdoor cordons.
    5. Mulch the surface with a 2–3 cm layer of bark chips or straw. This conserves moisture, suppresses weeds and keeps the compost surface cooler on hot days.

    Ongoing Care — Watering, Feeding and Training

    Watering

    Inconsistent watering is the number-one cause of problems in container tomatoes. The compost should stay evenly moist — never bone-dry, never waterlogged.

    • In warm weather (above 20 °C), water once or twice daily. Early morning is best; a second watering in the evening if the compost has dried out.
    • Water at the base of the plant, not over the foliage. Wet leaves encourage fungal diseases.
    • Erratic watering — a dry spell followed by a flood — causes blossom end rot (a calcium-uptake problem, not a calcium deficiency in the compost) and fruit splitting. Consistency matters more than volume.

    Feeding

    Once the first truss of flowers sets small green fruits, begin feeding weekly with a high-potash liquid tomato fertiliser. Potassium drives fruit production and flavour.

    • Tomorite (Levington) and Chempak Tomato Food are widely available at garden centres, B&Q, Wilko and online.
    • Dilute according to the label — overfeeding causes lush leaf growth at the expense of fruit.
    • Some growers switch to feeding twice weekly in peak cropping (August). Watch the plant: if lower leaves yellow while the plant is fruiting heavily, it may need more feed.

    Training Cordon Varieties

    • Pinch out sideshoots — these are the small shoots that appear in the “V” between the main stem and each leaf branch. Remove them when they are 2–3 cm long by snapping sideways with your fingers. This directs the plant’s energy into fruit rather than foliage.
    • Tie the main stem loosely to the cane with soft string or tomato clips as it grows. Check ties weekly to avoid constriction.
    • Stop the plant in August by pinching out the growing tip two leaves above the highest truss you expect to ripen. In most UK outdoor conditions, 4–5 trusses per plant is realistic.

    Bush varieties need none of this — let them grow naturally and support branches with a low cage or stakes if they flop under the weight of fruit.

    Harvesting and Ripening

    Pick tomatoes when they are fully coloured and come away from the truss with a gentle twist. Cherry varieties often ripen unevenly on the truss — pick individual fruits as they colour rather than waiting for the whole truss.

    For the best flavour, eat tomatoes at room temperature, not fridge-cold. The RHS notes that refrigeration suppresses volatile compounds responsible for “tomato taste.”

    Ripening Green Tomatoes at the End of the Season

    In October, when night temperatures drop and ripening stalls outdoors, harvest remaining green tomatoes and ripen them indoors:

    • Place green tomatoes in a paper bag or cardboard box with a ripe banana. The banana releases ethylene gas, which triggers ripening.
    • Store at room temperature (18–21 °C) in a dark spot. Check every few days.
    • Most green tomatoes will colour up within one to three weeks.
    • Alternatively, uproot the entire plant and hang it upside down in a frost-free garage or shed — the fruits will continue to ripen on the vine.

    Common Problems

    Blossom End Rot

    A dark, sunken patch at the base of the fruit. Caused by irregular watering disrupting calcium uptake — not a lack of calcium in the compost. The fix is consistent, even watering. Affected fruits are safe to eat if you cut off the damaged area.

    Tomato Blight (Phytophthora infestans)

    Brown patches on leaves and stems, often in wet summers from mid-July onward. Container plants on a patio have lower risk than those in open ground because air circulation is better and foliage stays drier. Choose resistant varieties (look for “blight tolerant” on the label) and avoid overhead watering. Remove and destroy affected foliage immediately — do not compost it.

    Aphids (Greenfly and Blackfly)

    Cluster on soft shoot tips and undersides of leaves. Squash small infestations by hand. Encourage ladybirds, lacewings and hoverflies. A strong jet of water dislodges them. Organic sprays (fatty acid or neem-based) work as a last resort.

    Glasshouse Whitefly

    Tiny white-winged insects that fly up in clouds when the plant is disturbed. More common under glass than outdoors. Yellow sticky traps reduce populations. The biological control Encarsia formosa is effective in greenhouses.

    Fruit Splitting

    Caused by a sudden intake of water after a dry spell — the fruit swells faster than the skin can stretch. The prevention is the same as for blossom end rot: water consistently. Split fruits are perfectly edible but use them quickly as they spoil faster.

    Leaf Curl

    Upward curling of lower leaves without any discolouration is usually a physiological response to temperature swings or heavy fruit set. It is not a disease. If leaves are curling and also yellowing or developing spots, investigate for viral or nutritional issues.

    Companion Planting

    Growing certain plants alongside tomatoes in the same container or in neighbouring pots can benefit your crop. Some of these relationships are well-established in traditional gardening, while others have varying degrees of scientific backing.

    • Basil — the classic tomato companion. Gardening tradition holds that basil improves tomato flavour, though this is not scientifically proven. What is established is that basil’s strong scent can confuse some pest insects, and both plants enjoy the same warm, sunny conditions and similar watering needs — making them practical pot-mates.
    • French marigolds (Tagetes patula) — research published by the RHS and others confirms that French marigolds deter glasshouse whitefly. Their roots also release compounds that suppress root-knot nematodes in the soil, though this is more relevant to border planting than containers with fresh compost each year. At the very least, they attract hoverflies whose larvae consume aphids.
    • Chives — their strong allium scent is thought to deter aphids. Chives are low-growing and fit neatly around the base of a tomato pot without competing for light.

    Avoid planting tomatoes near brassicas (cabbage family) or fennel, both of which are traditionally considered poor neighbours — fennel in particular can inhibit the growth of many nearby plants.

    Frequently Asked Questions

    How many tomato plants can I put in one pot?
    One plant per pot for cordon varieties. For bush varieties, one plant per 30 cm pot or two to three per standard grow bag. Overcrowding reduces airflow and encourages disease.
    Can I reuse tomato compost next year?
    Not for tomatoes or other members of the Solanaceae family (peppers, aubergines, potatoes) — disease and nutrient depletion make it risky. You can reuse it for unrelated crops like salad leaves or flowers, refreshed with a handful of slow-release fertiliser.
    Do container tomatoes need a greenhouse?
    No. Many varieties crop well outdoors in a sheltered, south-facing spot. A greenhouse or cold frame extends the season and reduces blight risk, but it is not essential — especially with the hardier bush varieties.
    When should I start feeding my tomato plants?
    Once the first truss of flowers has set small green fruits. Before that point, the plant is growing roots and foliage and does not need the extra potash. A balanced multi-purpose compost provides everything the plant needs in the early weeks.
    Why are my tomato flowers dropping off without setting fruit?
    Usually caused by temperatures that are too low (below 13 °C at night) or too high (above 35 °C), dry air, or poor pollination. Outdoors in the UK, low night temperatures in early summer are the most common cause. Move pots to a warmer spot, and try gently tapping or shaking the plant at midday to help release pollen — tomatoes are self-pollinating but benefit from vibration.

    What Next

    Once you have your tomato containers planted up, you might like to explore:

    Affiliate disclosure: Some links in this article are affiliate links. If you buy a product through one of these links, plantsandgardening.com may earn a small commission at no extra cost to you. We only recommend products we genuinely believe in. This does not influence our editorial content. See our full affiliate disclosure for details.
    About the Author

    John Kitcher is the lead gardening writer at Plants and Gardening. He grew up mucking in on his grandfather’s Devon allotment and has spent the last fifteen years growing fruit, veg and ornamentals across three very different UK gardens — a windy coastal plot in North Cornwall, a shaded London back garden, and now a clay-heavy smallholding in the Midlands. He trials every technique covered here in his own beds and containers before writing about it, cross-references against RHS and Kew guidance, and has a soft spot for heritage tomato cultivars and anything that survives a British winter without complaint.

    Got a question about something we’ve written? Drop a comment — we read every one.

  • Best Grow Bags for Vegetables (UK Buyer’s Guide)

    Best Grow Bags for Vegetables (UK Buyer’s Guide)

    As an Amazon Associate I earn from qualifying purchases.

    Grow bags revolutionised vegetable gardening. What started as a space-saving solution for patio tomatoes has become essential for potatoes, salads, and even root crops. The right grow bag turns any sunny spot into productive growing space.

    This guide covers everything UK gardeners need to choose grow bags — from understanding litre capacity to selecting materials that survive British weather.

    Quick Comparison: Top Vegetable Grow Bags

    Grow Bag Size Material Best For Durability
    Hozelock grow bag Hozelock 35L 35 litres Reinforced plastic Tomatoes, peppers 3+ seasons
    Vigoroot grow bag Vigoroot 20L 20 litres Air-pruning fabric Potatoes, carrots 2 seasons
    Levington peat-free grow bag Levington Peat-Free 33 litres Compost-filled Beginners, tomatoes Single season
    Smart Pot fabric container Smart Pot 15-gal 57 litres Geotextile fabric Large tomatoes, squash 5+ seasons
    Budget grow bag multipack Budget 5-Pack 20 litres Standard plastic Salad crops, annuals 1–2 seasons

    Why Grow Bags Beat Traditional Pots

    Root health: Grow bags encourage better root development through air-pruning. When roots reach the bag edge, they stop rather than circling. This creates a dense, fibrous root ball that absorbs water and nutrients efficiently.

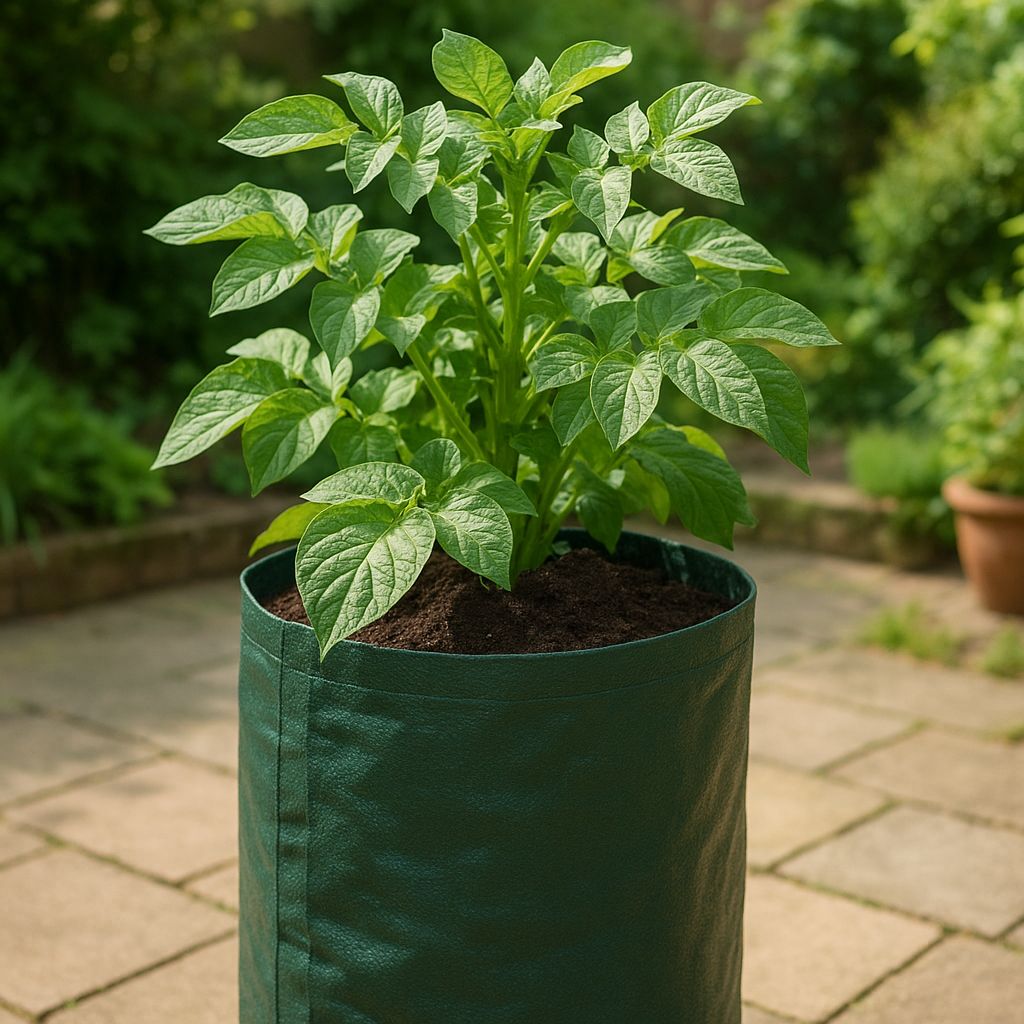
    Potato plants growing tall in a deep fabric grow bag

    Temperature regulation: Black plastic warms quickly in spring, giving tomatoes and peppers the heat they crave. Fabric bags breathe, preventing overheating in summer.

    Drainage: Excess water escapes through fabric or drainage holes, preventing waterlogging that kills container vegetables.

    Space efficiency: Empty bags fold flat for winter storage. Stack filled bags on patios, balconies, or paths without permanent beds.

    Cost: Grow bags cost 30– than equivalent ceramic or terracotta pots.

    Understanding Grow Bag Sizes

    Capacity in Litres

    Size Dimensions (approx) Best For
    10–15L 25×25×20cm Single salad plant, herbs
    20–25L 30×30×25cm 2× tomato plants, potatoes
    30–40L 35×35×30cm Large tomatoes, peppers, aubergines
    50L+ 40×40×35cm Potatoes, squash, multiple plants

    The tomato rule: One tomato plant needs minimum 20L, ideally 30–40L for cordon varieties.

    The potato rule: Early potatoes need 30L, maincrop need 40L+ per bag.

    Shape Matters

    Traditional rectangular: Stack neatly, stable against walls
    Tall cylindrical: Better for deep-rooted crops (potatoes, carrots)
    Wide shallow: Ideal for salads, shallow-rooted crops
    With handles: Easier to move when filled

    Product Deep Dives

    Hozelock 35L Grow Bag

    Best for: Reliable tomatoes season after season

    Specifications:
    – Capacity: 35 litres
    – Material: Reinforced UV-stabilised plastic
    – Dimensions: 35×35×30cm
    – Features: Reinforced handles, drainage holes

    Why it works: The reinforced plastic withstands three seasons of British weather without splitting. Handles make repositioning for maximum sun easy — essential as the season progresses.

    The durability test: Hozelock bags survive winter storage without cracking. Cheaper alternatives often split at the seams after one season.

    Best setup: Fill with Miracle-Gro compost multi-purpose compost mixed 50:50 with horticultural grit horticultural grit. Plant two bush tomatoes or one cordon variety.

    Vigoroot 20L Air-Pruning Fabric Bag

    Best for: Potatoes, carrots, root crops

    Specifications:
    – Capacity: 20 litres (multiple sizes available)
    – Material: Non-woven geotextile fabric
    – Technology: Air-pruning fabric
    – Breathable: Yes

    Why it works: The fabric sides allow air penetration. When roots reach the edge, they stop growing (air-pruning) rather than circling. This creates a dense, efficient root system.

    The potato advantage: Traditional potato bags need hilling (adding soil as plants grow). Vigoroot bags eliminate this — plant at the bottom, roots fill the bag naturally.

    The carrot test: Long-rooted carrots grow straight in fabric bags. Plastic often causes forking as roots hit solid sides.

    Care: Wash and dry thoroughly between seasons. Stores flat.

    Levington Peat-Free Tomato Grow Bag

    Best for: Beginners, single-season convenience

    Specifications:
    – Capacity: 33 litres pre-filled
    – Compost: Peat-free multi-purpose
    – Nutrients: 6-week feed included
    – Ready to use: Yes

    Why it works: No compost purchase needed — cut the bag, plant directly. The peat-free compost quality has improved dramatically and now matches peat performance.

    The beginner advantage: Everything included. No mixing, no adding drainage materials. Cut three holes, plant, water.

    Limitations: Single season use. Compost exhausted after 6 weeks — start feeding with liquid tomato feed tomato fertiliser from July.

    Best for: First-time tomato growers, temporary setups, gifts

    Smart Pot 15-Gallon Fabric Container

    Best for: Serious growers, large plants, long-term investment

    Specifications:
    – Capacity: 57 litres (15 US gallons)
    – Material: Dense geotextile fabric
    – Durability: 5+ seasons
    – Handles: Yes

    Why it works: The original fabric pot company. Dense fabric creates optimal root environment — air-pruning without drying out too quickly.

    The large plant solution: Cordon tomatoes, squash, even dwarf fruit trees thrive in this volume. The 57L capacity matches a 40cm ceramic pot at one-third the cost and weight.

    Temperature regulation: Black fabric absorbs heat for warmth-loving crops, but breathes to prevent overheating. Plants establish faster than in plastic.

    Investment value: At –20, cost-per-season beats replacing cheap plastic bags annually.

    Budget 5-Pack 20L Grow Bags

    Best for: Salad crops, trying grow bags without commitment

    Specifications:
    – Capacity: 20 litres each
    – Quantity: 5 bags
    – Material: Standard plastic
    – Colour: Black

    Why it works: At under per bag, experiment without financial risk. Perfect for lettuces, spring onions, radishes — crops that finish in one season.

    The salad solution: Plant one lettuce per bag. Harvest outer leaves for weeks. When plants bolt in summer, compost the whole bag contents — no cleaning.

    Realistic expectations: Expect 1–2 seasons before seams split. Not for long-term perennials or heavy-feeding tomatoes.

    Best for: Beginners testing grow bags, seasonal salads, children’s gardening projects

    What to Fill Grow Bags With

    Never Use Garden Soil

    Garden soil compacts in bags, drains poorly, and introduces pests. Always use container compost.

    Best Mix for Vegetables

    Base: Multi-purpose compost 70%
    Drainage: horticultural grit Horticultural grit 20%
    Moisture: coconut coir Coconut coir 10%

    Alternative: John Innes No.3 50% + multi-purpose 50% for long-season crops

    Filling Technique

    1. Place bag where it will grow — difficult to move when filled
    2. Fill to 5cm from top — allows watering reservoir
    3. Shake and firm — settles compost without compacting
    4. Water thoroughly before planting — saturates compost fully
    5. Let drain 2–3 hours — prevents waterlogging new plants

    Planting Guide by Crop

    Tomatoes in Grow Bags

    Bag size: 30–40L minimum
    Plants per bag: 2 bush tomatoes OR 1 cordon (indeterminate)
    Planting depth: Deep — bury 10cm of stem for extra rooting
    Support: tomato cage Tomato cage or bamboo canes essential
    Feeding: Weekly liquid tomato feed tomato feed from first flowers

    Potatoes in Grow Bags

    Bag size: 30L for early, 40L+ for maincrop
    Seed potatoes: 3 per 30L bag
    Method: Place seed potatoes on 15cm compost, cover with 10cm more
    Earthing up: Add compost as shoots emerge (traditional) OR plant deeply once (Vigoroot fabric bags)
    Harvest: Tip bag out when flowers fade

    Carrots in Grow Bags

    Bag size: 20–30L
    Depth: 25cm minimum for long varieties, 15cm for stump-rooted
    Compost: 50% sand or grit mixed in for drainage
    Thinning: Essential — crowded carrots fork and twist
    Protection: carrot fly mesh Carrot fly mesh essential

    Salads in Grow Bags

    Bag size: 10–20L per plant
    Succession: Sow new bags every 2 weeks
    Harvest: Cut-and-come-again or full head
    Advantage: Move bags to shade in heat — prevents bolting

    Grow Bag Care Through the Season

    Watering

    Grow bags dry faster than garden soil.

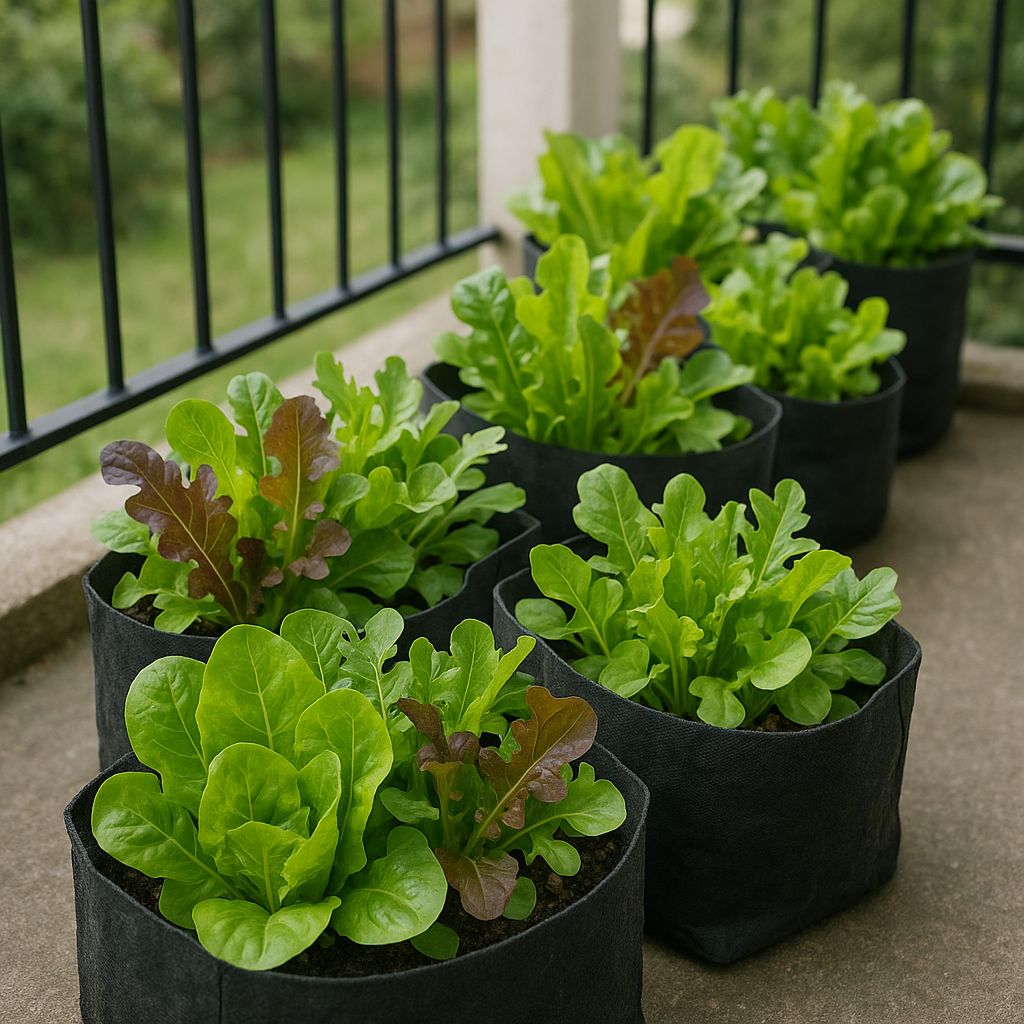
    Mixed salad leaves growing in budget grow bags on a balcony

    Summer schedule: Daily in heat, morning preferred
    Check method: Stick finger 5cm deep — dry at this depth means water
    Technique: Slow soak until water drains from bottom — ensures full saturation

    Feeding

    Bag compost exhausts nutrients by midsummer.

    Liquid feed: Weekly from June for fruiting crops
    Slow-release: Top-dress with slow-release fertiliser granules in July
    Mulch: 5cm organic straw mulch straw mulch reduces watering 30%

    Moving Bags

    Why move: Follow sun as season progresses, shelter from wind, protect from frost
    When: Only when compost is slightly dry — wet bags weigh 15kg+
    How: Two people, lift by base not handles (handles tear on heavy bags)

    Winter Storage and Reuse

    Plastic Bags

    1. Empty compost onto garden beds or compost bin
    2. Brush out debris
    3. Wash with garden hose
    4. Dry thoroughly (prevents mould)
    5. Store flat in shed

    Lifespan: 2–3 seasons for quality bags, 1 season for budget

    Fabric Bags

    1. Empty and brush out
    2. Machine wash or hose thoroughly
    3. Air dry completely
    4. Store dry

    Lifespan: 3–5 seasons depending on fabric weight

    Compost Disposal

    Annual vegetables: Spread on borders as mulch — nutrients depleted but organic matter valuable
    Diseased plants: Hot compost or dispose — don’t spread blight or virus

    Troubleshooting Grow Bag Problems

    Problem: Plants wilt despite watering

    Cause: Compost dried and became hydrophobic (repels water)

    Solution: Stand bag in tray of water for 30 minutes to rehydrate fully. Prevent with water-retaining gel water-retaining gel additive.

    Problem: Compost goes green with algae

    Cause: Overwatering and surface compaction

    Solution: Reduce watering frequency. Add 2cm horticultural grit grit mulch to surface. Improve drainage.

    Problem: Bags split at seams

    Cause: Cheap plastic degrades in UV or overfilled

    Solution: Buy reinforced bags (Hozelock, Smart Pot). Don’t overfill — leave 5cm headroom.

    Problem: Roots grow through drainage holes

    Cause: Plants becoming pot-bound

    Solution: Normal for vigorous plants. Trim roots or transplant to larger container if mid-season.

    Cost Comparison: Grow Bags vs Pots

    Container 30L Capacity Lifespan Cost/Year
    Budget grow bag 1 season
    Quality grow bag 3 seasons
    Fabric Smart Pot 5 seasons
    Plastic pot 10+ seasons
    Terracotta pot 20+ seasons

    Value winner: Quality plastic grow bags for seasonal vegetables. Terracotta for long-term perennials.

    Frequently Asked Questions

    Q: How many tomato plants per grow bag?

    A: Bush (determinate) varieties: 2 plants per 35L bag. Cordon (indeterminate): 1 plant per 35L+ bag.

    Q: Can I reuse grow bag compost?

    A: For annual vegetables, no — nutrients exhausted and potential disease. Mix into borders as soil improver, not for containers.

    Q: Why are my grow bag tomatoes small?

    A: Likely underwatering or nutrient deficiency. Grow bags need daily water in summer and weekly feeding once fruiting.

    Q: Do grow bags need drainage holes?

    A: Plastic bags should have pre-punched holes — add more if water pools. Fabric bags drain naturally through the material.

    Q: Can I grow winter vegetables in grow bags?

    A: Yes — overwintering onions, garlic, broad beans. Move bags to sheltered spot and protect from severe frost.

    Your Grow Bag Buying Checklist

    – [ ] Calculate total litres needed (see size guide above)
    – [ ] Choose material: Plastic (cheap, warms quickly) or fabric (air-pruning, breathable)
    – [ ] Check durability rating for your intended use years
    – [ ] Verify handles are reinforced (not just glued)
    – [ ] Buy compost: 60–70L per 35L bag (allows for settling)
    – [ ] Add drainage: horticultural grit Grit for all bags
    – [ ] Plan feeding: Weekly liquid feed from June

    Ready to grow? See our guides to best vegetables to grow in containers and best compost for container gardening for what to plant and fill with.

    Sources: RHS Growing in Containers, Which? Grow Bag Reviews, Gardening Which?, Allotment and Leisure Gardener You might also like our guide to other container types for beginners.

    Best Crops for Grow Bags

    Grow bags suit shallow-rooted and sprawling crops particularly well. The wide, flat shape gives roots room to spread without the depth (and cost) of large pots.

    Tomatoes

    The classic grow bag crop. Plant 2–3 per standard grow bag. Bush varieties like ‘Tumbling Tom Red’ and ‘Totem’ stay compact and don’t need staking — ideal for patios. For cordon types, ‘Gardener’s Delight’ (RHS Award of Garden Merit) produces heavy trusses of sweet cherry tomatoes and grows well in bags with cane support.

    Courgettes

    One plant per grow bag — they need the space. ‘Patio Star’ is a compact variety bred specifically for containers. ‘Black Beauty’ is a reliable open-pollinated variety that crops heavily from July to October.

    Peppers and Chillies

    Two to three plants per bag. ‘Gypsy’ (sweet pepper, RHS AGM) produces thick-walled fruits that ripen reliably outdoors in southern England. For chillies, ‘Apache’ stays compact at 30–40cm and fruits prolifically.

    Salad Leaves and Herbs

    Cut-and-come-again lettuce mixes, rocket, and spinach thrive in grow bags. Sow directly into the bag surface. ‘Little Gem’ hearts take about 10 weeks from sowing. Basil (‘Genovese’) and parsley (‘Moss Curled’) also do well in the sheltered microclimate of a grow bag on a warm patio.

    Potatoes

    First and second earlies work best. ‘Charlotte’ (waxy salad potato, RHS AGM) and ‘Rocket’ (very early, ready in 10–12 weeks) are both well-suited to bags. Plant 3–4 seed potatoes per large grow bag, covering with 10cm of compost and earthing up as shoots emerge.

    Where to Buy

    Grow bags, seeds, and all the supplies mentioned above are available from these UK retailers.

    Grow Bags and Growing Supplies

    • Crocus — stocks fabric grow bags, traditional grow bags, and premium composts. Fabric grow bags from £5–£15 depending on size. Also a good source for tomato support frames and plant feeds.
    • B&Q and The Range — stock standard grow bags (around £3–£5 each) and multi-purpose compost. Useful for same-day purchases.

    Seeds and Plug Plants

    • Thompson & Morgan — search for ‘patio’ or ‘container’ varieties to find cultivars bred for grow bag growing. Tomato seed from £2–£3.50 per packet.
    • You Garden — strong plug plant range for tomatoes, peppers, and courgettes. Plug plants arrive ready to plant out — no seed-sowing required.
    • Suttons — good selection of heritage and modern vegetable seeds. Their vegetable growing collections include varieties well-suited to container and grow bag growing.

    About the Author

    John Kitcher is the lead gardening writer at Plants and Gardening. He grew up mucking in on his grandfather’s Devon allotment and has spent the last fifteen years growing fruit, veg and ornamentals across three very different UK gardens — a windy coastal plot in North Cornwall, a shaded London back garden, and now a clay-heavy smallholding in the Midlands. He trials every technique covered here in his own beds and containers before writing about it, cross-references against RHS and Kew guidance, and has a soft spot for heritage tomato cultivars and anything that survives a British winter without complaint.

    Got a question about something we’ve written? Drop a comment — we read every one.

  • Best Containers and Pots for Beginners (UK Buyer’s Guide)

    Best Containers and Pots for Beginners (UK Buyer’s Guide)

    The right container transforms gardening from struggle to success. Too small and plants suffocate. Wrong material and compost dries in hours or waterlogs in minutes. This guide matches container types to your plants, budget, and gardening style.

    Whether you’re filling a patio with tomatoes or starting a windowsill herb collection, these recommendations come from years of UK container gardening experience.

    As an Amazon Associate I earn from qualifying purchases.

    Quick Comparison: Which Plant Pots Are Best for Beginners

    Container Size Material Best For Price
    Classic Terracotta 20–30cm Clay Herbs, Mediterranean plants ££
    Stewart Garden Plastic Various Plastic Vegetables, annuals £
    Timber Raised Bed 60×60cm Wood Deep-rooted vegetables £££
    Smart Pot Fabric 15–30L Geotextile Air-pruning, portability ££
    Glazed Ceramic 20–40cm Ceramic Ornamentals, patios £££

    Understanding Container Materials

    Terracotta (Clay)

    The classic. Porous, breathable, beautiful.

    Terracotta pot planted with fresh herbs on a sunny garden step

    Pros:
    – Breathes — roots get oxygen, hard to overwater
    – Insulates — protects roots from temperature swings
    – Beautiful — ages gracefully, traditional garden aesthetic
    – Stable — heavy enough not to blow over

    Cons:
    – Heavy — difficult to move, unsuitable for balconies with weight limits
    – Fragile — cracks in frost if poor quality
    – Expensive — –40 for medium pots
    – Dries quickly — needs more frequent watering

    Best for: Mediterranean herbs (thyme, rosemary, sage), permanent plantings, traditional gardens

    Winter care: Raise on feet to prevent frost damage. Soak thoroughly before hard frosts — dry terracotta cracks more easily.

    Plastic

    The practical choice. Lightweight, affordable, versatile.

    Pros:
    – Lightweight — easy to move, balcony-friendly
    – Affordable — –8 for equivalent terracotta sizes
    – Retains moisture — less frequent watering
    – Frost-resistant — won’t crack in UK winters
    – Variety — every colour, shape, and size

    Cons:
    – Can overheat — black pots cook roots in full sun
    – Less breathable — easier to overwater
    – Aesthetic — looks “cheap” to some gardeners
    – UV degradation — becomes brittle after 5+ years

    Best for: Vegetables, annuals, temporary plantings, balconies, renters

    Quality markers: Look for “UV-stabilised” and thick walls (3mm+). Cheap thin plastic cracks within a season.

    Wood

    The natural choice. Attractive, insulating, traditional.

    Pros:
    – Insulating — keeps roots cool in summer, warm in winter
    – Attractive — natural look improves gardens
    – Customisable — build any size or shape
    – Sustainable — if FSC-certified timber used

    Cons:
    – Maintenance — needs treating every 2–3 years
    – Expensive — –200 for raised beds
    – Heavy — permanent installations
    – Rot risk — untreated wood lasts 3–5 years only

    Best for: Raised beds, vegetable gardens, permanent features

    Timber treatment: Use wood-preserver-non-toxic non-toxic wood preserver on interior only — keep outside untreated for weathered look.

    Fabric (Geotextile)

    The modern choice. Air-pruning, lightweight, foldable.

    Pros:
    – Air-pruning — prevents root circling, better plant health
    – Lightweight — move filled containers easily
    – Foldable — stores flat when not in use
    – Breathable — excellent drainage, hard to overwater

    Cons:
    – Aesthetic — industrial look not for everyone
    – Dries quickly — needs more frequent watering
    – Limited lifespan — 3–5 seasons for quality brands
    – Supports needed — fabric bags sag when filled

    Best for: Vegetables, air-pruning benefits, portable gardens, storage concerns

    Glazed Ceramic

    The decorative choice. Colourful, finished, statement pieces.

    Pros:
    – Beautiful — colours and glazes enhance gardens
    – Non-porous — retains moisture well
    – Frost-resistant — quality glazes survive UK winters
    – Stable — heavy enough for top-heavy plants

    Cons:
    – Expensive — –60+ per pot
    – Heavy — permanent placement
    – Limited drainage — one hole often insufficient
    – Risk — poor quality glazes crack in frost

    Best for: Ornamentals, statement plants, patios where appearance matters

    Product Deep Dives

    Classic Terracotta Pot

    Best for: Mediterranean herbs, traditional gardens, long-term plantings

    Specifications:
    – Material: Fired clay
    – Wall thickness: 15–20mm
    – Drainage: Single hole (enlarge if needed)
    – Sizes: 10cm to 50cm+ diameter

    Why it works: The porous walls create perfect conditions for herbs that hate wet feet. Rosemary, thyme, and sage thrive where they’d rot in plastic.

    The frost factor: UK frost will crack cheap imported terracotta. Buy from reputable UK garden centres with frost-proof guarantees.

    Best setup: Add crocks-pottery crocks or pot-feet pot feet to base. Mix horticultural-grit grit into compost (30% by volume) for drainage.

    Stewart Garden Essential Plastic Pots

    Best for: Vegetables, beginners, budget-conscious

    Specifications:
    – Material: UV-stabilised polypropylene
    – Durability: 5+ years
    – Range: 9cm to 40cm diameter
    – Price: –8 per pot

    Why it works: Stewart has supplied UK gardeners for decades. Their plastic doesn’t go brittle in UV light — the common failure point in cheap rivals.

    The vegetable advantage: Standard sizes (20cm, 25cm, 30cm) match seed packet recommendations exactly. No guessing if your pot is large enough.

    Colour tip: Choose light colours (terracotta-effect, green) over black. Black plastic absorbs heat, stressing roots on hot days.

    Timber Raised Bed Kit

    Best for: Serious vegetable growing, permanent installations

    Specifications:
    – Material: FSC-certified timber
    – Typical size: 60×60×30cm or 120×60×30cm
    – Assembly: Slot-together or screw-fixed
    – Lining: Often includes membrane

    Why it works: Raised beds solve poor soil, drainage, and back pain in one. The 30cm depth handles tomatoes, carrots, and even dwarf fruit trees.

    The instant garden: One 120×60cm raised bed provides space for 4 tomato plants or 12 lettuce plants. Productive space in hours, not years.

    Site preparation: Place on level ground. Line base with weed-membrane weed membrane to prevent grass intrusion.

    Fill calculation: 120×60×30cm = 216 litres. Buy 3× 70L bags for one bed.

    Smart Pot Fabric Container

    Best for: Air-pruning benefits, vegetables, portability

    Specifications:
    – Material: Dense geotextile fabric
    – Sizes: 3.8L to 113L (1 to 30 US gallons)
    – Handles: Reinforced sewn handles
    – Durability: 5+ seasons

    Why it works: When roots reach the fabric edge, they stop (air-pruning) instead of circling. This creates a dense, fibrous root ball that absorbs nutrients efficiently.

    The result: Plants establish faster, grow larger, resist drought better than plastic-potted equivalents.

    Best for: Tomatoes, peppers, any container vegetable where maximum yield matters.

    Watering note: Fabric dries faster than plastic — check daily in summer.

    Glazed Ceramic Statement Pot

    Best for: Ornamentals, patios, design-conscious gardeners

    Specifications:
    – Material: Clay with coloured glaze
    – Frost resistance: Check rating (must say “frost-proof”)
    – Drainage: Usually one hole
    – Sizes: 15cm to 50cm+

    Why it works: Transforms functional container gardening into designed outdoor rooms. A glazed pot elevates a geranium to garden centre display quality.

    Quality check: Tap the pot — should ring, not thud. Thud indicates cracks or poor firing.

    The drainage fix: One hole is rarely enough. Drill 3–4 additional 10mm holes with ceramic drill bit before planting.

    Best for: Permanent displays where appearance matters as much as function.

    Container Sizes by Plant Type

    Herbs

    Herb Minimum Pot Ideal Pot Notes
    Basil 15cm 20cm Moisture-loving — plastic acceptable
    Rosemary 20cm 30cm Deep roots — terracotta preferred
    Mint 25cm 30cm Invasive — dedicated pot essential
    Parsley 15cm 20cm Biennial — replace annually
    Thyme 10cm 15cm Shallow roots — terracotta ideal

    Vegetables

    Vegetable Minimum Pot Ideal Pot Depth
    Lettuce 15cm 20cm 15cm
    Tomatoes 25cm 30cm 25cm
    Peppers 20cm 25cm 20cm
    Carrots 20cm 25cm 25cm+
    Potatoes 30cm 40cm 30cm
    Courgettes 30cm 45cm 30cm

    Ornamentals

    Plant Minimum Pot Ideal Pot Notes
    Bedding annuals 15cm 20cm Plastic fine
    Perennials 20cm 25cm Terracotta for permanence
    Shrubs 30cm 40cm Heavy pot for stability
    Small trees 40cm 50cm Drainage critical

    Essential Container Accessories

    Pot Feet

    Why: Prevents waterlogging, reduces frost damage, improves drainage

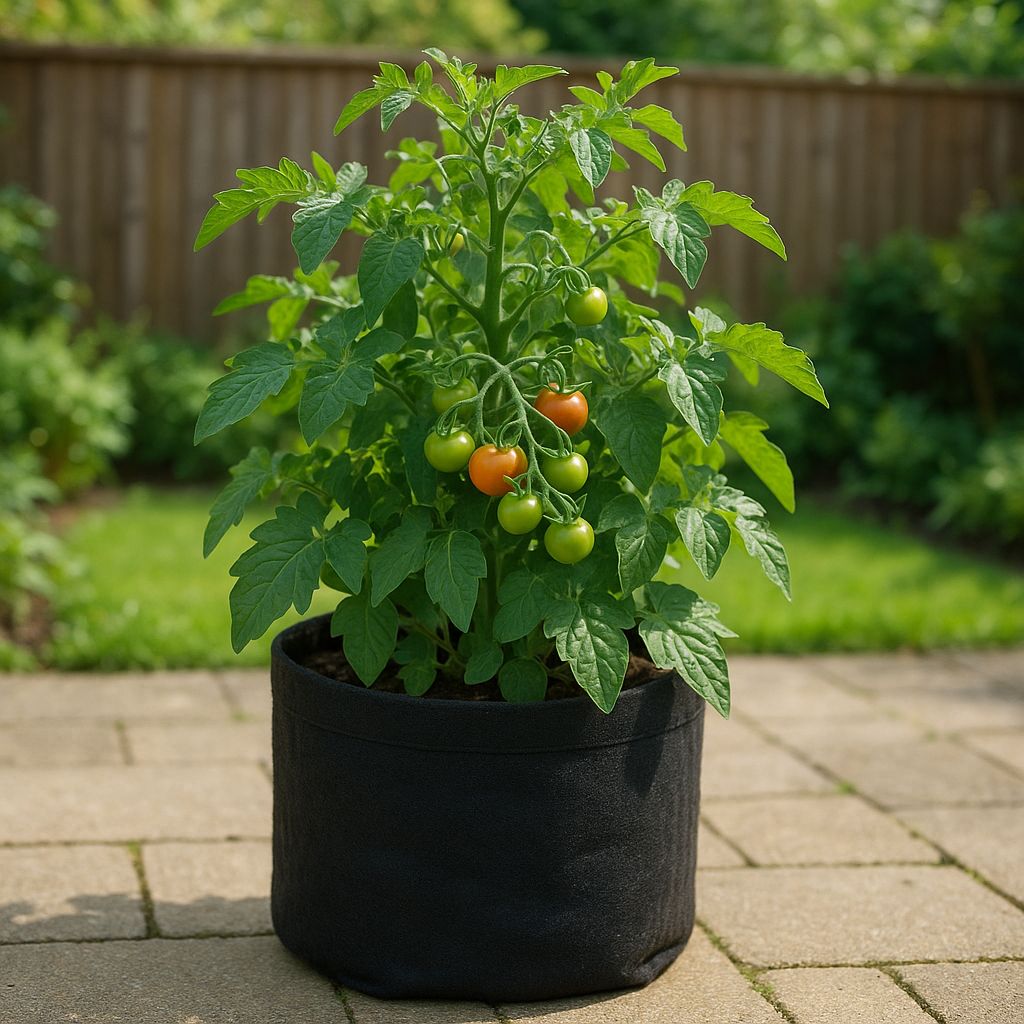
    Fabric grow bag with a healthy tomato plant growing on a patio

    Options:
    – Ceramic (decorative, expensive)
    – Plastic (cheap, functional)
    – Cork (natural, insulating)

    Use: One pot per foot, minimum 3 feet per pot. More for large containers.

    Crocks

    Why: Prevents compost washing out drainage holes, improves drainage

    Materials: Broken terracotta pots, gravel, purpose-made clay crocks

    Modern alternative: pot-mesh Plastic mesh — lighter, effective

    Saucers

    Why: Catches drainage water, protects surfaces

    Caution: Remove saucers in wet weather — sitting water causes root rot

    Plant Trolleys

    Why: Move heavy containers easily

    Best for: Large pots on patios, following sun seasonally, winter protection

    Container Buying Mistakes to Avoid

    Mistake 1: Pots Too Small

    Root-bound plants stop growing, become stressed, produce poorly.

    Solution: Go one size larger than minimum recommendations. A 30cm tomato pot beats a struggling 20cm pot.

    Mistake 2: No Drainage Holes

    Decorative pots often lack drainage. Water sits, roots rot, plants die.

    Solution: Drill holes with appropriate bit, or use as cachepot (decorative outer) with plastic pot inside.

    Mistake 3: Dark Colours on Hot Patios

    Black pots absorb heat, cooking roots on summer days.

    Solution: Choose light colours for full sun positions. Wrap black pots in hessian-wrap hessian to reflect heat.

    Mistake 4: Forgetting Weight Limits

    Balconies have weight restrictions. A 40cm terracotta pot weighs 15kg empty, 25kg+ filled.

    Solution: Check balcony limits. Use plastic or fabric for elevated spaces.

    Budget Container Setup for Beginners

    Starter kit (–50):
    – 4× 20cm plastic pots —
    – 2× 30cm plastic pots —
    – 6× pot-feet Pot feet —
    – 2× 70L compost —
    – horticultural-grit Horticultural grit —

    This kit starts: 4 herb plants + 2 tomato plants, with room to expand.

    Frequently Asked Questions

    Q: Can I grow vegetables in any container?

    A: Yes, if it has drainage holes and sufficient volume. A 2L yoghurt pot grows one lettuce. A 30cm pot grows a productive tomato.

    Q: Do containers need saucers underneath?

    A: Optional. Useful for patios (prevents staining) but remove in wet weather to prevent waterlogging.

    Q: How do I know if my pot is big enough?

    A: Check roots at drainage holes — if visible, pot on. Stunted growth despite feeding indicates root congestion.

    Q: Can I leave terracotta pots outside in winter?

    A: Quality UK frost-proof terracotta, yes. Cheap imported terracotta will crack. Raise on feet and soak before hard frosts.

    Q: What’s the best material for beginners?

    A: Plastic — affordable, forgiving, lightweight. Upgrade to terracotta for herbs once you’re confident.

    Your Container Buying Checklist

    – [ ] List what you want to grow (check size requirements)
    – [ ] Measure your space and check weight limits (balconies)
    – [ ] Choose material: Plastic (budget), terracotta (herbs), wood (vegetables), fabric (portable)
    – [ ] Count drainage holes — minimum 1, ideally 3–4
    – [ ] Buy pot feet — essential for all containers
    – [ ] Purchase compost: Calculate 70L per large pot
    – [ ] Add drainage: horticultural-grit Grit for terracotta, essential for all

    Ready to fill your pots? See our guides to best compost for container gardening and best herbs to grow in containers for what to plant.

    Sources: RHS Container Gardening, Which? Garden Product Reviews, Gardening Which?, Garden Design Magazine You might also like our guide to the best vegetables to grow in containers.

    About the Author

    John Kitcher is the lead gardening writer at Plants and Gardening. He grew up mucking in on his grandfather’s Devon allotment and has spent the last fifteen years growing fruit, veg and ornamentals across three very different UK gardens — a windy coastal plot in North Cornwall, a shaded London back garden, and now a clay-heavy smallholding in the Midlands. He trials every technique covered here in his own beds and containers before writing about it, cross-references against RHS and Kew guidance, and has a soft spot for heritage tomato cultivars and anything that survives a British winter without complaint.

    Got a question about something we’ve written? Drop a comment — we read every one.

  • Best Herbs to Grow in Containers for Beginners (UK Guide)

    Best Herbs to Grow in Containers for Beginners (UK Guide)

    As an Amazon Associate I earn from qualifying purchases.


    Fresh herbs transform everyday cooking — and they’re among the easiest plants for beginner gardeners. Whether you have a patio, balcony, or sunny windowsill, growing herbs in containers puts flavour at your fingertips without the need for a garden bed.

    Quick tip: Containers dry out faster than garden beds in summer and stay wetter in winter — check moisture levels regularly rather than sticking to a rigid schedule.

    This guide covers ten reliable herbs that thrive in UK conditions, with specific pot sizes, seasonal guidance, and practical harvest tips. It pairs perfectly with our guide to vegetables to grow in containers — together they cover everything for your patio garden.

    What You Need to Get Started

    Essential Supplies

    Terracotta pots, compost, and gardening supplies for container herb gardening
    Essential supplies for starting your container herb garden
    • Containers (15–30cm depending on herb — specifics below)
    • Multi-purpose compost with horticultural grit for drainage
    • Horticultural grit (25% by volume for Mediterranean herbs)
    • Watering can with rose
    • Plant markers (herbs look similar when young)

    Important: Give the living herb pots sold in supermarkets a miss. They’re forced along quickly in commercial greenhouses, which leaves them soft and sappy, so they tend to struggle the moment they go outdoors. For herbs that settle in and last, start them from seed or pick up a healthy plant from a nursery or garden centre.

    Container Considerations for Herbs

    Drainage is critical. Herbs hate wet feet, especially Mediterranean varieties. Ensure every pot has drainage holes.

    Terracotta is ideal. The porous material prevents overwatering — perfect for herbs that prefer drier conditions.

    Group by water needs:

    • Mediterranean herbs (rosemary, thyme, oregano, sage): prefer drier conditions
    • Leafy herbs (basil, parsley, coriander, mint): prefer consistent moisture

    Mint warning: Always grow mint in its own pot. Its roots spread aggressively and will quickly overpower other herbs.

    The 10 Best Container Herbs for Beginners

    # Herb Container Size Sun Needs Best For Difficulty
    1 Basil 15cm (2–3L) Full sun Cooking, pesto Very Easy
    2 Parsley 20cm (3–5L) Partial shade Garnish, cooking Very Easy
    3 Mint 25cm (5L+) — dedicated pot Partial shade Tea, drinks Easy
    4 Chives 15cm (2–3L) Full sun to partial Garnish, eggs Very Easy
    5 Rosemary 30cm (12L+) Full sun Roasts, oils Easy
    6 Thyme 15cm (2–3L) Full sun Cooking, drying Very Easy
    7 Oregano 20cm (3–5L) Full sun Pizza, pasta Very Easy
    8 Coriander 20cm (3–5L) Partial shade Asian cooking Easy
    9 Sage 25cm (5–8L) Full sun Stuffing, butter Easy
    10 Dill 20cm (3–5L) Full sun Fish, pickles Easy

    Deep Dive — Top Herbs

    Basil — The Beginner’s Best Friend

    Basil is the quintessential container herb. Fast-growing, fragrant, and endlessly useful — it’s the perfect starting point for new gardeners.

    For detailed advice, check our guide to growing basil in a pot.

    Best varieties: ‘Sweet Genovese’ (classic Italian), ‘Greek’ (compact, smaller leaves), ‘Thai’ (aniseed notes, spicy)

    Growing: Sow every three weeks for continuous supply. Basil germinates quickly indoors on a warm windowsill.

    Care: Likes consistent moisture — don’t let it dry out completely. Pinch out growing tips regularly to encourage bushy growth. Remove flower buds immediately — flowering turns leaves bitter.

    Basil companion planted with tomatoes in a container
    Basil thrives when planted with tomatoes in containers

    Harvest: Pick from the top, leaving at least two sets of leaves on the stem. This encourages branching.

    Mint — Contain or Regret

    Mint is delicious and useful — but it’s a garden thug. Containers aren’t just convenient for mint; they’re essential. See our full guide on how to grow mint in containers for variety choices, potting advice and overwintering tips.

    Fresh mint growing vigorously in a dedicated container

    Best varieties: Spearmint (cooking, mint sauce), Peppermint (tea), Chocolate mint (desserts, subtle cocoa notes)

    Why dedicated pots matter: Mint roots spread aggressively underground. In open ground, it takes over. In a container, you control it completely.

    Mint growing in its own dedicated container
    Always grow mint in its own pot to prevent spreading

    Care: Mint prefers moist, fertile soil and partial shade — an east-facing spot is ideal. When it looks straggly, lift the root ball, divide it, and repot fresh pieces into rich compost.

    Harvest: Cut stems to ground level — it’ll resprout vigorously.

    Rosemary — The Permanent Resident

    Rosemary is a long-term investment. Given the right conditions, a single plant provides harvests for seven to eight years. For full growing details, see our guide to growing rosemary in pots.

    Critical pot size: Rosemary needs a minimum 30cm (1ft) wide and deep pot. Smaller containers lead to poor establishment and winter vulnerability.

    Care: Full sun is essential. Drought-tolerant once established — water sparingly. Rosemary hates soggy roots, especially in winter. Use gritty compost with 25% horticultural grit mixed in.

    Rosemary growing in a large terracotta container
    Rosemary needs a large pot — minimum 30cm diameter

    Position: Sunny and sheltered from harsh winds.

    Harvest: Snip sprigs as needed year-round. The soft new growth in late spring has the best flavour.

    Winter protection: Container rosemary is vulnerable to freezing. If temperatures below -8°C are forecast, wrap the pot in bubble wrap or move to a sheltered spot near a wall. Cold, wet compost kills roots faster than cold air.

    Parsley — The Reliable Workhorse

    Parsley is biennial — it lives two years, then flowers and dies. For continuous supply, sow fresh each year.

    Types: Flat-leaf (better flavour, preferred by cooks), Curly (better garnish, holds shape when chopped)

    Sowing: Parsley is slow to germinate — three to four weeks. If impatient, buy young plants from garden centres.

    Care: Likes consistent moisture and tolerates partial shade better than most herbs. Add garden compost or slow-release fertiliser to the potting mix — parsley prefers richer conditions than Mediterranean herbs.

    Harvest: Pick outer leaves first, leaving the centre to continue producing. One plant keeps going for months.

    Thyme and Oregano — The Mediterranean Pair

    These two share identical preferences: sun, drainage, and minimal fuss.

    Care: Both demand full sun and excellent drainage. Add plenty of grit to compost — up to 25% by volume. They’re drought-tolerant and forgiving if you forget to water occasionally.

    Harvest: Best flavour is just before flowering. Regular harvesting keeps plants compact and bushy.

    Perennial bonus: Both survive UK winters in containers. Established plants tolerate temperatures down to -8°C. Container plants benefit from grouping pots together or wrapping in bubble wrap during extreme cold.

    Coriander — The Fast-Bolter

    Coriander is delicious but temperamental. Heat and long days trigger it to flower and set seed quickly.

    Care: Prefers partial shade in midsummer — afternoon shade prevents premature bolting. Sow successionally every three weeks for continuous leaves.

    Dual-purpose: If it does bolt, the seeds are useful too — green seeds have a fresh citrus flavour; dried seeds are the spice.

    Harvest: Pick leaves young for best flavour. Once flowering begins, leaves turn feathery and less tasty.

    Herb-Vegetable Companion Pairings

    Herbs and vegetables grown together benefit each other. Here are proven combinations:

    Herb Pairs With Benefit Container Arrangement
    Basil Tomatoes Improves flavour, repels whiteflies and aphids Same large pot (tomato centre, basil at base) or nearby containers
    Chives Tomatoes Repels aphids, antifungal properties Nearby pots or around base
    Rosemary Beans General pest deterrence Nearby pots
    Mint Brassicas (cabbage family) Deters cabbage white butterfly Dedicated separate pot — never plant together
    Dill Courgettes Attracts beneficial insects Nearby pots

    Space-saving tip: If you’re short on space, basil and tomatoes make the best container-sharing pair. Use a pot at least 30cm diameter for both.

    Season-by-Season Herb Calendar

    Season Key Tasks
    Spring (Mar–May) Sow tender herbs indoors: basil, coriander, dill. Plant hardy herb plants. Divide and repot mint.
    Early Summer (Jun) Harden off tender seedlings. Plant out after last frost. Start harvesting first basil. Begin feeding container herbs every 2–3 weeks.
    Mid Summer (Jul–Aug) Peak harvest season. Succession sow coriander. Take cuttings from thyme and rosemary. Provide afternoon shade for coriander.
    Autumn (Sep–Oct) Harvest and dry herbs for winter. Pot up divisions of mint and chives. Move tender herbs indoors or to sheltered spots.
    Winter Minimal watering. Protect Mediterranean herbs from waterlogging. Basil needs warm windowsill indoors. Plan next year’s herbs.

    Harvesting and Preserving

    Fresh Harvest Tips

    • Morning harvesting = best flavour (essential oils at peak)
    • Cut, don’t pull — clean cuts heal faster
    • Regular harvesting encourages bushier growth — even if you don’t need herbs, trim to maintain shape

    Hands harvesting fresh herbs with garden scissors
    Harvest herbs in the morning when essential oils are at their peak

    Preserving Methods

    Drying:

    • Hang small bunches upside down in warm, dark, well-ventilated place
    • When crisp, strip leaves and store in airtight jars
    • Best for: rosemary, thyme, oregano, sage

    Freezing:

    • Chop leaves and freeze in ice cube trays with water or olive oil
    • Best for: basil, parsley, coriander, chives

    Herb Butters:

    • Mix finely chopped herbs with softened butter
    • Roll into log, wrap, freeze
    • Slice as needed

    Common Herb Growing Mistakes

    Mistake #1: Overwatering Mediterranean Herbs

    Rosemary, thyme, oregano, and sage come from hot, dry climates. They want “dry feet.”

    Rosemary plant growing in a terracotta pot in a sunny garden

    Solution: Add 25% horticultural grit to compost, use terracotta pots, water only when soil is dry.

    Mistake #2: Letting Basil Flower

    Once basil flowers, leaves turn bitter and production slows.

    Solution: Pinch out flower buds as soon as they appear. Sow successionally for continuous supply.

    Mistake #3: Planting Mint With Other Herbs

    Mint roots spread underground and takeover.

    Solution: Always grow mint in its own dedicated pot. Never plant in open ground unless you want a mint lawn.

    Mistake #4: Pots Too Small for Rosemary

    Rosemary in a small pot becomes stressed, produces poorly, and dies in winter.

    Solution: Minimum 30cm diameter and depth. This is non-negotiable for success.

    Mistake #5: Wrong Sun Exposure

    • Basil in shade = leggy, weak, prone to disease
    • Mint in full sun = scorched, crispy leaves

    Solution: Match herb to position. Mediterranean herbs need 6+ hours sun. Leafy herbs tolerate partial shade.

    Troubleshooting

    Problem Likely Cause Solution
    Yellow leaves Overwatering Reduce watering, check drainage holes aren’t blocked
    Leggy, weak growth Insufficient light Move to sunnier spot; south-facing for Mediterranean herbs
    Basil turns black Cold damage Basil is tender below 10°C; bring indoors
    Coriander flowers quickly Heat/light stress Provide afternoon shade; succession sow every 3 weeks
    Woody, bare stems (thyme/rosemary) Lack of pruning Prune after flowering to encourage new growth
    White fuzzy mould Poor air circulation Space pots apart; reduce watering; remove affected leaves
    Mint looks straggly Needs repotting Lift, divide roots, repot fresh pieces into rich compost

    Quick-Reference Tables

    Minimum Pot Sizes by Herb Type

    Herb Type Minimum Pot Compost Notes
    Annual herbs (basil, coriander, dill) 15cm (2–3L) Standard multi-purpose
    Perennial herbs (thyme, chives, oregano) 15–20cm (3–5L) Add grit for Mediterranean types
    Woody herbs (rosemary, sage) 30cm+ (12L+) Gritty mix essential; John Innes No 3 for long-term
    Invasive herbs (mint) 25cm (5L+) Rich, moist compost; dedicated pot essential

    Sun vs Shade Herbs

    Sun Level Hours/Day Herbs
    Full sun 6+ hours Basil, rosemary, thyme, oregano, sage, chives, dill
    Partial sun 3–5 hours Parsley, mint, coriander

    Water Requirements

    Water Needs Herbs Care
    Low (drought-tolerant) Rosemary, thyme, oregano, sage Water when soil dry; terracotta ideal
    Medium (consistent moisture) Basil, parsley, chives, coriander Don’t let dry out completely
    High (moist soil) Mint Keep consistently damp; repot frequently

    Your First Herb Garden — Week-by-Week

    Weeks 1–2: Setup

    • Acquire: 4–5 terracotta pots, multi-purpose compost, horticultural grit
    • Buy plants: rosemary, thyme (slow from seed — buy established plants)
    • Sow indoors: basil, coriander in small pots on warm windowsill

    Weeks 3–6: First Growth

    • Thin seedlings to strongest plant per pot
    • Pot on basil when 10cm tall
    • Start light harvesting from bought plants

    Weeks 7–12: Peak Harvest

    • Regular weekly harvesting established
    • Succession sow more basil and coriander
    • Begin feeding container herbs every 2–3 weeks with liquid feed

    Ongoing: Maintenance

    • Weekly harvest in season
    • Liquid feed every 2–3 weeks during growing season
    • Winter protection: wrap pots or move to shelter
    • Annual replacement: basil (treat as annual), parsley (biennial)

    Frequently Asked Questions

    Q: What’s the easiest herb to grow in a pot?

    A: Chives. Practically indestructible, tolerate shade or sun, and come back every year with zero fuss.

    Q: Can I grow herbs indoors on a windowsill?

    A: Absolutely. Basil, parsley, and chives do well indoors. South-facing windows are best. Supplement with grow lights in winter if needed. Windowsill herb kits make starting easy.

    Q: How often should I water container herbs?

    A: Mediterranean herbs (rosemary, thyme, oregano, sage) — when soil is dry to touch. Leafy herbs (basil, parsley, coriander, mint) — keep evenly moist. Check by pushing finger 2cm into compost.

    Q: Can I plant different herbs in the same pot?

    A: Yes, but group by water needs. Basil + parsley work together (both like moisture). Rosemary + thyme + oregano work together (all Mediterranean, dry-loving). Never plant mint with anything.

    Q: Why does my coriander keep bolting?

    A: Heat and long daylight hours trigger flowering. Sow successionally every three weeks, provide afternoon shade in summer, and harvest leaves young.

    Q: Should I feed container herbs?

    A: Lightly. Herbs prefer poorer soil than vegetables. A weak liquid feed every 2–3 weeks during growing season is plenty. Avoid high-potash feeds — they promote flowering over leaf growth.

    Q: How do I overwinter container herbs?

    A: Mediterranean herbs — move to sheltered spot, reduce watering, wrap pots if very cold forecast. Tender herbs (basil) — bring indoors to sunny windowsill or treat as annual and resow in spring.

    Q: Why did my supermarket herb die when I put it outside?

    A: Those pots are raised in warm, sheltered nursery conditions, so the growth is soft and hasn’t toughened up — dropped straight outside, it rarely copes. For anything you’ll keep in an outdoor container, sow your own or buy a garden-centre plant that’s been grown harder.

    What to Plant Now

    Not sure where to start? Here’s your no-fail starter pack:

    1. Chives — Buy one pot, harvest forever
    2. Basil — Sow seeds indoors now for summer harvests
    3. Rosemary — Buy an established plant in a large pot
    4. Mint — In its own dedicated container

    With these four, you’ll have fresh herbs for every meal and the confidence to expand your collection.

    Herbs and vegetables growing together in patio containers
    Companion planting herbs and vegetables in containers

    Ready to grow vegetables too? Pair your herb garden with our guide to the best vegetables to grow in containers for a complete patio harvest.


    Sources: RHS Growing Herbs in Containers, RHS Rosemary Growing Guide, RHS Mediterranean Herbs Container Guide, Haxnicks UK Companion Planting Guide, The English Garden You might also like our guide to the best containers and pots for beginners.

    About the Author

    John Kitcher is the lead gardening writer at Plants and Gardening. He grew up mucking in on his grandfather’s Devon allotment and has spent the last fifteen years growing fruit, veg and ornamentals across three very different UK gardens — a windy coastal plot in North Cornwall, a shaded London back garden, and now a clay-heavy smallholding in the Midlands. He trials every technique covered here in his own beds and containers before writing about it, cross-references against RHS and Kew guidance, and has a soft spot for heritage tomato cultivars and anything that survives a British winter without complaint.

    Got a question about something we’ve written? Drop a comment — we read every one.

  • 15 Best Vegetables to Grow in Containers (UK Beginner’s Guide)

    15 Best Vegetables to Grow in Containers (UK Beginner’s Guide)

    As an Amazon Associate I earn from qualifying purchases.

    No garden? No problem. If you have a patio, balcony, or sunny doorstep, you can grow fresh vegetables in containers.

    Colourful vegetable containers arranged on a UK patio garden
    A thriving container vegetable garden on a patio

    Container gardening works because you control everything: the soil, the drainage, and the position for maximum sun. There are no weeds to battle, and you can move pots to catch the light. For beginners, containers are often more successful than traditional beds — and there’s genuine satisfaction in snipping fresh lettuce from a pot by your back door.

    This guide covers 15 vegetables that thrive in pots, chosen for reliability and UK conditions. Each includes specific container sizes, realistic harvest times, and practical care tips. If you’re completely new to growing food, you might want to start with our guide on starting your first vegetable garden from scratch.

    What You Need to Get Started

    Essential container gardening supplies: pots, compost and tools
    Essential supplies for container vegetable gardening

    Essential supplies: (See our complete starter guide for a more detailed shopping list)

    • Containers in various sizes (specifics below)
    • Multi-purpose compost mixed with John Innes
    • Liquid feed for hungry crops
    • Watering can with rose
    • Optional: slow-release fertiliser, saucers, plant supports

    Choosing containers:
    Size matters more than material. A tomato in a 15cm pot will struggle; in a 30cm pot, it will feed you for months (see how to grow tomatoes in pots). When uncertain, go bigger — extra compost holds moisture and nutrients.

    Materials compared:

    • Plastic: Light, affordable, retains moisture
    • Terracotta: Attractive but dries quickly; line with plastic
    • Fabric grow bags: Excellent drainage, stores flat
    • Glazed ceramic: Heavy and stable for top-heavy plants

    Essential: drainage holes. Stagnant water kills roots faster than dryness.

    The 15 Best Container Vegetables

    1. Cherry Tomatoes

    Container: 30cm diameter (12 litres) | Sun: Full sun (6+ hours) | Harvest: 60–80 days | Difficulty: Easy

    Cherry tomatoes ripening on the vine in a large container pot
    Cherry tomatoes 'Gardeners Delight' growing in container
    Cherry tomatoes thriving in a 30cm container

    The reward-per-effort champion. One well-fed plant produces pints of fruit from July until first frost.

    Best varieties: ‘Tumbling Tom’ for hanging baskets, ‘Gardeners Delight’ for pots, ‘Balconi Red’ for compact spaces.

    Key care: Feed weekly with tomato fertiliser once flowering. Water consistently — irregular watering causes blossom end rot. Support with a cane or cage.

    2. Lettuce and Mixed Leaves

    Container: 15cm (3 litres) | Sun: Partial shade OK | Harvest: 6–8 weeks | Difficulty: Very Easy

    The fastest route to harvesting your own food. Cut-and-come-again varieties let you snip outer leaves while the plant keeps producing.

    Best approach: Sow successionally every two weeks for continuous salad. ‘Salad Bowl’, ‘Lollo Rossa’, and oriental mixes all perform well.

    Key care: Keep soil moist — lettuce turns bitter when stressed. Sow thinly to avoid overcrowding.

    3. Radishes

    Container: 15cm (3 litres) | Sun: Partial shade OK | Harvest: 4–6 weeks | Difficulty: Very Easy

    The confidence builder. Sow radishes and you’ll be eating them before you’ve had time to doubt yourself.

    Best varieties: ‘Cherry Belle’ (classic round red), ‘French Breakfast’ (elongated, milder).

    Key care: Sow thinly — about 2cm apart. Thinning is essential; crowded radishes won’t bulb. Harvest promptly — left too long, they turn woody.

    4. Spring Onions

    Container: 15cm (3 litres) | Sun: Full sun to partial shade | Harvest: 8–10 weeks | Difficulty: Very Easy

    Neat, vertical, and endlessly useful. Spring onions occupy minimal space and ask almost nothing of you.

    Key care: Keep well-watered for milder flavour. Sow every three weeks for continuous supply. No thinning needed — they push each other upright.

    5. Dwarf French Beans

    Container: 25cm (8 litres) | Sun: Full sun | Harvest: 50–60 days | Difficulty: Easy

    Perhaps the most productive crop for the space. A single pot produces handfuls of tender pods every few days for six to eight weeks.

    Best varieties: ‘Maxibel’ (stringless, heavy cropper), ‘Stanley’ (reliable early variety).

    Key care: Pick regularly — the more you pick, the more they produce. Allowing pods to swell stops flowering. Short supports keep pods clean.

    6. Chillies

    Container: 20cm (5 litres) | Sun: Full sun | Harvest: 70–90 days | Difficulty: Medium

    Chillies love containers. Restricted roots seem to concentrate heat in the fruit. They’re also ornamental — colourful fruits look good on sunny windowsills.

    Best varieties: ‘Apache’ (compact, prolific), ‘Hungarian Hot Wax’ (milder), ‘Jalapeño’ (classic).

    Key care: Start early indoors or buy ready plants in May — they need a long season. Feed weekly during fruiting. Overwinter plants indoors for next year’s crop.

    7. Courgettes (Dwarf)

    Container: 40cm (20 litres) | Sun: Full sun | Harvest: 50–60 days | Difficulty: Easy

    Dwarf courgette plant in container
    Dwarf courgettes produce well in large containers

    Standard courgettes need space. Dwarf varieties like ‘Bush Baby’ and ‘All Green Bush’ stay compact yet productive.

    Key care: Keep consistently moist — drought followed by flood causes misshapen fruit. Harvest at 10–15cm; oversized become watery marrows. One plant is plenty for most families.

    8. Carrots (Short Varieties)

    Container: 20cm diameter, 20cm deep (10 litres) | Sun: Full sun | Harvest: 60–80 days | Difficulty: Medium

    Containers solve carrot fly problems — the pest flies low and rarely finds elevated pots. Choose short-rooted varieties.

    Best varieties: ‘Paris Market’ (round, sweet), ‘Atlas’ (round, stores well), ‘Amsterdam Forcing’ (slender, fast).

    Key care: Sow thinly. Thinning is essential — crowded carrots fork and twist. Keep soil moist for germination.

    9. Beetroot

    Container: 20cm (5 litres) | Sun: Full sun to partial shade | Harvest: 50–70 days | Difficulty: Easy

    Dual-purpose: tender roots and edible leaves. Beetroot is unfussy and reliable.

    Best varieties: ‘Boltardy’ (resistant to running to seed), ‘Chioggia’ (striking pink rings).

    Key care: Thin to 5cm spacing. Harvest young for sweetness — older roots become woody. Don’t cut leaves completely; leave 2cm to prevent bleeding.

    10. Spinach

    Container: 15cm (3 litres) | Sun: Partial shade OK | Harvest: 6–8 weeks | Difficulty: Very Easy

    Spinach bolts quickly in hot, dry conditions. Containers let you move pots to shade in midsummer, extending harvest.

    Best varieties: ‘Apollo’ (slow to bolt), ‘Medania’ (hardy).

    Key care: Sow successionally every three weeks. Harvest outer leaves, leaving the centre to continue. Water consistently — dryness triggers bolting.

    11. Peas (Dwarf)

    Container: 25cm (8 litres) | Sun: Full sun to partial shade | Harvest: 60–70 days | Difficulty: Easy

    Fresh peas from the pod are a revelation. Dwarf varieties need only short twiggy supports.

    Best varieties: ‘Kelvedon Wonder’ (reliable), ‘Bingo’ (early, compact).

    Key care: Sow generously — not all germinate. Pick promptly; over-mature peas are starchy.

    12. Kale

    Container: 25cm (8 litres) | Sun: Full sun to partial shade | Harvest: 50–60 days (baby leaves) | Difficulty: Easy

    The cut-and-come-again champion of winter. Kale tolerates cold, shade, and neglect.

    Best varieties: ‘Nero di Toscana’ (tender, dark leaves), ‘Red Russian’ (hardy, frilly).

    Key care: Harvest bottom leaves first. Plants become top-heavy — ensure stable pots. Protect from pigeons with netting.

    13. Pak Choi

    Container: 15cm (3 litres) | Sun: Partial shade OK | Harvest: 30–45 days | Difficulty: Very Easy

    Rapid, attractive, and versatile. Pak choi germinates reliably and reaches harvest in just over a month.

    Key care: Sow successionally. Bolts quickly in hot weather; afternoon shade helps in midsummer.

    14. Patio Aubergine

    Container: 30cm (12 litres) | Sun: Full sun | Harvest: 80–100 days | Difficulty: Medium

    Aubergines demand heat and sun but reward the effort. Modern patio varieties are bred for containers.

    Best varieties: ‘Pot Black’ (compact), ‘Moneymaker’ (reliable in UK).

    Key care: Start indoors or buy plants. Don’t plant out until late May when nights are warm. Feed weekly during fruiting. Support stems — fruit is heavy.

    15. Salad Potatoes (Early)

    Container: 40cm (30 litres) | Sun: Full sun | Harvest: 70–90 days | Difficulty: Easy

    Few harvests match tipping out a pot of home-grown potatoes. Early varieties are fastest and most reliable.

    Best varieties: ‘Charlotte’ (waxy, excellent flavour), ‘Swift’ (very early), ‘Rocket’ (reliable).

    Key care: Plant 3–4 seed potatoes per 40cm pot. Cover stems with compost as they grow. Keep well-watered during tuber formation. Harvest when flowers open.

    Season-by-Season Care Calendar

    Season Key Tasks
    Spring (Mar–May) Sow lettuce, radish, peas, potatoes. Harden off tomato/chilli plants.
    Early Summer (Jun) Main planting. Water well as weather warms. Begin weekly feeding for fruiting crops.
    Mid Summer (Jul–Aug) Daily watering. Harvest beans, tomatoes, courgettes regularly. Succession sow salads.
    Autumn (Sep–Oct) Final harvests. Sow winter salads. Clear spent crops.
    Winter Plan next year. Order seeds. Kale and some herbs may continue.

    Watering and Feeding

    Watering:
    Containers dry faster than ground soil. In hot weather, daily watering is normal. Morning is best — plants enter the day hydrated, and foliage dries before evening.

    For detailed advice, check our guide to growing tomatoes from seed.

    Check moisture by pushing your finger 2cm into compost. If dry, water. Saucers beneath pots act as reservoirs, but don’t let plants sit in water.

    Feeding:
    Compost feeds plants for 4–6 weeks. After that:

    • Leafy crops: Balanced liquid feed every two weeks
    • Fruit crops: High-potash tomato feed weekly once flowering
    • Root crops: Minimal feeding — focus on good initial compost

    Common Mistakes to Avoid

    1. Pots too small
    Root-bound plants produce poor harvests. When in doubt, go bigger.

    2. Irregular watering
    Drought stress followed by overwatering causes split fruit and bitter lettuce. Check daily in summer.

    3. Poor compost choice
    Straight multi-purpose dries too quickly. Mix with John Innes or choose container-specific blends.

    4. Forgetting to feed
    Limited soil means limited nutrients. Fruiting crops especially need regular feeding.

    5. Planting too early
    Tender crops sulk in cold soil. Wait until late May in most UK regions.

    Maximising Your Harvest

    Succession sowing: Sow small batches every 2–3 weeks rather than everything at once. Prevents gluts and gaps. Works for: lettuce, radish, spring onion, spinach, pak choi.

    Lettuce and mixed salad leaves growing in window boxes

    Companion planting: Some combinations work well:

    • Tomatoes with basil at the base
    • Carrots with spring onions (masks scent from pests)
    • Lettuce with radish (radish marks rows, harvested first)

    Vertical space: Use hanging baskets for tumbling tomatoes, wall planters for herbs, tiered stands for salads.

    Troubleshooting

    Problem Cause Solution
    Yellow lower leaves Natural ageing or overwatering Remove; check drainage
    Wilting despite wet soil Root rot Improve drainage
    Leggy seedlings Insufficient light Move to sunnier spot
    No fruit set Cold nights Wait for warmer weather; shake flowers
    Bitter lettuce Heat stress Provide shade, water consistently
    Forked carrots Obstacles in compost Use sifted compost
    Flowers but no beans Too hot Mulch, water deeply

    Quick-Reference Tables

    Minimum Pot Sizes

    Crop Type Diameter Depth
    Leafy salads 15cm 15cm
    Root crops 20cm 20cm
    Bush beans/peas 25cm 25cm
    Compact fruiting 30cm 30cm
    Heavy feeders 40cm+ 40cm+

    Sun Requirements

    Level Hours/Day Crops
    Full sun 6+ Tomatoes, peppers, courgettes, beans
    Partial sun 4–6 Lettuce, spinach, peas, beetroot
    Shade tolerant 2–4 Leafy greens, herbs

    First Container Garden — Week-by-Week

    Weeks 1–2: Setup and early sowing
    – Acquire containers, compost, seeds
    – Sow indoors: tomatoes, chillies, aubergines
    – Sow outdoors: radish, lettuce, spring onion

    Weeks 3–4: Expanding plantings
    – Sow: peas, beetroot, spinach
    – Plant early potatoes in large containers

    Weeks 5–8: Main season
    – Harden off and plant tender crops
    – Sow: dwarf beans, succession salads
    – Begin weekly feeding

    Weeks 9–12: First harvests
    – First radishes (weeks 6–8)
    – First lettuce leaves
    – Continuous picking of beans, courgettes

    Frequently Asked Questions

    What’s the easiest vegetable to grow in a pot?
    Radishes. Four to six weeks from sowing to harvest, minimal care, virtually foolproof.

    Can I grow vegetables indoors on a windowsill?
    Leafy salads, spring onions, and herbs work well. Fruiting crops need more light than most windowsills provide.

    How often should I water?
    Daily in hot weather, every 2–3 days in cooler periods. Check by pushing finger 2cm into compost.

    Do I need special compost?
    Multi-purpose works, but mixing with John Innes improves water retention. Avoid garden soil — it’s too heavy and may contain pests.

    Can I reuse compost?
    Yes, but refresh it. Mix in fresh compost or add slow-release fertiliser.

    Why are my tomatoes flowering but not fruiting?
    Likely cold nights (below 10°C) or poor pollination. Shake plants gently. Warm weather usually solves it.

    Most productive crop for small spaces?
    Dwarf French beans. Weeks of continuous harvest from a single pot.

    Sources: RHS container growing guidance, Garden Organic, Which? Gardening trials, University of Maryland Extension. You might also like our guide to choosing the right containers and pots. You might also like our guide to the best compost for container gardening.

    Where to Buy Seeds and Containers

    Getting started with container vegetables is straightforward once you know where to shop. Here are reliable UK suppliers for seeds, plants, and growing kit.

    Seeds

    • Thompson & Morgan — broad vegetable seed range including many container-friendly varieties. Look for their ‘patio’ and ‘dwarf’ selections specifically bred for pots. Seed packets from £2–£4.
    • Suttons — strong heritage vegetable range with reliable germination rates. Their vegetable seed collections (£8–£15) offer good variety for container growers.
    • You Garden — good value plug plants if you’d rather skip the seed-sowing stage. Vegetable plug plant collections start around £8–£12 for mixed packs.

    Containers, Compost, and Tools

    • Crocus — wide range of pots from budget plastic to premium terracotta and metal. Containers suitable for vegetables start at £5 for basic 30cm pots, up to £25+ for larger decorative options. They also stock quality compost and hand tools.
    • B&Q, The Range, and local garden centres — best for compost (multi-purpose with added John Innes, around £5–£10 for 40–50L) and for seeing container sizes in person before buying.

    Budget Tips

    • Repurpose containers: old buckets, wooden crates lined with landscape fabric, and recycled grow bags all work. Drill drainage holes in the bottom.
    • Buy compost in spring: garden centres often run multi-buy deals (3 bags for the price of 2) in March and April.
    • Seed collections save money: a mixed vegetable seed collection costs less per variety than buying individual packets.

    About the Author

    John Kitcher is the lead gardening writer at Plants and Gardening. He grew up mucking in on his grandfather’s Devon allotment and has spent the last fifteen years growing fruit, veg and ornamentals across three very different UK gardens — a windy coastal plot in North Cornwall, a shaded London back garden, and now a clay-heavy smallholding in the Midlands. He trials every technique covered here in his own beds and containers before writing about it, cross-references against RHS and Kew guidance, and has a soft spot for heritage tomato cultivars and anything that survives a British winter without complaint.

    Got a question about something we’ve written? Drop a comment — we read every one.