Category: Vegetable Gardening

  • Best Onion Sets to Plant in the UK Autumn — Variety & Supplier Guide

    Best Onion Sets to Plant in the UK Autumn — Variety & Supplier Guide

    As an Amazon Associate I earn from qualifying purchases.

    Planting onion sets in the autumn is a proven strategy for securing an early summer harvest in UK gardens. By sowing from September to November, gardeners allow onions to establish over winter and begin bulbing in spring, giving them a 6–8 week advantage over spring-planted varieties. This approach suits those aiming to enjoy fresh onions earlier in the season, particularly in regions with mild winters.

    When to Plant Onion Sets in the UK

    Autumn onion sets should be planted between September and November, depending on your region’s climate. In southern and central UK zones (H4–H5), planting can extend into early November. In colder areas like the Scottish Highlands (H6–H7), aim to complete planting by mid-October to avoid frost heave and ensure good root development before winter sets in. Late planting after mid-November increases the risk of poor establishment, especially where ground freezes. The key is to allow sets to develop a strong root system before the ground hardens, enabling them to overwinter as small plants and resume growth in spring. This timing ensures a harvest in June—typically 6–8 weeks earlier than onions planted in spring.

    Autumn vs Spring Onion Sets: Key Differences

    Autumn-planted onion sets are sown in the autumn and overwinter as small, dormant plants before bulbing in spring. In contrast, spring sets are planted from March to April and mature later, usually from late summer into autumn. Due to their earlier start, autumn sets produce a smaller bulb but are ready for harvest in early summer, making them ideal for gardeners seeking fresh onions sooner. Spring-planted onions, however, develop larger bulbs and are better suited to long-term storage—up to 6–9 months when properly dried. Autumn-planted onions, by comparison, are best used within 3–4 months of harvest due to their thinner skins and less dense structure. While autumn sets offer a seasonal advantage, spring sets provide greater storage longevity and are better for those planning winter cooking or preserving.

    Top UK-Adapted Onion Varieties for Autumn Planting

    Choosing the right variety is essential for success with autumn onion sets. ‘Senshyu Yellow’ is a Japanese overwintering onion that has proven reliable in UK gardens. Its semi-flat yellow bulbs are crisp and mild, with a harvest time in early summer. This variety handles cold well and maintains productivity even in cooler soils. ‘Electric’ (RHS AGM) stands out with its deep purple-red bulbs and bold, slightly sweet flavour. Despite its vibrant colour, it is surprisingly hardy and performs well under UK conditions, making it a top pick for both taste and performance. ‘Troy’ is a newer autumn-planted variety gaining popularity at Thompson & Morgan. It features strong disease resistance, particularly to downy mildew and rust, and delivers consistent yields even in marginal soils. These varieties are all suited to the UK’s variable climate and offer gardeners a range of flavours, colours, and resilience.

    Recommended Varieties: Top Picks from UK Suppliers

    For gardeners seeking proven results, several UK suppliers offer top-tier autumn onion sets. ‘Radar’ (RHS AGM) is widely available from Suttons and Marshalls. This fast-bulbing yellow onion is known for its early summer harvest and consistent performance in UK gardens. Its compact size and reliable yield make it ideal for small plots and container growing. ‘Shakespeare’ (Thompson & Morgan) is specifically developed to resist early bolting—a common issue in colder UK regions. It thrives in northern and coastal gardens where spring temperatures fluctuate, ensuring it doesn’t send up a flower stalk prematurely. ‘Electric’ (available from Suttons and You Garden) combines striking visual appeal with robust overwintering ability. Its deep purple-red bulbs are not only eye-catching but also deliver excellent flavour and good shelf life after drying. These suppliers offer quality-tested stock, ensuring gardeners get healthy sets with strong germination potential.

    How to prepare the ground for autumn onion sets

    A little ground preparation before you plant onion sets in autumn pays off in firmer, healthier bulbs the following summer. Choose an open, sunny spot with free-draining soil — onions hate sitting in cold, wet ground over winter. Clear the area of weeds, then loosen the soil to about a spade’s depth and rake it to a reasonably fine, level tilth so the sets sit snugly.

    Work in some well-rotted garden compost a few weeks beforehand if your soil is poor, but avoid fresh manure: too much nitrogen produces soft, leafy growth and bulbs that store badly. A light dressing of general-purpose fertiliser raked in before planting is plenty. Firm the bed gently with the back of a rake before you start — onions root better in soil that is settled rather than fluffy.

    On heavy clay or anywhere prone to winter waterlogging, start the sets in modules or small pots of multipurpose compost instead, keep them in a cold frame or sheltered spot, and transplant them out once they have rooted and the worst of the wet has passed. Raised beds are another reliable way to give autumn onions the sharp drainage they need.

    How to Plant Onion Sets: Spacing, Depth & Timing

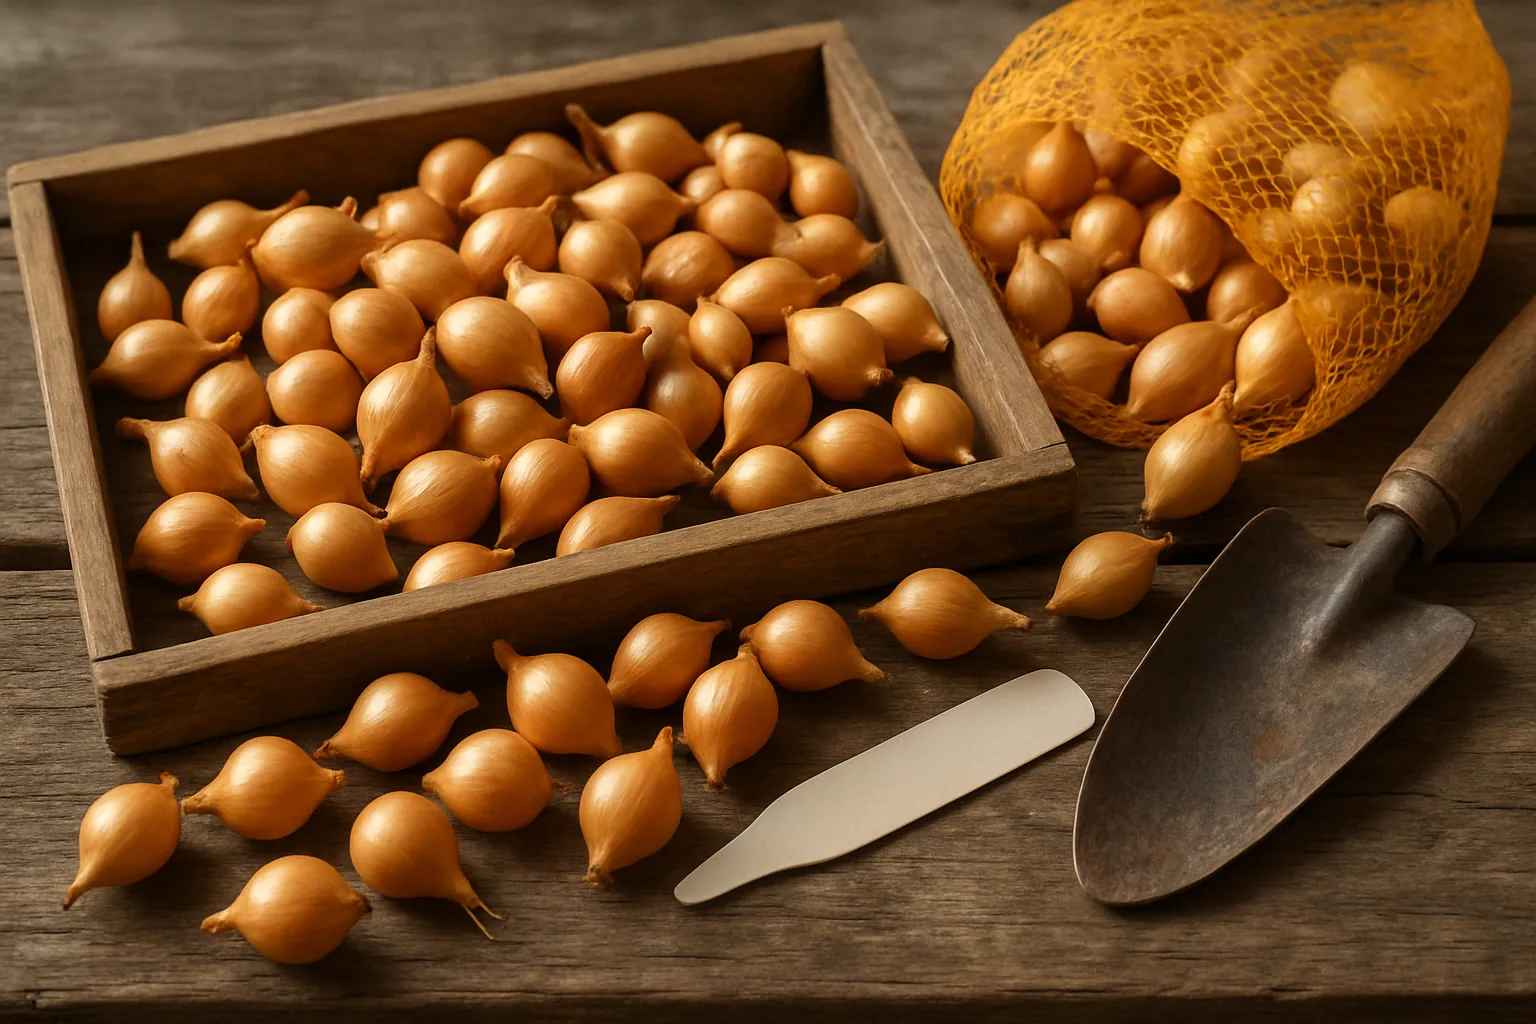
    Plant onion sets with the tip just visible above the soil surface. Burying them too deeply invites birds and increases the risk of rot. Use a trowel or hand fork to create a shallow hole, place the set upright, and gently firm the soil around it. Space sets 10cm apart in rows, with 30cm between rows to allow for air circulation, weeding, and root development. Proper spacing prevents overcrowding, which can lead to smaller bulbs and increased disease pressure. After planting, water lightly to settle the soil, but avoid overwatering—excess moisture promotes rot. For the first 2–3 weeks, use bird netting to protect new plantings from predators such as starlings and crows, which are drawn to fresh sets. Remove the netting once the plants are established and growing steadily.

    Equipment & What You Need for Autumn Onion Sets

    Basic garden tools are sufficient for planting onion sets. A trowel or hand fork helps create precise planting holes, while a garden line or string ensures straight rows. For larger plots, a spade or garden hoe can aid in soil preparation. If growing in containers, use pots at least 20cm deep with drainage holes to prevent waterlogging. Fill with multipurpose compost or a soil-based mix suitable for vegetables. Water lightly after planting, then reduce irrigation once bulbs begin to swell in May. Avoid watering during dry spells unless the soil is visibly dry—overwatering encourages rot. Keep the area free of weeds and monitor for slugs, especially in spring. Proper equipment ensures accurate spacing and healthy root development, leading to a successful harvest.

    Winter Care & Protection for Overwintered Onions

    Most UK gardeners do not need to provide extra protection for autumn-planted onion sets, as they are generally hardy and well-adapted to winter conditions. However, in exposed or frost-prone areas—such as coastal regions or high ground—mulching with a thin layer of straw (2–3cm) can help insulate the soil and reduce frost heave. Avoid heavy mulch or wet soil, as this increases the risk of rot. Keep the soil well-drained and airy, and remove mulch in early spring to allow bulbs to warm and resume growth. Monitor regularly for slugs, which can damage young shoots, and use barriers or organic slug pellets if needed. Bird netting should remain in place for the first 2–3 weeks after planting, especially in open gardens.

    When to Harvest Autumn-Planted Onions

    Harvest autumn-planted onions when the tops have naturally fallen over and the bulbs are fully formed—typically in June. This indicates that the plant has completed its growth cycle and is ready for harvest. Stop watering 2 weeks before harvesting to encourage skin formation and reduce the risk of rot during storage. Gently lift bulbs using a fork, taking care not to damage the outer layers. Allow onions to dry in a dry, shaded, and well-ventilated area for 1–2 weeks. This process, known as curing, helps toughen the skins and prolongs storage life. Once cured, store in a cool, dry, dark place with good airflow—such as a mesh bag or ventilated crate. Use within 3–4 months for best quality, as autumn-planted onions do not store as long as spring-planted varieties.

    FAQs: Autumn Onion Sets in the UK

    • When should I plant autumn onion sets in the UK? Plant from September to November, ideally by mid-October in colder regions (H6–H7) and up to early November in milder zones (H4–H5).
    • What’s the difference between autumn and spring onion sets? Autumn sets overwinter and harvest in early summer (June), 6–8 weeks earlier than spring-planted onions. They are smaller and store for only 3–4 months, while spring sets mature later and can store 6–9 months when properly dried.
    • Which onion varieties grow best in the UK? Top choices include ‘Senshyu Yellow’, ‘Electric’ (RHS AGM), ‘Radar’ (RHS AGM), ‘Troy’, and ‘Shakespeare’. All are proven performers in UK gardens.
    • How deep and far apart should onion sets be planted? Plant with the tip just visible above soil. Space sets 10cm apart in rows, with 30cm between rows for airflow and ease of maintenance.
    • Do onion sets need protection over winter? In most UK regions, no extra protection is needed. However, use bird netting for the first 2–3 weeks post-planting to deter predators. Mulch only in exposed or frost-prone areas with a thin layer of straw.
    • When are autumn-planted onions ready to harvest? Harvest when the tops fall over and bulbs are fully formed, usually in June. Stop watering 2 weeks before harvest to aid curing.

    Common Mistakes and Troubleshooting

    Planting Too Deeply

    A common error is burying onion sets too deeply, which can lead to rot and poor emergence. Always plant with just the tip of the set visible above soil. If planted too deep, the sets may struggle to push through and can decay in damp conditions. This is especially risky in heavy clay soils common in parts of the UK, where poor drainage compounds the problem.

    Overwatering After Planting

    Excess moisture shortly after planting is a frequent cause of failed crops. While it’s important to settle the soil, overwatering—particularly in poorly drained beds—can cause sets to rot before they establish. Stick to a light watering only if the soil is dry, and avoid watering again until spring growth begins.

    Ignoring Slug Activity in Spring

    Slugs are a major threat to young onion shoots in spring, particularly in damp, sheltered areas. Even with good winter protection, newly emerged leaves are vulnerable. Use organic slug pellets from suppliers like Mr Fothergill’s or install copper barriers around beds to reduce damage. Regular evening checks can help catch infestations early.

    Skipping the Curing Process

    Many gardeners rush to store onions immediately after lifting, but skipping the curing phase leads to poor storage life. After harvesting, dry onions in a dry, shaded, and well-ventilated area—such as a greenhouse or porch—for 1–2 weeks. This toughens the outer layers and prevents mould. The Garlic Farm recommends using a mesh tray to ensure airflow and avoid damp spots.

    Using Old or Poor-Quality Sets

    Buying onion sets that are shrivelled, soft, or discoloured reduces success rates. Always inspect sets before planting and source from reputable UK suppliers like J. Parkers, who offer certified, disease-free stock. Avoid sets that have already sprouted, as they are more prone to bolting and stress in cold soil.

    What Next?

    Have you tried growing onion sets in the autumn? Share your experiences, challenges, and tips in the comments below—your insights could help fellow gardeners across the UK. For more seasonal guidance, explore these essential reads: What to Plant in October UK—perfect for extending your growing season; How to Grow Runner Beans UK—ideal for summer harvests and vertical gardening; and Starting a Vegetable Garden for Beginners UK—a step-by-step guide for new growers building their first beds.
  • Best Strawberry Plants for UK Gardens — 2026 Variety & Supplier Guide

    Best Strawberry Plants for UK Gardens — 2026 Variety & Supplier Guide

    As an Amazon Associate I earn from qualifying purchases.

    Strawberries are a staple in UK gardens, prized for their sweet flavour and versatility in jams, desserts, and fresh eating. With a range of varieties and growing methods, choosing the right strawberry plants can make all the difference in yield and enjoyment. This 2026 guide to the best strawberry plants covers top AGM-approved varieties, the best suppliers, and proven growing techniques tailored to British conditions.

    Understanding Strawberry Types: June-Bearing vs. Everbearing

    June-bearing strawberries produce a single, heavy crop in June and early July, ideal for gardeners seeking a large harvest for jam-making or immediate consumption. These varieties are typically more productive per plant but have a shorter picking window. In contrast, everbearing (or perpetual) types deliver multiple flushes of fruit from June through October, extending the harvest season and offering a steady supply of fresh berries. While yields per flush are smaller, the prolonged cropping period makes everbearing types excellent for continuous harvesting and gardeners with limited space. For maximum yield and convenience, choose June-bearing varieties. For a longer harvest and more frequent picking, everbearing types are the better option.

    Top 6 AGM Strawberry Varieties for UK Gardens (2026)

    The RHS Award of Garden Merit (AGM) recognises varieties that perform reliably under UK conditions. ‘Cambridge Favourite’ (RHS AGM) is a UK-bred, June-bearing classic known for its disease resistance, consistent yields, and excellent flavour — a top choice for home growers. ‘Honeoye’ (RHS AGM), also June-bearing, delivers a heavy early crop with firm, sweet berries that hold well after picking, making it ideal for gardeners who want a strong June punch. ‘Symphony’ (RHS AGM), another June-bearing variety, extends the season with large, dark-red fruits harvested in late June and early July. For everbearing options, ‘Albion’ (RHS AGM) is a standout, producing large, bright fruits from June to October and performing well in both ground beds and containers. ‘Mara des Bois’ (everbearing — not currently RHS AGM but widely sold and prized for its wild-strawberry flavour) ripens in succession with smaller fruits. ‘Fragaria vesca ‘Mignonette” (alpine — not AGM, but a long-established UK favourite) is a compact, no-runner variety with tiny, intensely flavoured berries — perfect for edging or small pots.

    Recommended Varieties by Growing Method

    For container growing, ‘Albion’ excels due to its vigorous growth and extended fruiting period from June to October. It thrives in 30cm pots or dedicated strawberry planters with good drainage. ‘Mignonette’ (alpine) is ideal for edging, hanging baskets, or small pots — it requires no runners and offers a constant supply of tiny, fragrant berries. In ground beds, ‘Cambridge Favourite’ and ‘Mara des Bois’ perform well when planted in full sun with well-drained soil. ‘Cambridge Favourite’ benefits from a light mulch to suppress weeds, while ‘Mara des Bois’ appreciates a slightly acidic soil and consistent moisture. All these varieties respond well to regular feeding and protection from pests when fruiting.

    When to Plant Strawberry Runners in the UK

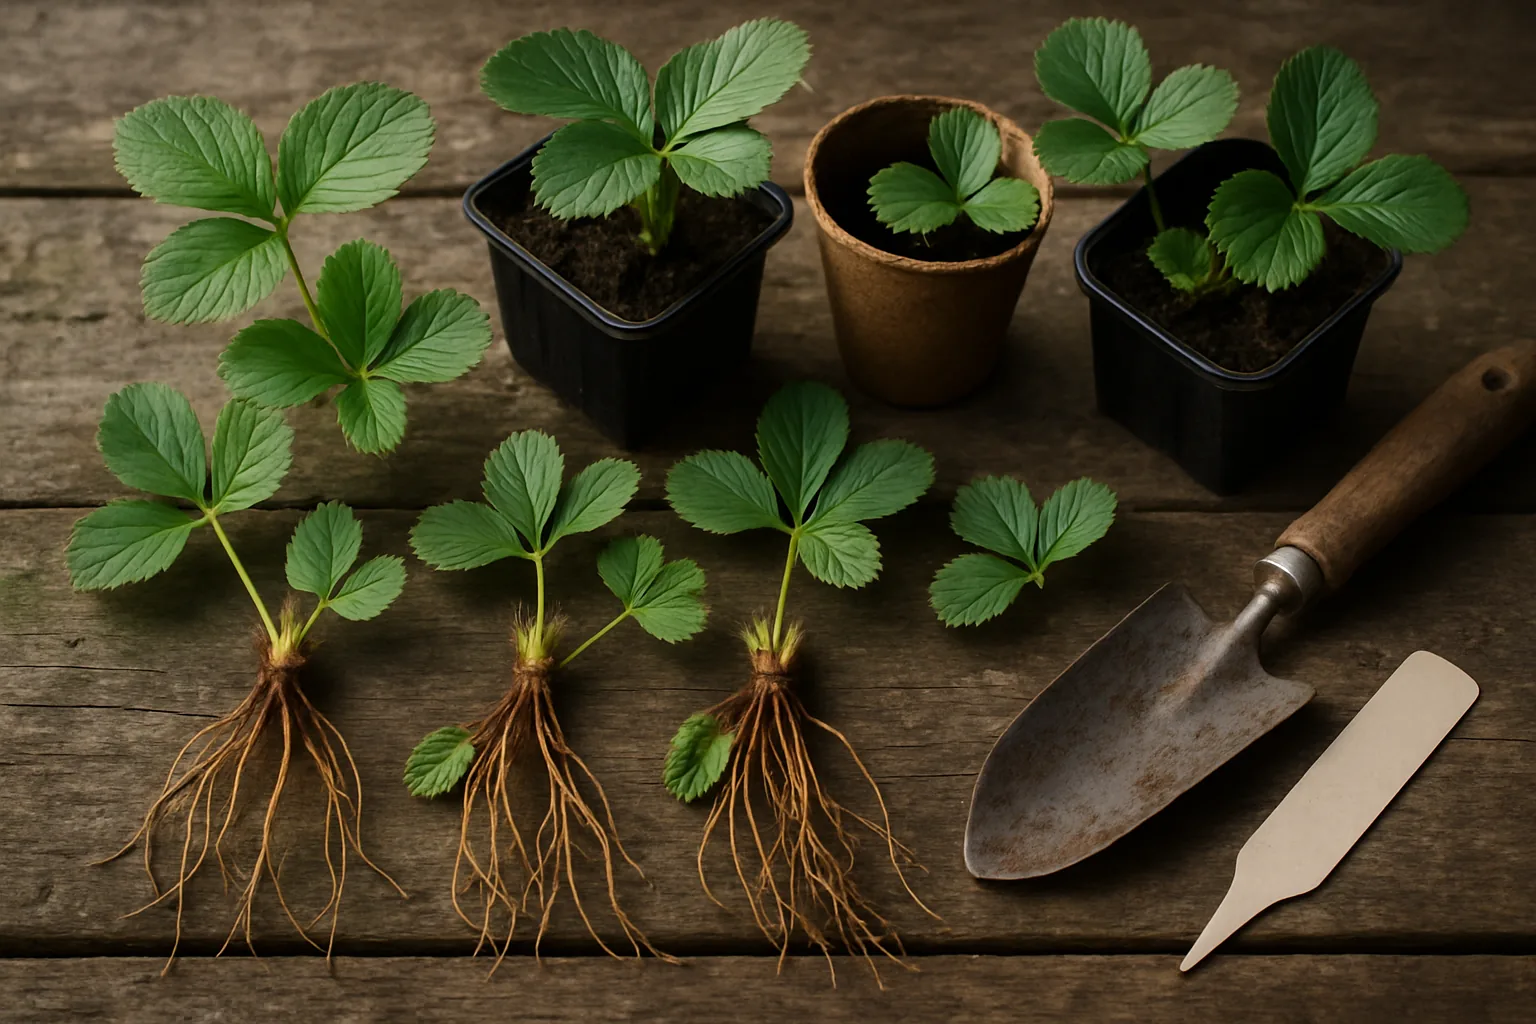
    Plant strawberry runners in August or September for optimal establishment before winter. This timing allows roots to develop strongly over autumn and winter, leading to a full crop the following summer. Spring planting (March–April) is viable for a lighter harvest in the same year, though plants may be less vigorous. Avoid planting in late autumn — frost can damage young roots and reduce overwintering success. Choose healthy, disease-free runners from AGM varieties for the best results. Ensure planting depth is correct: bury the crown just below the soil surface, with roots fully covered but not smothered.

    Growing Strawberries in Containers

    Pots and grow bags are ideal for strawberries, especially where space is tight. For pot sizes, compost, watering, feeding and the full container method, see our dedicated guide to growing strawberries in pots. The varieties recommended above all crop well in containers.

    Equipment & What You Need to Grow Strawberries Successfully

    Essential items include strawberry pots or planters (30cm minimum diameter, allowing 3–5L of compost per plant), loam-based compost (John Innes No 2), coarse grit or perlite for drainage, a watering can with a rose attachment, and a garden fork for soil prep. A garden trowel helps with planting and mulching. Once fruit sets, apply a layer of straw mulch or use a strawberry mat to keep berries off damp soil and reduce slug damage. Install fine-mesh bird netting when fruit begins to colour — blackbirds and thrushes can strip a bed in hours. Secure netting edges with garden pegs or stones to prevent access.

    How to Protect Ripening Strawberries from Birds and Slugs

    Net plants with fine mesh (3mm or less) once fruit begins to colour — this is critical, as blackbirds and starlings will consume unprotected crops rapidly. Secure netting tightly at the base using pegs or stones to prevent birds from slipping underneath. For slugs, use beer traps buried at soil level or apply copper tape around the base of containers — slugs avoid crossing the charged barrier. In damp spring weather, check under mulch and around plant crowns regularly. Straw mulch or dedicated strawberry mats not only reduce slug contact but also maintain soil moisture and prevent fruit from rotting on the ground.

    How Long Do Strawberry Plants Last? When to Replace Them

    Strawberry plants typically crop well for 2–3 years. After this period, yields decline significantly due to reduced vigour and increased disease pressure. Replace strawberry plants every 3 years with fresh runners from healthy AGM varieties to maintain productivity. This practice also reduces the risk of soil-borne pathogens like verticillium wilt. Take runners from strong, disease-free plants in summer, grow them on in small pots, and plant out in August–September for the next cycle. This ensures a continuous supply of vigorous, high-performing plants.

    Best Suppliers for Strawberry Plants in the UK (2026)

    Several UK suppliers offer reliable, high-quality strawberry plants. Suttons stocks widely available AGM varieties such as ‘Cambridge Favourite’ and ‘Honeoye’ in both runner and potted forms. Thompson & Morgan provides ‘Symphony’ and ‘Albion’, making them a go-to for everbearing and AGM types. You Garden is a top source for ‘Mara des Bois’ and alpine strawberries like ‘Mignonette’, with excellent selection and detailed growing advice. Check planting dates — many suppliers begin selling runners in August for autumn planting. Always verify hardiness ratings (H1–H7) and AGM status when ordering to ensure suitability for your garden zone.

    FAQs: Your Top Strawberry Questions Answered

    • What’s the difference between June-bearing and everbearing strawberries? June-bearing varieties produce one large crop in June and July; everbearing types fruit in multiple flushes from June to October.
    • When should I plant strawberry runners in the UK? Plant in August–September for best results, or March–April for a lighter first-year crop.
    • Which strawberry varieties have the best flavour? ‘Mara des Bois’ and ‘Royal Sovereign’ are consistently rated among the best-flavoured strawberries in the UK.
    • Can strawberries be grown in containers? Yes — use 30cm pots or allow 3–5L of compost per plant with John Innes No 2 and grit; ‘Albion’ and ‘Mignonette’ are ideal.
    • How long do strawberry plants crop for before they need replacing? Most plants perform well for 2–3 years; replace with fresh runners to maintain yield and reduce disease.
    • How do I protect ripening strawberries from birds and slugs? Net with fine mesh once fruit colours; use straw mulch or mats and apply beer traps or copper tape to deter slugs.

    How to Grow Strawberries in Pots UK
    Best Compost for Container Gardening
    Starting a Vegetable Garden for Beginners UK

    Common Mistakes and Troubleshooting

    Overwatering in Containers

    Container-grown strawberries are prone to root rot if overwatered, especially in heavy soils or poorly drained compost. UK autumns can be wet, so ensure pots have adequate drainage holes and avoid leaving them sitting in saucers. Use a moisture meter or check the top 2cm of compost before watering — it should feel dry. Overwatering also encourages fungal diseases like grey mould (Botrytis), which can ruin ripening fruit. Always water at the base, not over the foliage, to reduce humidity around the crown.

    Incorrect Planting Depth

    Planting too deep can cause the crown to rot, while planting too shallow exposes it to drying out and frost damage. The crown — where the leaves meet the roots — must sit level with the soil surface. A common error is burying it under compost, which can suffocate the plant. Use a trowel to gently firm soil around the roots without compacting, and check the depth after planting to ensure the crown is not buried.

    Ignoring Runner Management

    While runners help propagate new plants, allowing too many to grow on fruiting plants can reduce yield. For June-bearing varieties, remove most runners to focus energy on fruiting. For everbearing types like ‘Albion’, let a few runners develop for future plants but pinch back excess growth. Alpine varieties like ‘Mignonette’ should have all runners removed to maintain compact growth and consistent fruiting.

    Using the Wrong Compost

    Avoid peat-based composts for strawberries — peat extraction is environmentally unsustainable, and peat-free alternatives are now the UK industry standard. Instead, use loam-based John Innes No 2 or No 3, mixed with a third of grit or perlite for drainage. Using lightweight potting composts can lead to rapid drying and poor root development. For garden beds, amend soil with well-rotted garden compost and grit to improve drainage. Suttons offers a range of peat-free, loam-based composts specifically formulated for fruiting plants.

    Delaying Harvest and Drying

    Strawberries should be picked when fully ripe and glossy, not left on the plant to dry. Overripe berries become soft and attract pests. Harvest daily during peak season and store in the fridge, not in a damp place. If you’re drying strawberries for later use, spread them in a single layer on a tray in a warm, dry, well-ventilated area (e.g., a greenhouse or airing cupboard) for 24–48 hours. Avoid direct sunlight to preserve colour and flavour.

    What Next?

    Have you grown strawberries this year? Share your tips, challenges, or harvest photos in the comments below — we love hearing from fellow UK gardeners. For more inspiration, explore these essential guides: How to Grow Strawberries in Pots UK shows how to maximise space with container gardening. Best Compost for Container Gardening helps you choose the right mix for healthy, productive plants. And if you’re new to growing, Starting a Vegetable Garden for Beginners UK walks you through the first steps with proven, easy-to-follow advice.

  • What to Plant in December: Complete UK Monthly Planting Guide

    What to Plant in December: Complete UK Monthly Planting Guide


    December is the month most UK gardeners assume is over. It is not. The bare-root season is at its peak, there is still time to squeeze garlic into the ground in mild spots, indoor sowing starts for chillies and aubergines, and this is the quiet window to plan the coming year without the pressure of a backlog. If you do not plant anything else, plant a fruit tree.

    Here is what to plant, sow and do in December across the UK.

    Seed trays of chilli seedlings emerging on a warm windowsill in a heated propagator with grow lights

    Vegetables to Plant and Sow in December

    Garlic (Last Chance in Most of the UK)

    If you missed November, early December is still workable for garlic across southern England and in mild coastal areas. The bulbs will produce slightly smaller heads than October-November plantings, but they will crop. Stick to well-tested cultivars: ‘Solent Wight’ (RHS AGM, H4) for softneck reliability, ‘Germidour’ (RHS AGM, H4) for a consistent medium-sized crop, and ‘Cristo’ (RHS AGM, H4) for flavour.

    Plant into the sunniest, best-drained bed you have. If soil is sodden, use 30cm-deep containers filled with a mix of multi-purpose compost and horticultural grit instead — garlic in waterlogged ground will rot before spring.

    Broad Beans (Very Last Window)

    In very mild areas of the south-west and along south-coast gardens, ‘Aquadulce Claudia’ (RHS AGM, H5) can still be sown in early December. Elsewhere, it is too late — germination becomes unreliable below 5°C soil temperature. If you have not sown yet, wait until late February.

    Indoor Sowing: Chillies and Aubergines

    This is the time to start the longest-season crops under heat. Chillies and aubergines need five to six months from sowing to picking, so sowing in late December gives you ripe fruit from July onwards. Both need warmth (20–25°C) to germinate — a heated propagator on a bright windowsill or in a warm greenhouse.

    Reliable AGM chilli cultivars for the UK: ‘Apache’ (RHS AGM, H1c) stays compact and crops heavily in a pot, good for patios. ‘Hungarian Hot Wax’ (RHS AGM, H1c) is medium heat and ripens early. ‘Prairie Fire’ (RHS AGM, H1c) is ornamental as well as edible and good on a sunny windowsill. For aubergines, ‘Bonica’ (RHS AGM, H1c) is the dependable choice — Mediterranean-style glossy black fruits and enough productivity for a proper harvest from two plants.

    Sow seeds 1cm deep in modules of fresh seed compost. Cover the propagator and bottom-water to keep humidity up. Germination takes 10–21 days. Prick out once seedlings have two true leaves.

    Winter Salads Under Cover

    ‘Winter Density’ (RHS AGM, H2) lettuce sown in November will be ready for thinning and eating now. For a fresh sowing, oriental greens like mizuna, mibuna, and winter purslane germinate readily in an unheated greenhouse and crop within six to eight weeks.

    Fruit to Plant in December

    Bare-root Fruit Trees

    December is peak planting time for bare-root apples, pears, plums, cherries, and quince. Nurseries are dispatching, soil is usually workable, and the trees have the longest possible dormant period to establish before spring growth. As long as the ground is not frozen solid or waterlogged, plant as soon as stock arrives.

    Heel in temporarily (lean the tree at 45° in a shallow trench and cover the roots with soil) if you cannot plant immediately. Never let bare roots dry out in an open shed or garage — keep them covered and moist.

    Soft Fruit Canes and Bushes

    Bare-root raspberries, blackcurrants, redcurrants, gooseberries, and blackberries all establish well in December. For autumn raspberries, ‘Joan J’ (RHS AGM, H6) is thornless and produces a heavy autumn crop. ‘Glen Ample’ (RHS AGM, H6) remains the summer-fruiting standard. For blackcurrants, ‘Big Ben’ (RHS AGM, H6) produces unusually large, sweet berries good for eating fresh — not just cooking.

    Rhubarb

    Rhubarb crowns are cheap and widely available bare-root in December. ‘Timperley Early’ (RHS AGM, H5) is the fastest to crop and responds well to forcing under a bucket or terracotta forcer. ‘Fulton’s Strawberry Surprise’ (RHS AGM, H5) has unusually pink stems and a milder flavour. Plant crowns with the growing point just level with soil — deeper and they struggle to break through.

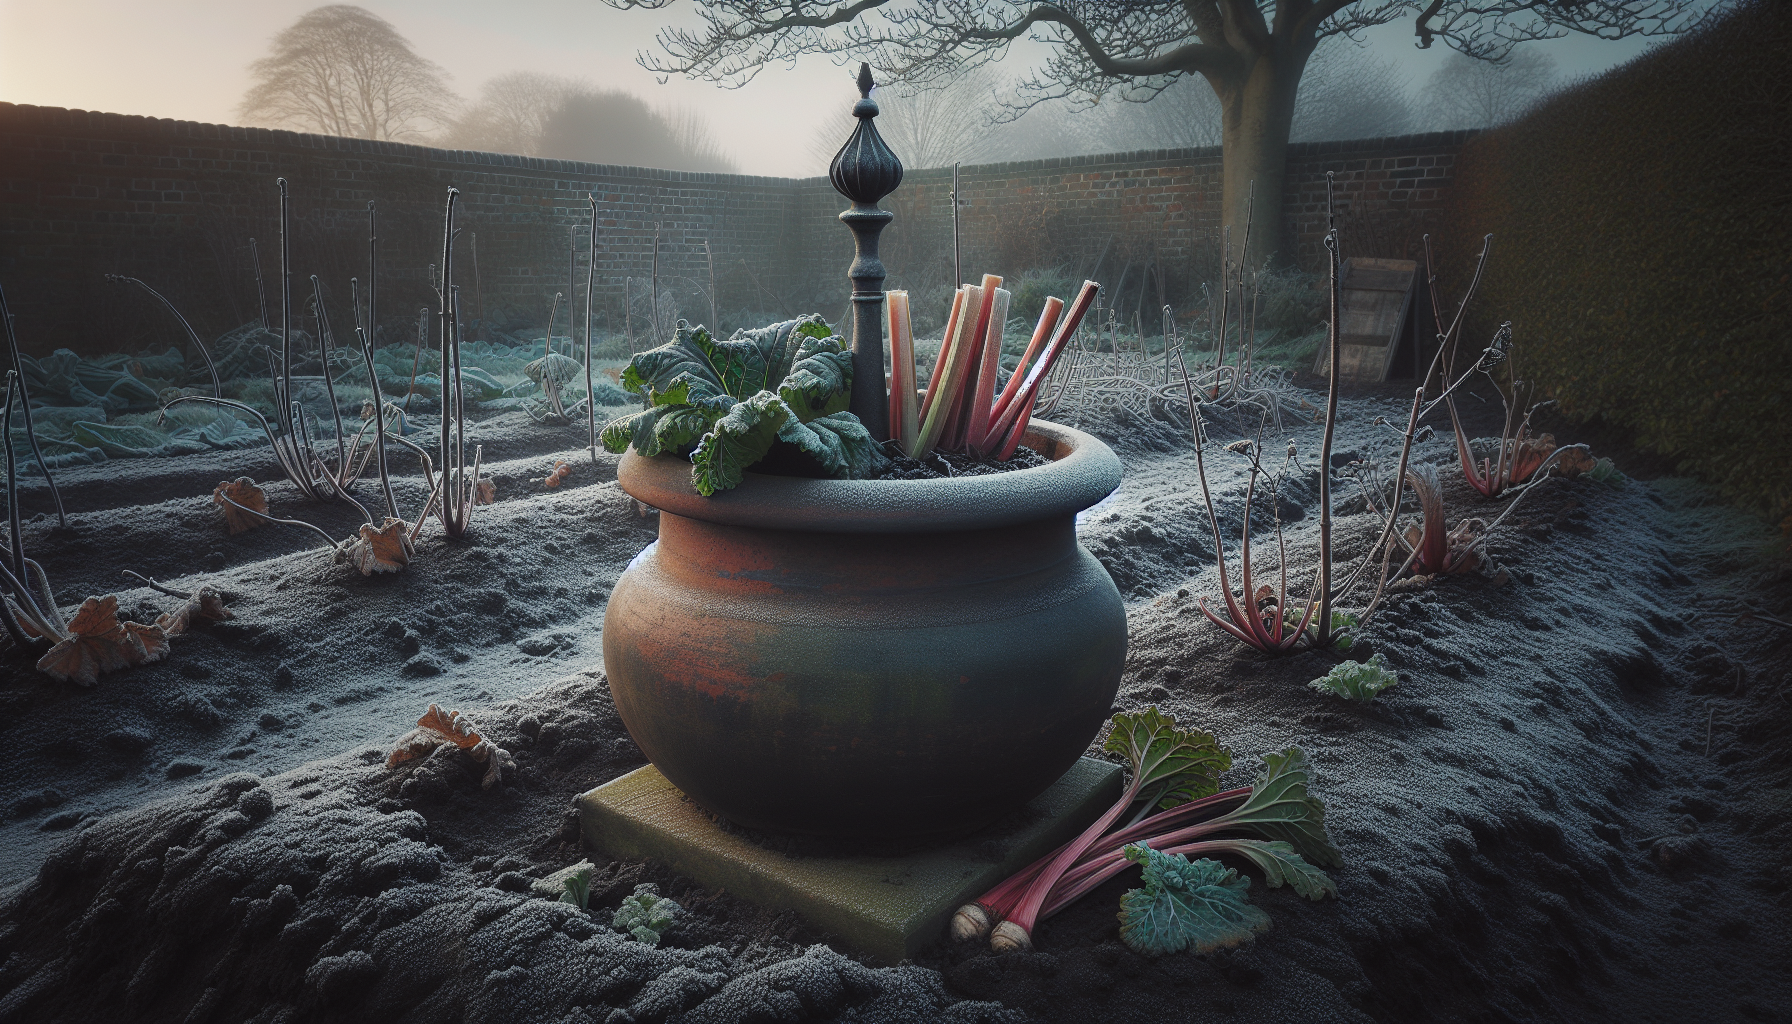
    Forcing Rhubarb

    Existing rhubarb crowns can be forced now for an early harvest of pale, tender stems in February or March. Cover the crown with a large pot, bucket, or traditional terracotta forcer and block out all light. Stems drawn up in darkness are sweeter and less stringy than open-grown spring rhubarb. Do not force the same crown two years running — it exhausts the plant.

    Rhubarb crown covered with a terracotta forcer in a winter vegetable garden

    Bulbs and Ornamentals

    Indoor Bulbs for Christmas

    Amaryllis (Hippeastrum) bulbs planted in October or November flower for Christmas and into January. If you are planting fresh now, expect flowering in February. Plant bulbs with the top third exposed above the compost, water sparingly until the flower spike emerges, then regularly.

    Paperwhite narcissi are the quickest indoor bulb — six to eight weeks from planting to flower. They need no cold period and grow in gravel with water alone, which makes them useful for gifts.

    Tulips (Last Call)

    Tulip bulbs can still be planted right up to Christmas if the ground is not frozen. Bulbs left too long will dry out and give poor results, so either plant or discard — do not carry them into spring. Plant three times their own depth, 10cm apart, pointed end up.

    Bare-root Roses and Shrubs

    Roses, clematis, and deciduous shrubs are all at their cheapest as bare-root stock in December and January. Buy from a reputable supplier — cheaper does not help if the stock is poor. Plant with the graft union at soil level for roses, and prune back to three outward-facing buds after planting.

    Tasks for December

    Planning and Ordering

    • Order seed potatoes for delivery in January or February. First and second earlies are popular and sell out — ‘Foremost’ (RHS AGM, H2), ‘Charlotte’ (RHS AGM, H2), ‘Vivaldi’ (RHS AGM, H2) are reliable early choices.
    • Draw up a rough crop plan for the coming year, noting what did well and what to replace.
    • Order seeds early — popular varieties sell out from January onwards.

    Pruning

    • Apple and pear trees can be winter-pruned any time between leaf-fall and bud-break — December is ideal if the weather is mild.
    • Autumn-fruiting raspberries should be cut right down to ground level in late December or January — they fruit on new canes.
    • Avoid pruning plums, cherries, peaches, and apricots in winter — they are vulnerable to silver leaf disease.

    Soil and Infrastructure

    • Spread a 5–7cm layer of compost or well-rotted manure over empty vegetable beds. Worms will incorporate it by spring.
    • Lime beds destined for brassicas next year if your soil is acidic. Lime takes months to work.
    • Insulate outside taps and drain hosepipes before the first hard frost.
    • Clean pots and seed trays now so they are ready for January and February sowings. Hot soapy water plus a cup of vinegar removes most pathogens.

    Wildlife

    • Keep bird feeders topped up — they draw more visitors to the garden when it is cold and improve pest control by spring.
    • Leave seedheads and hollow plant stems standing until March — they overwinter ladybirds and lacewings.
    • Make sure a small area of any pond is kept ice-free on very cold days. Float a ball overnight rather than breaking ice, which stresses fish.

    Frequently Asked Questions

    Can I still plant garlic in December?

    In southern England and mild coastal areas, early December is workable. Bulbs will be slightly smaller but will still crop. Further north or inland, wait until February and plant a spring-planting variety instead.

    When should I start chillies and aubergines from seed?

    Late December to mid-January for the earliest possible crops. Both need warm conditions (20–25°C) and a long growing season. Sown now and grown on under lights or in a heated greenhouse, you can expect ripe fruit from late July.

    Is it too late to plant tulips?

    No — tulips can be planted right up to Christmas if the soil is not frozen. Waiting actually reduces the risk of tulip fire, a fungal disease that attacks bulbs in warm, damp autumn soil. Do not store bulbs into the new year though — they dry out and flower poorly.

    Can I prune apple trees in December?

    Yes — winter pruning (December to February, while dormant) encourages vigorous growth. Summer pruning, by contrast, restricts growth. Do not prune plums, cherries, or other stone fruit in winter.

    What vegetables can I harvest in December?

    Brussels sprouts, parsnips, leeks, kale, winter cabbage, Jerusalem artichokes, celeriac, and swede. All of these improve in flavour after frost. Parsnips in particular should be left in the ground until after the first hard frost to develop their full sweetness.

    Should I feed the garden in December?

    Not vegetables — everything is dormant or nearly so. The one exception is a generous mulch of compost or well-rotted manure on beds and around perennial plants, which feeds the soil over winter rather than the plants directly.

    What Next?

    Pick one job from this month’s list and actually get it done this week — bare-root stock waits for no one, and tulip bulbs still sitting in the shed will not flower next spring. If you are planning a bigger overhaul, work out your crop rotation before ordering seeds in January, and start a notebook for what worked and what flopped this season. Future-you will thank present-you.

    Have a question about something on this list, or want to share what you are planting this month? Drop a comment below — we read every one and answer as many as we can.

    For further reading on bare-root fruit planting and winter pruning, the Royal Horticultural Society publishes detailed month-specific guidance.

    Related Guides

  • What to Plant in January: Complete UK Monthly Planting Guide

    What to Plant in January: Complete UK Monthly Planting Guide


    January gets dismissed as a dead month in the garden. It is not. Under cover, the new growing year starts properly now — chillies, aubergines, and onions under lights, first-early potatoes chitting in the shed, and broad beans and peas ready for the first mild window in February. Outside, this is the last month for bare-root planting and the prime window for winter pruning. What you do in January sets the shape of everything that follows.

    Here is what to plant, sow and do in January across the UK.

    Seed potatoes chitting in egg boxes with short green sprouts on a cool windowsill

    Vegetables to Sow and Plant in January

    Indoor Sowing: Chillies, Aubergines, Peppers

    If you did not sow chillies and aubergines in late December, early January is the next-best window. Both need five to six months to ripen fruit, and any later than mid-January risks running out of sun before the season ends.

    Reliable RHS AGM chillies: ‘Apache’ (H1c) for compact container growing, ‘Hungarian Hot Wax’ (H1c) for medium heat and early ripening, ‘Fuego’ (H1c) for heavy cropping, and ‘Prairie Fire’ (H1c) for something ornamental on a sunny windowsill. For sweet peppers, ‘Gypsy’ is the old reliable (no longer on the current AGM list but still widely sold), and ‘Corno di Toro Rosso’ (RHS AGM, H1c) is excellent for long red fruits. Aubergines: ‘Bonica’ (RHS AGM, H1c) and ‘Galine’ (RHS AGM, H1c).

    Sow into modules of seed compost, 1cm deep, and germinate at 20–25°C in a heated propagator. A bright windowsill works for germination but seedlings will need supplementary light once they emerge — grow lights on a timer for 14 hours a day produce sturdier plants than a south-facing windowsill alone.

    Onions from Seed

    Sow onion seed indoors in late January for transplanting out in April. This gives larger bulbs than sets. ‘Sturon’ (RHS AGM, H3) and ‘Hercules’ (RHS AGM, H3) are reliable yellow-skinned choices. ‘Red Baron’ (RHS AGM, H3) for red onions. Sow thinly into trays of seed compost, prick out into modules once seedlings are 5cm tall, and keep frost-free.

    Broad Beans (Under Cloches)

    In the south, January sowings of ‘Aquadulce Claudia’ (RHS AGM, H5) under cloches will catch up with autumn-sown plants by late spring. Sow 20cm apart, 5cm deep, with cloches in place for at least four weeks. Avoid waterlogged soil — seeds rot rather than germinate if soil temperature is below 5°C and wet.

    Early Peas (Sheltered Sowing)

    Mid-to-late January is the starting gun for early peas in mild southern gardens. ‘Kelvedon Wonder’ (RHS AGM, H2) is the traditional early variety and remains one of the best. Sow in modules of root trainers indoors or under cloches outside, three seeds per module, thinning to the strongest two.

    Gardener pruning a dormant apple tree in a winter orchard with secateurs

    Salads and Microgreens Under Cover

    Quick crops sown in January in an unheated greenhouse or cold frame give the first fresh leaves of the year by mid-February. ‘Little Gem’ (RHS AGM, H2) lettuce sown now into modules will heart up by early April. Oriental greens (mizuna, mibuna, rocket) are faster still. Pea shoots sown in shallow trays of compost are ready to cut in three weeks and regrow once or twice.

    Chitting Seed Potatoes

    Seed potatoes arrive this month and should be chitted (pre-sprouted) before planting. Stand tubers in trays or empty egg boxes, with the end that has the most eyes (the rose end) pointing up, in a cool, bright, frost-free place. Six weeks of chitting produces stubby green shoots 2cm long — exactly what you want before planting in March.

    First earlies to chit now: ‘Foremost’ (RHS AGM, H2), ‘Orla’ (RHS AGM, H2), ‘Winston’ (RHS AGM, H2), and ‘Casablanca’ (RHS AGM, H2 — bred specifically for container growing).

    Fruit to Plant in January

    Bare-root Trees and Bushes (Last Window)

    January is the last full month of the bare-root season in most of the UK. Everything available in November and December is still available now, often at end-of-season prices. If you have been thinking about apple trees, gooseberries, or a rhubarb patch, buy now — bare-root stock from February onwards is rarely worth the money as the trees are breaking dormancy.

    Priority picks: ‘Cambridge Favourite’ strawberries (RHS AGM, H6), ‘Invicta’ gooseberries (RHS AGM, H6), ‘Glen Ample’ raspberries (RHS AGM, H6), and ‘Timperley Early’ rhubarb (RHS AGM, H5).

    Pruning

    January is the peak month for winter pruning. Apples, pears, blackcurrants, gooseberries, and autumn-fruiting raspberries all get cut back now. Remove the three Ds first — dead, diseased, damaged wood — then thin to shape. Autumn raspberries should be cut to the ground; they fruit on canes grown in the same year.

    Do NOT prune plums, cherries, peaches, apricots, or other stone fruit in January. They need summer pruning to avoid silver leaf disease.

    Bulbs and Ornamentals

    Snowdrops and Winter Aconites

    Snowdrops and winter aconites are best planted “in the green” (just after flowering) rather than as dry bulbs. January is too early for this — wait until March. But if you have clumps that are overcrowded in borders, this is the month to plan where you will divide and move them in early spring.

    Dahlia and Lily Orders

    Dahlia tubers and lily bulbs arrive in garden centres from January. Dahlias are safer bought in person so you can check for firmness — soft or mouldy tubers will not recover. Store somewhere frost-free until starting into growth in March.

    Sweet Peas

    Sweet pea seeds can be sown now under glass for flowers from June onwards. An autumn sowing produces the earliest flowers, but a January sowing catches up quickly. Sow three seeds per root trainer, germinate at 15°C, and grow on cool.

    Tasks for January

    Plan and Order

    • Seed catalogues are at their most tempting in January. Order seeds for spring and summer sowing now — popular varieties sell out by February.
    • Plan crop rotation for the coming year. Brassicas, legumes, roots, and solanums should not follow themselves in the same bed year on year.
    • Book in bare-root deliveries for late January if you have not already.

    Maintenance

    • Wash greenhouse glass inside and out for maximum light transmission before seed sowing ramps up. A weak solution of Citrox or horticultural soap removes algae.
    • Check stored fruit (apples in trays) and stored vegetables (onions, garlic, squash) for rot and remove any affected quickly.
    • Service or sharpen mower blades before spring — it is a job you will not have time for once the lawn starts growing.
    • Clean pots, seed trays, and propagator lids with hot soapy water.

    Soil and Composting

    • Turn the compost heap if it is not frozen. Turning introduces oxygen and speeds decomposition.
    • Spread any remaining compost or well-rotted manure over empty beds.
    • Test soil pH if you have not in the last three years. Kits cost under £5 and guide liming and acidifying decisions.

    Wildlife

    • Top up bird feeders and provide fresh water daily when temperatures are low.
    • Hang bird nest boxes before the end of January — great tits, blue tits, and robins start prospecting from February.
    • Leave stems, seedheads, and leaf litter in borders for insect shelter until March.

    Frequently Asked Questions

    Is it too early to sow seeds in January?

    Outdoors, yes — January sowings in open ground rarely succeed. But under glass or on a warm windowsill, this is the correct month to start chillies, aubergines, onions from seed, and sweet peas. Indoor sowing in January gives you a three-month head start on crops that need a long season.

    When should I plant my first-early potatoes?

    Mid-March in most of the UK, late March further north. Chit the tubers from January onwards so they are ready to plant with short green shoots. Container-grown earlies can go in two to three weeks earlier under a cold frame or fleece.

    Can I prune apple trees in January?

    Yes — January is the ideal month for winter pruning of apples and pears. The tree is fully dormant, structure is easy to see without leaves, and pruning now encourages strong spring growth. Avoid pruning on days below freezing as wood is brittle.

    What vegetables can I harvest in January?

    Brussels sprouts, leeks, parsnips, swede, winter cabbage, kale, and Jerusalem artichokes are all in season. Stored crops from autumn (onions, garlic, squash, maincrop potatoes) bridge the gap. Parsnips and leeks are at their sweetest after several frosts.

    Do I need grow lights for chilli seedlings?

    Not to germinate, but yes for best results once seedlings emerge. UK daylight in January is short and weak. Without supplementary light, seedlings stretch towards the window and grow leggy. A basic LED grow light on a timer for 14 hours a day prevents this and produces stockier, healthier plants.

    When should I start off my dahlia tubers?

    Late February to early March is standard — any earlier and the shoots get too large before it is safe to plant out in May. Pot tubers into barely moist compost, keep at 10–15°C, and water sparingly until shoots are 5cm tall.

    What Next?

    Pick one job from this month’s list and actually get it done this week — bare-root stock waits for no one, and tulip bulbs still sitting in the shed will not flower next spring. If you are planning a bigger overhaul, work out your crop rotation before ordering seeds in January, and start a notebook for what worked and what flopped this season. Future-you will thank present-you.

    Have a question about something on this list, or want to share what you are planting this month? Drop a comment below — we read every one and answer as many as we can.

    For the most up-to-date AGM listings and cultivar advice, the Royal Horticultural Society publishes annual reviews.

    Related Guides

  • How to Grow Courgettes in Containers: Complete UK Beginner’s Guide

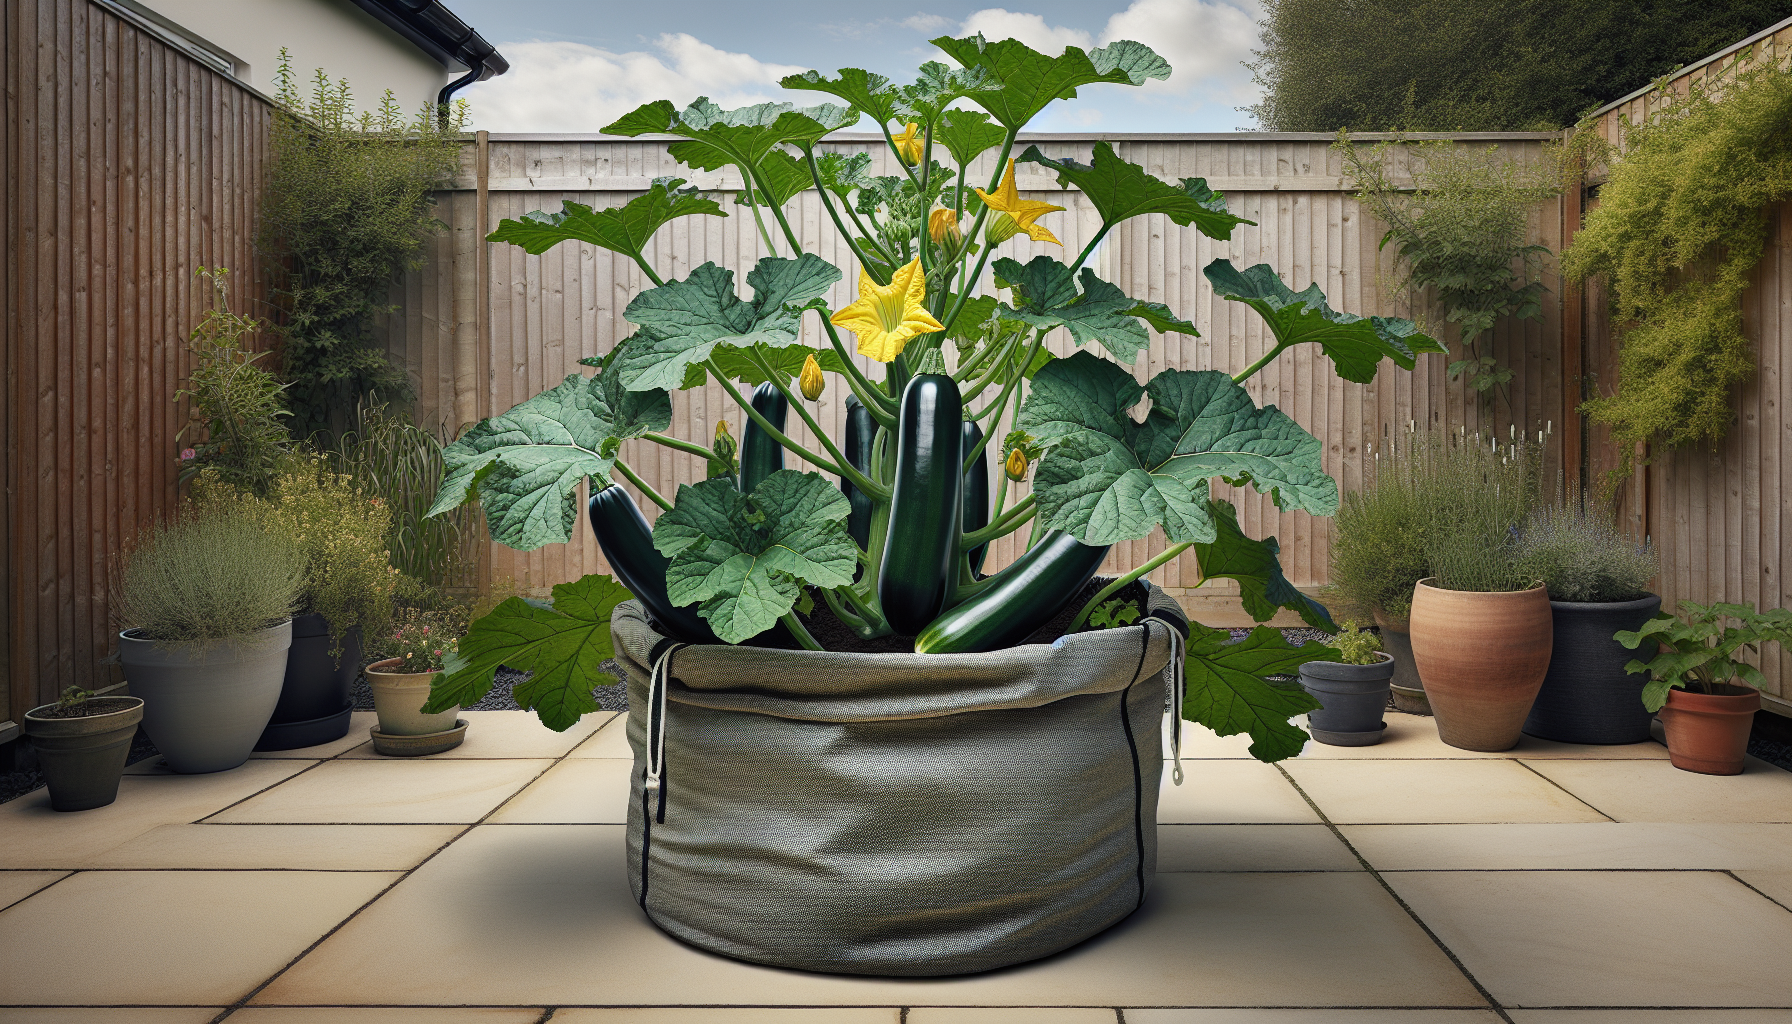
    How to Grow Courgettes in Containers: Complete UK Beginner’s Guide

    Quick Answer

    • Container size: Minimum 40 litres per plant
    • Best varieties: ‘Defender’ AGM, ‘Astia’ AGM, ‘Patio Star’ AGM
    • Sow indoors: April — on their sides, 2 cm deep
    • Plant out: Late May, after the last frost
    • Harvest: July to October
    • Expected yield: 10–20 courgettes per plant through the season

    Table of Contents

    Why Grow Courgettes in Containers

    Courgettes are one of the most productive vegetables you can grow in a pot. A single plant in a 40-litre container on a sunny patio can produce 10 to 20 fruits over a season — more than enough for a household of two. They grow fast, crop heavily from July to October, and need no complicated support structures.

    Container growing suits courgettes particularly well for several reasons:

    • Space-saving: Modern compact cultivars stay bushy rather than trailing, making them ideal for patios, balconies, and small courtyards.
    • Better drainage control: Courgettes hate waterlogged roots. Pots with drainage holes let you manage moisture far more precisely than open ground.
    • Warmth: Containers warm up faster than garden soil in spring, giving courgettes the heat they need to establish quickly.
    • Pest avoidance: Raising plants off the ground reduces slug damage, and you can position pots away from problem areas.

    The RHS rates courgettes as straightforward to grow, placing them in the “easy” category for beginners. If you have a sunny spot and a large enough pot, you already have everything you need to get started.

    Best Container Varieties

    Compact, bush-type varieties perform best in containers. Trailing types need too much space and tend to topple pots. These five cultivars all hold the RHS Award of Garden Merit (AGM), meaning they have been trialled and proven to perform reliably in UK conditions:

    ‘Defender’ AGM

    The most widely recommended variety for UK growers. ‘Defender’ has a compact, upright habit and strong resistance to cucumber mosaic virus — the most common virus affecting courgettes. It produces dark green, uniform fruits consistently from July onwards. An excellent all-rounder for containers.

    ‘Astia’ AGM

    Specifically bred for container growing. ‘Astia’ has a particularly compact growth habit with shorter internodes, meaning the plant stays tidy in a pot rather than sprawling outward. Fruits are mid-green with a smooth skin. If you only have room for one pot, this is a strong choice.

    ‘Patio Star’ AGM

    As the name suggests, this cultivar was developed for patio containers. It produces a steady crop of classic green courgettes on a notably compact plant. The smaller leaf canopy also improves airflow around the base, which helps reduce powdery mildew.

    ‘Firenze’ AGM

    An Italian-style courgette producing glossy, dark green fruits with excellent flavour. ‘Firenze’ has an open plant habit that makes harvesting straightforward — you can see and reach developing fruits easily. Particularly good eaten young at 10 cm.

    ‘El Greco’ AGM

    A distinctive pale green variety with a slightly nutty flavour when cooked. ‘El Greco’ is vigorous and prolific, producing a reliable crop through the summer months. It adds visual variety if you are growing alongside a standard dark green cultivar.

    Choosing Containers

    A minimum 40-litre pot is essential — courgettes are large, hungry plants with extensive root systems. Anything smaller restricts root growth and leads to poor fruiting.

    Pot requirements

    • Volume: 40 litres minimum; 50–60 litres is better for vigorous varieties.
    • Drainage: At least three drainage holes in the base. Courgettes need consistent moisture but will rot in standing water.
    • Material: Plastic pots retain moisture longer than terracotta, reducing how often you need to water. Terracotta looks attractive but dries out fast in summer heat.
    • Colour: Light-coloured pots absorb less heat. Dark pots in full sun can overheat roots on hot days.

    Can you use grow bags?

    Standard grow bags (around 35–40 litres) can work, but the shallow depth means you will need to water twice daily in hot weather. If using grow bags, cut a large opening in the top rather than small planting holes — this gives the courgette room to develop its broad leaf canopy. Limit to one plant per grow bag.

    Positioning

    Place containers in the sunniest spot you have. Courgettes need a minimum of six hours of direct sunlight daily for good fruiting. A south-facing or west-facing patio is ideal. Shelter from strong wind helps too, as courgette leaves are large and can suffer wind damage.

    Compost and Feeding

    Rich, moisture-retentive compost is the foundation of productive container courgettes. These are greedy plants that exhaust nutrients fast in the confined space of a pot.

    Compost mix

    Fill your container with a 70/30 blend of multi-purpose compost and garden compost (or well-rotted manure). The garden compost adds nutrients and improves water retention. If you do not have garden compost, mix in a handful of slow-release fertiliser granules at planting time.

    Add a layer of crocks, gravel, or broken polystyrene at the base of the pot to prevent drainage holes from clogging. Leave a 3 cm gap between the compost surface and the rim — this makes watering far easier without overflow.

    Feeding schedule

    • At planting: The compost mix provides enough nutrients for the first 4–6 weeks.
    • Once flowers appear: Begin feeding with a high-potassium liquid tomato feed (such as Tomorite) every 7 days. Potassium drives fruit production.
    • Fortnightly boost: Alternate the tomato feed with a liquid seaweed feed every other week. Seaweed provides trace minerals and encourages strong root development.
    • Mid-season top-up: By August, nutrients in the compost will be depleted. Top-dress with a 2 cm layer of fresh compost or well-rotted manure to sustain the plant through to autumn.

    When and How to Sow

    Sow indoors in April, plant out in late May. Courgette seeds germinate quickly — often within five to seven days — and seedlings grow fast, so resist the temptation to start too early.

    Indoor sowing (April)

    1. Fill 9 cm pots with seed compost and water thoroughly.
    2. Place one seed per pot, on its side, pushed 2 cm deep. Sowing on the side prevents water pooling on the flat seed surface, which can cause rot.
    3. Cover with a thin layer of vermiculite or compost.
    4. Place on a warm windowsill or in a propagator at 18–21 °C.
    5. Seeds germinate in 5–7 days. Once the first true leaves appear, move to a bright, slightly cooler spot to prevent leggy growth.

    Hardening off (mid-May)

    From mid-May, move seedlings outdoors during the day and bring them back inside at night. Do this for 7–10 days. This acclimatises the plant to outdoor temperatures and wind before permanent planting.

    Planting out (late May onwards)

    Wait until all risk of frost has passed — typically late May in most of England, early June in Scotland and northern England. Night temperatures should be consistently above 10 °C.

    Plant one courgette per container. These are large plants and need all the root space, water, and nutrients in the pot for themselves. Planting two per pot is a common mistake that results in poor cropping from both plants.

    Direct outdoor sowing

    If you prefer to skip indoor sowing, you can sow directly into your container from late May. Push one seed 2 cm deep on its side, water well, and cover the pot with a cloche or clear plastic bag until the seedling emerges. Direct-sown plants crop 2–3 weeks later than transplants.

    Growing Care

    Consistent watering is the single most important factor for container courgettes. Everything else — feeding, pollination, pruning — is secondary to keeping the compost evenly moist.

    Watering

    Courgettes are heavy drinkers. In summer, a container plant may need watering every single day — sometimes twice in very hot weather. Water at the base of the plant rather than over the leaves to reduce the risk of powdery mildew. Early morning watering is ideal.

    Check moisture by pushing your finger 3 cm into the compost. If it feels dry at that depth, water thoroughly until liquid runs from the drainage holes. Mulching the compost surface with a 3 cm layer of bark chips or straw helps retain moisture and keep roots cool.

    Feeding

    Follow the schedule in the Compost and Feeding section above: weekly tomato feed once flowering begins, alternating with a fortnightly seaweed feed.

    Hand pollination

    Courgettes produce separate male and female flowers on the same plant. Outdoors, bees usually handle pollination, but in sheltered urban spaces or during cool, wet spells, pollination can be poor. The symptom is small fruits that turn yellow and rot before developing.

    To hand-pollinate:

    1. Identify a male flower (thin stem, no swelling at the base) and a female flower (small swelling — the immature fruit — behind the petals).
    2. Pick the male flower, peel back its petals to expose the pollen-covered stamen.
    3. Gently dab the stamen into the centre of the female flower, transferring pollen onto the stigma.
    4. Do this in the morning when flowers are fully open.

    Removing lower leaves

    As the plant matures, remove the lowest two or three leaves to improve airflow around the base. This reduces humidity at soil level and helps prevent powdery mildew. Use clean secateurs and cut close to the main stem.

    Common Problems

    Powdery mildew

    White, powdery patches on leaves are the most common problem with courgettes, especially from mid-summer. It rarely kills the plant but weakens it and reduces cropping. Improve airflow by removing lower leaves, avoid watering over the foliage, and keep the plant well-fed to maintain vigour. Badly affected leaves can be removed entirely. Fungicide sprays based on potassium bicarbonate offer some control.

    Poor pollination and fruit rot

    Small fruits that yellow, soften, and rot before reaching usable size indicate failed pollination. Early in the season, plants often produce male flowers first with a delay before female flowers appear — this is normal. Once both flower types are present, hand-pollinate if bees are not visiting. See the hand pollination guide above.

    Slugs and snails

    Young courgette seedlings are vulnerable to slug damage, particularly in the first week after planting out. Container growing gives you an advantage — apply copper tape around the pot rim or use organic slug pellets (ferric phosphate) on the compost surface. Check plants at dusk when slugs are active.

    Cucumber mosaic virus

    Symptoms include mottled, distorted leaves and stunted, bumpy fruits. There is no cure — infected plants must be removed and binned (not composted). Prevent it by growing virus-resistant varieties such as ‘Defender’ AGM, controlling aphids (which spread the virus), and washing hands and tools between plants.

    Harvesting

    Pick courgettes at 10–15 cm long for the best flavour and texture. At this size, the skin is tender, the seeds are tiny, and the flesh is firm. Larger courgettes become watery and seedy — they are still edible but less pleasant to eat.

    How to harvest

    Use a sharp knife or secateurs to cut the stem 2–3 cm above the fruit. Twisting or pulling can damage the main plant stem. Harvest in the morning when fruits are cool and firm.

    Why regular picking matters

    Courgette plants channel energy into maturing existing fruits. If you leave a courgette on the plant to grow into a marrow, the plant slows down or stops producing new flowers. Regular picking — every two to three days during peak season — signals the plant to keep flowering and fruiting. A well-picked plant will crop for 8–10 weeks.

    Dealing with a glut

    Even one productive plant can overwhelm you with courgettes in August. Put the surplus to good use:

    • Courgette cake: Grated courgette keeps sponge cakes incredibly moist. It works as a direct substitute in carrot cake recipes.
    • Soup: Courgette and mint soup freezes well and makes a quick lunch through autumn and winter.
    • Spiralised or ribboned: Use a peeler to create thin ribbons for salads or a spiraliser for a low-carb pasta alternative.
    • Share with neighbours: A time-honoured tradition among allotment holders and container gardeners alike.

    Storing and Using

    Fridge storage

    Fresh courgettes keep for about one week in the salad drawer of the fridge. Do not wash them before storing — moisture on the skin accelerates spoilage. Place in a loose paper bag or wrap in a clean tea towel.

    Freezing

    Courgettes freeze well when prepared correctly:

    1. Wash and slice into 1 cm rounds or dice into cubes.
    2. Blanch in boiling water for 1 minute, then plunge immediately into ice water.
    3. Drain thoroughly and pat dry with kitchen paper.
    4. Spread on a baking tray in a single layer and freeze for 2 hours (open freezing prevents pieces sticking together).
    5. Transfer to labelled freezer bags. Use within 3 months for best quality.

    Frozen courgettes work best in cooked dishes — soups, stews, pasta sauces, and ratatouille. They lose their firm texture once thawed, so they are not suitable for salads after freezing.

    Month-by-Month Calendar

    Month What to Do
    March Prepare containers: clean pots, buy compost, order seeds. Choose your varieties.
    April Sow seeds indoors on their sides, 2 cm deep, in 9 cm pots. Keep at 18–21 °C.
    May Harden off seedlings from mid-month. Plant out into containers in late May once frost risk has passed. Direct-sow outdoors from late May if preferred.
    June Water regularly as plants establish. First flowers appear — usually male flowers first. Begin feeding with tomato fertiliser once female flowers open.
    July Harvest begins. Pick fruits at 10–15 cm. Water daily in warm spells. Continue weekly feeding. Hand-pollinate if fruit set is poor.
    August Peak cropping — harvest every 2–3 days. Watch for powdery mildew and remove affected lower leaves. Top-dress with fresh compost. Manage the glut.
    September Cropping slows as temperatures drop. Continue harvesting. Reduce watering slightly as growth slows. Last feeds of the season.
    October Final harvests before the first frosts. Clear spent plants, empty and clean containers. Compost the plant debris (unless diseased).

    Frequently Asked Questions

    How many courgette plants do I need?

    One or two plants are enough for most households. A single well-tended container courgette produces 10–20 fruits over the season. Two plants provide a generous surplus for sharing and preserving.

    Can I grow courgettes in a 30-litre pot?

    A 30-litre pot is below the recommended minimum. The restricted root space leads to smaller plants, reduced fruiting, and faster compost drying. Stick to 40 litres or larger for reliable results.

    Do courgettes need a support or stake?

    Bush varieties grown in containers do not need staking. The compact habit keeps them self-supporting. In very exposed or windy positions, a single bamboo cane pushed into the compost beside the main stem provides extra stability.

    Why are my courgettes turning yellow and falling off?

    This is almost always poor pollination. The fruit begins to develop but without fertilisation it aborts, turning yellow and soft. Hand-pollinate female flowers using a male flower as described in the Growing Care section.

    Can I grow courgettes on a north-facing balcony?

    Courgettes need a minimum of six hours of direct sunlight daily. A north-facing balcony in the UK typically receives insufficient light for fruiting crops. You would be better suited to leafy crops like lettuce, spinach, or herbs in that position.

    When should I stop harvesting?

    Harvest until the first autumn frosts, usually in October. Courgette foliage is frost-tender and plants will collapse after a hard frost. Pick all remaining fruits before this happens, regardless of size.

    What Next

    Now that you have a plan for container courgettes, explore more of our growing guides to make the most of your space:

    If you are growing courgettes for the first time this year, start with ‘Defender’ AGM in a 45-litre pot, follow the watering and feeding schedule above, and you will be picking your first fruits by mid-July.

    About the Author

    John Kitcher is the lead gardening writer at Plants and Gardening. He grew up mucking in on his grandfather’s Devon allotment and has spent the last fifteen years growing fruit, veg and ornamentals across three very different UK gardens — a windy coastal plot in North Cornwall, a shaded London back garden, and now a clay-heavy smallholding in the Midlands. He trials every technique covered here in his own beds and containers before writing about it, cross-references against RHS and Kew guidance, and has a soft spot for heritage tomato cultivars and anything that survives a British winter without complaint.

    Got a question about something we’ve written? Drop a comment — we read every one.

  • How to Grow Runner Beans: Complete UK Beginner’s Guide

    How to Grow Runner Beans: Complete UK Beginner’s Guide

    Quick Answer: Growing Runner Beans in the UK

    • Best varieties: ‘Enorma’ (Enorma Elite), ‘White Lady’, ‘Achievement’, ‘Firestorm’, ‘Moonlight’, ‘Liberty’ — all RHS AGM holders
    • Sow indoors: Late April to May
    • Sow outdoors: Late May to early June (after last frost)
    • Spacing: 15 cm apart, rows 60 cm apart
    • Support height: 2.4 m (8 ft) minimum
    • Harvest period: July to October
    • Expected yield: Up to 2 kg per plant in a good season

    Runner beans (Phaseolus coccineus) are one of the most productive and rewarding crops you can grow in a UK garden. A single row of plants will produce kilograms of tender pods from midsummer well into autumn, the scarlet or white flowers attract pollinators, and the climbing habit means you get a huge harvest from a small footprint. Here is everything you need to know to grow them successfully, from seed selection through to storing your surplus.

    Why Grow Runner Beans

    Runner beans deliver one of the highest yields per square metre of any UK vegetable. A well-tended row of ten plants can produce 15–20 kg of pods across the season. Beyond sheer productivity, there are several compelling reasons to give them space:

    • Beginner-friendly. Large seeds are easy to handle and germinate reliably in warm soil. There is very little that can go wrong at the sowing stage.
    • Decorative value. The vivid scarlet, white, or bicolour flowers make runner beans attractive enough for a front garden or mixed border. They were originally introduced to Britain as ornamental plants in the 17th century.
    • Soil improver. Like all legumes, runner beans fix atmospheric nitrogen through root nodules. After harvest, cut the stems at ground level and leave the roots in place to release nitrogen for the following crop.
    • Long harvest window. Regular picking keeps plants productive from July right through to the first frosts in October, giving you fresh beans for three months or more.
    • Cost saving. A £2 packet of seed replaces dozens of supermarket packs across the season.

    Best Varieties for UK Gardens

    Choose an RHS Award of Garden Merit (AGM) variety for tested reliability in UK growing conditions. The following six varieties all hold current AGM status:

    ‘Enorma’ AGM (sold as Enorma Elite)

    The classic heavy cropper. ‘Enorma’ produces long, straight, smooth pods up to 35 cm and sets reliably even in cooler summers. It is the go-to choice for allotment growers who want maximum yield from every plant. Scarlet flowers.

    ‘White Lady’ AGM

    A stringless variety with white flowers that set more readily in hot weather than red-flowered types. The pods stay tender even when slightly larger, making ‘White Lady’ forgiving if you miss a picking session. An excellent choice for beginners.

    ‘Achievement’ AGM

    The exhibition grower’s favourite. ‘Achievement’ produces exceptionally long, straight pods with a fine flavour. If you want to enter produce at your local show, this is the variety to grow. Scarlet flowers.

    ‘Firestorm’ AGM

    Bred specifically for reliable pod set, even during heatwaves. ‘Firestorm’ performs consistently across variable British summers. Red flowers. A strong choice if you have a south-facing, sun-baked plot.

    ‘Moonlight’ AGM

    Another white-flowered variety with superb pod set in warm conditions. ‘Moonlight’ produces tender, well-flavoured beans on vigorous plants. Its white flowers make it a good partner for cottage-garden planting schemes.

    ‘Liberty’ AGM

    A dependable all-rounder that crops heavily over a long season. ‘Liberty’ is well suited to the typical UK garden and performs consistently across different regions.

    Tip: White-flowered varieties (‘White Lady’, ‘Moonlight’) tend to set pods more reliably during hot, dry spells because their flowers are more attractive to pollinators in high temperatures.

    When to Sow Runner Beans

    Sow indoors from late April, or direct into the ground from late May once the risk of frost has passed. Runner beans are frost-tender and will not survive temperatures below 0°C.

    Indoor Sowing (Late April – May)

    Starting seeds indoors gives you a head start of two to three weeks. Sow one seed per 9 cm pot, 5 cm deep, in multipurpose compost. Place on a warm windowsill or in an unheated greenhouse at 12–18°C. Seeds germinate in 7–14 days. Harden off plants for a week before planting out after the last expected frost.

    Outdoor Direct Sowing (Late May – Early June)

    Direct sowing is simpler and avoids transplant shock. Wait until soil temperature is consistently above 12°C. In most of England and Wales, this means late May; in Scotland and northern England, early June is safer.

    Regional Timing

    Region Sow Indoors Plant Out / Direct Sow
    South-east England Mid–late April Mid May onwards
    Midlands & South-west Late April Late May
    Northern England & Wales Early May Late May – early June
    Scotland Mid May Early–mid June

    How to Build a Bean Support

    Runner beans climb to 2.4–3 m, so sturdy support is essential. Build your structure before sowing or planting so the supports are ready when the plants need them.

    Wigwam (Tepee) Method

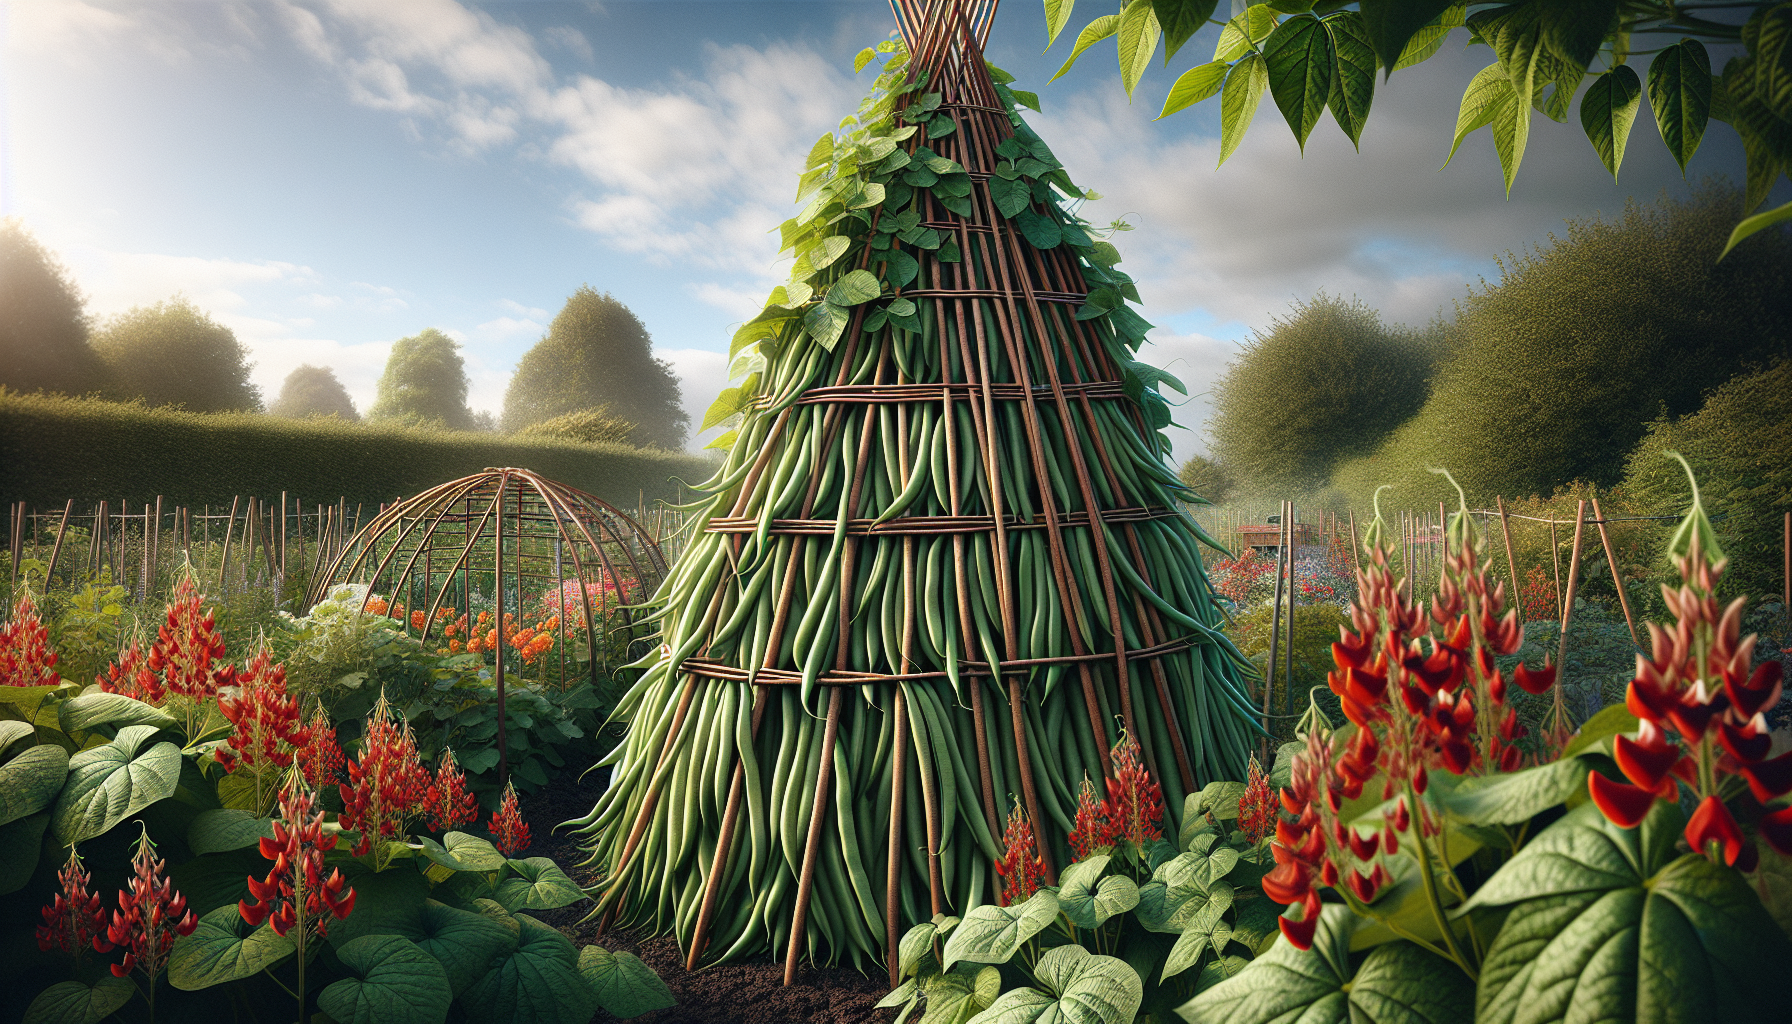
    Push 6–8 bamboo canes (2.4 m / 8 ft length) into the ground in a circle roughly 60 cm across. Angle each cane inward and tie them together at the top with strong garden twine. Sow or plant one bean at the base of each cane. Wigwams fit neatly into borders and make an attractive garden feature.

    A-Frame (Row) Method

    For maximum yield, set up a double row. Push pairs of 2.4 m canes into the ground 30 cm apart, angling each pair toward each other and crossing them about 15 cm from the top. Lay a horizontal cane along the V-shaped junction and lash everything together with twine. Space each pair of canes 30 cm apart along the row. Sow one bean at the base of each cane.

    Materials

    • Bamboo canes: 2.4 m (8 ft) is the standard length. Thicker canes (16–18 mm diameter) are more stable in wind.
    • Garden twine: Natural jute or synthetic — either works. Tie firmly at the top and add horizontal strings at 30 cm intervals to help young plants find the canes.
    • Alternatives: Hazel poles, bean netting on a frame, or a permanent metal obelisk all work well.

    Sowing and Planting

    Sow seeds 5 cm deep and 15 cm apart, with rows spaced 60 cm apart. These spacings apply whether you are sowing directly or planting out indoor-raised seedlings.

    Direct Sowing Steps

    1. Prepare the ground by digging in well-rotted manure or garden compost to a spade’s depth. Runner beans are hungry plants and perform best in rich, moisture-retentive soil.
    2. Sow two seeds at the base of each cane, 5 cm deep. Once seedlings emerge, thin to one per station by removing the weaker plant.
    3. Water the drill well before sowing if the soil is dry.
    4. Cover with cloches or fleece if a late cold snap is forecast.

    Planting Out Indoor-Raised Seedlings

    1. Begin hardening off when seedlings have two true leaves, approximately two weeks before the planned planting date.
    2. Place pots outside during the day, bringing them in at night, for 7–10 days.
    3. Plant out at the same depth as the pot. Firm the soil gently around each stem and water well.
    4. Loosely tie the stem to the cane with soft twine. The plants will begin to climb within a few days.

    Growing Care

    Consistent watering once flowering begins is the single most important factor in getting a good crop. Beyond that, runner beans need little intervention.

    Watering

    Water deeply and regularly once flowers appear. A thorough soak every two to three days is better than a light sprinkle every evening. Dry conditions at flowering cause the most common problem growers face: flower drop without pod set. Aim for at least 10 litres per metre of row at each watering. Mulching around the base retains soil moisture and reduces watering frequency.

    Feeding

    Apply a high-potash liquid feed (tomato feed is ideal) once a fortnight from the start of flowering. The potassium encourages flower and pod development. There is no need to add nitrogen feed — the plants fix their own through root nodules.

    Pinching Out

    When plants reach the top of their support, pinch out the growing tips. This redirects energy into pod production rather than upward growth and prevents the top of the wigwam or row becoming a tangled mass.

    Mulching

    Apply a 5–8 cm layer of garden compost, well-rotted manure, or straw around the base of the plants once they are established. This conserves moisture, suppresses weeds, and feeds the soil as it decomposes.

    Common Problems and Solutions

    Flower Drop (No Pods Forming)

    The most frequent complaint. Runner bean flowers drop without setting pods when the plants are too dry or temperatures are too high. Water consistently and heavily during flowering. White-flowered varieties (‘White Lady’, ‘Moonlight’) are less affected by heat-related flower drop. Misting the flowers with water on hot afternoons can also help.

    Black Bean Aphid

    Dense colonies of black aphids cluster on shoot tips and the undersides of young leaves, stunting growth and distorting pods. Pinch out heavily infested shoot tips and dispose of them. Encourage natural predators — ladybirds, hoverfly larvae, and lacewings. For severe infestations, spray with a soap-based insecticide approved for edible crops.

    Slugs and Snails

    Young plants are most vulnerable. Protect seedlings with copper tape around pots, organic slug pellets (ferric phosphate), or beer traps. Transplanting sturdy, well-hardened plants rather than relying on direct sowing reduces slug damage significantly.

    Halo Blight

    A bacterial disease causing water-soaked spots on leaves surrounded by a yellow halo. Infected pods develop greasy-looking patches. There is no chemical treatment. Remove and destroy affected plants promptly. Avoid overhead watering, rotate bean crops on a three- to four-year cycle, and buy certified disease-free seed.

    Harvesting Runner Beans

    Pick pods when they are 15–20 cm long, before the seeds inside become visible as bumps along the pod. At this stage, the beans are tender, stringless, and at their best for eating.

    • Frequency: Harvest every two to three days during peak production. Leaving mature pods on the plant signals it to stop producing new flowers.
    • Technique: Hold the stem with one hand and pull the pod downward with the other to avoid snapping the brittle stems.
    • Extending the harvest: Regular picking is the single best way to prolong cropping. A well-picked row will produce from July through to the first autumn frosts in October.
    • Overgrown pods: If any pods grow past 25 cm and become stringy, remove them. Shell out the beans inside for drying, or add them to stews — but remove these pods promptly so the plant keeps cropping.

    Container Growing

    Runner beans grow well in large containers provided you give them adequate root volume, water, and support.

    • Container size: Use a pot or trough with a minimum capacity of 40 litres. Larger is better — a half-barrel or 60-litre planter gives the roots more space and dries out less quickly.
    • Compost: Fill with a good-quality multipurpose or peat-free compost mixed with 20% perlite for drainage.
    • Support: Insert a wigwam of three to four canes directly into the container, or position the container against a wall-mounted trellis or obelisk.
    • Dwarf varieties: If space is tight, look for dwarf runner beans such as ‘Hestia’ (a compact bicolour-flowered variety reaching around 45 cm). Dwarf types do not need canes but produce smaller yields.
    • Watering: Containers dry out rapidly in summer. Water daily — sometimes twice daily in hot weather. A saucer beneath the pot helps retain moisture.
    • Feeding: Start liquid feeding with tomato feed from flowering, every 7–10 days.

    Storing and Preserving

    Freezing

    Freezing is the best way to preserve a glut of runner beans. Prepare them as you would for cooking: top and tail, remove any strings, and slice into 2–3 cm pieces. Blanch in boiling water for two minutes, plunge into ice water for two minutes, drain thoroughly, then spread on a tray and freeze. Once frozen solid, transfer to labelled freezer bags. Properly blanched and frozen beans keep for up to 12 months.

    Saving Seed for Next Year

    At the end of the season, leave a few pods on the plant until they turn brown and papery. Shell out the dried beans and store in a paper envelope in a cool, dry place over winter. These seeds are viable for two to three years. Seed saving works reliably with open-pollinated varieties but not with F1 hybrids.

    Month-by-Month Calendar

    Month Tasks
    April Sow seeds indoors in 9 cm pots. Prepare the growing site by digging in compost or well-rotted manure. Build supports.
    May Continue indoor sowing early in the month. Harden off earlier-sown plants. Direct sow outdoors from late May (southern England). Plant out indoor-raised seedlings after the last frost.
    June Direct sow outdoors in northern regions. Tie in young plants to supports. Mulch around the base. Water if dry.
    July First flowers appear. Begin regular deep watering. Start fortnightly liquid feeding with tomato feed. Watch for black bean aphid on shoot tips. First pods ready to harvest by late July.
    August Peak harvest. Pick every 2–3 days. Continue watering and feeding. Pinch out growing tips that have reached the top of supports. Freeze any surplus.
    September Harvest continues. Reduce feeding to once a fortnight. Leave a few pods to mature for seed saving if desired.
    October Final harvest before the first frosts. Collect dried seed pods. Cut plants at ground level, leaving roots in the soil to release nitrogen. Compost the top growth. Remove and store canes for next year.

    Frequently Asked Questions

    Do runner beans need full sun?

    Runner beans crop best in a sheltered spot that receives at least six hours of direct sunlight daily. They tolerate light partial shade but yield and pod quality will be reduced. Avoid exposed, windy sites — the tall plants act as a sail and the brittle stems snap easily.

    Can I grow runner beans without supports?

    Standard climbing varieties need 2.4 m supports. However, dwarf varieties such as ‘Hestia’ grow as compact bushes to around 45 cm and need no support. Yields are smaller than climbing types, but they are convenient for containers, raised beds, and small gardens.

    Why are my runner beans stringy?

    Pods become stringy when left on the plant too long. Harvest when pods are 15–20 cm long, before the seeds inside start to swell. If your pods are consistently stringy at a small size, the weather may be too hot or the plants too dry. Try ‘White Lady’, which is naturally stringless.

    How many runner bean plants do I need?

    For a family of four, 12–20 plants provide a steady supply through summer with enough surplus for freezing. A single wigwam of 8 plants makes a good starting point for a first attempt.

    Can I sow runner beans in September for an autumn crop?

    No. Runner beans need approximately 12 weeks of warm growing conditions from sowing to harvest. September sowings in the UK will not have enough warmth or daylight to produce a crop before winter. The latest viable sowing date is mid-June in southern England.

    Are runner bean flowers edible?

    Yes. The scarlet and white flowers are edible and make an attractive garnish for salads. Picking flowers does reduce pod production, so only harvest a few at a time.

    What Next?

    Ready to expand your vegetable patch? These guides will help:

    Growing runner beans for the first time? Drop a comment below and let us know how you get on — we love seeing your harvests.

    Sources: RHS — Grow runner beans; RHS AGM plant listings.

    About the Author

    John Kitcher is the lead gardening writer at Plants and Gardening. He grew up mucking in on his grandfather’s Devon allotment and has spent the last fifteen years growing fruit, veg and ornamentals across three very different UK gardens — a windy coastal plot in North Cornwall, a shaded London back garden, and now a clay-heavy smallholding in the Midlands. He trials every technique covered here in his own beds and containers before writing about it, cross-references against RHS and Kew guidance, and has a soft spot for heritage tomato cultivars and anything that survives a British winter without complaint.

    Got a question about something we’ve written? Drop a comment — we read every one.

  • What to Plant in October: Complete UK Monthly Planting Guide

    What to Plant in October: Complete UK Monthly Planting Guide

    What to plant in October — at a glance:

    • Garlic: Plant cloves now for harvest next July — the single most important October job
    • Broad beans: Autumn-sow ‘Aquadulce Claudia’ AGM for an early June crop
    • Onion sets: Autumn varieties like ‘Radar’ and ‘Senshyu Yellow’ go in now — see our guide to the best onion sets for autumn planting
    • Spring bulbs: Daffodils, crocuses, hyacinths, and alliums (but NOT tulips yet)
    • Bare-root trees: Fruit trees, roses, and hedging — the planting season begins

    Last updated: April 2026

    October is when the garden shifts gear from harvesting to planning ahead. The summer crops are finishing, the first frosts are arriving in northern regions, and the soil is still warm enough for roots to establish before winter. This is the month to plant garlic, sow overwintering beans, get spring bulbs in the ground, and take advantage of the bare-root planting season that runs through to March.

    If you only do one thing this month, plant garlic. Everything else is a bonus.

    Regional Timing Guide

    First frosts change everything. By October, northern gardens and those at altitude are already experiencing overnight frosts, while southern coastal areas may not see their first frost until November.

    Region First Frost (typical) October Priority
    South England & South Wales Late October–mid November Plant garlic, sow broad beans, final outdoor salads
    Midlands & East Anglia Mid–late October Plant garlic early, protect salads with cloches
    North England & North Wales Early–mid October Most outdoor sowing finished; focus on garlic and bulbs
    Scotland Late September–early October All salads under cover; garlic, broad beans, bare-root planting

    Garlic — The Essential October Job

    Plant garlic now and you will harvest fat, flavourful bulbs next July. Garlic needs a cold spell (vernalisation) to develop properly, which is why autumn planting produces far better results than spring planting in the UK.

    Best Varieties for Autumn Planting

    • ‘Solent Wight’ — The most reliable softneck for UK conditions. Stores well, produces large bulbs. The RHS recommends it as the best all-round choice for home growers.
    • ‘Lautrec Wight’ — Pink-skinned hardneck with excellent flavour. Slightly smaller bulbs but outstanding taste.
    • ‘Picardy Wight’ — Softneck type, good for plaiting. Strong flavour, stores through to January.
    • ‘Elephant Garlic’ — Technically a leek, but produces enormous mild-flavoured cloves. Plant deeper (10cm) than standard garlic.

    How to Plant

    1. Choose a sunny, well-drained spot. Garlic rots in waterlogged soil.
    2. Break the bulb into individual cloves. Use only the largest outer cloves — the small inner ones produce disappointing bulbs.
    3. Plant each clove pointed end up, 2–3cm below the soil surface, 15cm apart in rows 30cm apart.
    4. On heavy clay, add grit to the planting hole to improve drainage.
    5. Cover and firm down. No need to water unless the soil is bone dry.

    Tip: Buy certified virus-free seed garlic from a reputable supplier (Thompson & Morgan, Suttons, or your local garden centre). Supermarket garlic is often treated to prevent sprouting and may carry disease.

    Broad Beans for Overwintering

    Sowing broad beans in October or November gives you a crop 4–6 weeks earlier than spring-sown plants. The seedlings overwinter as small, hardy plants and burst into growth in early spring.

    Best Autumn-Sowing Varieties

    • ‘Aquadulce Claudia’ AGM — The classic overwintering variety. Extremely hardy, tall plants producing long pods of large beans. Sow October–November for harvest in late May–June.
    • ‘The Sutton’ AGM — Dwarf variety (30–45cm tall), perfect for containers, raised beds, and exposed or windy sites. Compact habit means no staking needed.
    • ‘Imperial Green Longpod’ AGM — Heavy cropping with excellent flavour. Good for freezing.

    How to Sow

    1. Sow seeds 5cm deep, 15cm apart, in double rows 20cm apart.
    2. Alternatively, sow in deep pots or root trainers under cover and plant out in February.
    3. In very cold areas (Scotland, northern hills), delay sowing until early November or sow under cloches.

    The plants will emerge within 2–3 weeks and grow slowly through winter. They are hardy to around −10°C once established, though a severe frost after germination can damage young seedlings. Cover with fleece if temperatures drop sharply in late autumn.

    Autumn Onion Sets

    Autumn-planted onion sets establish roots before winter and produce an earlier harvest (June–July) than spring-planted sets.

    Best Autumn Varieties

    • ‘Radar’ — The most popular autumn-planting onion in the UK. Japanese-type, extremely hardy, produces medium-sized golden bulbs.
    • ‘Senshyu Yellow’ — Flattened shape, mild flavour, very cold-tolerant. Harvest in June.
    • ‘Electric Red’ — Red-skinned autumn variety. Stores less well but excellent sliced raw in salads.

    How to Plant

    1. Push sets into well-drained soil so the tip just shows above the surface.
    2. Space 10cm apart in rows 25cm apart.
    3. Firm the soil around each set. Birds love pulling them out — cover with fleece netting for the first few weeks.

    Avoid planting onion sets where you grew onions, garlic, or leeks in the previous two years. Rotating your allium crops helps prevent white rot and onion fly.

    Winter Salads Under Cover

    With a cold frame, cloche, or unheated greenhouse, you can keep harvesting salad leaves through the winter months.

    What to Sow Now

    • ‘Winter Density’ AGM lettuce — The gold-standard winter lettuce. Semi-cos type, incredibly cold-tolerant, sweet and crisp. Sow now for cuts from December onward.
    • ‘Chartwell’ AGM lettuce — Butterhead type, very hardy, slow to bolt even in fluctuating winter temperatures.
    • Lamb’s lettuce (corn salad) — One of the hardiest salad crops. Will crop outdoors without cover in all but the coldest areas.
    • Winter purslane (claytonia) — Mild, slightly succulent leaves. Thrives in cold, damp conditions that would kill most salads.
    • Pak choi and mizuna — Fast-growing oriental greens. Sow under cover for baby-leaf harvests in 4–6 weeks.
    • Spinach — Autumn-sown spinach is hardier than spring-sown. Protect with fleece or a cloche and pick leaves through winter.

    Sow into modules under cover and transplant, or direct-sow into beds protected by cloches. Water sparingly — winter salads suffer more from damp and rot than from cold.

    Spring Bulb Planting

    October is the ideal month for planting most spring-flowering bulbs. The soil is still warm enough for roots to develop before winter dormancy.

    Plant Now

    • Daffodils (Narcissus) — Plant at three times the bulb depth (roughly 10–15cm). Early varieties include ‘February Gold’ and ‘Tête-à-Tête’.
    • Crocuses — Plant 8–10cm deep in drifts for a natural look. ‘Pickwick’ and ‘Remembrance’ are popular choices.
    • Hyacinths — Plant 10cm deep, 15cm apart. Excellent for pots and window boxes as well as borders.
    • Alliums — Large ornamental alliums (‘Purple Sensation’, ‘Globemaster’) need planting now for a May display. Plant 15cm deep.
    • Muscari (grape hyacinths) — Naturalise well in grass or borders. Plant 8cm deep.

    NOT Yet: Tulips

    Wait until November to plant tulips. Planting too early increases the risk of tulip fire (Botrytis tulipae), a fungal disease that thrives when soil temperatures are above 10°C. Late planting avoids this. Mark your calendar for mid-November.

    Bare-Root Trees and Shrubs

    The bare-root planting season runs from October to March. Trees and shrubs sold without pots (bare-root) are cheaper, establish faster, and offer a far wider choice of varieties than containerised plants.

    What to Plant

    • Fruit trees — Apple, pear, plum, cherry, and damson trees are all available bare-root from specialist nurseries. October planting gives roots the longest possible time to establish before spring growth.
    • Roses — Bare-root roses from reputable growers (David Austin, Peter Beales) are significantly cheaper than potted roses and often establish better.
    • Hedging — Beech, hawthorn, privet, and hornbeam hedging is most cost-effective bought bare-root in bundles. October–November is the ideal planting window.
    • Soft fruit — Currant bushes (black, red, white), gooseberries, and grape vines are all available bare-root.

    Planting Tips

    1. Soak bare roots in a bucket of water for 2–4 hours before planting.
    2. Dig a hole wider than the root spread, not deeper.
    3. Spread roots out in the hole. The graft union (swollen point on the trunk) should sit just above soil level for fruit trees.
    4. Backfill with a mix of excavated soil and compost. Firm gently.
    5. Stake fruit trees securely — use a short stake at 45° with a rubber tree tie.

    Fruit Planting and Maintenance

    New Strawberry Beds

    October is a good time to establish new strawberry plants from runners or cold-stored plants. They will root in before winter and fruit well next summer.

    • ‘Cambridge Favourite’ AGM — Reliable cropper with good flavour. The standard choice for most UK gardens.
    • ‘Florence’ AGM — Late-season variety, extends your picking season into August. Large, firm berries with excellent flavour.
    • ‘Hapil’ AGM — Heavy-cropping mid-season variety. Tolerates heavier soils better than most strawberries.

    Raspberry Canes

    Autumn is the ideal time to plant new raspberry canes. They establish well over winter.

    • ‘Glen Ample’ AGM — Spine-free canes, heavy crops of large berries. Summer-fruiting (July).
    • ‘Joan J’ AGM — Spine-free autumn-fruiting variety. Fruits from August until the first frosts.
    • ‘Polka’ AGM — Autumn-fruiting with excellent flavour. Good disease resistance.

    For autumn-fruiting varieties already in the ground, leave the canes standing until February, then cut all canes to ground level.

    Blueberry Bushes

    Plant in ericaceous (lime-free) compost in a large container or raised bed. October planting allows root establishment before spring.

    • ‘Duke’ AGM — Early season, reliable cropper. Self-fertile but fruits better with a second variety nearby.
    • ‘Spartan’ AGM — Large, flavourful berries. Good autumn leaf colour as a bonus.

    Green Manures

    Bare soil over winter loses nutrients through leaching, develops a crust, and encourages weeds. Green manures solve all three problems at once.

    Best October Choices

    • Winter field beans — Fix nitrogen in the soil. Very hardy, thick growth suppresses weeds. Dig in during March.
    • Crimson clover — Nitrogen-fixing legume with attractive red flowers. Hardy through most UK winters.
    • Phacelia — Fast-growing, excellent for bees if it flowers before being dug in. Less hardy — killed off by hard frosts, leaving a natural mulch.
    • Winter tare (vetch) — Vigorous nitrogen-fixer. Good for heavy soils. Cut and incorporate in early spring.
    • Grazing rye — Extremely hardy grass that prevents soil erosion and suppresses weeds. Dig in 4 weeks before planting.

    Broadcast seed thickly over cleared beds, rake in lightly, and water if the soil is dry. No other care needed until you dig them in next spring.

    October Garden Tasks

    Lawn Care

    October is prime time for lawn work — our autumn lawn maintenance guide covers the full routine in the right order.

    • Scarify to remove thatch (dead grass and moss build-up)
    • Aerate compacted areas with a garden fork or hollow-tine aerator
    • Overseed bare patches while the soil is still warm enough for germination
    • Apply an autumn lawn feed (high potassium, low nitrogen) to toughen grass before winter

    Compost and Leaf Mould

    • Rake fallen leaves and pile them into a wire-mesh bin or black bags (punch a few holes) to make leaf mould. It takes 1–2 years but produces the finest soil conditioner available.
    • Turn your compost heap to speed decomposition. Add a mix of fallen leaves (carbon) and spent crop material (nitrogen).

    Greenhouse Maintenance

    • Clean glass or polycarbonate panels inside and out to maximise winter light
    • Check door and vent seals for gaps
    • Install a minimum-maximum thermometer to monitor conditions
    • Move tender plants (citrus, pelargoniums, fuchsias) under cover before the first hard frost

    General Tasks

    • Lift and store dahlia tubers after the first frost blackens the foliage. Dry upside down, then store in just-damp compost in a frost-free place.
    • Divide herbaceous perennials — October is ideal for splitting overcrowded clumps of hostas, hemerocallis, and sedums.
    • Net fruit bushes to prevent birds stripping buds over winter.
    • Insulate outdoor taps and drain hoses to prevent frost damage.
    • Plant up containers with winter bedding — pansies, violas, heathers, and ornamental cabbages provide colour through winter.

    What NOT to Plant in October

    • Tender crops — Tomatoes, peppers, courgettes, cucumbers, and aubergines are finished for the year. Clear the plants, compost the foliage (not if diseased), and prepare beds for next year.
    • Tulips — Wait until November. Early planting risks tulip fire disease. This is one of the few bulbs where later really is better.
    • Most bedding plants — Petunias, marigolds, and other summer annuals will not survive frost. Replace with winter-hardy alternatives (pansies, violas, cyclamen).
    • Half-hardy herbs from seed — Basil, coriander, and dill will not germinate reliably in October temperatures. Wait until spring.

    Frequently Asked Questions

    Can I still sow carrots in October?

    Not outdoors. Carrot seeds need soil temperatures above 7°C to germinate, and October soil is usually too cold. If you have carrots already growing, cover them with a thick layer of straw mulch to continue harvesting through early winter. Fresh sowings are better left until March.

    When exactly should I plant garlic?

    Any time from mid-October to mid-November in most of the UK. The ideal is late October — the soil is still warm enough for initial root growth, and the cloves get a full winter cold period. You can plant as late as February, but autumn-planted garlic consistently produces larger bulbs.

    Should I cut back perennials in October?

    Cut back herbaceous perennials that have finished flowering and look untidy. However, leave some seed heads standing for wildlife — birds feed on them through winter, and hollow stems provide shelter for overwintering insects. A garden that looks slightly wild in winter is actually supporting biodiversity.

    Do I need to protect autumn-sown broad beans from frost?

    Established broad bean seedlings are hardy to around −10°C. However, newly germinated seedlings (under 4 weeks old) are more vulnerable. If a sharp frost is forecast shortly after germination, cover with horticultural fleece overnight. Remove it during the day to prevent the plants becoming leggy.

    Is October too late to start a compost heap?

    Not at all. October is actually excellent for starting compost because you have a glut of material: fallen leaves, spent crop plants, grass clippings, and kitchen waste. The heap will decompose slowly over winter and be ready to use by next summer. Mix green material (nitrogen) with brown material (carbon) in roughly equal amounts.

    Can I plant fruit trees in pots in October?

    Yes. Bare-root fruit trees on dwarfing rootstocks (M26 or M27 for apples, Pixy for plums) grow well in large containers (50+ litres). October planting gives roots time to establish before the tree needs to support spring growth. Use John Innes No. 3 compost for weight and stability.

    What Next

    Keep your garden productive through autumn and beyond:

    About the Author

    John Kitcher is the lead gardening writer at Plants and Gardening. He grew up mucking in on his grandfather’s Devon allotment and has spent the last fifteen years growing fruit, veg and ornamentals across three very different UK gardens — a windy coastal plot in North Cornwall, a shaded London back garden, and now a clay-heavy smallholding in the Midlands. He trials every technique covered here in his own beds and containers before writing about it, cross-references against RHS and Kew guidance, and has a soft spot for heritage tomato cultivars and anything that survives a British winter without complaint.

    Got a question about something we’ve written? Drop a comment — we read every one.

  • How to Grow Carrots in Containers: Complete UK Beginner’s Guide

    How to Grow Carrots in Containers: Complete UK Beginner’s Guide


    Quick Answer

    You can absolutely grow carrots in pots in the UK. Use a container at least 30 cm deep (45 cm for maincrop varieties), fill with sieved multipurpose compost mixed with perlite, and sow seed directly from March to July. Short-rooted cultivars such as ‘Amsterdam Forcing 3’ (AGM) and ‘Adelaide’ (AGM) are ideal for containers and ready to harvest in as little as 10–12 weeks.

    Why Grow Carrots in Containers

    Growing carrots in pots is one of the smartest moves a UK gardener can make, especially if your garden soil is heavy clay or riddled with stones. Here’s why containers work so well:

    • Carrot fly defence built in. Carrot fly (Psila rosae) is the number-one pest for UK carrot growers. These low-flying insects rarely rise above 60 cm, so a pot on a table or raised surface puts your crop out of reach without any netting at all.
    • No need for stone-free soil. Stones, compacted clay and fresh manure all cause forked, stunted roots. A container filled with sieved compost gives carrots the loose, fine-textured growing medium they need.
    • Perfect for small spaces. A single 40 cm pot on a balcony or patio can produce 20–30 carrots per sowing. If you’re starting a vegetable garden as a beginner, carrots in containers are a brilliant first crop.
    • Easier succession sowing. With multiple pots, you can sow a fresh batch every three to four weeks from March through July, giving you carrots from June right through to November. For the rest of the month’s sowings, see our July planting guide.
    • Move them to follow the sun. Containers can be repositioned throughout the season. Start them in the sunniest spot in spring, then shift to partial shade during a scorching July to prevent the compost drying out too quickly.
    • Less weeding. Container compost is largely weed-free compared to open ground, so you spend less time on maintenance and more time watching your carrots grow.

    Best Carrot Varieties for Containers UK

    Short-rooted and round cultivars are the natural choice for pots because they don’t need deep compost to develop properly. The RHS Award of Garden Merit (AGM) is a reliable indicator of proven performance in UK conditions.

    Short-Rooted Varieties (30 cm containers)

    • ‘Amsterdam Forcing 3’ (AGM) — A classic early variety, 10–15 cm roots, sweet flavour. Ideal for the earliest sowings under cloches from late February.
    • ‘Adelaide’ (AGM) — Quick to mature, smooth cylindrical roots. Excellent for succession sowing in pots.
    • ‘Nairobi’ (AGM) — A reliable Nantes-type with good disease resistance and uniform roots around 15 cm long.
    • ‘Artemis’ (AGM) — Smooth skin, strong tops for easy pulling, and consistent performance in containers.

    Round Varieties (even shallower containers work)

    • ‘Romance’ (AGM) — A Paris Market type producing small, round roots perfect for windowsill containers and growing with children.

    Maincrop Varieties (45 cm+ containers)

    • ‘Bangor’ (AGM) — A long Berlicum type that stores exceptionally well. Needs a deeper container but rewards patience with large, smooth roots.
    • ‘Maestro’ (AGM) — Good carrot fly tolerance and vigorous growth. Sow from April for autumn harvest.
    • ‘Flyaway’ (AGM) — Bred specifically for carrot fly resistance. A Nantes-type maincrop that performs well in larger pots.

    Popular varieties such as ‘Chantenay Red Cored’ and ‘Autumn King’ are perfectly good choices too — they simply haven’t received the AGM designation.

    Month-by-Month UK Growing Calendar

    Timings below are for most of England and Wales. In Scotland and northern England, shift sowing dates forward by two to three weeks. In mild south-west areas, you may start a fortnight earlier.

    Month Activity Notes
    February Early sowing under cover Only ‘Amsterdam Forcing 3’ or similar early cultivars, with cloche or fleece protection
    March–April Main sowing begins Sow outdoors once soil temp reaches 7°C. Short-rooted varieties first
    May–June Succession sowing + thin earlier sowings Sow maincrop varieties (‘Bangor’, ‘Maestro’) for autumn harvest
    July Final sowing Quick-maturing varieties only (‘Adelaide’, ‘Amsterdam Forcing 3’)
    June–August Harvest early varieties Pull when roots are finger-thick; baby carrots are sweeter
    September–November Harvest maincrop varieties Lift before hard frosts or protect containers with fleece

    Choosing Containers and Compost

    Container Size

    Depth matters more than width for carrots. As an absolute minimum:

    • Short-rooted varieties: 30 cm deep
    • Maincrop varieties: 45 cm deep
    • Width: At least 30 cm diameter — wider is better for yield

    Traditional terracotta pots, plastic planters, grow bags, and even old buckets with drainage holes drilled in the base all work well. Browse our guide to the best containers and pots for beginners for more options.

    Drainage

    Carrots sitting in waterlogged compost will rot. Every container must have drainage holes in the base. Add a 2–3 cm layer of crocks, gravel, or broken polystyrene at the bottom to keep holes clear.

    Compost Mix

    Use sieved multipurpose compost — remove any lumps, twigs or bark pieces that would deflect growing roots and cause forking. Mix in roughly 20% perlite or vermiculite by volume to improve drainage and keep the compost open and airy. Avoid garden soil (too heavy and may harbour pests) and steer clear of fresh manure or high-nitrogen composts, which cause hairy, forked roots. See our guide to the best compost for container gardening for recommended products.

    How to Sow Carrot Seeds

    Always direct sow. Carrots develop a single taproot and don’t transplant well — disturbing the root causes forking or stunted growth. Sow where they’ll grow.

    1. Fill your container to within 2 cm of the rim with your prepared compost mix. Firm gently — don’t compact it.
    2. Water the compost thoroughly before sowing. This settles the surface and means you won’t wash seeds around afterwards.
    3. Make shallow drills about 1 cm deep. In a round pot, draw drills across the surface spaced 10–15 cm apart. In a rectangular trough, run drills lengthways.
    4. Sow thinly. Carrot seed is tiny, so tip a small amount into your palm and pinch individual seeds along the drill roughly 1–2 cm apart. Seed tapes are a useful alternative if you find this fiddly.
    5. Cover with sieved compost or vermiculite to exactly 1 cm depth. Pat down lightly.
    6. Water gently with a fine rose to avoid disturbing seeds. Keep the compost consistently moist until germination, which typically takes 14–21 days.

    Tip: Carrot seed germinates slowly. Sow a few radish seeds alongside as row markers — they’ll emerge in days and show you where your carrot rows are. The radishes will be harvested long before the carrots need the space.

    Dealing with slow germination: In cool spring weather, cover the pot with a sheet of glass, clear plastic, or cling film to raise the compost temperature and retain moisture. Remove the cover as soon as the first seedlings appear to prevent them from becoming leggy.

    Ongoing Care — Watering, Thinning and Feeding

    Watering

    Consistent moisture is the single most important factor for smooth, well-shaped carrots. Allow the compost to dry out and the roots crack; overwater and they rot. Aim to keep the compost evenly moist — not sodden. In summer, containers may need watering daily, especially terracotta pots which dry out faster than plastic.

    Thinning

    Once seedlings reach about 5 cm tall, thin them to 3–5 cm apart. This is essential — overcrowded carrots produce tiny, misshapen roots. Two important tips:

    • Thin in the evening when carrot fly is less active. The bruised foliage releases scent that attracts the pest.
    • Pinch seedlings off at soil level rather than pulling them out, to minimise root disturbance and scent release.
    • Water immediately after thinning to settle the compost around remaining roots.

    Feeding

    Less is more. Carrots need very little additional feeding — the nutrients in fresh multipurpose compost are sufficient for the entire growing season. If your compost is old or spent, a single application of a balanced liquid feed (such as Maxicrop seaweed extract) at half strength around 6 weeks after sowing is plenty. Avoid high-nitrogen feeds — excess nitrogen produces lush green tops and forked, hairy roots with poor flavour.

    Dealing with Carrot Fly

    Carrot fly is the most damaging pest for UK carrot growers. The adult flies lay eggs at the base of carrot plants, and the resulting larvae tunnel into roots, leaving brown-black tracks and ruining the crop. There are two main generations per year: May–June and August–September.

    Physical Barriers

    The RHS recommends covering crops with fine-mesh insect netting (such as Enviromesh) from sowing through to harvest. Carrot fly is a weak, low flier — a vertical barrier of fine fleece or mesh at least 60 cm high around your container is effective. Alternatively, drape netting directly over the pot, secured at the edges.

    The Container Advantage

    Growing in containers gives you a head start. Place pots on a table, bench, or wall at waist height and the flies simply can’t reach them. This is the single easiest way to grow carrot-fly-free carrots without any barriers at all.

    Resistant Varieties

    ‘Flyaway’ (AGM) and ‘Resistafly’ have been bred with reduced susceptibility to carrot fly. They’re not immune, but combined with container growing and elevation, they give you excellent protection.

    Companion Planting

    Interplanting with strong-scented alliums (spring onions, chives) can help mask the carrot scent that attracts the fly. More on this below.

    Harvesting and Storing Carrots

    When to Harvest

    Carrots are ready when the top of the root (the “shoulder”) is visible at the compost surface and measures roughly 1.5–2 cm across for short varieties. Early types sown in March can be pulled from June. You can harvest at any size — baby carrots pulled young are tender and sweet.

    How to Harvest

    Water the container an hour before pulling to soften the compost. Grip the foliage at the crown and pull straight up with a gentle twist. In containers, carrots come out far more easily than from open ground. If you’re growing in a deep pot and the roots resist, tip the whole container on its side and slide the root ball out — then pick out individual carrots by hand.

    Don’t worry about harvesting the entire pot at once. Pull the largest roots first and leave smaller ones to continue growing for another week or two. This staggered approach gives you fresh carrots over a longer period rather than a single glut.

    Storing

    • Short term (2–3 weeks): Remove the green tops (they draw moisture from the root), brush off loose compost, and store unwashed in the fridge in a paper bag.
    • Long term (3–4 months): Layer carrots in a box of damp sand in a cool, frost-free shed or garage. Don’t let roots touch each other.
    • Freezing: Peel, dice or slice, blanch in boiling water for 3 minutes, plunge into iced water, drain, then freeze in bags. Frozen carrots keep for up to 12 months.

    Companion Planting

    Choosing the right neighbours for your container carrots can deter pests and make the most of limited space.

    Good Companions

    • Spring onions — Their scent masks the carrot smell from carrot fly. Sow a ring around the edge of the pot.
    • Chives — Same allium-family benefit, plus you get a perennial herb that comes back each year.
    • Leeks — Another allium; effective at confusing carrot fly when interplanted closely.
    • Mint — Strong scent deters multiple pests. Grow mint in its own pot alongside (see our guide to growing mint in pots) — it’s too vigorous to share a container.

    Avoid in the Same Container

    • Dill — Can cross-pollinate with carrots (both are umbellifers) and may attract the same pests.
    • Parsnips — Also susceptible to carrot fly, so combining them doubles the attraction signal.
    • Celeriac and celery — Fellow umbellifers that can share diseases.

    Frequently Asked Questions

    How deep should a container be for carrots?
    At least 30 cm for short-rooted varieties like ‘Amsterdam Forcing 3’ and ‘Adelaide’. For maincrop types such as ‘Bangor’, use a container at least 45 cm deep to give the taproot room to develop without hitting the bottom.
    Can I grow carrots in grow bags?
    Yes — standard grow bags work for short-rooted varieties, though most are only 20–25 cm deep. Stand the bag upright and cut the top open for more depth, or choose a deeper fabric pot instead.
    Why are my carrots forked?
    The most common causes are stones or lumps in the compost, fresh manure, too much nitrogen, or root disturbance during transplanting or rough thinning. Use sieved, lump-free compost and always direct sow.
    Do I need to feed carrots in pots?
    Rarely. Fresh multipurpose compost provides enough nutrients for the full growing season. A single half-strength liquid seaweed feed at six weeks is the most you should apply. Excess nitrogen causes lush tops and poor roots.
    Can I sow carrots in autumn for a winter harvest?
    A late July sowing of a quick-maturing variety such as ‘Adelaide’ (AGM) can produce a small harvest in October–November. True autumn sowing (September onwards) rarely works outdoors in the UK — temperatures are too low for reliable germination. A cold frame or unheated greenhouse extends the season somewhat.

    What Next

    Now that you know how to grow carrots in pots, here are some logical next steps:

    Affiliate disclosure: Some links in this article are affiliate links. If you buy through them, we may earn a small commission at no extra cost to you. This helps us keep plantsandgardening.com running. We only recommend products we genuinely believe are useful for UK gardeners. See our full disclosure policy for details.

    About the Author

    John Kitcher is the lead gardening writer at Plants and Gardening. He grew up mucking in on his grandfather’s Devon allotment and has spent the last fifteen years growing fruit, veg and ornamentals across three very different UK gardens — a windy coastal plot in North Cornwall, a shaded London back garden, and now a clay-heavy smallholding in the Midlands. He trials every technique covered here in his own beds and containers before writing about it, cross-references against RHS and Kew guidance, and has a soft spot for heritage tomato cultivars and anything that survives a British winter without complaint.

    Got a question about something we’ve written? Drop a comment — we read every one.

  • How to Grow Tomatoes in Pots: Complete UK Container Guide

    How to Grow Tomatoes in Pots: Complete UK Container Guide

    Quick answer: You can grow tomatoes in containers in any UK garden, balcony or patio. Use a pot at least 30 cm wide (10 litres) for bush varieties or 40 cm+ for cordons, fill with peat-free multi-purpose compost mixed with perlite, sow indoors from late February, plant outside after the last frost in late May or June, and feed weekly with a high-potash tomato fertiliser once the first truss sets. Most container tomatoes crop from July through October.

    Growing tomatoes in containers is one of the most rewarding things you can do as a UK gardener — even if your “garden” is a south-facing doorstep. Pots give you total control over compost quality, drainage and warmth, which means healthier plants and earlier harvests compared with open ground in our sometimes reluctant summers.

    This guide covers everything: the best varieties for pots, a month-by-month calendar, container choices, planting, feeding, troubleshooting and harvesting. Whether you are a complete beginner or an experienced grower switching to containers, you will find practical, RHS-backed advice below.

    Why Grow Tomatoes in Containers

    Containers are not a compromise — for tomatoes in the UK climate, they often outperform open ground. Here is why.

    • Warmth control. Dark-coloured pots on a sunny patio absorb heat and warm the root zone faster than border soil. Tomatoes are warm-season crops native to Central and South America, so every extra degree counts in a British summer.
    • Space efficiency. A single 40 cm pot on a balcony can produce 4–5 kg of cherry tomatoes over a season. You do not need an allotment.
    • Mobility. You can wheel pots into a greenhouse, porch or against a south-facing wall when night temperatures drop. This extends the cropping season by two to three weeks at each end.
    • Soil control. Container compost drains freely, holds consistent moisture and carries no soil-borne diseases. If you have had blight or verticillium wilt in your borders, pots give you a clean start each year.
    • Perfect for beginners. Fewer variables make container growing more predictable. If you are starting a vegetable garden for the first time, tomatoes in pots are one of the best entry points.

    Best Tomato Varieties for Containers UK

    Tomato varieties fall into two growth habits, and container success depends on matching the right habit to the right pot.

    Bush (Determinate) Varieties — Best for Smaller Pots

    Bush tomatoes stop growing at a set height, need no staking and produce their crop in a concentrated flush. They are ideal for pots from 30 cm wide, hanging baskets and windowboxes.

    • ‘Tumbling Tom Red’ — a trailing cherry variety bred for hanging baskets and the edges of raised beds. Heavy cropper with sweet, bite-sized fruits.
    • ‘Totem’ — very compact (30–40 cm tall), bred specifically for patio containers. Produces good-sized salad tomatoes on a dwarf plant.
    • ‘Gold Nugget’ (RHS AGM) — early, reliable bush cherry with golden-yellow fruits. One of the earliest to ripen outdoors in the UK, which is valuable in shorter growing seasons.
    • ‘Roma’ — a determinate plum type for sauces and passata. Meaty, low-moisture flesh.

    Cordon (Indeterminate) Varieties — Best for Larger Containers

    Cordons keep growing upward all season and need a cane or stake for support, plus regular side-shoot removal. They crop over a longer period and generally produce more fruit per plant — but they need a pot of at least 40 cm and a sturdy support.

    • ‘Sungold’ (RHS AGM) — widely regarded as the best-tasting cherry tomato. Intensely sweet orange fruits. Vigorous grower; give it a tall cane and plenty of feed.
    • ‘Shirley’ (RHS AGM) — a classic medium-sized cordon with excellent disease resistance. Reliable in cooler UK summers and a strong choice for unheated greenhouses or sheltered patios.
    • ‘Gardener’s Delight’ — one of the UK’s most popular cherry tomatoes for flavour. Produces long trusses of small, tangy-sweet red fruits throughout summer.
    • ‘Moneymaker’ — a heritage variety still widely grown. Medium-sized, reliably productive fruits. Not the most flavoursome modern option, but forgiving for beginners.
    • ‘Tigerella’ (RHS AGM) — distinctive red-and-yellow striped fruits with a tangy flavour. A reliable cropper and a talking point at the table.
    • ‘Sweet Aperitif’ (RHS AGM) — exceptionally sweet red cherry, often topping RHS taste trials. Vigorous cordon that crops heavily in a good summer.
    • ‘Marmande’ (RHS AGM) — a beefsteak type producing large, ribbed fruits perfect for slicing. Needs a large container (45 cm+) and a warm, sheltered spot.
    • ‘Floridity’ (RHS AGM) — a productive plum tomato with firm, flavourful fruits. Excellent for roasting and sauces.

    For a full guide to starting your own plants, see our tomato seed-sowing guide.

    Month-by-Month Growing Calendar

    This calendar assumes an average UK location (roughly RHS hardiness rating H3–H4 areas). Northern Scotland and exposed highland gardens should shift everything about two weeks later.

    Month Task
    February Sow seeds indoors on a warm windowsill or in a heated propagator at 18–21 °C. Use small pots or module trays filled with seed compost. Cover lightly and keep moist.
    March Seedlings emerge in 7–14 days. Move to the brightest windowsill or a grow light. When the first true leaves appear, prick out into individual 9 cm pots.
    April Pot on into 12–15 cm pots as roots fill the smaller ones. Begin hardening off in a cold frame or sheltered outdoor spot during the day if temperatures exceed 10 °C.
    May Continue hardening off. In southern England, plant out into final containers from mid-May under fleece. Further north, wait until late May or early June. Have fleece ready for late frosts.
    June Plant out into final containers if not done in May. Insert canes or supports for cordon types. Begin pinching out sideshoots on cordons. Water regularly.
    July First trusses set fruit. Start weekly liquid feeding with a high-potash tomato fertiliser (e.g., Tomorite). Water daily in warm weather — sometimes twice on hot days. First cherry tomatoes may ripen by late July.
    August Peak harvest month. Pick fruits as they fully colour. Remove any yellowing lower leaves to improve airflow. “Stop” cordon plants by pinching out the growing tip after 4–5 trusses to redirect energy into ripening.
    September Continue harvesting. Remove any leaves shading ripening trusses. Move pots to the warmest, most sheltered spot (against a south-facing wall). Reduce watering slightly as growth slows.
    October Final harvest. Pick any remaining green tomatoes and ripen indoors in a paper bag with a banana (the ethylene gas speeds ripening). Clear spent plants and compost the foliage unless blight was present.

    Choosing Containers and Compost

    Container Size

    This is the single most common mistake. Too-small pots dry out in hours, restrict roots and slash yields. The RHS recommends a minimum of 23 cm (9 in) pots for tomatoes, but for container growing outdoors you should go bigger.

    • Bush varieties: minimum 30 cm diameter / 10 litres. A 15-litre pot is better.
    • Cordon varieties: minimum 40 cm diameter / 20 litres. Larger is always better — a 30–40 litre pot gives the most consistent results.
    • Grow bags: a standard grow bag (35–40 litres) supports two cordon plants or three bush plants. Stand the bag in a tray to catch runoff and cut drainage slits in the bottom corners.

    Dark-coloured pots absorb more heat, which tomatoes appreciate. Fabric grow bags (available from Amazon and Wilko) are lightweight and provide excellent drainage and air-pruning of roots. Terracotta looks beautiful but dries out faster than plastic — line the inside with a piece of bin liner (with drainage holes at the bottom) to slow moisture loss.

    For a full comparison of pots and planters, see our guide to the best containers for beginners.

    Drainage

    Every container must have drainage holes. If your decorative pot lacks them, drill or punch at least four 10 mm holes in the base. Stand pots on “pot feet” or a couple of bricks to ensure water escapes freely — waterlogged roots are a death sentence for tomatoes.

    Compost

    Use a good-quality peat-free multi-purpose compost mixed with roughly 20% perlite or horticultural grit for drainage. Avoid garden soil — it compacts in containers, drains poorly and may harbour diseases.

    Some growers add a slow-release fertiliser (such as Osmocote) at planting time to supplement liquid feeds later. This is optional but helpful if you occasionally forget a weekly feed.

    How to Plant Tomatoes in Containers

    When to Plant Out

    Tomatoes are frost-tender — a single night below 0 °C will kill an unprotected plant. In most of England and Wales, the last frost date falls between mid-May and early June. In Scotland and northern England, early to mid-June is safer.

    The RHS advises not to plant tomatoes outdoors until night temperatures are reliably above 10 °C. If in doubt, keep plants in their intermediate pots for another week rather than risk a late frost.

    How to Plant

    1. Fill your container with compost to about 5 cm below the rim (this gap prevents water overflowing when you irrigate).
    2. Bury the stem deep. Tomatoes root along buried stems, which produces a stronger root system. Remove the lowest pair of leaves and plant the seedling up to the next leaf node — roughly 5–8 cm deeper than it sat in the previous pot.
    3. Water in thoroughly until water runs from the drainage holes. This settles the compost around the roots and eliminates air pockets.
    4. Insert a cane or support immediately for cordon varieties. Pushing a cane in later risks damaging established roots. A 1.5 m bamboo cane is usually sufficient for outdoor cordons.
    5. Mulch the surface with a 2–3 cm layer of bark chips or straw. This conserves moisture, suppresses weeds and keeps the compost surface cooler on hot days.

    Ongoing Care — Watering, Feeding and Training

    Watering

    Inconsistent watering is the number-one cause of problems in container tomatoes. The compost should stay evenly moist — never bone-dry, never waterlogged.

    • In warm weather (above 20 °C), water once or twice daily. Early morning is best; a second watering in the evening if the compost has dried out.
    • Water at the base of the plant, not over the foliage. Wet leaves encourage fungal diseases.
    • Erratic watering — a dry spell followed by a flood — causes blossom end rot (a calcium-uptake problem, not a calcium deficiency in the compost) and fruit splitting. Consistency matters more than volume.

    Feeding

    Once the first truss of flowers sets small green fruits, begin feeding weekly with a high-potash liquid tomato fertiliser. Potassium drives fruit production and flavour.

    • Tomorite (Levington) and Chempak Tomato Food are widely available at garden centres, B&Q, Wilko and online.
    • Dilute according to the label — overfeeding causes lush leaf growth at the expense of fruit.
    • Some growers switch to feeding twice weekly in peak cropping (August). Watch the plant: if lower leaves yellow while the plant is fruiting heavily, it may need more feed.

    Training Cordon Varieties

    • Pinch out sideshoots — these are the small shoots that appear in the “V” between the main stem and each leaf branch. Remove them when they are 2–3 cm long by snapping sideways with your fingers. This directs the plant’s energy into fruit rather than foliage.
    • Tie the main stem loosely to the cane with soft string or tomato clips as it grows. Check ties weekly to avoid constriction.
    • Stop the plant in August by pinching out the growing tip two leaves above the highest truss you expect to ripen. In most UK outdoor conditions, 4–5 trusses per plant is realistic.

    Bush varieties need none of this — let them grow naturally and support branches with a low cage or stakes if they flop under the weight of fruit.

    Harvesting and Ripening

    Pick tomatoes when they are fully coloured and come away from the truss with a gentle twist. Cherry varieties often ripen unevenly on the truss — pick individual fruits as they colour rather than waiting for the whole truss.

    For the best flavour, eat tomatoes at room temperature, not fridge-cold. The RHS notes that refrigeration suppresses volatile compounds responsible for “tomato taste.”

    Ripening Green Tomatoes at the End of the Season

    In October, when night temperatures drop and ripening stalls outdoors, harvest remaining green tomatoes and ripen them indoors:

    • Place green tomatoes in a paper bag or cardboard box with a ripe banana. The banana releases ethylene gas, which triggers ripening.
    • Store at room temperature (18–21 °C) in a dark spot. Check every few days.
    • Most green tomatoes will colour up within one to three weeks.
    • Alternatively, uproot the entire plant and hang it upside down in a frost-free garage or shed — the fruits will continue to ripen on the vine.

    Common Problems

    Blossom End Rot

    A dark, sunken patch at the base of the fruit. Caused by irregular watering disrupting calcium uptake — not a lack of calcium in the compost. The fix is consistent, even watering. Affected fruits are safe to eat if you cut off the damaged area.

    Tomato Blight (Phytophthora infestans)

    Brown patches on leaves and stems, often in wet summers from mid-July onward. Container plants on a patio have lower risk than those in open ground because air circulation is better and foliage stays drier. Choose resistant varieties (look for “blight tolerant” on the label) and avoid overhead watering. Remove and destroy affected foliage immediately — do not compost it.

    Aphids (Greenfly and Blackfly)

    Cluster on soft shoot tips and undersides of leaves. Squash small infestations by hand. Encourage ladybirds, lacewings and hoverflies. A strong jet of water dislodges them. Organic sprays (fatty acid or neem-based) work as a last resort.

    Glasshouse Whitefly

    Tiny white-winged insects that fly up in clouds when the plant is disturbed. More common under glass than outdoors. Yellow sticky traps reduce populations. The biological control Encarsia formosa is effective in greenhouses.

    Fruit Splitting

    Caused by a sudden intake of water after a dry spell — the fruit swells faster than the skin can stretch. The prevention is the same as for blossom end rot: water consistently. Split fruits are perfectly edible but use them quickly as they spoil faster.

    Leaf Curl

    Upward curling of lower leaves without any discolouration is usually a physiological response to temperature swings or heavy fruit set. It is not a disease. If leaves are curling and also yellowing or developing spots, investigate for viral or nutritional issues.

    Companion Planting

    Growing certain plants alongside tomatoes in the same container or in neighbouring pots can benefit your crop. Some of these relationships are well-established in traditional gardening, while others have varying degrees of scientific backing.

    • Basil — the classic tomato companion. Gardening tradition holds that basil improves tomato flavour, though this is not scientifically proven. What is established is that basil’s strong scent can confuse some pest insects, and both plants enjoy the same warm, sunny conditions and similar watering needs — making them practical pot-mates.
    • French marigolds (Tagetes patula) — research published by the RHS and others confirms that French marigolds deter glasshouse whitefly. Their roots also release compounds that suppress root-knot nematodes in the soil, though this is more relevant to border planting than containers with fresh compost each year. At the very least, they attract hoverflies whose larvae consume aphids.
    • Chives — their strong allium scent is thought to deter aphids. Chives are low-growing and fit neatly around the base of a tomato pot without competing for light.

    Avoid planting tomatoes near brassicas (cabbage family) or fennel, both of which are traditionally considered poor neighbours — fennel in particular can inhibit the growth of many nearby plants.

    Frequently Asked Questions

    How many tomato plants can I put in one pot?
    One plant per pot for cordon varieties. For bush varieties, one plant per 30 cm pot or two to three per standard grow bag. Overcrowding reduces airflow and encourages disease.
    Can I reuse tomato compost next year?
    Not for tomatoes or other members of the Solanaceae family (peppers, aubergines, potatoes) — disease and nutrient depletion make it risky. You can reuse it for unrelated crops like salad leaves or flowers, refreshed with a handful of slow-release fertiliser.
    Do container tomatoes need a greenhouse?
    No. Many varieties crop well outdoors in a sheltered, south-facing spot. A greenhouse or cold frame extends the season and reduces blight risk, but it is not essential — especially with the hardier bush varieties.
    When should I start feeding my tomato plants?
    Once the first truss of flowers has set small green fruits. Before that point, the plant is growing roots and foliage and does not need the extra potash. A balanced multi-purpose compost provides everything the plant needs in the early weeks.
    Why are my tomato flowers dropping off without setting fruit?
    Usually caused by temperatures that are too low (below 13 °C at night) or too high (above 35 °C), dry air, or poor pollination. Outdoors in the UK, low night temperatures in early summer are the most common cause. Move pots to a warmer spot, and try gently tapping or shaking the plant at midday to help release pollen — tomatoes are self-pollinating but benefit from vibration.

    What Next

    Once you have your tomato containers planted up, you might like to explore:

    Affiliate disclosure: Some links in this article are affiliate links. If you buy a product through one of these links, plantsandgardening.com may earn a small commission at no extra cost to you. We only recommend products we genuinely believe in. This does not influence our editorial content. See our full affiliate disclosure for details.

    About the Author

    John Kitcher is the lead gardening writer at Plants and Gardening. He grew up mucking in on his grandfather’s Devon allotment and has spent the last fifteen years growing fruit, veg and ornamentals across three very different UK gardens — a windy coastal plot in North Cornwall, a shaded London back garden, and now a clay-heavy smallholding in the Midlands. He trials every technique covered here in his own beds and containers before writing about it, cross-references against RHS and Kew guidance, and has a soft spot for heritage tomato cultivars and anything that survives a British winter without complaint.

    Got a question about something we’ve written? Drop a comment — we read every one.

  • What to Plant in August: Complete UK Monthly Planting Guide

    What to Plant in August: Complete UK Monthly Planting Guide

    Quick Answer:

    • Sow outdoors: Lettuce, spinach, chard, spring cabbage, turnips, radishes, rocket, lamb’s lettuce, spring onions
    • Plant out: Strawberry runners, overwintering onion sets, garlic (late August in mild areas), prepared spring-flowering bulbs
    • Harvest now: Tomatoes, courgettes, runner beans, French beans, cucumbers, sweetcorn, blueberries, autumn raspberries, herbs

    August is one of the most rewarding months in the garden — you are reaping summer’s bounty while sowing the seeds of autumn and early spring harvests.

    August sits right on the hinge between summer abundance and autumn preparation. Your borders and raised beds are brimming with tomatoes, courgettes, and runner beans — yet the days are already getting noticeably shorter, and the soil is still warm enough to germinate a whole second wave of crops.

    This is the month that separates productive gardeners from those who let their plots wind down too early. By sowing quick-maturing salads, planting strawberry runners, and getting overwintering alliums into the ground, you set yourself up for harvests that stretch well into November and give you a flying start next spring.

    Below you will find everything you need to know about what to sow, plant, and harvest in August in the UK, along with recommended cultivars — many of them holders of the RHS Award of Garden Merit (AGM) — and practical tips to keep your garden thriving through the late-summer transition.

    What to Sow Outdoors in August

    The soil is warm, germination is fast, and there is still enough daylight for quick-growing crops to reach maturity before the first frosts. August outdoor sowings fall into two camps: fast crops you will eat this autumn, and overwintering varieties that hunker down through winter and crop next spring.

    Autumn Salads

    Lettuce, rocket, and lamb’s lettuce (corn salad) are the stars of August sowing. They germinate in days rather than weeks and will give you fresh salad leaves from late September right through to November — longer if you cover them with fleece or a cloche as temperatures drop.

    • Lettuce: Sow short rows every 10–14 days for continuous picking. The AGM-holding ‘Little Gem’ is compact and bolt-resistant, ideal for tight spaces. ‘Winter Density’ (also AGM) is a cos type bred specifically for late-season growing. ‘Navara’ (AGM) adds attractive red tones to the salad bowl.
    • Rocket: Both salad rocket and wild rocket germinate rapidly in warm soil. Sow thinly in rows 15 cm apart and start picking baby leaves within three to four weeks.
    • Lamb’s lettuce: One of the hardiest salad crops you can grow. Sow now and it will crop through autumn and mild winter spells with no protection at all.

    Spinach and Chard

    August-sown spinach avoids the bolting problems of spring sowings because day length is decreasing. The AGM cultivar ‘Lazio’ is vigorous and downy-mildew resistant. ‘Medania’ (AGM) produces large, smooth leaves that are excellent for cooking and salads alike.

    Chard is equally straightforward. ‘Bright Lights’ (AGM) gives you a rainbow of stem colours and is hardy enough to stand through winter in most of the UK. ‘Fordhook Giant’ (AGM) produces heavy yields of thick, white-stemmed leaves, while ‘Rhubarb Chard’ (AGM) offers deep crimson stems that look stunning in the border as well as on the plate.

    Spring Cabbage

    Early to mid-August is the ideal window for sowing spring cabbage. Transplant the seedlings to their final positions in September or October, spacing them about 30 cm apart. They will sit through winter as small rosettes and then heart up rapidly in March and April, filling the hungry gap when little else is ready. Choose cultivars bred for overwintering — ‘Durham Early’ and ‘April’ are popular choices.

    Turnips and Radishes

    Both crop quickly and are perfectly suited to filling gaps left by spent summer crops.

    • Turnips: ‘Tokyo Cross’ (AGM) is the one to grow. It matures in about 35 days from sowing and produces sweet, white, golf-ball-sized roots that are delicious raw or lightly steamed.
    • Radishes: ‘French Breakfast 4 Francis’ (AGM) and ‘Scarlet Globe’ (AGM) are reliable fast croppers. Sow directly where they are to grow, thin to 2–3 cm apart, and you will be pulling them within a month.

    Spring Onions

    An August sowing of a hardy spring onion variety such as ‘White Lisbon Winter Hardy’ will overwinter and give you an early crop next spring — well before spring-sown ones are ready. Sow in drills 1 cm deep and 10 cm apart.

    What to Plant Out in August

    August is not just about sowing seed. Several important crops are planted out this month, giving them time to establish roots while the soil is still warm.

    Strawberry Runners

    This is the prime month for planting new strawberry beds. Runners planted in August will establish strong root systems through autumn and deliver a full crop next summer. The RHS recommends planting as early in August as possible to maximise establishment time.

    Top cultivars to look for:

    • ‘Cambridge Favourite’ (AGM): A mid-season variety with excellent flavour and reliable cropping. Arguably the most widely grown garden strawberry in the UK.
    • ‘Florence’ (AGM): Late-season, heavy-cropping, and notably disease-resistant. Ideal if you already have an early variety and want to extend the season.
    • ‘Malling Centenary’ (AGM): Large, sweet berries on a vigorous plant. Bred at East Malling Research in Kent.

    If you are short on bed space, strawberries grow brilliantly in containers, hanging baskets, and growing bags. Our guide to growing strawberries in pots covers everything from compost choice to feeding schedules.

    Overwintering Onion Sets

    From mid-August onwards, garden centres stock overwintering onion sets. These are planted in autumn, grow slowly through winter, and produce mature bulbs in June — weeks before spring-planted sets are ready.

    Look for AGM holders ‘Centurion’ and ‘Sturon’ for dependable results. ‘Red Baron’ (AGM) is the pick if you want red onions. Push each set into prepared soil with the tip just showing, spacing them 10 cm apart in rows 25 cm apart.

    Garlic

    In mild southern areas, you can start planting garlic from late August. Most gardeners wait until October or November, but early planting gives the cloves a longer establishment period, which often results in bigger bulbs.

    Choose cultivars suited to autumn planting: ‘Solent Wight’ (AGM) is a softneck type bred on the Isle of Wight and well adapted to UK conditions. ‘Germidour’ (AGM) is a French softneck with a mild flavour and excellent keeping qualities. ‘Cristo’ (AGM) is a reliable all-rounder that stores well into the following summer.

    Plant individual cloves 5 cm deep and 15 cm apart, pointy end up. Garlic needs a period of cold (vernalisation) to form proper bulbs, so autumn planting is ideal in the UK climate.

    Spring-Flowering Bulbs (Preparation)

    While most spring bulbs go in from September onwards, August is the month to order them. Daffodils, crocuses, tulips, and alliums sell out fast — especially the more unusual varieties. Get your order in now, plant from late September, and your spring borders will reward you handsomely.

    Late Summer Crops and Succession Sowing

    If you have been growing vegetables this year, August is your last real chance for successional sowings and a prime opportunity to improve your soil for next season.

    Successional Salad Sowings

    The golden rule: sow a little, sow often. A short row of lettuce or rocket every 10 to 14 days keeps you in fresh leaves without gluts or gaps. This approach works particularly well with cut-and-come-again varieties — ‘Chatsworth’ (AGM) lettuce is excellent for repeat harvesting.

    Beetroot

    There is still time for a final sowing of beetroot in early August, provided you choose a quick-maturing cultivar. ‘Boltardy’ (AGM) lives up to its name and resists bolting even in challenging conditions. ‘Pablo’ (AGM) is a smooth-skinned globe type that performs consistently well in trials. Sow directly, thin to 10 cm apart, and expect to harvest baby beets from October.

    Carrots

    Fast-maturing carrot varieties sown in the first week of August will produce sweet, finger-sized roots by October. ‘Nairobi’ (AGM) is a Nantes type that matures quickly and has good resistance to carrot fly. ‘Flyaway’ (AGM) is specifically bred for reduced carrot fly susceptibility — a real advantage for late-season sowings when carrot fly pressure peaks.

    Cover your carrot rows with fine mesh or environmesh to exclude carrot fly. The second generation of this pest is active in August and September, so protection is essential.

    Green Manures

    Any bed or patch that has been cleared of a spent crop should not be left bare. Bare soil is an invitation for weeds, nutrient leaching, and structural damage from heavy autumn rain.

    Sow a green manure instead:

    • Phacelia: Fast-growing, smothers weeds, and its purple flowers are a magnet for pollinators. Dig it in before it sets seed.
    • Mustard: Germinates in days and produces a dense canopy of biomass. Dig in after six to eight weeks. Avoid if you are growing brassicas in rotation on that bed (same family).
    • Field beans (winter-hardy): Sow from September and they will fix nitrogen in the soil over winter, then get dug in come spring. Ideal for heavy clay soils.

    Green manures are one of the best ways to build soil fertility without buying in expensive compost or soil improvers.

    What to Harvest in August

    August is the month of abundance. If your earlier sowings have gone well, you will be picking more than you can eat — which is a wonderful problem to have.

    Tomatoes

    Greenhouse and outdoor tomatoes hit peak production this month. ‘Sungold’ (AGM) produces cascades of intensely sweet orange cherry tomatoes that rarely make it indoors — they get eaten straight off the vine. ‘Shirley’ (AGM) is a dependable slicer for salads and sandwiches.

    Keep feeding with a high-potash tomato feed every week and remove sideshoots on cordon varieties to direct energy into ripening fruit. By mid-August, pinch out the growing tip of outdoor cordons — any flowers that form now will not have time to produce ripe fruit before autumn. For more detail, see our complete guide to growing tomatoes.

    Courgettes and Summer Squash

    ‘Defender’ (AGM) is still going strong this month. Pick courgettes regularly when they are 10–15 cm long; leaving them to become marrows diverts the plant’s energy from producing new fruit. If you are drowning in courgettes, slice and freeze them for soups and stews later in the year.

    Runner Beans and French Beans

    Runner beans such as ‘Enorma’ (AGM) and ‘White Lady’ (AGM) are at their most prolific in August. Pick every two to three days to keep the plants producing — any pods you miss will become tough and stringy, and the plant will start to shut down.

    French beans are equally productive. Harvest while the pods still snap cleanly. Surplus beans freeze well: blanch for two minutes, plunge into iced water, then bag and freeze flat.

    Soft Fruit

    Autumn-fruiting raspberries start cropping from mid-August. ‘Joan J’ (AGM) is a spine-free variety with large, dark red berries and excellent flavour. ‘Polka’ (AGM) fruits heavily and copes well in containers. ‘All Gold’ (AGM) produces golden-yellow berries that are striking in fruit salads and desserts.

    Late-season blueberries such as ‘Duke’ (AGM) and ‘Spartan’ (AGM) are also ready for picking now. They need ericaceous (acidic) soil, so container growing in ericaceous compost is often the easiest option.

    Herbs

    Basil, parsley, mint, rosemary, and chives are all at their best. Harvest basil regularly to prevent flowering — once it bolts, leaf production drops sharply. ‘Aroma 2’ (AGM) is the basil cultivar to grow if you want large, fragrant leaves. Parsley keeps producing if you cut from the outside of the plant; ‘Bravour’ (AGM) is a flat-leaf type with strong flavour.

    If you are growing mint in pots or rosemary in containers, both benefit from a trim now to encourage fresh, bushy growth heading into autumn.

    Managing the Glut

    When the harvest overwhelms you, keep these options in mind:

    • Freeze: Beans, courgettes (sliced), herbs (in ice-cube trays with oil or water), raspberries (open-freeze on a tray first)
    • Preserve: Green tomato chutney, runner bean chutney, courgette relish, raspberry jam
    • Share: Neighbours, colleagues, local food banks, and community fridges are always glad of fresh produce
    • Compost: Anything you genuinely cannot use goes on the compost heap rather than to waste

    Container Growing in August

    No garden? No problem. August is an excellent month for container growing, though you need to stay on top of watering as pots dry out fast in warm weather.

    What to Sow and Plant in Pots

    • Lettuce and salad leaves: A 30 cm pot or window box is all you need. Sow ‘Little Gem’ (AGM) or a cut-and-come-again mix and you will be harvesting within four weeks.
    • Radishes: Perfect for shallow containers. ‘Scarlet Globe’ (AGM) matures fast and needs only 15 cm of compost depth.
    • Spinach: ‘Lazio’ (AGM) grows well in pots. Keep the compost consistently moist to prevent bolting.
    • Herbs: Basil, parsley, coriander, and chives all thrive in pots on a sunny windowsill or patio. Group them together for easy watering.
    • Strawberry runners: Plant into 25–30 cm pots or a strawberry planter for fruiting next summer.

    Watering and Feeding

    In hot weather, containers may need watering twice a day — once in the morning and again in the evening. The RHS recommends watering in the early morning or late evening to reduce evaporation. Mulching the surface of the compost with gravel or bark chippings also helps retain moisture.

    Feed fruiting crops (tomatoes, strawberries, peppers) weekly with a high-potash liquid feed. Leafy crops and herbs benefit from a balanced liquid feed every fortnight. For advice on choosing the right growing medium, see our guide to compost for container gardening.

    What NOT to Plant in August

    Knowing when it is too late to sow is just as important as knowing what to sow. These crops are off the table for August:

    • Main-crop potatoes: They need 15–20 weeks to reach maturity. An August planting would be trying to bulk up in the cold and dark of December — it simply will not work outdoors in the UK. If you want a late crop, plant a few ‘Charlotte’ tubers in bags in June for harvesting in October.
    • Sweetcorn: Sweetcorn needs sustained warmth and long days to form and fill cobs. Sowing now would give you tall plants with empty cobs at best.
    • Tender squash and pumpkins from seed: Butternut squash, courgettes from seed, and pumpkins all need months of warm growing weather. Any seedlings started now would be killed by the first frost well before fruiting.
    • Parsnips: They require a full growing season (120–170 days). The sowing window for parsnips closed in May. Mark it in the calendar for next February or March.
    • French and runner beans from seed: Germination would be fine, but the plants would not have time to flower and set pods before autumn frosts. Enjoy the ones you already have growing instead.

    August Gardening Tasks Checklist

    Beyond sowing and harvesting, August has a full roster of maintenance tasks. Tick these off through the month:

    1. Water deeply and consistently — especially newly planted crops, containers, and anything under glass. Water at the base of plants, not over the foliage, to reduce disease risk.
    2. Feed tomatoes weekly with a high-potash fertiliser. Remove yellowing lower leaves to improve air circulation and reduce blight risk.
    3. Deadhead flowering plants (dahlias, roses, sweet peas) to prolong blooming well into September.
    4. Prune summer-fruiting raspberries — cut the canes that fruited this year down to ground level, and tie in the new green canes that will fruit next summer.
    5. Order spring-flowering bulbs — daffodils, crocuses, tulips, and alliums. The best selection is available now; plant from late September.
    6. Take semi-ripe cuttings of shrubs such as lavender, rosemary, box, and hydrangea. Insert into gritty compost and keep moist.
    7. Clear spent crops — remove bolted lettuce, finished pea plants, and any other exhausted vegetables. Add them to the compost heap and sow green manures in the gaps.
    8. Turn and water the compost heap — August warmth accelerates decomposition. Keep the heap moist but not waterlogged.
    9. Net brassicas — cabbage white butterflies are at peak activity this month. Cover all brassicas with fine mesh to prevent egg-laying.
    10. Top up wildlife ponds — water levels drop in warm weather. Use rainwater from a butt if possible, as tap water contains chemicals that encourage algae growth.

    Frequently Asked Questions

    Can I still sow carrots in August?

    Yes, but only fast-maturing varieties. ‘Nairobi’ (AGM) and ‘Flyaway’ (AGM) are good choices for an August sowing. Expect to harvest sweet, finger-sized roots in October. Cover with fine mesh to protect against carrot fly, which is especially active in late summer.

    Is it too late to plant strawberries in August?

    Not at all — August is actually the ideal month. Runners planted now will establish strong roots through autumn and deliver a full crop next summer. Choose AGM-holding varieties like ‘Cambridge Favourite’, ‘Florence’, or ‘Malling Centenary’ for the best results.

    What is the latest I can sow lettuce outdoors?

    In most parts of the UK, you can sow lettuce outdoors until mid-September, though August sowings are more reliable. After September, move sowings under cover — a cold frame, cloche, or unheated greenhouse will extend the season significantly. Hardy varieties such as ‘Winter Density’ (AGM) cope best with shortening days and cooler temperatures.

    Should I pinch out my tomato plants in August?

    Yes. By mid-August, remove the growing tip of outdoor cordon tomatoes (cut just above the truss that is currently setting fruit). This stops the plant producing new flowers that will never ripen and redirects energy into swelling and ripening the existing fruit. Greenhouse tomatoes can continue a little longer, but should be stopped by early September.

    Can I plant garlic in August?

    In the milder south of England, you can plant garlic from late August. In cooler northern regions, most gardeners wait until October or November. Early planting gives cloves more time to establish roots, which can result in larger bulbs. Choose autumn-planting cultivars such as ‘Solent Wight’ (AGM) or ‘Germidour’ (AGM).

    What green manure should I sow on empty beds?

    For beds cleared in August, phacelia and mustard are both fast-growing and effective. Phacelia produces attractive purple flowers that benefit pollinators, while mustard creates dense ground cover in weeks. For beds you will not use until spring, sow field beans from September — they fix nitrogen in the soil over winter. Avoid mustard on beds earmarked for brassicas, as they are in the same plant family.

    What to Do Next

    August is a pivotal month, but it is just one chapter in the year-round gardening calendar. If you are building a planting plan or want to see what you should have been doing earlier (and what is coming next), explore our other monthly guides:

    For more hands-on growing advice, these guides cover some of August’s key crops in detail:

    Affiliate Disclosure: Some links on this page are affiliate links. If you purchase a product through one of these links, plantsandgardening.com may earn a small commission at no extra cost to you. We only recommend products we genuinely believe will help your garden thrive. This does not influence our editorial content or cultivar recommendations.

    About the Author

    John Kitcher is the lead gardening writer at Plants and Gardening. He grew up mucking in on his grandfather’s Devon allotment and has spent the last fifteen years growing fruit, veg and ornamentals across three very different UK gardens — a windy coastal plot in North Cornwall, a shaded London back garden, and now a clay-heavy smallholding in the Midlands. He trials every technique covered here in his own beds and containers before writing about it, cross-references against RHS and Kew guidance, and has a soft spot for heritage tomato cultivars and anything that survives a British winter without complaint.

    Got a question about something we’ve written? Drop a comment — we read every one.