Category: Vegetable Gardening

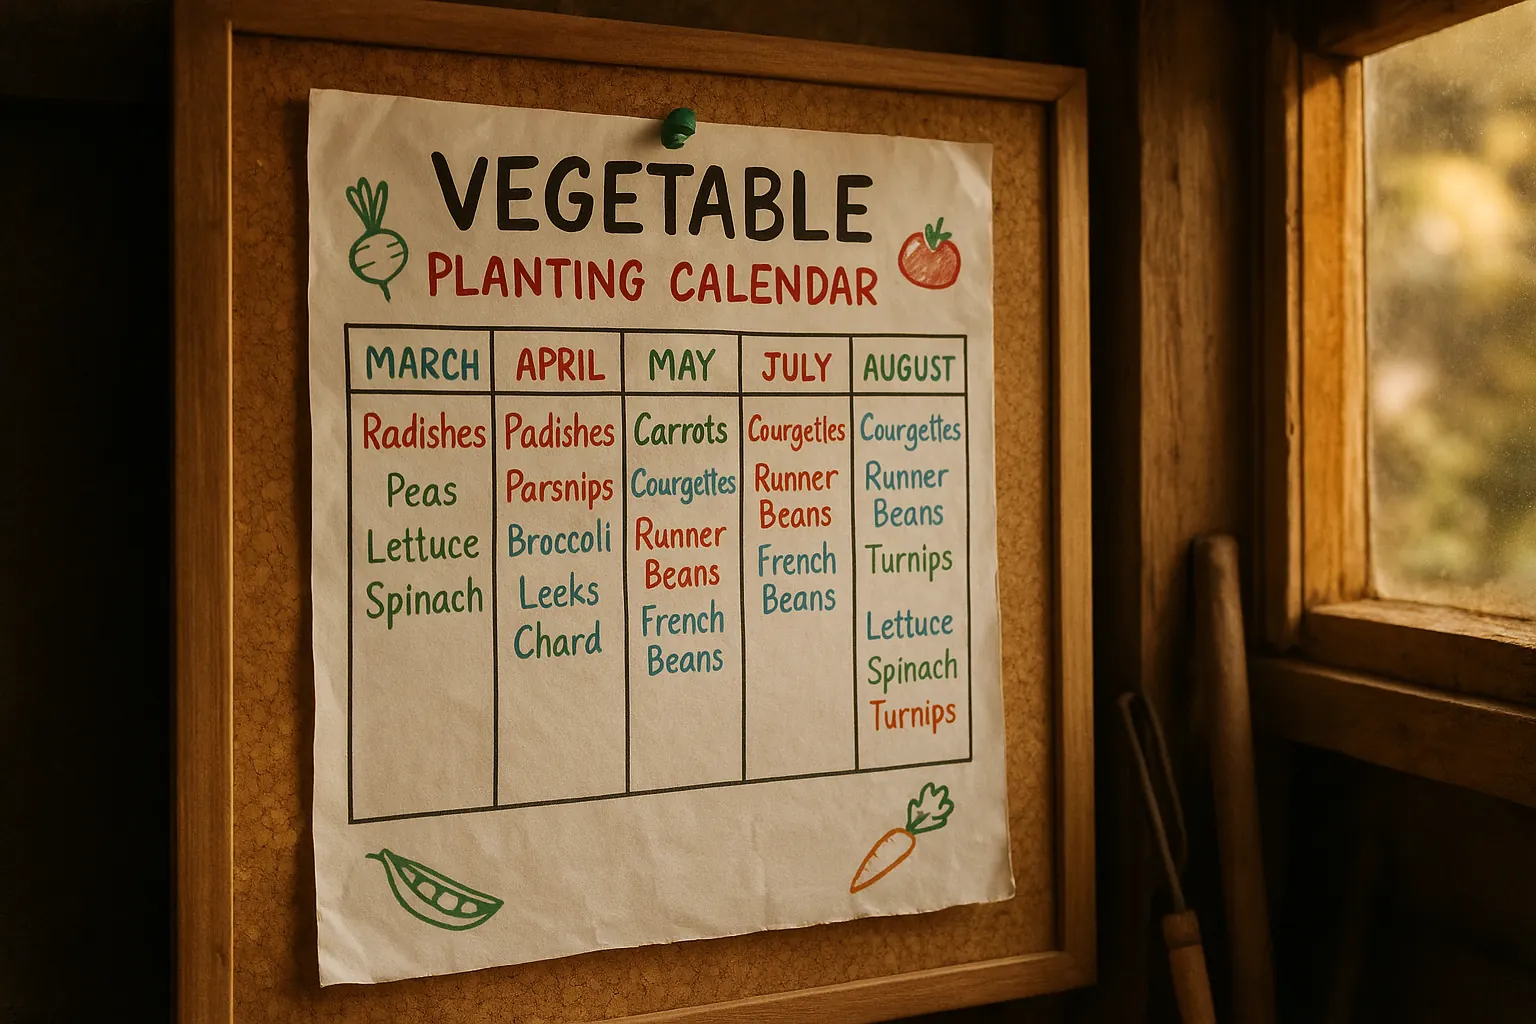
  • What to Plant in July: Complete UK Monthly Planting Guide

    What to Plant in July: Complete UK Monthly Planting Guide

    Quick Answer

    In July, sow carrots, beetroot, lettuce, turnips, spring cabbage, and French beans for autumn harvests. Keep tomatoes, cucumbers, courgettes, and peppers well watered and fed. Peg down strawberry runners, harvest summer raspberries, and sow biennials like wallflowers and foxgloves for colour next spring. July is one of the busiest months in the UK garden — the trick is balancing harvesting, maintenance, and those crucial successional sowings that will keep your kitchen stocked well into autumn.

    As an Amazon Associate I earn from qualifying purchases.

    Why July Matters in the UK Garden

    July sits at the heart of the UK growing season. Long days, warm soil, and (with any luck) the odd thunderstorm mean your garden is producing at full tilt. But this is not the month to sit back and admire the courgette glut. What you sow and plant now directly determines whether you will still be picking fresh veg in September, October, and beyond.

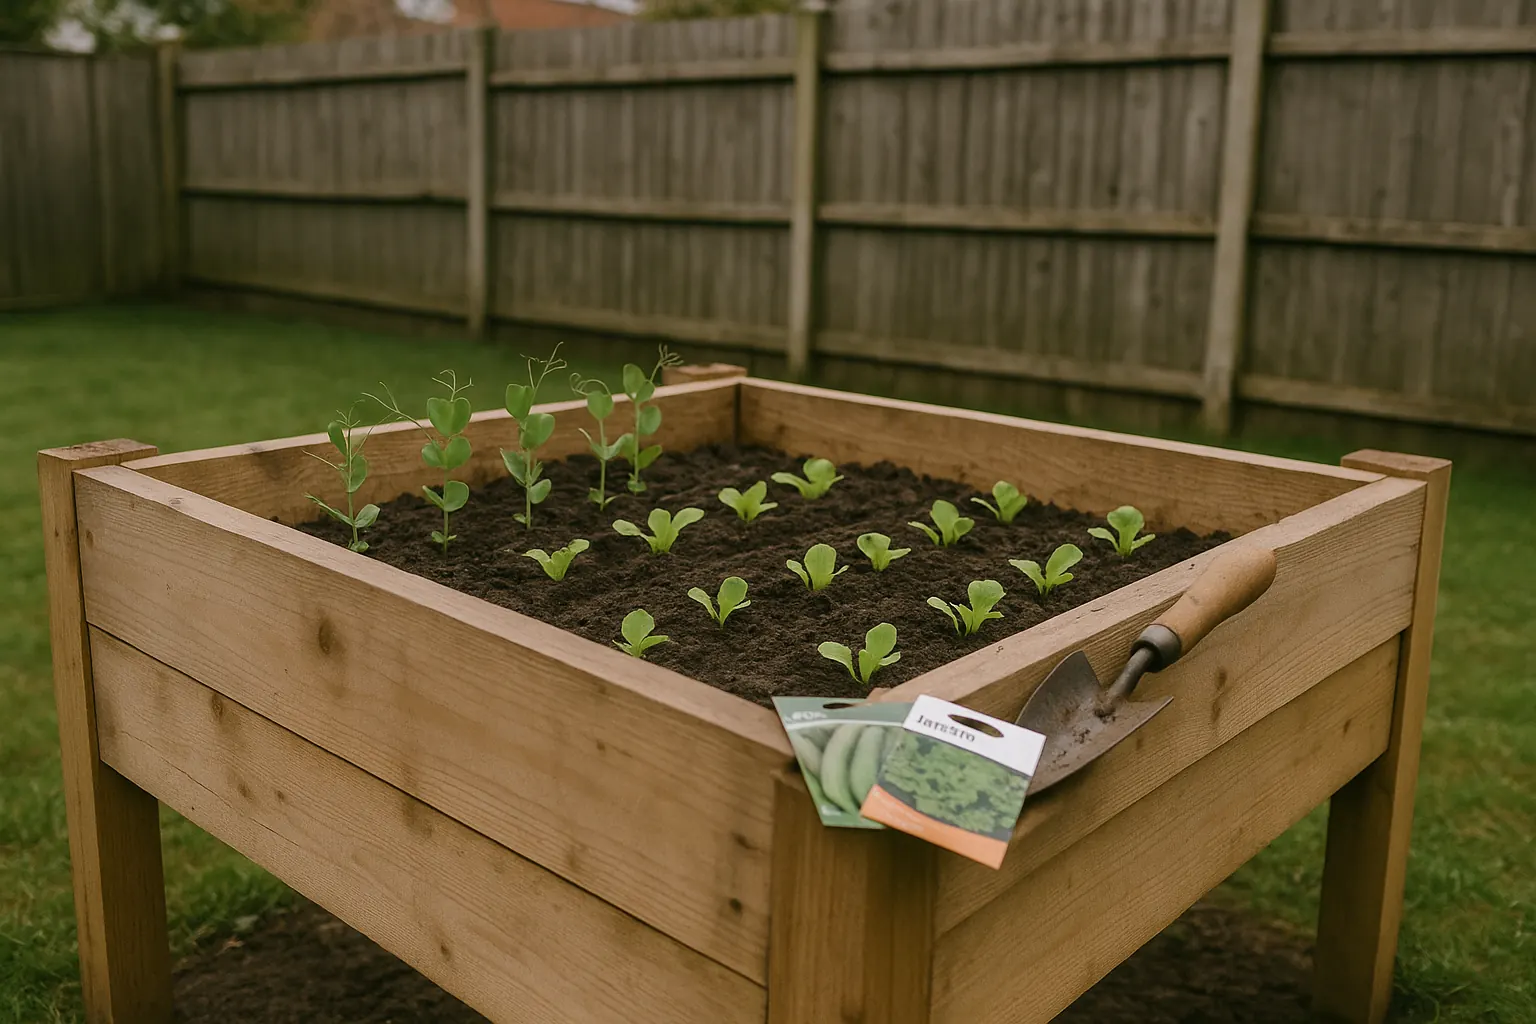
    Successional sowing is the single most important habit in July. Lettuce sown now fills the gap left by spring sowings that have bolted. Carrots and beetroot sown in early July will be ready for lifting before the first frosts. And if you missed the spring window for French beans, you still have time — just.

    At the same time, your tender crops need daily attention. Tomatoes need side-shooting and feeding. Courgettes need harvesting every other day before they turn into marrows. And everything, without exception, needs water. If you are new to vegetable growing, our beginner’s guide to starting a vegetable garden covers the fundamentals.

    This guide covers exactly what to sow, plant, harvest, and maintain in July, with cultivar recommendations backed by the Royal Horticultural Society (RHS).

    Vegetables to Sow in July

    July sowings are all about successional crops and fast-maturing varieties that will produce before the growing season winds down. Soil temperatures are at their peak, so germination is rapid — most of these seeds will be up within a week.

    Carrots

    Early July is your last realistic window for a maincrop carrot sowing in most of the UK. Choose a fast-maturing cultivar: ‘Nairobi’ (AGM) is an excellent Nantes type that matures in around 12 weeks, or try ‘Flyaway’ (AGM) if carrot fly has been a persistent problem — it has genuine resistance, not just tolerance.

    Sow thinly in rows 15 cm apart, and thin seedlings to 5–7 cm spacing once they are large enough to handle. Covering with enviromesh immediately after sowing keeps carrot fly at bay more reliably than any companion planting scheme. If you are growing in a smaller space, carrots do well in deep containers — see our guide to the best vegetables to grow in containers.

    Beetroot

    Beetroot is one of the most forgiving crops for a July sowing. It tolerates a range of soils, germinates readily in warm conditions, and baby beet can be pulled in as little as seven weeks.

    ‘Boltardy’ (AGM) is the go-to choice — its bolt resistance is particularly valuable for summer sowings when day length might otherwise trigger flowering. ‘Pablo’ (AGM) is another strong performer with smooth, round roots and excellent flavour.

    Sow in rows 25 cm apart. Each beetroot “seed” is actually a cluster of seeds, so thin to one seedling per station when they appear. Water consistently — erratic watering causes woody rings inside the roots.

    Lettuce and Salad Leaves

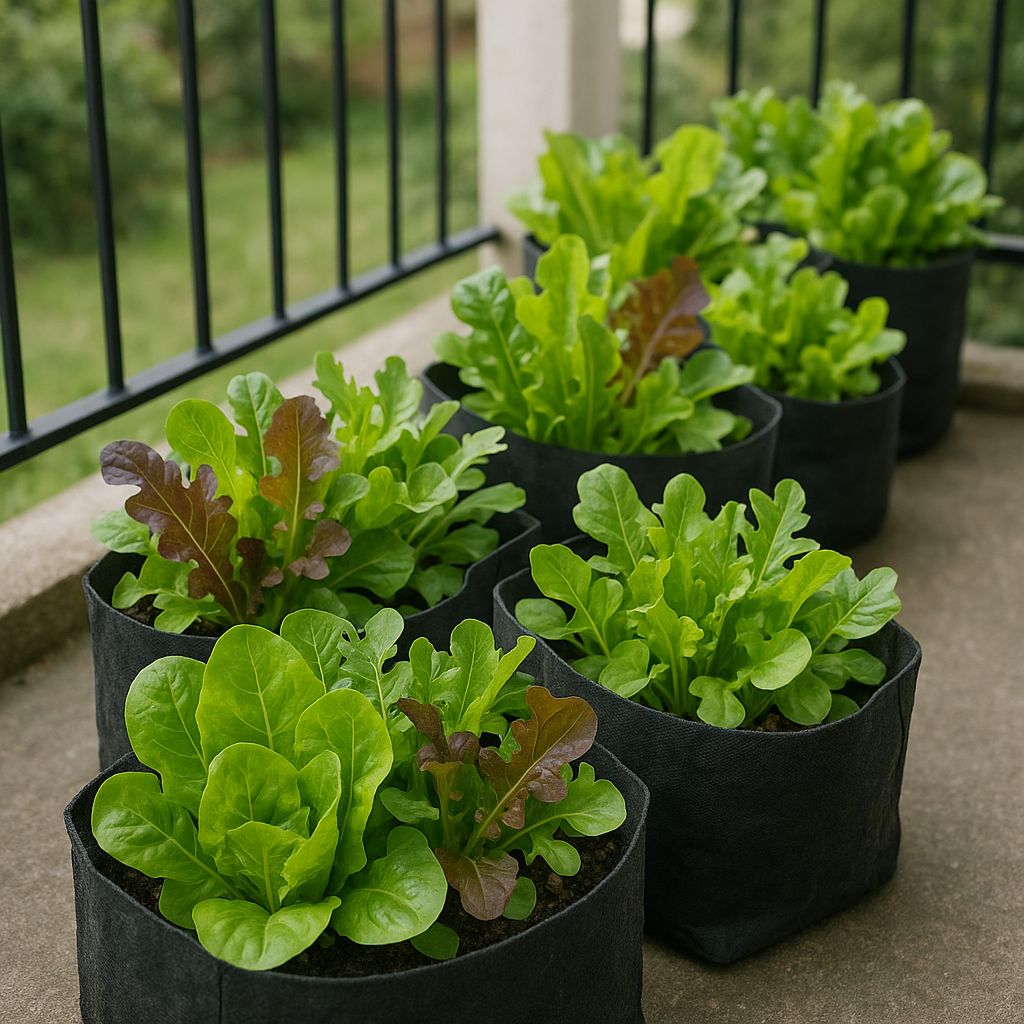
    Your spring lettuce will be bolting by now, so a July sowing is essential to maintain a steady supply. The trick is choosing heat-tolerant cultivars and providing some shade during the hottest part of the day.

    ‘Little Gem’ (AGM) remains the most reliable cos-type lettuce for UK gardens — it is compact, quick to heart up, and handles summer heat better than most. ‘Chatsworth’ (AGM) is a newer butterhead with good bolt resistance. For cut-and-come-again leaves, sow a mixed salad blend every two to three weeks through July.

    Tip: Sow lettuce in the late afternoon or on a cloudy day. Lettuce seed goes dormant above 25°C, and July soil surface temperatures can exceed this in full sun. A light mulch of vermiculite over the seed row helps keep things cooler.

    Turnips

    Often overlooked, turnips sown in July produce tender baby roots by early autumn. Sow thinly in rows 23 cm apart and thin to 12 cm. They grow fast and need little attention beyond regular watering. Choose early-maturing varieties like ‘Atlantic’ or ‘Milan Purple Top’.

    Spring Cabbage

    This is the month to sow spring cabbage in a nursery bed or modules. The seedlings will be transplanted to their final positions in September, overwinter as small plants, and produce tight heads the following March to May. Cultivars such as ‘Durham Early’ and ‘April’ are reliable performers.

    Sow in a shaded spot if possible — July heat can cause leggy seedlings. Transplant when they have four or five true leaves, spacing 30 cm apart in rows 45 cm apart.

    French Beans

    You have until mid-July to direct-sow French beans and still expect a worthwhile crop before the first frost. Dwarf types are the safest bet for late sowings because they mature faster than climbers.

    ‘Annabel’ (AGM) is a dwarf French bean that crops heavily and reliably. ‘Sprite’ (AGM) is another excellent dwarf choice with slender, stringless pods. If you have a warm, sheltered spot and are feeling confident, climbing ‘Cobra’ (AGM) sown by the first week of July should produce into September.

    Sow 5 cm deep, 15 cm apart for dwarf types or 20 cm apart for climbers. French beans are tender, so if your region typically sees early autumn frosts, have fleece ready for September evenings. They also perform brilliantly in grow bags on a warm patio.

    Other Vegetables Worth Sowing in July

    Crop Sowing method Time to harvest Notes
    Spinach (‘Lazio’ AGM, ‘Medania’ AGM) Direct sow 6–8 weeks (baby leaf) Bolt-resistant cultivars essential for summer sowing
    Radish Direct sow 4–6 weeks Fastest crop in the garden; sow every 2 weeks
    Pak choi Direct sow or modules 6–8 weeks Prefers partial shade in high summer; cover against flea beetle
    Endive Direct sow or modules 8–10 weeks More heat-tolerant than lettuce; blanch hearts for milder flavour
    Kale Modules (transplant Aug–Sep) 12+ weeks Sow now for winter harvesting; incredibly hardy

    Tender Crops to Harvest and Maintain

    Your spring-sown tender crops are now in full production. July is about keeping them healthy, well-fed, and harvesting regularly to encourage continuous cropping.

    Tomatoes

    By July, cordon (indeterminate) tomatoes should be in full flower and setting fruit on the lower trusses. Your key jobs this month:

    • Remove side shoots weekly — pinch out the shoots that grow in the leaf axils (between the main stem and a branch). This concentrates the plant’s energy into fruit production rather than foliage.
    • Feed fortnightly with a high-potash liquid feed (tomato feed) once the first truss has set.
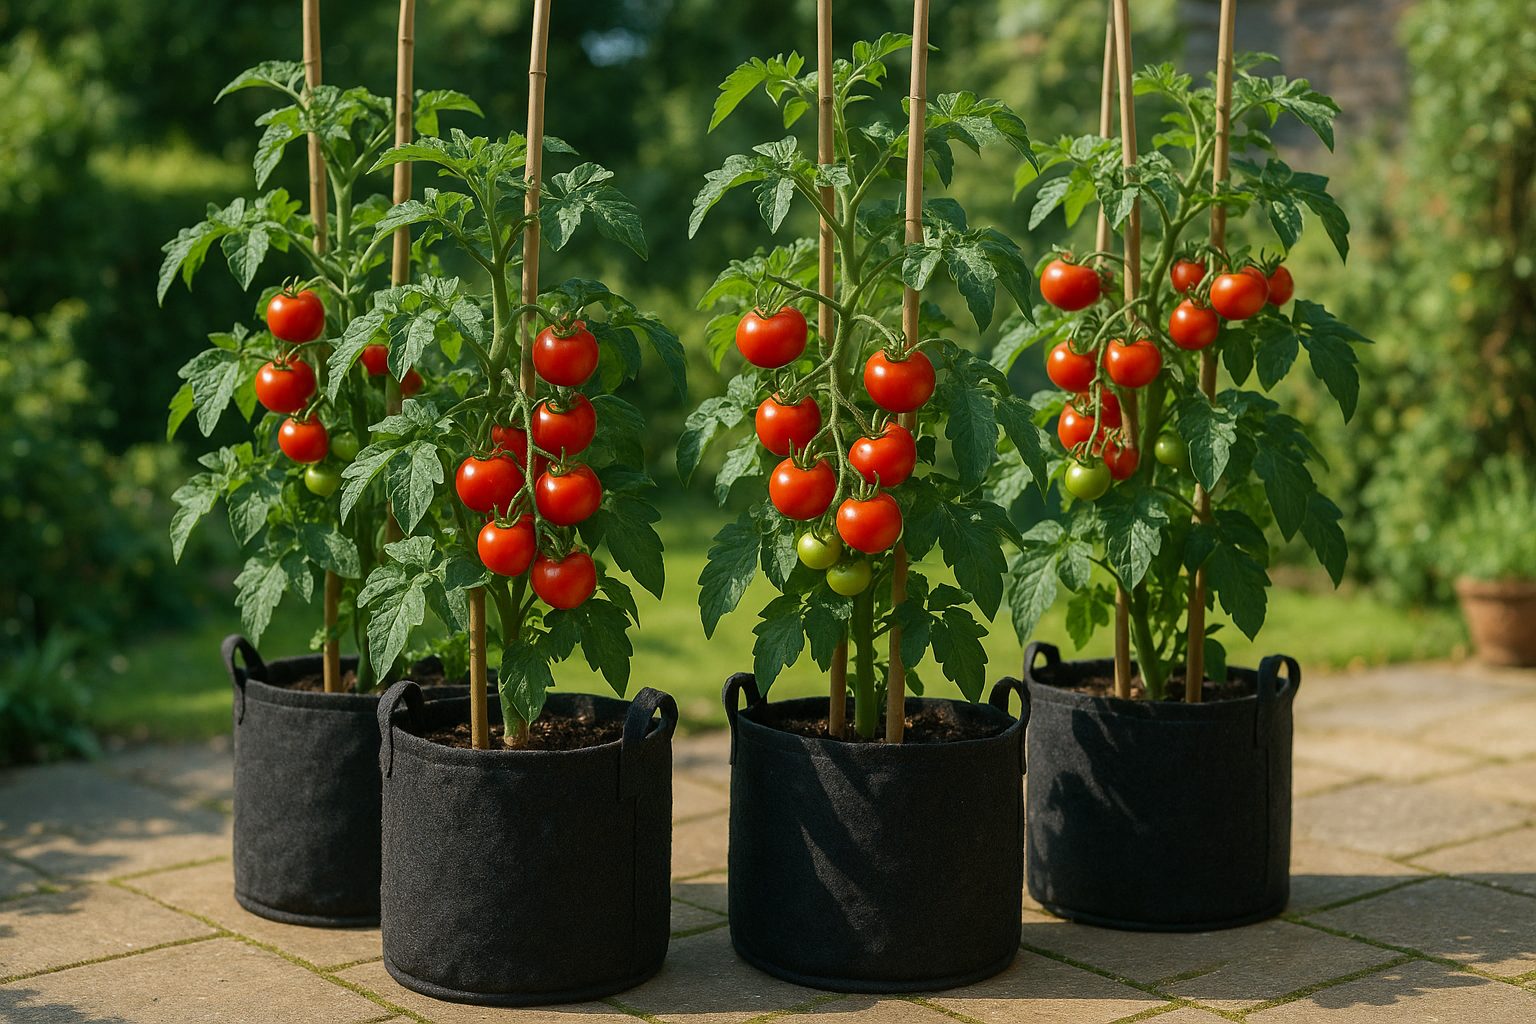
    • Water consistently — irregular watering causes blossom end rot and fruit splitting. Aim for the same amount at the same time each day, especially for container-grown plants.
    • Remove lower leaves below the first ripening truss to improve air circulation and reduce the risk of blight.

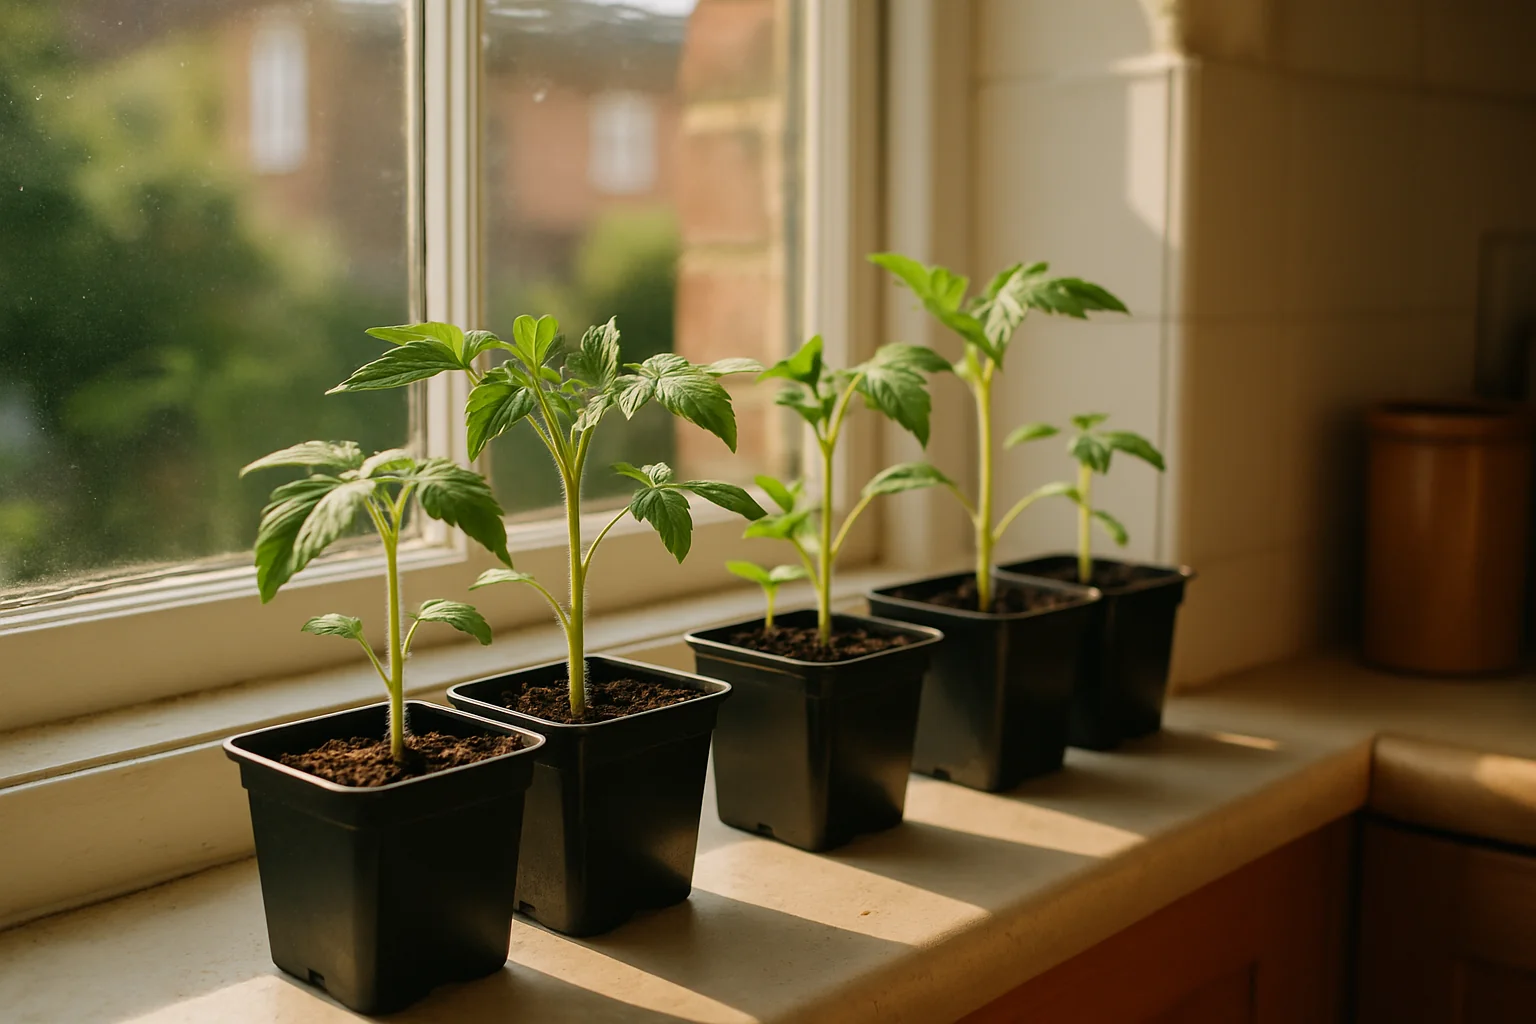
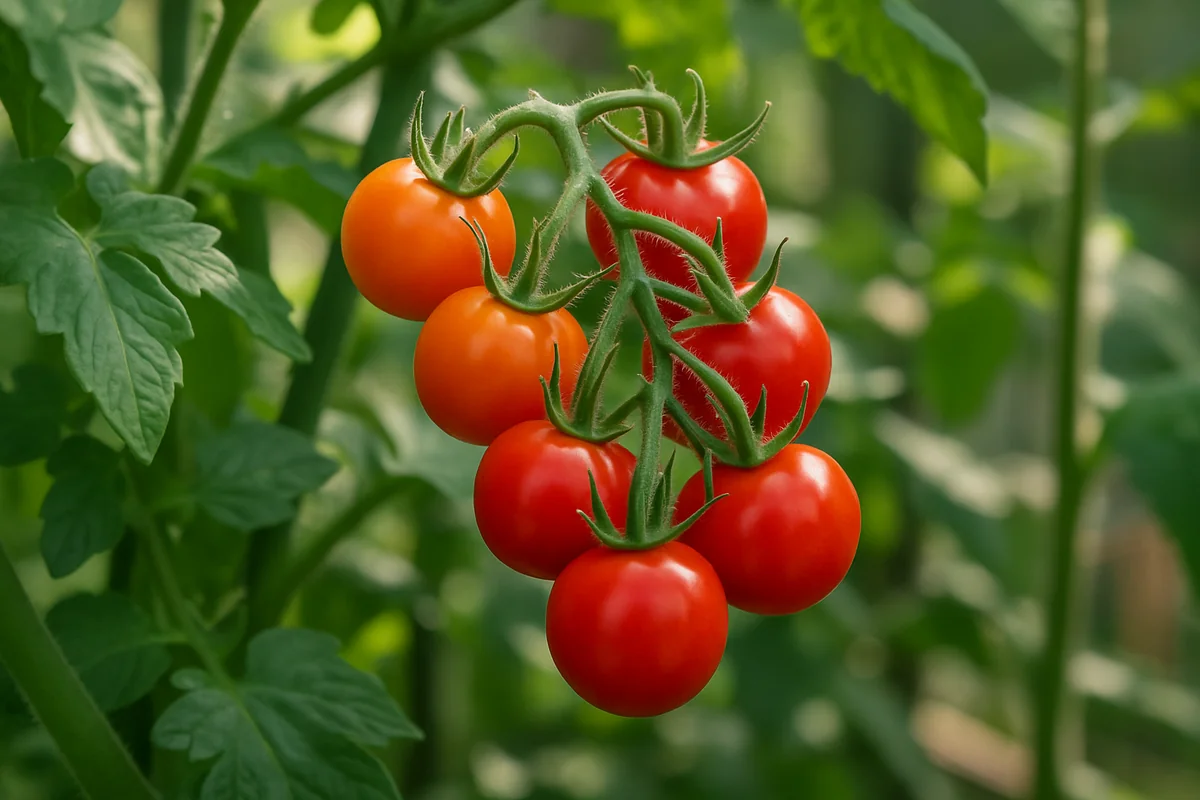
    ‘Sungold’ (AGM) is the benchmark cherry tomato — intensely sweet, incredibly productive, and reliable outdoors in sheltered spots. ‘Shirley’ (AGM) is a classic greenhouse variety with good disease resistance. For a full walkthrough on growing from seed, see our guide to growing tomatoes from seed.

    Cucumbers

    Greenhouse cucumbers should be producing heavily by now. Keep on top of harvesting — leaving mature fruit on the plant signals it to slow down production. Train the main stem up a support and pinch out side shoots after two leaves.

    Outdoor ridge cucumbers like ‘Marketmore’ (AGM) are tougher and more forgiving. Water at the base rather than overhead to reduce powdery mildew risk. Feed weekly with a balanced liquid fertiliser once fruits start forming.

    Peppers and Chillies

    Peppers need warmth, so greenhouse or sunny windowsill growing is essential for most of the UK. ‘Mohawk’ (AGM) is a compact sweet pepper that performs well in pots on a warm patio or in an unheated greenhouse.

    Pinch out the growing tip when the plant reaches about 20 cm to encourage bushier growth and more fruit. Feed with tomato fertiliser every fortnight once the first fruits set.

    Courgettes

    A single healthy courgette plant can produce 20–30 fruits over the season. The trick is harvesting when they are 10–15 cm long — check every other day, because a courgette can double in size in 48 hours. ‘Defender’ (AGM) has good virus resistance and consistent cropping.

    Water at the base to keep the foliage dry and reduce the risk of grey mould. If plants are producing lots of male flowers but no female ones (the ones with a small swelling behind the flower), be patient — female flowers usually follow within a week or two.

    Herbs in July

    July is prime time for herb harvesting, and you can still make several sowings to keep your supply going through autumn.

    Basil

    Basil loves the warmth of July. Sow ‘Aroma 2’ (AGM) in pots on a sunny windowsill or in a warm greenhouse. It is one of the most reliable cultivars for UK conditions, with strong fragrance and good vigour. Pinch out flower spikes as they appear to keep the plant producing leaves.

    Coriander

    Coriander bolts rapidly in hot weather, so sow little and often — a small pinch of seed every two weeks in a partially shaded spot. Water consistently. Slow-bolt varieties like ‘Confetti’ or ‘Leisure’ give you a better window before they run to seed.

    Parsley

    A July sowing of parsley will provide fresh leaves through autumn and into winter (it is biennial and surprisingly hardy). ‘Bravour’ (AGM) is a flat-leaf type with excellent flavour, while ‘Moss Curled’ (AGM) is the classic curly-leaf choice. Sow in modules or direct — germination can take two to three weeks, so be patient.

    Other Herbs to Harvest and Maintain

    Mint is at its most vigorous now — harvest freely and keep it contained in pots to prevent it colonising your entire plot. Our guide to growing mint in pots has everything you need. Rosemary benefits from a light trim after flowering to keep it bushy; see our container rosemary guide for more detail.

    Harvest herbs in the morning after the dew has dried but before the midday sun — this is when the essential oil concentration is highest.

    Fruit in July

    Strawberry Runners

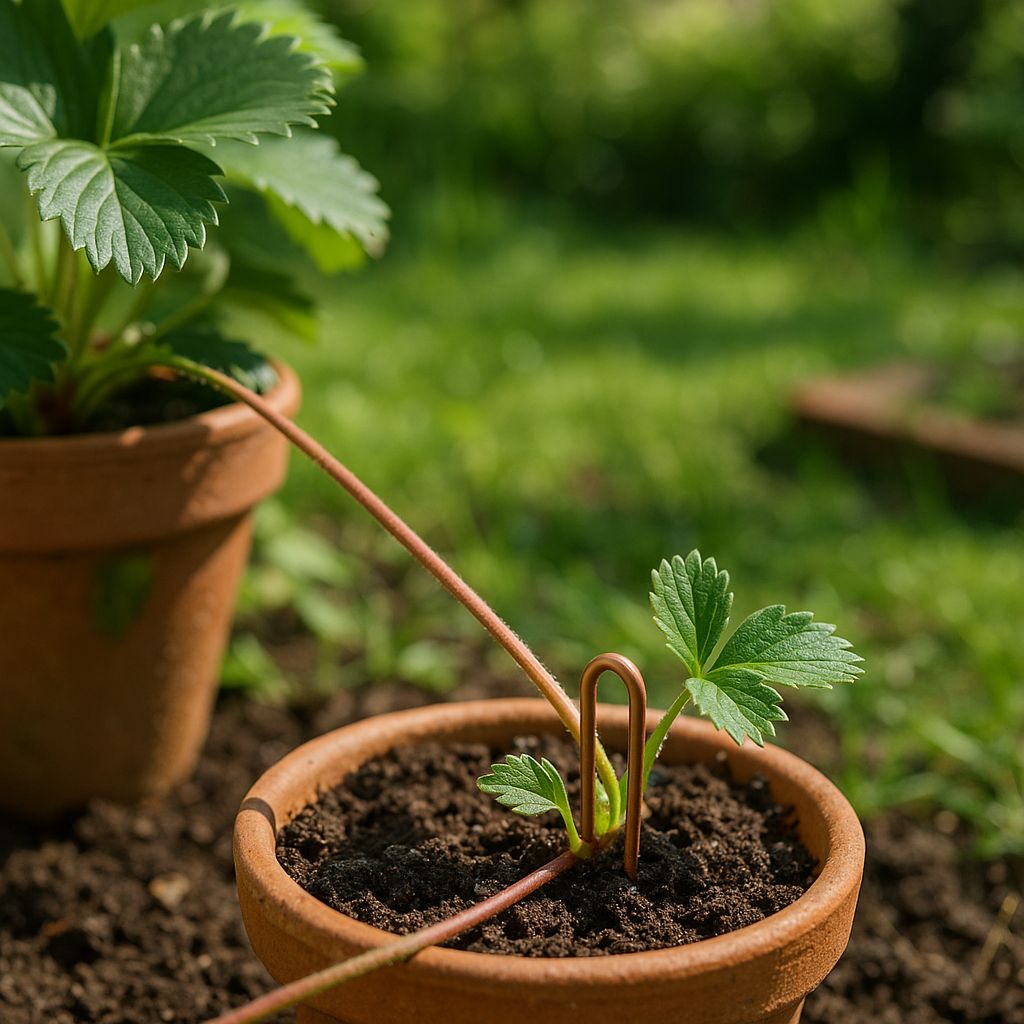
    Established strawberry plants produce runners freely in July. If you want to propagate new plants, select the strongest runner from each parent plant, peg it down into a small pot of compost sunk into the ground beside the parent, and sever it once it has rooted (usually three to four weeks).

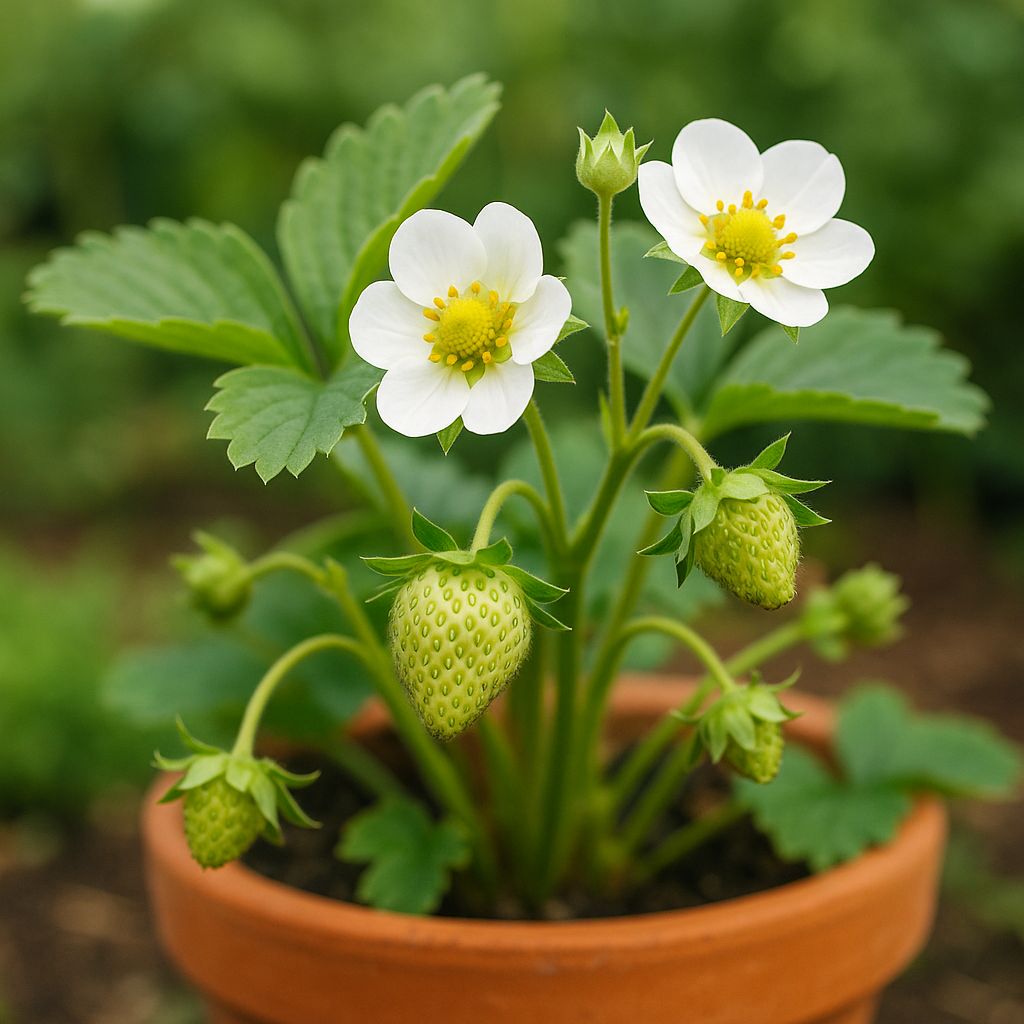
    If you do not want new plants, remove runners as they appear — they divert energy from fruit production. ‘Cambridge Favourite’ (AGM) is the classic all-rounder, while ‘Malling Centenary’ (AGM) produces large, sweet berries and has good disease resistance. For growing in containers, see our guide to growing strawberries in pots.

    Summer Raspberries

    July is peak harvest month for summer-fruiting raspberries. Pick every two to three days when the berries are fully coloured and pull away from the plug easily. ‘Glen Ample’ (AGM) is a spine-free, heavy-cropping variety that makes picking much more pleasant.

    After harvesting, cut fruited canes down to ground level — summer raspberries fruit on the previous year’s growth, so the canes that have just cropped will not produce again. Tie in the new green canes that are growing up from the base; these will carry next year’s fruit.

    Blueberries

    Blueberries ripen over several weeks, so pick individually as each berry turns fully blue. Do not rush — berries left on the bush for a few days after turning blue develop a deeper sweetness. ‘Duke’ (AGM) is an early-season variety that crops well in the UK climate, and ‘Spartan’ (AGM) follows a week or two later with excellent flavour.

    Blueberries require ericaceous (acidic) compost and rainwater rather than tap water (which is often alkaline). Feed with an ericaceous fertiliser in spring. In July, the main job is netting the bushes against birds — blackbirds and starlings are particularly fond of blueberries.

    Other Fruit Jobs in July

    • Summer-prune trained fruit trees (cordons, espaliers, fans) — cut back new side shoots to three leaves above the basal cluster. This encourages fruit bud formation for the following year.
    • Thin apple and pear fruitlets if the tree has set heavily. Remove the smallest fruit from each cluster, leaving two per cluster. This gives you fewer but larger, better-quality fruit.
    • Water newly planted fruit trees and bushes deeply during dry spells. A thorough soaking once or twice a week is far more effective than a daily sprinkle.

    Flowers to Sow and Plant in July

    July is the month for sowing biennials — plants that grow foliage this year and flower next year. It is also a good time for filling gaps in borders with late-flowering perennials from garden centres.

    Biennials to Sow Now

    • Wallflowers (Erysimum) — sow in a nursery bed or modules for transplanting in autumn. They will flower from March to May next year, filling the gap before summer perennials kick in.
    • Foxgloves (Digitalis purpurea) — sow on the surface of moist compost; the seed needs light to germinate. These are essential for cottage garden style and beloved by bees. Note: all parts of foxgloves are toxic if ingested. Wear gloves when handling and keep away from children and pets.
    • Sweet William (Dianthus barbatus) — sow in rows and transplant in autumn. Wonderfully fragrant cut flowers.
    • Honesty (Lunaria annua) — sow now for flowers next spring and those iconic translucent seed pods in late summer.
    • Canterbury bells (Campanula medium) — sow in a seed tray and pot on. A traditional cottage garden favourite.

    Perennials from Seed

    Many hardy perennials germinate readily from a July sowing and will establish strong root systems before winter. Aquilegia, echinacea, and rudbeckia all sow well now. Pot seedlings on into individual containers and overwinter in a cold frame or sheltered spot.

    Maintaining Summer Bedding

    Deadhead dahlias, roses, sweet peas, and cosmos regularly to extend their flowering season. With sweet peas in particular, pick them every few days — the more you cut, the more they produce. If you stop picking, they set seed and stop flowering.

    July Gardening Tasks Checklist

    Watering

    • Water containers every day in hot weather — pots dry out far faster than open ground. Use the right compost for containers to improve water retention.
    • Water in the evening to reduce evaporation (the RHS recommends this approach during dry spells).
    • Prioritise newly planted trees, shrubs, and anything fruiting or flowering — established shrubs and perennials can usually cope.
    • Mulch borders with a 5–7 cm layer of garden compost, bark chips, or well-rotted manure to suppress weeds and retain moisture.
    • Going away? Before a summer holiday, group containers together in light shade, stand them on trays or saucers of water, and fit a simple drip-irrigation timer or ask a neighbour — unattended pots can dry out and die within a couple of hot July days.

    Feeding

    • Feed tomatoes, peppers, cucumbers, and aubergines with a high-potash liquid feed every one to two weeks.
    • Give container-grown flowers a balanced liquid feed fortnightly.
    • Side-dress brassicas and sweetcorn with a nitrogen-rich feed (such as pelleted chicken manure) to fuel leafy growth.

    Pest and Disease Control

    • Check brassicas for caterpillars of cabbage white butterflies — pick off by hand or use enviromesh netting.
    • Look for signs of tomato blight, especially after warm, humid weather. Remove affected leaves immediately and improve ventilation in greenhouses.
    • Inspect roses for blackspot and aphids. A strong jet of water dislodges aphids; blackspot-affected leaves should be removed and binned (not composted).
    • Slug and snail activity remains high, especially in wet spells. Beer traps, nematode biological controls, and copper tape are all effective organic options — in a damp July our guide to getting rid of slugs covers the methods that actually work.
    • Inspect soft fruit netting for holes — birds are highly motivated when berries are ripe.

    Deadheading and Pruning

    • Deadhead roses, dahlias, cosmos, and sweet peas at least twice a week.
    • Trim lavender lightly after the first flush of flowers to encourage a second flush and maintain a compact shape.
    • Cut back hardy geraniums (cranesbills) to the ground after flowering — they will produce fresh foliage and often a second flush of blooms.
    • Prune wisteria: cut back the whippy summer growth to five or six leaves from the main branch framework.

    Planning for Autumn and Beyond

    • Order spring-flowering bulbs (tulips, daffodils, alliums) now for the best cultivar selection. You will plant them in October and November.
    • Start thinking about what worked and what did not this season. Jot down notes while your memory is fresh.
    • If you are planning a new border or raised bed for next year, now is the time to sheet-mulch with cardboard and compost — it will be weed-free and ready for planting by spring.
    • Check what you planted in earlier months — our April, May, and June planting guides may remind you of crops that need attention now.

    Frequently Asked Questions

    Is it too late to plant vegetables in July?

    Not at all. July is perfect for successional sowings of fast-maturing crops like lettuce, radish, beetroot, and French beans. You can also sow carrots (early July), turnips, spinach, and spring cabbage. The key is choosing quick-maturing cultivars that will produce before the first autumn frosts, typically in late October for most of England and Wales.

    Can I still sow carrots in July in the UK?

    Yes, but sow by early to mid-July at the latest. Choose a fast-maturing cultivar like ‘Nairobi’ (AGM) or ‘Flyaway’ (AGM), which reach usable size in around 12 weeks. This gives them time to mature before the soil cools significantly in October. Cover with enviromesh to protect against carrot fly, which has its second generation peak in July and August.

    How often should I water my vegetable garden in July?

    Container-grown vegetables need watering daily in hot weather, sometimes twice a day for small pots. Plants in open ground typically need a thorough soaking (about 10 litres per square metre) two to three times a week during dry spells, rather than a light daily sprinkle. Water in the evening to minimise evaporation. Mulching with compost or bark reduces watering frequency significantly.

    What flowers can I sow in July for next year?

    July is the ideal time to sow biennials, which grow foliage this year and flower the next. Sow wallflowers, foxgloves, sweet William, honesty, and Canterbury bells. You can also sow many hardy perennials — aquilegia, echinacea, and rudbeckia all germinate well from a July sowing and will flower the following summer.

    Should I remove tomato side shoots in July?

    Yes, if you are growing cordon (indeterminate) tomatoes. Pinch out the side shoots that grow in the angle between the main stem and leaf branches every week. This directs the plant’s energy into producing and ripening fruit rather than excess foliage. Bush (determinate) tomatoes should not be side-shooted — they naturally grow as a compact bush.

    When should I cut down summer raspberry canes?

    Cut the fruited canes down to ground level immediately after you have finished harvesting — for most summer-fruiting varieties, this is in July or August. Leave the new green canes that have grown up from the base this year; tie them into your support framework, spacing them about 10 cm apart. These will carry next year’s crop. Autumn-fruiting raspberries are different — do not cut those back until late winter.

    What to Do Next

    July is a month where consistent, steady effort pays off more than any single dramatic action. Here is your priority list:

    1. Sow successional crops this week. Lettuce, beetroot, carrots, and French beans sown now will fill your kitchen through autumn. Every week you delay narrows the harvest window.
    2. Get on top of watering. Set up a routine — containers in the evening, borders when the top 2–3 cm of soil is dry. Mulch everything you have not already mulched.
    3. Feed your fruiting crops. Tomatoes, peppers, cucumbers, and courgettes are producing heavily and need regular high-potash feeds to keep going.
    4. Harvest, harvest, harvest. Picking regularly encourages more production, whether it is courgettes, French beans, sweet peas, or raspberries.
    5. Sow biennials for next year. Wallflowers and foxgloves sown this month will give you a head start on colour next spring.

    If you are just getting started with growing your own, our beginner’s guide to starting a vegetable garden walks you through everything from choosing a site to making your first sowing. And for a reminder of what you should have planted earlier this year, check our April, May, and June planting guides.

    Remember to take time to sit in the garden occasionally. You have earned it.

    Affiliate disclosure: Some links in this article may be affiliate links. If you purchase through these links, we may earn a small commission at no extra cost to you. This helps support plantsandgardening.com and allows us to continue creating free gardening guides. We only recommend products we genuinely believe will help your garden. See our full affiliate disclosure for details.
    About the Author

    John Kitcher is the lead gardening writer at Plants and Gardening. He grew up mucking in on his grandfather’s Devon allotment and has spent the last fifteen years growing fruit, veg and ornamentals across three very different UK gardens — a windy coastal plot in North Cornwall, a shaded London back garden, and now a clay-heavy smallholding in the Midlands. He trials every technique covered here in his own beds and containers before writing about it, cross-references against RHS and Kew guidance, and has a soft spot for heritage tomato cultivars and anything that survives a British winter without complaint.

    Got a question about something we’ve written? Drop a comment — we read every one.

  • What to Plant in June: Complete UK Monthly Planting Guide

    What to Plant in June: Complete UK Monthly Planting Guide

    Quick Answer: In June, UK gardeners can direct-sow courgettes, French and runner beans, sweetcorn, beetroot, carrots, and salad leaves outdoors. It is also the ideal month to plant out tomatoes, cucumbers, and peppers raised under cover. Strawberries, summer raspberries, and blueberries are cropping now — and flowers including sunflowers, cosmos, and nasturtiums can still be sown for late-summer colour. The RHS recommends June as one of the most productive sowing months of the year for warm-season crops.

    Why June Is a Turning Point in the UK Garden

    June marks the moment the UK garden shifts from spring caution to full summer productivity. Soil temperatures across most of England, Wales, and lowland Scotland have now risen consistently above 10°C — often reaching 15–18°C by mid-month — which is the threshold at which warm-season crops truly thrive rather than merely survive.

    Frost risk drops to near-zero after the first week of June in most regions (always check your local last-frost date; parts of northern Scotland and high ground can still see late frosts into early June). This means you can confidently move tender plants outside and commit to direct sowing without the protective measures needed in earlier months.

    The longer days — June brings up to 16.5 hours of daylight around the summer solstice — also accelerate growth rates dramatically. Seedlings that would take six weeks in March can be ready to transplant in three to four weeks in June. If you missed sowing some crops in April or May, June gives you a genuine second chance for many of them.

    The golden rule for June is to act early in the month. Every week of growing season matters for crops like sweetcorn and squash that need a long, warm run to mature before autumn arrives.

    Vegetables to Sow in June

    June is an excellent month for direct sowing fast-maturing and heat-loving vegetables outdoors. The following crops are all well-suited to June sowing across most of the UK.

    Courgettes

    If you did not sow courgettes earlier, it is not too late. Sow seeds on their sides, 2.5cm deep, directly into prepared beds or large containers. Space plants 90cm apart — courgettes are vigorous spreaders. The RHS Award of Garden Merit (AGM) cultivar ‘Defender’ (green, reliable, mildew-resistant) is a strong choice. ‘Romanesco’ (ridged, nutty flavour, excellent productivity) is another popular option. Expect your first courgettes 8–10 weeks after sowing.

    Runner Beans and French Beans

    Beans sown in June will crop reliably through August and September. Sow runner beans 5cm deep and 15cm apart at the base of supports — wigwams or 2.4m canes work well. For runner beans, try AGM cultivars ‘Enorma’ (long, stringless pods) or ‘White Lady’ (white-flowered, productive). For French beans, both climbing and dwarf types do well; AGM selections ‘Annabel’ (dwarf, no-support needed) and ‘Cobra’ (climbing, productive, long pods) are consistent performers.

    Beetroot

    Beetroot is one of the easiest crops to direct-sow in June. Sow clusters of 2–3 seeds 2.5cm deep at 10cm intervals, thinning to the strongest seedling. The AGM cultivar ‘Boltardy’ is particularly good for June sowings because it is slow to bolt — a critical trait as day length peaks around the solstice. ‘Pablo’ is another AGM choice with uniform, deep red roots ideal for small gardens.

    Carrots

    June carrot sowings escape the first generation of carrot fly and can mature for autumn harvest. Sow thinly, 1cm deep, in rows 15cm apart. Cover rows with fine mesh immediately after sowing to exclude carrot fly. AGM cultivars ‘Nairobi’ and ‘Flyaway’ both suit summer sowing — ‘Flyaway’ has the added benefit of some resistance to carrot fly. Carrots need loose, stone-free soil; if your ground is heavy, use containers or raised beds.

    Salad Leaves and Lettuce

    Continue sowing cut-and-come-again salad leaves every two to three weeks to maintain a continuous supply. In June, choose bolt-resistant varieties. AGM lettuce ‘Little Gem’ (compact cos, quick to mature) and ‘Chatsworth’ (butterhead, good heat tolerance) are reliable choices. Sow shallowly — 0.5cm deep — and water regularly in dry spells.

    Sweetcorn

    Early June is the last realistic sowing window for sweetcorn in most of the UK. Sweetcorn needs a long warm season, so every week counts. Sow in a block (not a row) to aid wind pollination, 30cm apart each way, 2.5cm deep. AGM cultivars ‘Swift’ (early-maturing, ideal for shorter UK seasons) and ‘Lark’ (large cobs, mid-season) are both reliable. In northern England and Scotland, use fleece to warm the soil before sowing and protect young plants in cool spells.

    Winter Squash and Pumpkins

    June is actually the optimal month to sow winter squash outdoors — earlier sowings often sit in cold soil without benefiting from the extra weeks. Sow 2–3 seeds per station, 2.5cm deep, thinning to one plant. AGM cultivars ‘Crown Prince’ (grey-blue skin, orange flesh, superb storage) and ‘Honey Bear’ (compact, rich nutty flavour, ideal for small gardens) are both excellent for UK conditions. Space generously: trailing types need 1.5–2m in each direction.

    Cucumber (Outdoor / Ridge Types)

    Outdoor ridge cucumbers can be sown directly in June once soil is warm. Sow 2cm deep, one seed per station, spacing 60cm apart. AGM cultivar ‘Marketmore’ produces straight, dark-green fruits and has good disease resistance. ‘Telegraph Improved’ can also be grown outdoors in a sheltered, sunny spot. Keep plants well-watered and mulch to retain moisture.

    Tender Crops to Plant Out in June

    If you started tomatoes, peppers, aubergines, cucumbers, and basil under cover in spring, June is when they move to their final outdoor or unheated glasshouse positions.

    Tomatoes

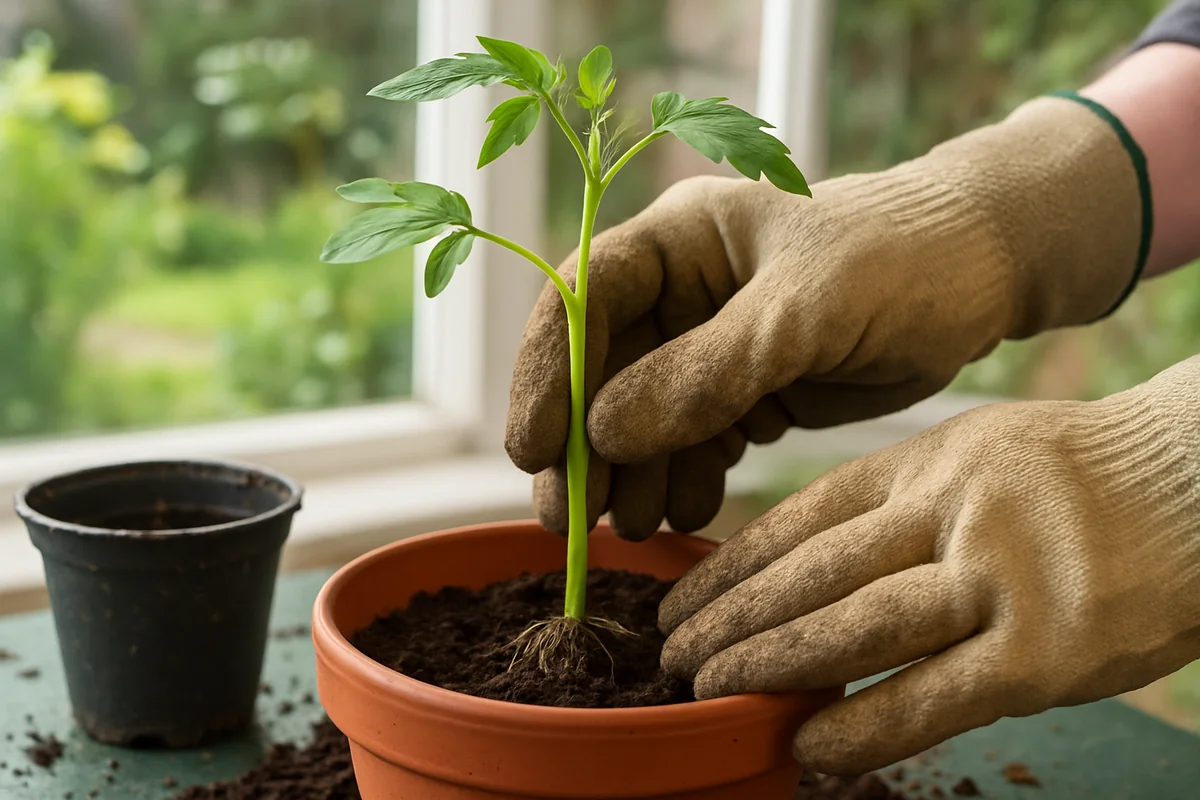
    Plant tomatoes outside after the last frost date for your area — for most of England, the first week of June is safe. If you are growing them on a patio or balcony, see our full guide to growing tomatoes in containers. Bury the stem up to the lowest leaves to encourage rooting. Proven AGM outdoor varieties include ‘Sungold’ (orange cherry, very sweet) and ‘Shirley’ (cordon, reliable in cool summers). ‘Gardener’s Delight’ (cherry, exceptional flavour), ‘Alicante’ (medium-sized, versatile), and ‘Moneymaker’ (classic cordon, consistent cropper) are also popular outdoor choices. Stake cordons immediately and pinch out sideshoots weekly. See our guide on how to grow tomatoes from seed in the UK for full growing details.

    Peppers and Chillies

    Peppers and chillies need the warmest spot available — a south-facing wall, glasshouse, or polytunnel. The AGM cultivar ‘Mohawk’ is one of the best choices for outdoor growing in the UK; it is compact, early to mature, and reliably productive even in cooler summers. Plant 45cm apart and water consistently; irregular watering causes blossom drop.

    Cucumbers (Glasshouse)

    Indoor cucumber plants raised from seed can be planted into glasshouse beds or large containers in June. Train them up vertical strings or trellis. Maintain humidity by misting and watering regularly. Glasshouse varieties like ‘Telegraph Improved’ produce long, smooth fruits when given the warmth they need.

    For growing vegetables in limited space, see our advice on the best vegetables to grow in containers and the best grow bags for vegetables.

    Herbs to Sow and Plant in June

    June is excellent for both sowing tender herbs outdoors and planting out pot-grown herbs that have been hardening off.

    Basil

    Basil is the quintessential June herb — it thrives in warm conditions and sulks in anything below 10°C. Sow outdoors in a sheltered, sunny spot or in containers on a warm patio. The AGM cultivar ‘Aroma 2’ has strong fragrance, good leaf size, and reasonable bolt resistance. Pinch out growing tips regularly to keep plants bushy. Never let basil sit in waterlogged compost — it rots quickly.

    Coriander

    Coriander bolts rapidly in long June days, but if you choose bolt-resistant varieties and sow every two weeks you can maintain a supply. Sow thinly in rows 20cm apart and harvest young leaves regularly. Sow in light shade to slow bolting.

    Dill, Fennel, and Chervil

    All three do well from June sowings. Dill and fennel are best sown direct as they dislike root disturbance. Chervil prefers a semi-shaded position and remains productive into autumn from a June sowing.

    Perennial Herbs (Plant Out)

    June is a good time to plant out pot-grown rosemary, thyme, sage, and oregano into their final positions. These Mediterranean herbs thrive in the warmth and can establish well before winter. Choose a free-draining spot; improve heavy soil with grit before planting.

    Fruit to Plant and Tend in June

    Strawberries

    Strawberries are fruiting through June. Remove runners promptly to direct energy into fruit production unless you want to propagate new plants (pin runners into small pots of compost for new plants, ready for replanting in August). Tuck straw under ripening fruits to keep them clean and deter slugs. AGM cultivars ‘Cambridge Favourite’ (mid-season, reliable, excellent flavour) and ‘Hapil’ (mid-to-late season, large fruits, good on light soils) are well-suited to UK conditions. See our full guide on growing strawberries in pots for container-specific advice.

    Raspberries

    Summer-fruiting raspberries such as AGM cultivar ‘Glen Ample’ (large, firm fruits, spine-free canes) are in or approaching crop in June. Net the fruit cage as berries colour up to exclude birds. Do not prune summer raspberries now — wait until after fruiting. Autumn-fruiting ‘Joan J’ (AGM, compact, spine-free) is still growing vegetatively; ensure canes are tied in and the bed is weed-free.

    Blueberries

    Container-grown blueberries are ripening from late June. Maintain consistently moist, acidic compost (pH 4.5–5.5) — use rainwater where possible; tap water is too alkaline for blueberries over time. AGM cultivars ‘Duke’ (early-cropping, sweet flavour) and ‘Spartan’ (mid-season, large fruits, reliable) are strong performers in UK containers.

    General Fruit Care

    Water newly planted fruit trees and bushes regularly — June can turn dry, and drought stress in the first growing season causes long-term problems. Apply a balanced granular fertiliser (such as Growmore) around the base, keeping it away from the trunk, and mulch to retain moisture.

    Flowers to Sow in June

    It is not too late to sow many annual flowers in June for late-summer and autumn colour. These can be sown direct into borders or into trays for later transplanting.

    Sunflowers

    A June sowing of sunflowers (Helianthus annuus) will flower from August. Sow 2.5cm deep, one seed per pot or station, in a sunny spot. Stake tall varieties as they grow. Choose shorter cultivars like ‘Pacino’ or ‘Sunbright’ for containers; taller types such as ‘Giant Single’ are better in borders with support.

    Cosmos

    Cosmos (Cosmos bipinnatus) grows quickly from a June sowing and produces feathery-leaved plants smothered in flowers from late summer. Sow direct or in trays, transplanting when roots fill the module. ‘Sensation Mixed’ and ‘Purity’ (white) are popular choices. Deadhead regularly to prolong flowering into October.

    Nasturtiums

    Nasturtiums (Tropaeolum majus) thrive in poor soil and are one of the easiest flowers to grow from seed. Sow direct, 2cm deep, in a sunny spot. Both flowers and leaves are edible — a bonus for kitchen gardeners. Avoid overfeeding; rich soil produces more leaves than flowers.

    Hardy Annuals for Late Sowing

    Cornflower (Centaurea cyanus), pot marigold (Calendula officinalis), and phacelia can all be sown in June for late-summer flowering. Phacelia is particularly useful as a fast-growing green manure or pollinator plant if you have a gap in the veg patch.

    June Gardening Tasks Checklist

    • Water consistently: June can be dry. Water in the morning at the base of plants to reduce fungal disease. Use mulch — bark chips, straw, or garden compost — to retain moisture and suppress weeds. For container plants, check daily; pots dry out rapidly in warm weather. See our guide to the best compost for container gardening for advice on moisture-retentive growing media.
    • Pinch out tomato sideshoots: For cordon (indeterminate) varieties, remove sideshoots growing in the leaf axils each week. Bush (determinate) types do not need pinching.
    • Erect supports: Put up cane wigwams, netting, or trellis for climbing beans, cucumbers, and sweetpeas before they need it — it is easier to install before plants take off than to retrofit later.
    • Thin seedlings: Direct-sown carrots, beetroot, lettuce, and other crops need thinning to avoid overcrowding. Thinning is the single task most beginners skip — and it makes the biggest difference to yields.
    • Weed regularly: June warmth accelerates weed growth. Hoe between rows on dry days (disturbed weeds die in sun quickly), and hand-weed around delicate seedlings.
    • Net brassicas and soft fruit: Cabbage white butterflies and birds are active. Net brassica crops with fine mesh and cover soft fruit with bird-proof netting as it colours up.
    • Feed container crops: From June, container-grown tomatoes, peppers, and cucumbers need a weekly liquid feed with a high-potassium fertiliser (tomato feed) once the first flowers appear.
    • Check for pests: Aphids, slugs, and vine weevil are all active. Check under leaves regularly. Encourage natural predators — ladybirds, lacewings, and ground beetles — by leaving some rough edges in the garden.
    • Deadhead flowers: Remove spent blooms from roses, geraniums, and annual flowers to extend the flowering season.
    • Order bare-root strawberry runners: If you plan to replant your strawberry bed (recommended every 3–4 years), order certified virus-free runners now for August delivery.

    Frequently Asked Questions

    Is it too late to plant tomatoes in June?

    No — June is actually the ideal month to plant out tomatoes in the UK, provided the risk of frost has passed for your area. Most of England is frost-free from the first week of June. Plants raised under cover in April or May can go straight into their final outdoor positions now. If you have not grown tomatoes from seed, you can buy plug plants or pot-grown plants from garden centres through June. Earlier outdoor planting in cool, frost-prone springs often results in stressed, checked plants; June-planted tomatoes frequently catch up quickly.

    What salad leaves can I sow in June?

    A wide range of salad leaves germinates well in June warmth, including lettuce (choose bolt-resistant varieties such as AGM ‘Little Gem’ or ‘Chatsworth’), rocket, mizuna, mustard leaves, land cress, and cut-and-come-again mixed salad. Sow every two to three weeks for continuous harvest. In hot spells, sow in light shade or wait for cooler evening temperatures before sowing, as some seeds become dormant above 25°C.

    Can I still sow courgettes in June?

    Yes. Courgettes sown in early June will begin cropping in August and continue productively until the first autumn frosts in October. This gives a good 8–10 weeks of harvest. Sow seeds on their sides (to prevent rotting) 2.5cm deep in pots or directly in prepared ground, and transplant or thin to one plant per 90cm station. Courgettes grow extremely fast once temperatures are reliably warm.

    What should I do if I missed sowing in spring?

    June is a genuine catch-up opportunity for many crops. You can still sow courgettes, French and runner beans, beetroot, lettuce, carrots, sweetcorn (early June only), cucumbers, and most herbs. Crops with very long growing seasons — parsnips, main-crop onions from seed, celery — are now too late for this year, but there is still plenty to fill the veg patch. If you are new to growing vegetables, our guide to starting a vegetable garden as a beginner in the UK will help you prioritise what to grow for the best return on your effort.

    How often should I water in June?

    This depends on your soil, recent rainfall, and what you are growing. As a general rule: check containers daily (they dry out fastest) and water when the top 2–3cm of compost feels dry. In borders, established plants with good mulch coverage may only need watering in prolonged dry spells. Newly sown seeds need consistent moisture until germination. Tomatoes and cucumbers need steady, regular watering — irregular watering causes blossom end rot and bitter cucumbers. Early morning watering at the base of plants is most efficient and reduces fungal disease risk.

    What flowers attract pollinators in June?

    June is the height of pollinator season in the UK, and your choice of flowers can make a significant difference to fruit set in the vegetable garden. Phacelia, borage, pot marigold (calendula), cornflower, and single-flowered dahlias are all excellent pollinator plants that can be sown in June. Hardy geraniums, lavender, and alliums (most still flowering in early June) are also highly attractive to bees. The RHS recommends choosing flowers with open, accessible centres — avoid densely double flowers that pollinators cannot access.

    What to Do Next

    June is a busy, rewarding month — but it sets the foundation for everything that follows in July, August, and September. Here are the most important next steps:

    • Act early in June: The first two weeks are the most productive sowing window. Sweetcorn in particular should be sown by 10 June at the latest in most UK locations.
    • Get your infrastructure in place: Supports, netting, and irrigation are easier to set up before crops need them. A quick half-day now saves hours of remediation later.
    • Keep notes: Record what you sow, where, and when. This information is invaluable for planning next year and understanding what worked in your specific conditions.
    • Order ahead for autumn: Spring-flowering bulbs are best ordered in summer while the ranges are full — see which to choose in our guide to spring bulbs to plant in September.
    • Plan your July sowings: As June crops establish, start thinking about July successional sowings of beetroot, carrots, and salad leaves to maintain continuity into autumn.

    For more growing help, explore these related guides:


    Affiliate disclosure: Some links on this page are affiliate links. If you purchase through them, we may earn a small commission at no extra cost to you. We only recommend products we have independently assessed and believe offer genuine value to UK gardeners.

    What You’ll Need This Month

    June splits between two jobs: keeping spring plantings healthy and sowing a second wave of fast-growing crops. Here’s what helps with both.

    Watering and Feeding

    • Watering can or hose with adjustable nozzle — June can be dry and warm. Containers may need watering daily. A 10L watering can (£8–£15) with a detachable rose covers most needs.
    • Liquid tomato feed — essential from now until September for tomatoes, peppers, aubergines, and cucumbers. Feed weekly once fruit starts forming.
    • Mulch material — a 5–7cm layer of compost, straw, or bark around plants reduces watering frequency and suppresses weeds. Bark mulch costs roughly £5–£8 for a 50L bag.

    Harvesting and Successional Sowing

    • Garden scissors or snips — cleaner cuts than tearing by hand, reducing disease risk. A pair of quality snips costs £5–£12 and makes harvesting salad leaves, herbs, and courgettes faster.
    • Seed trays or modules — for successional sowings of lettuce, radish, beetroot, and French beans. Sow a small batch every 2–3 weeks for continuous harvests into autumn.
    • Shade netting — if temperatures push above 30°C, lettuce and spinach bolt quickly. Light shade cloth (30–40% shade) extends their productive life.

    Pest Control

    • Insect mesh or enviromesh — keeps carrot fly, cabbage white, and flea beetle off crops without spraying. Drape loosely over hoops and peg down the edges.
    • Companion plants — marigolds (Tagetes) among tomatoes and French beans deter whitefly and attract hoverflies. Cheap to grow from seed or buy as plug plants (£2–£5 for a pack).

    About the Author

    John Kitcher is the lead gardening writer at Plants and Gardening. He grew up mucking in on his grandfather’s Devon allotment and has spent the last fifteen years growing fruit, veg and ornamentals across three very different UK gardens — a windy coastal plot in North Cornwall, a shaded London back garden, and now a clay-heavy smallholding in the Midlands. He trials every technique covered here in his own beds and containers before writing about it, cross-references against RHS and Kew guidance, and has a soft spot for heritage tomato cultivars and anything that survives a British winter without complaint.

    Got a question about something we’ve written? Drop a comment — we read every one.

  • What to Plant in May: Complete UK Monthly Planting Guide

    What to Plant in May: Complete UK Monthly Planting Guide

    Quick Answer: What to Plant in May UK

    • Sow carrots, beetroot, radish, spring onions, and salad leaves directly outdoors after the last frost.
    • Plant out tomatoes, courgettes, runner beans, cucumbers, and pumpkins once they are hardened off and soil temperatures exceed 10°C. Short on space? See how to grow tomatoes in pots.
    • Direct sow hardy annuals like calendula, cornflower, and nasturtium for summer colour.
    • Transplant strawberry runners and containerised fruit bushes into the garden or larger pots.
    • Start basil, coriander, and dill from seed after the last frost in a sheltered spot or container.
    • Use succession sowing to extend harvests with crops like peas, lettuce, and radish.
    Region Typical Last Frost When to Plant Out Tender Crops
    South England & Coastal Areas Mid-April Early to mid-May
    Home Counties Early May Mid-May
    Midlands Mid-May Late May
    North England Late May Early June
    Scotland Early June Mid-June

    Vegetables to Sow Outdoors in May

    Carrots

    Sow carrot seeds directly into well-prepared soil in May for a mid-summer harvest. Choose a fine, stone-free seedbed to prevent forked roots. Use the RHS Award of Garden Merit (AGM) cultivar ‘Nairobi’, which offers excellent flavour and smooth, tapered roots. Sow in drills 1–2cm deep, spacing rows 25cm apart. Keep the soil consistently moist during germination, which takes 14–21 days. Thin seedlings to 5cm apart once they reach 5cm in height.

    Beetroot

    Direct sow beetroot seeds in May for a late summer harvest. The AGM (RHS Award of Garden Merit) cultivar ‘Boltardy’ is resistant to bolting and produces deep red, sweet roots. Sow seeds 1cm deep in rows spaced 30cm apart. Thin to 10cm apart once seedlings are established. Keep soil moist but not waterlogged. Harvest when roots are 4–6cm in diameter, usually 10–12 weeks after sowing.

    French Beans (Direct Sow)

    Sow French bean seeds directly into warm soil once the risk of frost has passed. Choose the AGM variety ‘Sprite’, known for its high yield and disease resistance. Plant seeds 5cm deep, 10cm apart, in rows 50cm apart. Provide support such as wigwams or netting for climbing types. Germination occurs in 7–14 days at soil temperatures above 10°C. Harvest pods when young and tender, typically 6–8 weeks after sowing.

    Peas

    Sow early varieties of peas directly in May for a late-season crop. The AGM cultivar ‘Meteor’ is ideal for UK conditions, offering good yield and resistance to powdery mildew. Sow seeds 5cm deep in well-drained soil, spacing them 10cm apart in rows 45cm apart. Use supports such as pea sticks or netting. Peas prefer cool conditions, so avoid planting in excessively warm soil. Harvest when pods are plump but still green, usually 8–10 weeks after sowing.

    Salad Leaves

    Sow successive crops of salad leaves in May for continuous harvesting. Use the AGM variety ‘Little Gem’ for looseleaf lettuce, which matures quickly and resists bolting. Sow seeds 1cm deep, 15cm apart, in drills or containers. Keep soil moist and thin seedlings to 10cm apart. Succession sow every 2–3 weeks for a steady supply. Harvest outer leaves first to encourage regrowth.

    Spring Onions

    Direct sow spring onion seeds in May for a mid-summer harvest. The AGM cultivar ‘Red Baron’ produces robust, purple-tipped bulbs with a mild flavour. Sow seeds 1cm deep, 5cm apart in rows 30cm apart. Thin seedlings to 8cm apart once they are 10cm tall. Keep soil consistently moist. Harvest when bulbs are 2–3cm in diameter, typically 8–10 weeks after sowing.

    Radish

    Sow radish seeds directly in May for a quick harvest. The AGM cultivar ‘Scarlet Globe’ is prized for its crisp texture and sweet taste. Sow seeds 1cm deep, 2cm apart, in rows 25cm apart. Harvest when roots are 2–3cm in diameter, usually 4–6 weeks after sowing. Succession sow every 10 days to ensure continuous availability.

    Turnips

    Sow turnip seeds directly in May for a late summer crop. The AGM cultivar ‘Tokyo Cross’ produces firm, white roots with a mild, sweet flavour. Sow seeds 1cm deep, 10cm apart, in rows 30cm apart. Thin to 15cm apart once seedlings are 5cm tall. Keep soil moist during germination. Harvest when roots are 5–7cm in diameter, usually 8–10 weeks after sowing.

    Sweetcorn (Direct Sow Late May in South)

    In the south of England, direct sow sweetcorn seeds in late May when soil temperatures exceed 15°C. Use the AGM variety ‘Swift’, which produces sweet, tender cobs. Plant seeds 5cm deep, 30cm apart in blocks of at least 4 plants to ensure good pollination. Water well after sowing. Harvest cobs when kernels are plump and milky, usually 10–12 weeks after sowing.

    Young courgette plants being planted into rich soil in a UK vegetable garden in May
    Young courgette plants being planted into rich soil in a UK vegetable garden in May

    Tender Crops to Plant Out in May

    Tomatoes (Hardened Off, After Last Frost)

    Plant out hardened-off tomato seedlings in May once the last frost has passed and soil temperatures are above 10°C. Use the RHS AGM cultivar ‘Sungold’ for cherry tomatoes or ‘Alicante’ for larger, meaty fruits. Space plants 45cm apart in a sunny, sheltered spot. Insert support stakes or cages at planting time. Water well after planting and feed with a tomato-specific fertiliser every two weeks. Avoid overhead watering to reduce fungal risk.

    Courgettes and Squash

    Plant out courgette and squash seedlings in May after the last frost. Choose the AGM variety ‘Defender’ for compact growth or ‘Sunburst’ for large, yellow fruits. Space plants 75cm apart in a sunny, well-drained location. Provide support with a wigwam or trellis if growing upright. Mulch around the base to retain moisture and suppress weeds. Harvest courgettes when they are 15–20cm long for the best flavour.

    Runner Beans

    Plant out runner bean seedlings in May once they are hardened off and soil temperatures exceed 10°C. Use the AGM cultivar ‘Enorma’, which produces vibrant red flowers and long, tender pods. Install sturdy canes or netting before planting. Plant seedlings 45cm apart in a sunny, sheltered spot. Water well after planting and feed with a high-potash fertiliser every two weeks. Harvest pods when they are 15–20cm long, before the seeds harden.

    Cucumbers

    Plant out cucumber seedlings in May after the last frost. The AGM variety ‘Marketmore’ is a compact, disease-resistant cultivar ideal for small gardens. Plant seedlings 60cm apart in a sunny, sheltered position. Use a vertical support such as a trellis or netting to save space and improve air circulation. Water consistently and feed with a balanced liquid fertiliser every 10 days. Harvest cucumbers when they are 15–20cm long and firm.

    Pumpkins

    Plant out pumpkins in May once soil temperatures exceed 15°C. Use the AGM cultivar ‘Crown Prince’, a blue-skinned winter squash with outstanding sweet flavour. Space plants 1.5m apart in a sunny, well-drained spot. Provide ample space for sprawling vines. Mulch around the base to retain moisture. Harvest when the skin is hard and the colour is deep orange, usually 10–12 weeks after planting.

    Peppers and Chillies

    Plant out pepper and chilli seedlings in May once they are hardened off and soil temperatures are above 10°C. Use the AGM cultivar ‘Mohawk’ for sweet peppers or ‘Apache’ for hot chillies. Plant seedlings 45cm apart in a sunny, sheltered spot. Use grow bags or large pots to control soil temperature and drainage. Water consistently and feed with a high-potash fertiliser every two weeks. Harvest peppers when they are firm and fully coloured.

    Crop AGM Cultivar Spacing Support Needed Planting Time
    Tomatoes Sungold 45cm Yes (cages or stakes) After last frost
    Courgettes Defender 75cm Yes (trellis) After last frost
    Runner Beans Scarlet Runner 45cm Yes (canes or netting) After last frost
    Cucumbers Diva 60cm Yes (trellis) After last frost
    Pumpkins Jack Be Little 1.5m No After last frost
    Peppers Gypsy F1 45cm Yes (cages) After last frost

    Herbs to Grow in May

    Basil (AFTER Frost Only)

    Sow basil seeds in May only after the last frost, when soil temperatures exceed 15°C. The AGM cultivar ‘Aroma 2’ offers superior flavour and is ideal for pesto. Sow seeds 1cm deep in a warm, sunny spot. Thin to 30cm apart. Keep soil moist but not waterlogged. Harvest leaves regularly to encourage bushy growth. For container growing, use large pots with drainage and a premium compost blend.

    Coriander

    Direct sow coriander seeds in May for a late summer crop. The AGM cultivar ‘Calypso’ resists bolting and produces strong, aromatic leaves. Sow seeds 1cm deep in a sunny, sheltered spot. Thin to 20cm apart. Water consistently. Harvest leaves before the plant flowers. Succession sow every 3 weeks for continuous supply.

    Dill

    Sow dill seeds directly in May in a sunny spot. The AGM cultivar ‘Domino’ produces feathery foliage and strong flavour. Sow seeds 1cm deep, 25cm apart. Thin to 30cm apart. Dill self-seeds easily; allow some plants to flower to attract pollinators. Harvest leaves before flowering for best taste.

    Parsley

    Sow parsley seeds in May for a late summer harvest. The AGM cultivar ‘Bravour’ produces abundant flat-leaf foliage with strong flavour. Sow seeds 1cm deep, 20cm apart. Keep soil moist. Germination can take up to 3 weeks. Harvest outer leaves first to encourage regrowth.

    Chives

    Sow chive seeds in May in a sunny spot. The AGM cultivar ‘Forescate’ offers vibrant purple flowers and mild onion flavour. Sow seeds 1cm deep, 20cm apart. Thin to 25cm apart. Harvest leaves as needed. Divide established clumps in early summer to encourage new growth.

    Fruit to Plant and Maintain in May

    May is an excellent month for establishing soft fruit. The RHS strawberry growing guide covers variety selection and planting techniques in detail.

    Strawberry Runners

    Plant strawberry runners in May to establish new plants. Use the AGM cultivar ‘Cambridge Favourite’, known for large, sweet berries. Select healthy runners from established plants and plant them 30cm apart in a sunny, well-drained spot. Water well after planting. Keep soil moist and mulch with straw to suppress weeds and retain moisture.

    Blueberries

    Plant containerised blueberry bushes in May. The AGM cultivar ‘Duke’ produces large, sweet berries and is cold-hardy. Choose a large pot with acidic compost and place in full sun. Water regularly and feed with ericaceous fertiliser every 4 weeks. Mulch with pine bark to maintain acidity.

    Raspberry Maintenance

    In May, tie in new canes of summer-fruiting raspberries and remove old fruiting canes. For autumn-fruiting varieties, prune back canes that have fruited. Use appropriate tools to avoid damaging the plant. Apply a balanced fertiliser and mulch with well-rotted manure to encourage strong growth.

    Flowers to Sow and Plant in May

    Hardy Annuals (Direct Sow)

    Sow hardy annuals directly in May for summer colour. The cultivar calendula ‘Fiesta Gitana’ produces bright orange and yellow blooms. Sow seeds 1cm deep in a sunny spot. Thin to 25cm apart. Centaurea cyanus ‘Sweetheart’ (cornflower) is another AGM choice with long-lasting flowers. Sow in drills and thin to 30cm apart. Nigella ‘Miss Jekyll’ and nasturtium ‘Empress of India’ are also excellent choices for naturalising.

    Half-Hardy Flowers (After Frost)

    Plant out half-hardy annuals after the last frost. The cultivar zinnia ‘Benary’s Giant’ produces large, vibrant flowers. Plant seedlings 45cm apart in full sun. Cosmos ‘Purity’ and Dahlia ‘Bishop’s Children’ are also excellent AGM choices. Space dahlias 60cm apart and support with canes. Water well after planting and feed with a high-potash fertiliser.

    Pollinators

    Plant bee-friendly flowers near vegetable patches to support pollination. Use ‘Lavandula angustifolia ‘Hidcote’ and ‘Echinacea purpurea ‘Magnus’ to attract bees and butterflies. Position in sunny, sheltered spots. Combine with native species like bird’s-foot trefoil and knapweed for maximum benefit.

    Colourful container garden on a UK balcony in May with tomatoes, herbs and flowers
    Colourful container garden on a UK balcony in May with tomatoes, herbs and flowers

    Growing in Containers and Small Spaces

    In May, grow tomatoes, peppers, herbs, and salad leaves in pots. Use large containers with drainage holes and fill with high-quality compost. Water daily in hot weather. Feed every 10 days with a liquid fertiliser. Use grow bags for tomatoes and courgettes. Place containers in full sun and rotate for even growth.

    Crop Container Size Watering Feeding
    Tomatoes 20L+ grow bag or pot Daily in warm weather Every 10 days
    Peppers 15L pot Every 1–2 days Every 10 days
    Herbs (basil, parsley) 10L pot Every 1–2 days Every 14 days
    Salad Leaves 10L container Every 1–2 days Every 14 days

    What NOT to Plant Outdoors in May (Yet)

    Do not plant aubergines directly into the ground in the north of England or Scotland in May. Soil temperatures remain too low, and frost risk is still present. Wait until late June in those regions. Tropical plants like ginger and turmeric should not be planted outdoors in May—keep them in greenhouses or indoors. Garlic should have been planted in autumn; planting it in May is too late for a harvest. Bare-root trees are best planted in winter or early spring; planting them in May risks root stress and poor establishment.

    May Succession Sowing Calendar

    Week Outdoor Sowing Indoor Sowing
    Week 1 Carrots, beetroot, spring onions, radish Tomatoes, peppers, chillies (in heated propagator)
    Week 2 Salad leaves, turnips, peas Cucumbers, courgettes, aubergines
    Week 3 Sweetcorn (south only), nasturtium, calendula Zinnias, marigolds, dahlias
    Week 4 Succession sowing of radish, lettuce, spring onions Coriander, dill, basil

    Frequently Asked Questions

    What Next?

    Continue your growing journey with these guides:

    Start your next planting session with confidence using this month’s guide. Share your progress on social media using #UKGardeningMay.

    Planning your May garden? Share what you are sowing in the comments below.

    What You’ll Need This Month

    May is the month everything goes outdoors. After the last frost date (mid-May in most of England, late May in Scotland), tender crops can finally be planted out. Make sure you have these ready.

    Planting Out

    • Multi-purpose compost — you’ll go through a lot this month. Budget for at least two 40–50L bags (£5–£10 each) if you’re container gardening.
    • Grow bags — the classic choice for tomatoes, peppers, and cucumbers. Three plants per standard grow bag. Around £3–£5 each.
    • Canes, stakes, and plant ties — tomatoes and climbing beans need support from planting day. Bamboo canes (150–180cm) cost roughly £5–£8 for a pack of 20.
    • Tomato feed — start feeding tomatoes once the first truss sets fruit. A 1L concentrate bottle (£4–£7) lasts all season.

    Protection

    • Slug pellets (organic, pet-safe) — slugs are most active in warm, damp May weather. Ferric phosphate pellets are safe around pets and wildlife.
    • Netting — protects brassicas from cabbage white butterflies. Fine mesh netting (£5–£10) draped over hoops keeps butterflies off without restricting growth.
    • Watering system or timer — if you have many containers, a simple drip irrigation kit (£15–£30) saves daily watering during warm spells.

    Where to Buy Seeds and Supplies

    May is the last practical month for sowing many crops from seed, so order promptly. For quicker results, plug plants and young plants are widely available and go straight into their final positions.

    Seeds and Plug Plants

    • Thompson & Morgan — wide range of plug plants dispatched at the right planting time. Tomato and pepper plug plants (£5–£12 for 3–6 plants) save weeks compared to seed sowing.
    • You Garden — strong selection of vegetable plug plants and ready-to-plant collections. Their multi-buy offers often reduce the per-plant cost.
    • Suttons — reliable seed supplier with good availability into late spring. Herb seed collections (£6–£10) are ideal for May sowing.

    Growing Supplies

    • Crocus — premium tools, grow bags, and containers. Their own-brand compost is well-reviewed. Grow bags from £4, large containers from £8–£25.
    • Local garden centres — best for buying compost in bulk (often cheaper than delivery) and inspecting plug plants before you buy.

    About the Author

    John Kitcher is the lead gardening writer at Plants and Gardening. He grew up mucking in on his grandfather’s Devon allotment and has spent the last fifteen years growing fruit, veg and ornamentals across three very different UK gardens — a windy coastal plot in North Cornwall, a shaded London back garden, and now a clay-heavy smallholding in the Midlands. He trials every technique covered here in his own beds and containers before writing about it, cross-references against RHS and Kew guidance, and has a soft spot for heritage tomato cultivars and anything that survives a British winter without complaint.

    Got a question about something we’ve written? Drop a comment — we read every one.

  • What to Plant in April: Complete UK Monthly Planting Guide

    What to Plant in April: Complete UK Monthly Planting Guide

    April marks the peak of outdoor vegetable sowing across the UK, with rising soil temperatures and longer daylight hours creating ideal conditions for direct sowing hardy crops. You can now plant carrots, beetroot, peas, lettuce, radish, and spinach directly into the garden. Simultaneously, you should begin warm-season vegetables such as tomatoes, courgettes, peppers, and cucumbers under glass or in a heated propagator. This is also the time to plant second early and maincrop potatoes, establish strawberry runners, and start herb and flower seeds indoors. The RHS advises that April is one of the most productive months for gardeners, with the potential to grow a wide range of crops if timing aligns with your local last frost date [RHS April Jobs].

    Quick Answer: What to Plant in April UK

    • Direct sow outdoors: Carrots, beetroot, peas, mangetout, radish, lettuce, spinach, spring onions, turnips, chard
    • Start indoors: Tomatoes, courgettes, peppers, aubergines, cucumbers, sweetcorn
    • Plant out: Potatoes, strawberries, hardy herbs like rosemary, sage, and thyme
    • Regional timing varies: Sowing dates depend on your last frost date—check your local climate.

    Soil temperature should be at least 7°C for most vegetables. Use a thermometer pushed 5cm deep to check.

    Regional Timing Guide — Know Your Last Frost Date

    Your local last frost date determines the optimal timing for sowing and planting. In the UK, this varies significantly from the South West to the Scottish Highlands. The RHS provides a detailed regional guide to help you time your sowings accurately [RHS April Jobs]. Delaying planting until after the last frost avoids damage to tender crops and improves germination success. Always test soil temperature at a depth of 5cm using a soil thermometer—most vegetables require a minimum of 7°C for reliable germination.

    Region Average Last Frost Date Sowing Guidance
    South West / London 25 Mar – 10 Apr Can sow tender crops outdoors mid-April
    South East 1 – 15 Apr Safe to sow most tender crops from mid-April
    Midlands 10 – 25 Apr Delay tender crops until late April
    North West / Yorkshire 10 Apr – 5 May Add 7–14 days to southern dates
    Scotland Lowlands 25 Apr – 15 May Outdoor sowing from late April at earliest
    Scottish Highlands 10 – 25 May April sowing only under cover

    For example, if you’re in the Midlands, avoid planting tomatoes or courgettes outdoors before late May. In contrast, gardeners in the South East can begin sowing tender vegetables like cucumbers and peppers in late April under protection. Always consider microclimates—south-facing walls and raised beds warm up faster than open ground.

    Vegetables to Sow Outdoors in April

    Carrots

    Sow ‘Flyaway’ AGM (carrot fly resistant) or ‘Sweet Candle’ AGM. These cultivars are specifically bred to resist carrot fly, a common pest in UK gardens. Plant seeds 1cm deep in well-prepared, stone-free soil. Thin seedlings to 5–7.5cm apart to prevent overcrowding and ensure straight roots. Rows should be spaced 15–30cm apart. Harvest from late July to early September, depending on the variety. ‘Flyaway’ AGM is ready in 12–16 weeks, while ‘Sweet Candle’ AGM gives a sweeter, more uniform root. Companion plant carrots with onions or leeks—these repel carrot fly and improve soil structure. Avoid planting near dill or parsley, which attract carrot fly.

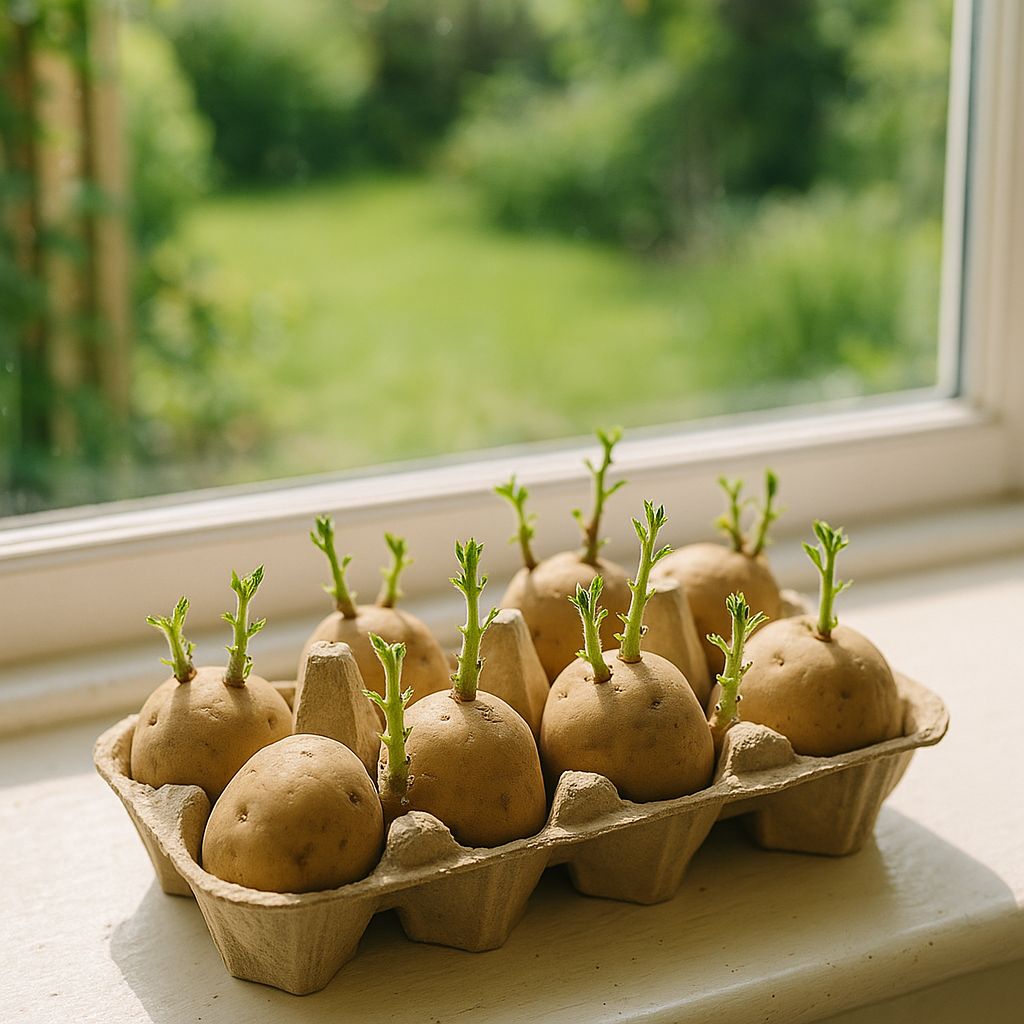
    Seed potatoes chitting in an egg box on a bright windowsill

    Beetroot

    Choose ‘Boltardy’ AGM (bolt-resistant) or ‘Pablo’ AGM for reliable yields. Sow seeds 2.5cm deep, 10cm apart in rows 30cm apart. Keep soil consistently moist during germination, which takes 7–14 days. Beetroot is ready for harvest in 10–12 weeks. ‘Boltardy’ AGM performs well in cooler soils, reducing the risk of premature flowering. Companion plant with lettuce or radish for early intercropping. Avoid planting near spinach or chard, as they compete for nutrients. Harvest when roots are 4–6cm in diameter for best texture.

    Peas and Mangetout

    Plant ‘Kelvedon Wonder’ AGM (a classic British variety) or ‘Hurst Green Shaft’ AGM (disease-resistant). Sow in a 5cm deep trench, 7.5cm apart, with rows 30cm apart. Peas require a minimum soil temperature of 10°C for germination. Support with canes, netting, or a pea wigwam to encourage upright growth. Harvest ‘Kelvedon Wonder’ in 12–16 weeks. For mangetout, ‘Delikata’ AGM offers a sweet, tender pod. Companion plant peas with carrots and radishes — these improve soil health and reduce pests. Avoid planting near garlic or onions, as alliums can inhibit legume growth.

    Lettuce and Salad Leaves

    Sow ‘Little Gem’ AGM, ‘Salad Bowl’ AGM, or ‘Lollo Rossa’ for a continuous supply. Surface sow seeds and keep the soil moist. Practice cut-and-come-again harvesting by picking outer leaves, allowing the plant to regrow. ‘Little Gem’ AGM is ideal for early salads and can be harvested in 4–6 weeks. ‘Lollo Rossa’ offers a deep red, frilly leaf with a mild flavour. Succession sow every 2–3 weeks for a steady supply. Companion plant with radishes or spinach—these grow quickly and free up space. Avoid planting near dill or coriander, which attract aphids.

    Radish

    Plant quick-growing varieties like ‘Cherry Belle’ or ‘French Breakfast’. Sow thinly in rows 15cm apart, 1cm deep. Radishes are ready in 4–6 weeks and are perfect for early harvests. Succession sow every 3–4 weeks for a continuous supply. ‘French Breakfast’ is ideal for longer roots and better flavour. Companion plant with carrots and lettuce—these grow quickly and allow you to intercrop. Avoid planting near mustard or cabbage, which can attract flea beetles.

    Spinach and Swiss Chard

    These leafy greens thrive in cooler conditions. Sow ‘Lazio’ AGM (a reliable, bolt-resistant spinach) or ‘Fordhook Giant’ AGM (for chard) 2.5cm deep. Keep soil consistently moist, especially during germination. Spinach is ready in 6–10 weeks; chard can be harvested from 8 weeks onwards. ‘Lazio’ AGM has good resistance to downy mildew. Companion plant spinach with radishes or lettuce for intercropping. Avoid planting near cucumbers or tomatoes, which can increase soil-borne diseases. Harvest outer leaves first to encourage regrowth.

    Spring Onions and Turnips

    Sow ‘Atlantic’ turnip and spring onions directly in April. Turnips are ready in 6 weeks, while spring onions take 8–12 weeks. Plant in well-prepared, well-drained soil. Sow spring onions 1cm deep, 10cm apart in rows 15cm apart. Thin seedlings to 15cm apart. Companion plant with carrots, radishes, or lettuce. Avoid planting near garlic or onions, which can attract pests. Harvest turnips when they are 4–6cm in diameter for best texture.

    Vegetables to Start Indoors in April

    Tomatoes — ‘Sungold’ AGM, ‘Gardener’s Delight’, ‘Shirley’ AGM

    Sow ‘Sungold’ AGM (golden cherry tomatoes), ‘Gardener’s Delight’ (cherry, reliable), or ‘Shirley’ AGM (disease-resistant) at 18°C in small pots or seed trays. Use a peat-free compost and keep the soil consistently moist. Once true leaves appear, pot on into 7.5–10cm pots. Harden off gradually over 7–10 days before planting out in late May or early June. Place in a sunny, sheltered spot with protection from wind. Avoid overwatering—let the compost dry slightly between waterings. Feed container-grown tomatoes with a balanced liquid fertiliser every 2 weeks once established. Do not plant outside until temperatures are reliably above 10°C.

    Courgettes and Squash — ‘Defender’ AGM, ‘Astia’ AGM

    Start ‘Defender’ AGM (CMV-resistant, British-bred) or ‘Astia’ AGM (compact, ideal for containers) in 7.5cm pots at 18–21°C. Use peat-free compost and avoid cold drafts. Keep warm and well-lit. Plant out after the last frost, spacing 90cm apart. Support with a trellis if growing vertically. Feed with a balanced liquid fertiliser every 2 weeks once established. Protect young plants from cold winds and slugs. Avoid planting in cold soil—wait until soil temperature exceeds 12°C.

    Cucumbers, Peppers and Aubergines

    Cucumbers, peppers, and aubergines require 18–21°C for germination. Sow cucumbers in late April under cover. Peppers and aubergines need a long growing season—start indoors now and keep them warm until planting out in late May. Use a heated propagator if necessary. Once seedlings have two true leaves, pot on into 10cm pots. Harden off gradually. Feed with a balanced liquid fertiliser every 2 weeks once established. Avoid overwatering—these crops prefer slightly drier conditions. Plant out only when soil temperature is consistently above 12°C.

    Sweetcorn

    Sow sweetcorn under glass in April. Use a peat-free compost and plant in blocks (not rows) for effective wind pollination. Space plants 30cm apart in each direction. Plant out at the end of May when temperatures are stable. Feed with a balanced liquid fertiliser every 2 weeks once established. Avoid planting near potatoes or tomatoes—these can attract similar pests. Harvest in 10–12 weeks when cobs are plump and tassels are brown.

    Potatoes to Plant in April

    Second early potatoes (plant early to mid-April): ‘Charlotte’ AGM (excellent for salads), ‘Jazzy’ AGM (early yield, good flavour). Maincrop (plant mid-April): ‘Maris Piper’ AGM (ideal for chips), ‘Desiree’ AGM (stores well), ‘Sarpo Mira’ AGM (highly blight resistant).

    Type Cultivar When to Plant Spacing Depth
    Second early ‘Charlotte’ AGM Early–mid April 30–37cm 15cm
    Second early ‘Jazzy’ AGM Early–mid April 30–37cm 15cm
    Maincrop ‘Maris Piper’ AGM Mid-April 30–37cm 15cm
    Maincrop ‘Desiree’ AGM Mid-April 30–37cm 15cm
    Maincrop ‘Sarpo Mira’ AGM Mid-April 30–37cm 15cm

    Plant seed potatoes in trenches 15cm deep. As shoots emerge, begin earthing up by mounding soil around the stems to protect tubers from sunlight and encourage more growth. Repeat every 2–3 weeks until the plants are 30cm tall. Keep soil consistently moist and weed-free. Feed with a high-potash fertiliser when tubers begin to form—apply every 2 weeks. Harvest second earlies in July; maincrop potatoes in September. Do not harvest before tubers are fully formed.

    Herbs to Grow in April

    Sow indoors: basil ‘Aroma 2’ AGM (Fusarium resistant), parsley ‘Bravour’ AGM. Use a warm spot (18–21°C) and peat-free compost. Keep soil moist but not waterlogged. Pot on when seedlings have two true leaves. Plant out after last frost. ‘Aroma 2’ AGM is ideal for cooking and pest resistance. Companion plant with tomatoes—these improve growth and deter pests.

    Plant out or buy plants: rosemary ‘Miss Jessopp’s Upright’, sage ‘Purpurascens’ AGM, thyme ‘Silver Queen’ AGM. These thrive in well-drained soil and full sun. Space 30–45cm apart. Mulch with gravel or grit to improve drainage. Harvest by cutting stems in the morning—avoid cutting more than one-third of the plant at once.

    Direct sow outdoors: chives, coriander. Sow in a sheltered spot, thin seedlings to 15cm apart. Chives are hardy and regrow after cutting. Coriander bolts quickly—succession sow every 3 weeks. Harvest by cutting outer leaves.

    Mint: always grow in a container — it spreads aggressively and invades other plant beds. Use a 30cm pot with drainage holes. Plant in peat-free compost and keep moist. Harvest by cutting stems at the base.

    Fruit to Plant in April

    Strawberry runners: plant now. ‘Cambridge Favourite’, ‘Elsanta’ fruit within weeks. Lay runners on soil, peg down, and place straw underneath to deter slugs. Space runners 30cm apart. Water regularly and feed with a balanced liquid fertiliser every 2 weeks. Prune runners to encourage fruiting.

    Raspberry canes: plant bare-root canes in early April while still dormant, or use container-grown plants later in the month. Plant in well-prepared soil. Keep soil moist and support with a trellis. Choose ‘Glen Ample’ AGM (high yield, disease-resistant). Space 50cm apart. Prune laterals in summer and cut old canes after fruiting.

    Blueberries: must be grown in ericaceous compost. Containers are ideal—use a 45cm pot with peat-free ericaceous compost. Water with rainwater to maintain acidity. Mulch with pine bark or oak leaves. Plant bee-friendly flowers nearby to improve pollination and fruit set. Growing two different cultivars close together encourages cross-pollination and heavier crops.

    Gooseberries and currants: plant bare-root bushes in a sunny or lightly shaded spot. Space 1.5m apart and mulch with well-rotted manure. Prune annually in winter to encourage fruiting. Protect from birds with netting.

    Flowers to Sow and Plant in April

    Hardy Annuals

    Sow hardy annuals directly outdoors: calendula ‘Orange King’, California poppy, field poppy, sweet pea ‘Cupido’, cornflower, nasturtium ‘Empress of India’, sunflower ‘Sunrich’. These tolerate light frosts and germinate in cool soil. Sow 1cm deep, thin to 15–30cm apart. Harvest flowers for cutting in 8–12 weeks. Companion plant with vegetables—nasturtiums deter aphids.

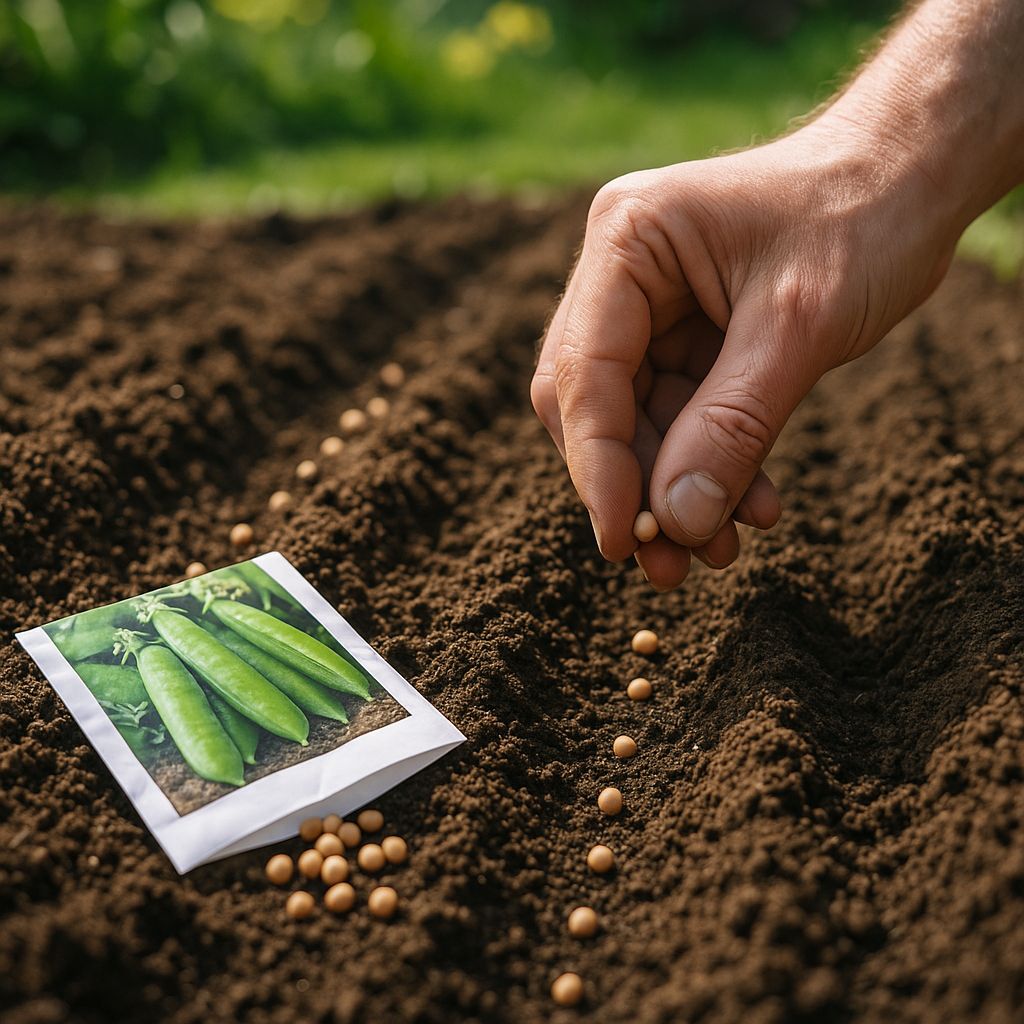
    Seeds being sown directly into prepared garden soil in spring

    Half-Hardy Flowers

    Start indoors under cover: cosmos ‘Sensation Mixed’, French marigold ‘Tangerine Gem’, zinnia ‘Zahara’, nicotiana ‘Lime Green’. Sow at 18–21°C in peat-free compost. Transplant after last frost. Space 20–45cm apart. Deadhead regularly to prolong flowering. These attract pollinators and add colour to borders.

    Bulbs

    Plant summer bulbs now: gladioli corms (‘Sarabande’), freesia (‘Purple Queen’), anemone (‘Honorine Jobert’). Plant corms 10cm deep, 15cm apart. Water well after planting. Gladioli need staking. Freesia and anemone thrive in light shade. All bloom from June onwards.

    Pollinators

    Boost pollinators with borage, phacelia, calendula ‘Indian Prince’, and cornflower ‘Blue Boy’. Sow directly in borders or containers. These attract bees, hoverflies, and butterflies. Deadhead to encourage repeat flowering. Plant in groups for maximum impact.

    Growing in Containers and Small Spaces

    Grow salad leaves, radish, herbs, strawberries, dwarf French beans, and patio tomatoes in pots this April. Use pots of at least 20cm for salad crops, 30cm or larger for tomatoes, and grow bags for potatoes. Use quality peat-free multipurpose compost—RHS recommends brands like John Innes or those certified by the Soil Association [RHS AGM Herbs]. Ensure pots have drainage holes—add crocks or gravel at the base. Position containers in full sun for at least 6 hours daily. Water daily in warm weather—check soil moisture by fingertip. Feed container plants with a balanced liquid fertiliser every 2 weeks once established. Avoid overwatering—containers dry out faster than garden beds.

    For best results, use grow bags for potatoes. Fill with compost, plant seed potatoes 15cm deep, and earth up as shoots emerge. Harvest when foliage dies back. Use self-watering containers for herbs and salad crops—these reduce maintenance.

    What NOT to Plant Outdoors in April

    Do not plant runner beans outdoors — they need consistent temperatures above 10°C and are at risk of frost damage. Tender bedding plants like petunias and begonias should wait until late May, as they cannot tolerate cold nights. Basil dies instantly if exposed to frost — sow indoors only. Tomatoes and peppers require a stable 15°C+ environment; planting them outside now invites stunted growth or death. Courgettes and squash are frost-sensitive and should be delayed until after the last frost. All these crops fail in cold soil or sudden temperature drops. Instead, focus on hardy crops like lettuce, radish, and spinach, which thrive in April’s mild conditions.

    April Succession Sowing Calendar

    Crop Sow Every April May June July
    Lettuce Every 2 weeks Yes Yes Yes Yes
    Radish Every 3 weeks Yes Yes Yes Yes
    Spring onions Every 3 weeks Yes Yes Yes Yes
    Spinach Every 3 weeks Yes Yes Yes No
    Beetroot Every 3 weeks Yes Yes Yes Yes

    Frequently Asked Questions

    • Is it too late to plant seeds in April? No — April is ideal for sowing many vegetables and flowers.
    • Can I plant tomatoes outside in April UK? No — keep them under cover until late May, when temperatures are reliably above 10°C.
    • What is the easiest vegetable to grow in April? Radish — ready in just 4 weeks.
    • What flowers can I plant in April for summer blooms? Cosmos, nasturtiums, calendula, sunflowers, and sweet peas.
    • Do I need a greenhouse to garden in April? No — many crops can go straight outdoors; a sunny windowsill works for indoor starts.
    • What should I avoid planting outdoors in April? Runner beans, tender bedding plants, basil, tomatoes, and peppers — all need warmer conditions.

    What Next?

    Got questions about April planting? Drop a comment below — we’d love to help.

    What You’ll Need This Month

    April is one of the busiest sowing months, so having the right kit ready saves time and prevents missed windows. Here’s what to gather before you start.

    Seed Starting

    • Seed trays and module inserts — 24-cell or 40-cell trays work well for most vegetable seeds. Modules make transplanting easier and reduce root disturbance.
    • Seed compost — finer than multi-purpose, with better drainage for germination. A 20L bag covers roughly 10 standard trays.
    • Propagator or cling film — keeps humidity high for germination. A heated propagator (around £20–£35) speeds up tomatoes, peppers, and aubergines significantly.
    • Plant labels and a waterproof pen — you will forget what you sowed where. Label everything.

    Outdoor Sowing and Planting

    • Hand trowel and fork — for planting out and weeding. A decent stainless steel set costs £15–£30 and lasts years.
    • Fleece or cloches — April nights can still drop below 5°C. Horticultural fleece (around £5–£10 for a 10m roll) protects tender transplants from late frosts.
    • Watering can with a fine rose — gentle watering prevents washing out seeds and damaging seedlings.
    • Canes and twine — for supporting peas, beans, and early-planted tomatoes.

    Where to Buy Seeds and Supplies

    Order seeds early in the month — popular varieties sell out fast in spring. These UK suppliers offer reliable stock and delivery.

    Seeds and Plants

    • Thompson & Morgan — one of the UK’s largest seed suppliers. Strong range of vegetable, herb, and flower seeds. Seed packets typically cost £2–£4, with collections offering better value at £8–£15.
    • You Garden — competitive prices on seeds, plug plants, and bulbs. Good option for beginners who prefer plug plants (ready-grown seedlings you plant straight out) over starting from seed.
    • Suttons — established seed house with a wide vegetable range. Particularly good for heritage and unusual varieties. Seed packets from £2–£3.50.

    Tools, Pots, and Compost

    • Crocus — excellent range of quality tools, containers, and composts. Hand tool sets from £15–£40, pots from £3–£20 depending on size and material.
    • B&Q and local garden centres — good for compost (multi-purpose bags £5–£10 for 40–50L) and last-minute supplies you need the same day.

    About the Author

    John Kitcher is the lead gardening writer at Plants and Gardening. He grew up mucking in on his grandfather’s Devon allotment and has spent the last fifteen years growing fruit, veg and ornamentals across three very different UK gardens — a windy coastal plot in North Cornwall, a shaded London back garden, and now a clay-heavy smallholding in the Midlands. He trials every technique covered here in his own beds and containers before writing about it, cross-references against RHS and Kew guidance, and has a soft spot for heritage tomato cultivars and anything that survives a British winter without complaint.

    Got a question about something we’ve written? Drop a comment — we read every one.

  • How to Grow Strawberries in Pots: UK Beginner Guide

    How to Grow Strawberries in Pots: UK Beginner Guide

    Quick Answer Box

    Plant strawberries in a pot at least 30 cm wide filled with peat-free multi-purpose compost. Choose an RHS AGM variety like Cambridge Favourite or Finesse. Plant in March–May or August–September, position in full sun, and feed fortnightly with tomato feed once flowers appear. Expect your first harvest within 8–12 weeks of spring planting.

    Introduction

    Strawberries thrive in containers and are among the most rewarding fruits to grow in pots across the UK. Whether you have a small balcony, a sunny doorstep, or a compact patio, you can harvest fresh, sweet berries from just one or two pots. You don’t need a garden bed — a single 30 cm pot can produce up to 500 grams of fruit per season. This guide covers everything you need to know to grow strawberries successfully in containers, based on expert advice from the Royal Horticultural Society (RHS). You’ll learn which varieties perform best, how to choose the right pot, when to plant, and how to manage pests and feeding. With the right approach, your strawberries will fruit reliably and deliciously, even in the smallest urban spaces.

    Strawberry runners being pegged into soil in a small pot

    If you’re new to growing in pots, start with our guide to the best containers and pots for beginners.

    Best Strawberry Varieties for Pots (UK)

    Choosing the right variety is the first step to success when growing strawberries in pots. For a fuller rundown of cultivars and where to buy them, see our guide to the best strawberry plants for UK gardens. The Royal Horticultural Society (RHS) awards the Award of Garden Merit (AGM) to plants that perform well in UK gardens. Stick to AGM-listed varieties for reliability, disease resistance, and consistent yields. Below is a comparison of the top eight varieties, selected for their performance in containers.

    Strawberry plant with white flowers and small developing green fruit
    Variety AGM Season Notes
    Cambridge Favourite Yes Mid-season Reliable, sweet, heavy cropper with excellent disease resistance. Ideal for beginners and containers.
    Finesse Yes Perpetual (June–October) Produces multiple harvests of sweet, firm berries. One of the best everbearing varieties for pots.
    Flamenco No Perpetual Consistent yields with good flavour. Thrives in containers and tolerates variable weather.
    Honeoye Yes Early (June) Large, firm berries with excellent flavour. One of the best early summer varieties for containers.
    Florence Yes Late (July–August) Heavy crop of firm, well-flavoured fruit. Excellent disease resistance and container-friendly.
    Mara des Bois No Perpetual Rich, aromatic berries with a wild strawberry flavour. Larger than most alpines.
    Elvira No Summer Compact habit, ideal for hanging baskets. Produces heavy crops of sweet, glossy berries.
    Alexandria No Perpetual Alpine variety with small, intensely flavoured berries. Everbearing and shade-tolerant.

    For beginners, Cambridge Favourite AGM is the top choice — it’s forgiving, prolific, and resistant to common diseases. If you want fruit over a longer season, Finesse AGM delivers multiple harvests from early summer to autumn. For a unique flavour, try Mara des Bois, which offers a complex, aromatic taste. Alpine varieties like Alexandria are perfect for north-facing balconies or shaded corners, where larger strawberries struggle.

    Always buy certified virus-free stock to avoid poor growth and low yields. The RHS warns that strawberry viruses can severely reduce productivity and are often invisible until symptoms appear. When selecting plants, look for those labelled ‘certified virus-free’ from reputable suppliers. Thompson & Morgan, Crocus, and Dobies all offer certified virus-free strawberry plants online. You can also find healthy bare-root runners at B&Q and garden centres from March onwards. See the RHS AGM fruit list for recommended varieties.

    Choosing the Right Pot

    The pot you choose directly affects your strawberry’s health and yield. The RHS recommends wide, shallow containers over traditional strawberry pots with side holes — the latter can dry out quickly and make root management difficult. A pot of at least 30 cm in diameter gives enough space for roots to develop and supports a healthy plant.

    Container Type Minimum Size Plants per Container Notes
    Standard round pot 30 cm diameter, 20 cm deep 3–4 plants Best all-round option for most gardeners. Easy to manage and widely available.
    Hanging basket 40 cm diameter 4–6 plants Keeps fruit off the ground, reducing slug damage. Requires frequent watering.
    Window box 60 cm x 15 cm x 18 cm 4 plants Ideal for sunny windowsills and small balconies. Easy to place and maintain.
    Growing bag 95 cm x 35 cm 6 plants Cost-effective and pre-fertilised. Contains slow-release feed for up to six weeks.
    Strawberry planter (pocketed) 35 cm x 35 cm 8 plants Maximises space but pockets dry out fast. Requires daily checks.
    Terracotta pot 25 cm x 25 cm 3 plants Attractive but dries out quickly. Best suited for shaded or sheltered spots.

    For beginners, a 30 cm round pot filled with quality compost is the most reliable choice. Avoid plastic pots that are too shallow — they dry out fast and restrict root growth. If you’re growing in a windy location, secure your pots with bricks or stakes to prevent tipping. Consider using a pot with a built-in saucer to catch excess water and prevent soil erosion.

    Check out our guide to the best containers and pots for beginners for more detailed recommendations on materials, drainage, and design.

    Compost and Soil

    Use peat-free multi-purpose compost or soil-based compost for growing strawberries in pots. The RHS advises against using standard potting composts, which can dry out too quickly and lack essential nutrients. Multi-purpose composts are formulated to hold moisture and provide balanced nutrition for container plants. You can find quality peat-free composts from brands like SylvaGrow, Dalefoot, and Melcourt at most UK garden centres, B&Q, or online from Crocus.

    Choose a compost that is certified peat-free. Peat extraction damages fragile ecosystems, and many UK gardeners now opt for sustainable alternatives like coir, wood fibre, or composted green waste. Look for brands with the Soil Association or Peat Free Standard certification.

    Avoid garden soil — it’s too dense for containers and can introduce pests and diseases. Also steer clear of composts with added slow-release fertilisers unless they’re specifically designed for fruiting plants. These can lead to over-fertilisation, especially in pots where nutrients leach out quickly.

    For best results, mix in a handful of slow-release fertiliser (such as a 12-12-12 formula) at planting time. This gives your strawberries a steady nutrient supply for the first few months. If you’re using a growing bag, check the feeding schedule — many come pre-fertilised for six weeks.

    For more on choosing compost for container gardening, see our guide to the best compost for container gardening.

    When to Plant Strawberries in Pots (UK Calendar)

    Plant strawberries in pots during two key windows in the UK: mid-spring (March–May) and late summer/early autumn (August–September). Planting in these periods allows your plants to establish strong roots before fruiting or winter.

    Planting in August–September gives the best results for a bumper crop the following year. The cooler soil and reduced competition from pests allow roots to develop before winter. The RHS recommends planting no later than the first week of September in northern regions and the second week in southern areas.

    Month Recommended Action Notes
    January Check pots for damage. Prepare compost and containers. Protect pots from frost. No planting yet.
    February Inspect plants. Prune dead foliage. Prepare for spring planting. Start composting if not already done.
    March Begin planting if weather permits. Use early varieties like Honeoye. Ensure soil is frost-free and moist.
    April Continue planting. Water regularly. Feed with general-purpose liquid feed. Watch for aphids and slugs.
    May Final planting window. Monitor for runners and pests. First fruits may appear by late June.
    June Harvest early crops. Deadhead spent flowers. Begin feeding with tomato feed. Keep soil moist. Watch for grey mould.
    July Continue harvesting. Encourage runner growth for next year. Apply mulch to retain moisture.
    August Plant late-season varieties. Take cuttings of healthy runners. Best time for new plantings.
    September Final planting window. Cut back old leaves after harvest. Apply nematodes for vine weevil control if needed.
    October Overwintering prep. Move pots to sheltered spot if needed. Check for pests and winter damage.
    November Protect plants from frost. Avoid overwatering. Keep pots dry but not bone-dry.
    December Minimal care. Check for damage. Prepare for spring. Do not fertilise.

    Planting in spring gives you fruit within 8–12 weeks, while autumn planting leads to a stronger crop the following year. Always plant with the crown level with the soil surface — burying it too deep causes rot, while exposing it invites drying out.

    How to Plant Strawberries in Pots

    Follow these steps to plant strawberries in pots successfully:

    1. Choose a pot at least 30 cm in diameter with good drainage holes. Rinse it with water to remove dust or residue.

    2. Fill the pot with peat-free multi-purpose compost, leaving about 2 cm of space below the rim.

    3. Remove any dead or damaged leaves from your strawberry plant. Trim long roots slightly to encourage new growth.

    4. Position the plant so the crown (where the leaves meet the roots) sits level with the soil surface. Do not bury it.

    5. Gently firm the compost around the base, ensuring no air pockets remain.

    6. Water thoroughly until excess drains from the bottom. Avoid wetting the crown or leaves to prevent fungal disease.

    7. Place the pot in full sun — strawberries need at least 6 hours of direct sunlight daily.

    8. Label your pot with the variety name and planting date.

    After planting, avoid feeding for the first two weeks. This allows roots to settle. Once new growth appears, begin a fortnightly feeding schedule with a general-purpose liquid fertiliser.

    For more on starting a vegetable garden, see our beginner’s guide to starting a vegetable garden in the UK.

    Watering, Feeding, and Care

    Water your strawberries in pots every 2–3 days during hot weather, or when the top 2 cm of compost feels dry. Water in the morning to allow leaves to dry before nightfall, reducing the risk of grey mould (botrytis). Avoid wetting the crown or fruit — this is a major cause of disease.

    Feed your plants fortnightly with a general-purpose liquid fertiliser from planting until flower bud formation. Once flower buds appear, switch to a high-potassium fertiliser, such as tomato feed. This encourages fruit development and improves flavour.

    Runners — the horizontal stems that grow from the base — can be left to grow to produce more plants, or removed to focus energy on fruiting. For a larger harvest, remove all runners in summer-fruiting varieties like Cambridge Favourite. For perpetual types like Finesse, allow 1–2 runners to grow to extend the cropping season.

    Deadhead spent flowers to encourage new blooms. After harvesting, cut back old leaves 10 cm above the crown for summer-fruiting varieties. Perpetual types only need dead or diseased leaves removed.

    For best results, use a balanced feeding schedule. Over-fertilising can lead to lush foliage but poor fruiting. Always follow the dilution instructions on the fertiliser label.

    Common Problems and Pests

    Strawberries in pots are vulnerable to several pests and diseases. The RHS warns that vine weevil is particularly damaging to container-grown plants.

    Vine weevil: These pests have black adults (9 mm) and white, legless larvae (up to 10 mm). Adults feed at night, creating irregular notches on leaves. Grubs attack roots, causing wilting and plant death. Control with nematodes (Steinernema or Heterorhabditis spp.) applied between August and early September when soil temperatures are between 5–20°C. The RHS recommends biological control methods over chemical treatments.

    Botrytis (grey mould): Appears as a fuzzy grey coating on fruit and leaves, especially in humid, wet conditions. Prevent by avoiding wetting the crown and fruit, improving air circulation, and removing infected plant material promptly. If you must use a fungicide, choose one approved for edible crops — always check the HSE-approved label and follow the application instructions exactly. Prevention through good air circulation and watering practices is always preferable to chemical treatment.

    Slugs and snails: These pests eat holes in leaves and fruit. Use copper tape around the pot, or place beer traps nearby. Encourage natural predators like hedgehogs and birds.

    Aphids: Tiny green or black insects that cluster on new growth. Spray with a jet of water or use a natural insecticidal soap. Encourage ladybirds and lacewings.

    Regular inspection is key. Check under leaves and around the crown weekly. Early detection makes treatment far more effective.

    Harvesting and Storing

    Harvest strawberries when they are bright red all over. The best time is during the warmest part of the day — usually mid-morning. Gently twist the fruit off the stem, leaving a small piece of stalk attached. Avoid pulling, as this can damage the plant.

    For immediate eating, store berries in a single layer in the fridge for up to 3 days. Do not wash before storing — moisture encourages mould. For longer storage, freeze whole or halve the berries and place on a tray before transferring to a freezer bag.

    For jam-making, harvest when berries are fully ripe but not overripe. Overripe fruit can make jam too soft. Process immediately to preserve flavour and colour.

    Harvesting regularly encourages more fruit. If you leave ripe berries on the plant too long, they can attract pests and spoil.

    Hanging baskets and growing more plants from runners

    Strawberries are ideal for hanging baskets and tall planters: lifting the fruit off the ground keeps it cleaner and away from slugs, and the trailing habit looks attractive. Line baskets with a moisture-retentive compost, plant three or four plants per 30 cm basket, and water daily in warm weather, as baskets dry out fast.

    Established plants throw out long runners — thin stems with baby plantlets at the tips. To raise free new plants, peg a plantlet into a small pot of compost beside the parent (a hairpin or bent wire works well), keep it watered, and once it has rooted after a few weeks, snip it free from the runner. Renewing your pot-grown stock this way every three years keeps cropping strong, as older crowns gradually become less productive.

    Overwintering Strawberries in Pots

    Overwintering strawberries in pots requires careful preparation. Move pots to a sheltered, frost-free location such as a greenhouse, cold frame, or garage if you live in a cold part of the UK. In milder regions, you can leave them outside but protect them with horticultural fleece or bubble wrap.

    Reduce watering in autumn and winter. Let the compost dry slightly between waterings, but never let it become bone-dry. Overwatering in winter leads to root rot.

    After the last harvest, cut back old leaves 10 cm above the crown for summer-fruiting varieties. For perpetual types, remove only dead or diseased leaves. Do not fertilise in winter.

    Check pots monthly for pests, especially vine weevil. If you spot signs of infestation, treat with nematodes as soon as soil temperatures rise above 5°C.

    Replant your strawberries every 3–4 years to avoid replant disorder — a condition where soil-borne diseases build up and reduce yields. Always rotate your pots to a different location each year if possible.

    Frequently Asked Questions

    • Can I grow strawberries in a hanging basket? Yes, but choose a basket at least 40 cm in diameter. Use a variety like Elvira or Finesse for best results. Water daily in summer.
    • Why aren’t my strawberries fruiting? Common causes include poor pollination, lack of sunlight, over-fertilising, or planting too deep. Ensure the crown is level with the soil and that plants get full sun.
    • How many strawberries can I grow in one pot? A 30 cm pot can hold 3–4 plants. More than that leads to competition for nutrients and reduced yields.
    • Do I need to use tomato feed? Yes, once flower buds form. Switch from general-purpose feed to high-potassium tomato feed to boost fruit development.
    • Can I grow strawberries from seed? Yes, especially alpine varieties like Alexandria and Mignonette. Sow indoors in February–March, then transplant to pots after the last frost.
    • Are alpine strawberries worth growing? Yes, especially if you have a shaded spot. They produce intense flavour in small berries and are easy to grow from seed.
    • How do I prevent grey mould? Avoid wetting the crown and fruit. Water in the morning. Remove infected fruit immediately and improve air circulation.
    • Can I grow strawberries indoors? Yes, but only with a grow light and a sunny windowsill. Use a perpetual variety like Finesse for best results.

    What Next?

    Now you know how to grow strawberries in pots like a pro. Share your progress in the comments below — we love seeing your harvests. If you’re growing other fruits or vegetables in containers, check out our guides to the best vegetables to grow in containers, growing tomatoes in containers, and the best herbs to grow in containers. For more on building a successful container garden, visit our guide to the best compost for container gardening.

    About the Author

    John Kitcher is the lead gardening writer at Plants and Gardening. He grew up mucking in on his grandfather’s Devon allotment and has spent the last fifteen years growing fruit, veg and ornamentals across three very different UK gardens — a windy coastal plot in North Cornwall, a shaded London back garden, and now a clay-heavy smallholding in the Midlands. He trials every technique covered here in his own beds and containers before writing about it, cross-references against RHS and Kew guidance, and has a soft spot for heritage tomato cultivars and anything that survives a British winter without complaint.

    Got a question about something we’ve written? Drop a comment — we read every one.

  • Starting a Vegetable Garden for Beginners — UK Guide

    Starting a Vegetable Garden for Beginners — UK Guide

    This article contains affiliate links. If you buy through these links, we may earn a small commission at no extra cost to you.

    A few square metres of soil, a free weekend, and seven packets of seeds — that’s genuinely all you need to start growing your own vegetables in the UK. You don’t need an allotment, a greenhouse, or a decade of experience. Thousands of first-time growers start every spring with nothing more than a raised bed on a patio or a cleared patch of lawn.

    This guide walks you through everything: where to put your veg patch, how to prepare the soil, which crops typically produce a harvest in your first year, and exactly when to plant them. Every recommendation is UK-specific — the right sowing dates for our climate, varieties tested in British conditions, and tools you can pick up at B&Q, The Range, or your local garden centre this weekend.

    If you’re looking for more beginner gardening resources, our beginner gardening hub has guides on everything from tools to containers.

    Choose the Right Spot

    Most vegetables need at least six hours of direct sunlight per day. South-facing or west-facing spots are ideal in the UK, though east-facing works for salad crops and leafy greens that tolerate some shade. The RHS beginner’s guide to vegetables confirms that sun exposure is the single most important factor in choosing a site.

    Pick a spot that’s:

    • Sunny — six hours minimum, more is better for fruiting crops like tomatoes and courgettes
    • Sheltered from wind — a fence, wall, or hedge nearby helps protect young plants
    • Close to a water source — you’ll water frequently in summer, so a nearby tap or water butt saves time
    • Reasonably level — sloped ground drains too quickly and makes raised beds awkward

    No garden at all? You can grow a surprising amount in containers on a patio, balcony, or doorstep. Our guide to the best vegetables to grow in containers covers exactly what works in pots.

    Decide How to Grow — Raised Beds, In-Ground, or Containers

    There are three main options, and each suits different situations.

    Raised Beds (Best for Most Beginners)

    Raised beds are the most popular choice for first-time vegetable growers, and for good reason. You control the soil quality, they drain well, and you don’t need to dig into potentially poor ground underneath.

    The RHS recommends a maximum width of 1.2 metres (4 feet) so you can reach the centre from either side without stepping on the soil. A 1.2m × 2.4m bed (4ft × 8ft) gives you plenty of space for a first crop. Height of 15–30cm is enough for most vegetables — go deeper (45cm+) if you want to grow root crops like carrots and parsnips.

    Fill raised beds with a mix of topsoil, garden compost, and composted bark. Timber, galvanised steel, or recycled plastic edging all work — timber is cheapest and widely available at B&Q and garden centres.

    In-Ground (Cheapest Option)

    If you already have reasonable soil, you can dig a veg patch directly into the lawn or a border. Clear the turf, remove weeds, fork the soil over, and add compost. This costs almost nothing but requires decent existing soil.

    Containers (No Garden Needed)

    Large pots, grow bags, and even old compost bags work for many vegetables. Potatoes, tomatoes, salad leaves, and herbs all thrive in containers. You’ll need to water more frequently — typically daily in summer. See our guide to compost for container gardening for what to fill them with.

    Prepare Your Soil

    Good soil is the single biggest factor in a successful vegetable garden. Spend an hour preparing it properly and everything else becomes easier.

    1. Clear weeds thoroughly. Dig out perennial weeds like couch grass, bindweed, and dandelion roots. Leave the soil for two to three weeks, then hoe off any new seedlings that appear.
    2. Test your pH. Most vegetables prefer neutral soil (pH 6.5–7.0). Simple test kits cost a few pounds at garden centres. If your soil is very acidic, add garden lime; if alkaline, add sulphur chips.
    3. Add organic matter. Spread a 5–10cm layer of garden compost or well-rotted manure over the surface and fork it in. This improves drainage in clay soil and moisture retention in sandy soil.
    4. Feed your soil. If you’re working with poor or newly cleared ground, rake in a general-purpose fertiliser such as Growmore (about £4 for 1.5kg at B&Q) before planting. For established beds, a top-dressing of compost each spring is usually enough — the RHS recommends this as the simplest way to maintain fertility year on year.
    5. Rake level. A smooth, level surface makes sowing seeds in straight rows much easier.

    Clay soil tip: Clay is slow to warm in spring. Cover your bed with a cloche or clear polythene for two weeks before sowing to raise the soil temperature — BBC Gardeners’ World recommends this for earlier harvests.

    What to Grow — 7 Easy Vegetables for Your First Year

    These seven crops are the most reliable choices for UK beginners. Every one has earned the RHS Award of Garden Merit (AGM), meaning it’s been trialled at RHS gardens and proven to perform well in British conditions.

    Seed packets for radishes, lettuce, courgettes, runner beans, and beetroot laid out on a wooden surface
    Seed packets for beginner-friendly vegetables — all available at UK garden centres for under £3 each.
    Vegetable Recommended Cultivar (AGM) Sow Harvest Notes
    Radishes ‘French Breakfast’ March–September (outdoors) 3–4 weeks after sowing Fastest crop. Sow a short row every 2 weeks for continuous harvests.
    Salad leaves ‘Little Gem’ (lettuce) March–September (outdoors) 6–10 weeks Cut-and-come-again — harvest outer leaves and the plant keeps growing.
    Courgettes ‘Defender’ F1 April indoors, plant out late May July–October Hugely productive. One or two plants is enough for most families.
    Runner beans ‘Lady Di’ May (outdoors, after last frost) July–October Grow up a wigwam of canes. Long cropping season, pick regularly.
    Potatoes ‘Charlotte’ (second early) Plant tubers March–April June–July Grow in the ground or in bags. Earth up when shoots reach 15cm.
    Beetroot ‘Boltardy’ March–July (outdoors) 11–12 weeks after sowing Bolt-resistant, pest-resistant, and tolerates cool weather.
    Peas ‘Kelvedon Wonder’ March–June (outdoors) 12–14 weeks Sow direct. Support with sticks, twigs, or pea netting.

    All of these cultivars are widely available from Thompson & Morgan, Wilko, and most UK garden centres. A packet of seeds typically costs £1.50–£3.00.

    Already keen on tomatoes? Our detailed guide to growing tomatoes from seed in the UK covers everything from sowing to harvest.

    What NOT to Grow (Yet)

    Some vegetables look tempting in the seed catalogue but are genuinely difficult for beginners. Save these for your second or third year once you’ve built confidence.

    • Brassicas (cabbage, cauliflower, Brussels sprouts) — slow to mature, magnets for caterpillars, pigeons, and clubroot. They need netting and typically occupy the ground for six months or more.
    • Sweetcorn — needs block planting (not rows) for pollination, takes up significant space, and cropping is unreliable in cooler UK summers.
    • Celery — fussy about consistent moisture, prone to bolting in fluctuating temperatures, and slug-prone.
    • Asparagus — you’ll wait two to three years before your first harvest. Rewarding eventually, but not a beginner crop.
    • Aubergines — need sustained warmth that’s difficult to provide outdoors in most of the UK.

    None of these are impossible, but they’ll frustrate a first-time grower. Stick with the seven reliable crops above for Year 1.

    Your First-Year Planting Calendar

    This calendar covers what to sow and plant each month in your first year. Dates are based on average conditions in England and Wales — if you’re in Scotland or northern England, shift outdoor sowing by two to three weeks later. For a more detailed month-by-month breakdown, see our what to plant this month guide.

    UK vegetable planting calendar showing what to sow from March to September
    A simple planting calendar helps you stay on track through your first growing season.
    Month Sow Indoors Sow/Plant Outdoors Other Tasks
    March Courgettes (late March) Radishes, peas, lettuce, beetroot, broad beans Prepare beds, add compost, chit seed potatoes
    April Courgettes, runner beans (late April) Radishes, peas, lettuce, beetroot. Plant potatoes. Harden off indoor-sown seedlings gradually
    May Runner beans (after last frost, mid-May). Continue radishes, lettuce, beetroot. Plant out courgettes after last frost. Water regularly.
    June Radishes, lettuce, beetroot (successional sowing) Harvest first radishes and lettuce. Earth up potatoes.
    July Radishes, lettuce (last sowings) Harvest potatoes, early beetroot, peas. Pick courgettes and beans regularly.
    August Main harvest month. Keep picking beans and courgettes to encourage more.
    September Final harvests. Clear spent crops. Add compost to empty beds for next year.

    Key date: The last frost in most of England and Wales falls in mid-May. Don’t plant tender crops (courgettes, runner beans) outdoors before this date. Check your local last frost date — northern areas and higher ground may need to wait until late May or even early June.

    Essential Tools and What They Cost

    You don’t need a shed full of equipment. These basics are enough to get started, and you can pick them all up at B&Q, Wilko, or your local garden centre.

    Tool What It’s For Approximate Cost
    Digging spade Turning soil, digging beds £12–£20
    Garden fork Breaking up compacted soil, mixing in compost £12–£20
    Hand trowel Planting seedlings, weeding £3–£8
    Watering can (10L) Watering beds and pots £5–£8
    Seed trays (3-pack) Starting seeds indoors £2–£4
    Seeds (7 packets) Your first crops £10–£20

    Budget total: £44–£80. The lower end is achievable if you buy B&Q’s own-brand Verve range or Wilko basics. You can cut costs further by borrowing a spade and fork, using yoghurt pots instead of seed trays, and buying seeds from supermarkets (Aldi and Lidl sell packets for as little as 50p in spring).

    For more detailed recommendations, see our best gardening tools for beginners guide.

    5 Common Beginner Mistakes

    1. Planting too much at once. Start with three to five crops, not fifteen. You’ll learn more from growing a few things well than failing at many.
    2. Ignoring the last frost date. Planting tender crops outdoors before mid-May in most of England risks losing everything to a late frost. Check your local date and be patient.
    3. Watering inconsistently. Vegetables need steady moisture, especially in containers. A deep soak every two to three days is better than a light sprinkle daily. Water at the base of plants, not over the leaves.
    4. Skipping soil preparation. Twenty minutes of weeding and adding compost before you plant saves hours of problems later. Poor soil produces poor crops — it’s that simple.
    5. Sowing seeds too deep. Most vegetable seeds need to be sown at twice their own depth — no more. Tiny seeds like lettuce and carrots barely need covering. Check the packet instructions.

    Your First Weekend Action Plan

    Ready to start? Here’s exactly what to do this weekend.

    Saturday morning:

    1. Choose your sunny spot and measure it.
    2. Go to B&Q, Wilko, or your local garden centre. Buy: a bag of multi-purpose compost (around £5–£7), seed packets for radishes, lettuce, and one other crop from the table above, and a hand trowel if you don’t own one.
    3. If using a raised bed, buy or build one. A basic 1.2m × 2.4m timber kit costs £20–£40.

    Saturday afternoon:

    1. Clear the area. Remove weeds, stones, and debris.
    2. If growing in-ground, fork over the soil and mix in compost. If using a raised bed, fill it with your soil/compost mix.
    3. Rake the surface level.

    Sunday morning:

    1. Sow your first seeds. Follow the packet spacing. Water gently with a fine rose on your watering can.
    2. Label your rows — you will forget what you planted where.
    3. Take a photo. In four weeks, when your first radishes are ready to pull, you’ll want to see how far you’ve come.

    Three crops, one weekend, under £50. That’s all it takes to start your first vegetable garden. Pick your spot, get your hands in the soil, and grow something you can eat.

    We’d love to hear what you’re growing this year — let us know in the comments below.

    What Next?

    For more beginner guides, visit our beginner gardening section.

    About the Author

    John Kitcher is the lead gardening writer at Plants and Gardening. He grew up mucking in on his grandfather’s Devon allotment and has spent the last fifteen years growing fruit, veg and ornamentals across three very different UK gardens — a windy coastal plot in North Cornwall, a shaded London back garden, and now a clay-heavy smallholding in the Midlands. He trials every technique covered here in his own beds and containers before writing about it, cross-references against RHS and Kew guidance, and has a soft spot for heritage tomato cultivars and anything that survives a British winter without complaint.

    Got a question about something we’ve written? Drop a comment — we read every one.

  • How to Grow Tomatoes from Seed — UK Beginner’s Guide

    How to Grow Tomatoes from Seed — UK Beginner’s Guide

    Tomato seedlings growing on a sunny windowsill in a UK home

    There is nothing quite like the taste of a tomato still warm from the sun, picked from a plant you grew yourself. It is one of gardening’s simplest pleasures — and growing tomatoes from seed is far easier than many beginners expect.

    Yes, you could buy ready-grown plants from the garden centre in May. But starting from seed opens up a world of varieties you will never find on a nursery shelf, saves you a surprising amount of money, and gives you that deeply satisfying feeling of having nurtured something from the very beginning.

    Consider the economics. A packet of tomato seeds costs around £2 and contains anywhere from 20 to 100 seeds. Even with modest germination rates, that is potentially dozens of plants. Compare that to £2-3 per plant at a garden centre, and the maths speaks for itself. Then there is the variety: seed catalogues offer over a hundred tomato cultivars — cherry, plum, beefsteak, yellow, purple, striped — while your local garden centre might stock five or six standard varieties.

    You do not need a greenhouse. You do not need fancy equipment. A warm windowsill, a bit of patience, and this guide are enough to get you from seed packet to first harvest. Thousands of British gardeners do this every spring. By the end of this article, you will know exactly how to join them.

    What You’ll Need

    Before you start, gather your supplies. None of this is expensive, and much of it can be found around the house or bought cheaply at Wilko, B&Q, or your local garden centre.

    The Essentials

    • Tomato seeds: Choose varieties suited to your space (see recommendations below). Buy from reputable UK suppliers like Suttons, Thompson & Morgan, or SimplySeed.
    • Seed compost: Not multi-purpose compost — seed compost is finer and free-draining. Look for Westland John Innes Seed, Jack’s Magic, or Melcourt Sylvagrow. Expect to pay £4-6 for a 20L bag.
    • Containers: Proper seed trays with small modules work best, but clean yogurt pots, toilet roll tubes, or recycled plastic containers with drainage holes punched in the bottom do the job perfectly well.
    • Labels and a waterproof marker: Essential — you will not remember which variety is which once they are covered in compost.
    • A spray bottle: For gentle watering that does not wash seeds away.
    • A warm spot: More on this below, but tomatoes need consistent warmth to germinate.

    The Nice-to-Haves

    • Heated propagator: Makes germination much more reliable. A basic Stewart or Garland model costs £15-25. A premium Vitopod with variable temperature is £60-80 but will last years.
    • Clear plastic bag or propagator lid: To create humidity while seeds germinate. A loose freezer bag works fine.
    • Grow lights: Only if your windowsill faces north or is heavily shaded. A basic LED grow light from Amazon (£15-25) makes a huge difference.

    Budget vs. Deluxe Setup

    Item Budget Option Cost Deluxe Option Cost
    Seeds Standard varieties £2 F1 hybrids, premium varieties £3-4
    Compost Basic seed compost £4 Premium peat-free £6
    Containers Recycled pots/Yogurt pots £0 Professional seed trays £8-12
    Warmth Warm windowsill/airing cupboard £0 Heated propagator £20-80
    Total £6 £35-100

    When to Sow Tomato Seeds in the UK

    Timing is everything with tomatoes. Sow too early and your seedlings will become leggy and stressed long before it is safe to plant them outside. Sow too late and you will be harvesting green tomatoes in October.

    The Royal Horticultural Society advises sowing from late February to mid-March if you are growing in a greenhouse, or from late March to early April for outdoor crops. This is not arbitrary — it is based on light levels, temperature, and the number of weeks tomatoes need to reach fruiting stage.

    The Timing Breakdown

    • Greenhouse or polytunnel growing: Late February to mid-March. The protected environment means you can plant out earlier, so you can start earlier.
    • Outdoor growing: Late March to early April. Tomatoes cannot go outside until all risk of frost has passed — typically late May in the south, early June further north.

    The Monty Don Approach

    Gardening writer Monty Don recommends sowing in two batches: one in February and another in March or even April. This staggers your harvest and acts as insurance — if an unexpected cold snap damages your first batch, you have backups ready.

    Regional Variations

    These dates work for most of England and Wales. If you are in Scotland, northern England, or at higher altitude, add two to three weeks. If you are in the south-east with a sheltered garden, you might get away with the earlier end of the range.

    The Cold Spring Contingency

    British springs are unpredictable. If February and March are bitterly cold, wait. Tomato seedlings grow fast when conditions are right. Starting them too early in a cold house leads to weak, leggy plants that never really recover. Patience pays off.

    Month-by-Month Sowing Guide

    Month Action Notes
    February Sow greenhouse varieties Only if you have a heated propagator or very warm house
    March Main sowing month Greenhouse: early March. Outdoor: late March
    April Second sowing possible Good insurance policy and extends harvest
    May onwards Too late for seeds Buy plants instead if you have missed the window

    Step-by-Step: Sowing Your Seeds

    Now for the practical part. These steps work whether you are sowing one variety or ten, whether you have a heated propagator or just a warm windowsill.

    Sowing tomato seeds 6mm deep in seed compost

    Step 1: Prepare Your Containers

    If you are reusing plastic pots or trays, wash them thoroughly in warm, soapy water. This removes old soil, salts, and any lurking fungi that could cause damping off disease. Rinse well and let them dry.

    Ensure there are drainage holes in the bottom. Waterlogged compost is the fastest way to kill seeds.

    Step 2: Fill With Seed Compost

    Fill your containers with seed compost, tapping gently to settle it. Do not compress it heavily — seedlings need air around their roots as much as they need water. Level the surface with your hand or a flat tool.

    Step 3: Sow the Seeds

    For modules or small pots: place two to three seeds per module. This gives you insurance — if one fails, you have backups. You will thin to the strongest seedling later.

    Cover the seeds with about 6mm of compost — roughly the thickness of a pound coin. Tomato seeds need darkness to germinate, so do not leave them exposed.

    Step 4: Label Immediately

    Write the variety name and the date sown on a label. Do this now, before you forget. Use a waterproof marker — pencil fades and ordinary pen runs when wet.

    Step 5: Water Gently

    Use a spray bottle to moisten the compost thoroughly. You want it damp like a wrung-out sponge, not soggy. Avoid pouring water from a can — it washes seeds out of place.

    Step 6: Cover for Humidity

    Cover the tray with a clear plastic propagator lid, or slip the whole thing into a loose freezer bag. This traps moisture and creates the humid microclimate seeds love. Do not seal it completely — a tiny bit of airflow helps prevent mould.

    Step 7: Place in a Warm Spot

    Tomato seeds need a temperature of 18-21°C to germinate reliably. This is the critical factor — more important than light at this stage.

    Options include:

    • A heated propagator set to 20°C
    • An airing cupboard (check daily — move to light immediately when seedlings appear)
    • A warm windowsill above a radiator
    • On top of a fridge or freezer (slightly warmer than room temperature)

    Avoid anywhere that gets cold at night — a draughty windowsill can drop below 10°C after dark, which will delay or prevent germination.

    Germination: What to Expect

    Given the right temperature, tomato seeds are usually reliable germinators. Here is what to expect.

    The Timeline

    At 18-21°C, expect seedlings to emerge in 7 to 14 days. In optimal conditions — around 24°C with a heated propagator — this can be as fast as 5 to 7 days. At the lower end, around 15°C, germination can stretch to 3 or even 4 weeks.

    The first sign is usually a tiny green loop pushing through the compost surface. This is the stem bending to pull the seed leaves (cotyledons) up and out. Within a day or two, these leaves will unfold and turn green.

    Immediate Action Required

    As soon as the first seedling appears — immediately — remove the plastic cover and move the tray to a bright spot. Seedlings that germinate in darkness become leggy and weak within hours.

    Light is now more important than warmth. A south-facing windowsill is ideal. East or west-facing works too, though growth will be slightly slower. If you only have a north-facing window, invest in a basic LED grow light or the seedlings will stretch desperately toward the light and become spindly.

    Troubleshooting: Seeds Not Germinating?

    If nothing has appeared after three weeks, check:

    • Temperature: Is the spot consistently warm? A thermometer helps — do not guess.
    • Moisture: Has the compost dried out? Seeds need consistent dampness.
    • Seed age: Tomato seeds keep for 3-5 years if stored cool and dry. Older than that, germination drops off.
    • Depth: Did you bury them too deep? 6mm is plenty.

    Caring for Seedlings

    Two week old tomato seedlings on a windowsill

    Once your seedlings are up, they need consistent care for the next four to six weeks until they are ready for their next move.

    Light

    Tomato seedlings need as much light as possible. A south-facing windowsill is perfect. Turn the tray a quarter turn each day to prevent the seedlings leaning toward the light.

    If seedlings start stretching — growing tall and thin with gaps between leaves — they are not getting enough light. Move them to a brighter spot immediately, or add a grow light positioned 10-15cm above the foliage.

    Water

    Keep the compost consistently moist but never waterlogged. The best method is bottom watering: sit the tray in a shallow dish of water for 10-15 minutes, letting the compost draw moisture up from below. This prevents disturbing delicate seedlings and reduces fungal problems on the soil surface.

    Temperature

    After germination, seedlings are happy at 15-20°C. They will tolerate slightly cooler nights, but avoid anything below 10°C. Keep them away from cold draughts — that gap under the window, the hallway, or near an external door.

    Preventing Leggy Seedlings

    Leggy seedlings are the most common beginner problem. They stretch toward light, becoming tall, thin, and weak. The stem cannot support the weight and may collapse.

    Prevention: More light is the only real cure. A slightly cooler night temperature (15°C instead of 20°C) also helps keep growth compact.

    The good news: Tomatoes can recover from mild legginess. When you pot them on, bury the stem up to the first leaves — tomatoes are unusual in that they will sprout roots from the buried stem, creating a stronger plant.

    Potting On: When and How

    Demonstrating deep planting technique for tomato seedlings

    Your seedlings will outgrow their first home within three to four weeks. Knowing when and how to move them on is crucial.

    When to Pot On

    Look for one of these signs:

    • The first true leaves have appeared (these look like miniature tomato leaves, different from the smooth, oval seed leaves)
    • Roots are visible through the drainage holes
    • The compost dries out within a day of watering

    What You’ll Need

    • 9cm pots (one per seedling you want to keep)
    • Multi-purpose compost (not seed compost — they need more nutrients now)
    • A dibber or pencil for making holes

    The Technique

    Fill your 9cm pots with multi-purpose compost, firming gently. Make a hole in the centre deep enough to accommodate the seedling’s root ball.

    Water the seedling tray first — this helps the roots release from the compost. Then, handle the seedling by its leaves, never the stem. The stem is fragile and easily bruised. If you damage a leaf, the plant grows another. If you damage the stem, the plant dies.

    Lift the seedling and lower it into the new pot. Here is the key trick: bury the stem as deep as the plant allows, right up to the lowest leaves. Tomatoes have the remarkable ability to sprout roots from their stems. A deeply planted seedling develops a strong, extensive root system.

    Firm the compost gently around the seedling, water well, and return it to a warm, bright spot.

    Thinning: Choosing Which to Keep

    If you sowed multiple seeds per module, you now need to thin them. Choose the strongest seedling — the one with the thickest stem and most leaves — and snip the others at soil level with scissors. Do not pull them out; you risk disturbing the roots of the one you want to keep.

    Hardening Off

    Plants raised indoors are soft. The sudden shock of wind, direct sun, and temperature swings will damage or kill them. Hardening off is the gradual process of acclimatising them to outdoor conditions. Once hardened off, you can plant them out or grow them on in containers — see our guide to how to grow tomatoes in pots.

    Start this process about seven to ten days before you intend to plant out.

    The progression:

    1. Day 1: Place seedlings outside in a sheltered, shaded spot for one hour.
    2. Day 2: Two hours, slight breeze okay.
    3. Day 3-4: Half a day, morning sun tolerated.
    4. Day 5-6: Full day, increasing sun exposure.
    5. Day 7+: Leave out overnight if temperatures stay above 10°C.

    Watch the weather — bring plants in if strong winds, heavy rain, or frost is forecast. A cold frame is excellent for hardening off; simply prop the lid open during the day and close it at night.

    Planting Out

    The moment of truth: moving your plants to their final growing positions.

    When to Plant

    Wait until:

    • All risk of frost has passed (late May in the south, early June in the north)
    • Night temperatures are reliably above 10°C
    • Plants are hardened off

    Where to Plant

    Tomatoes need:

    • Sun: At least 6-8 hours of direct sunlight daily. More is better.
    • Shelter: Protection from strong winds which damage stems and flowers.
    • Warmth: Against a south-facing wall is ideal — the wall stores and radiates heat.

    Spacing and Support

    Space plants 45-60cm apart. Cordon varieties need sturdy supports — 2m canes driven firmly into the ground, or strong strings hung from an overhead frame. Bush varieties need less support but may need propping up when laden with fruit.

    Growing Options

    • In the ground: Dig in plenty of garden compost. Plant deeply, firming soil well.
    • Grow bags: Two plants per standard bag. Shake the bag to loosen compost before planting.
    • Large pots: Minimum 30cm diameter, 40cm better. Use good quality peat-free compost.
    • Greenhouse borders: The classic approach. Dig in well-rotted manure in winter.

    For detailed advice on growing vegetables in containers, see our dedicated guide.

    Feeding Your Tomato Plants

    Tomatoes are hungry plants. While seedlings get all they need from seed compost and then multi-purpose compost, mature plants producing fruit need regular feeding to perform their best.

    When to Start Feeding

    Begin feeding when you see the first flowers opening on your plants — or immediately after planting out, whichever comes first. Feeding too early encourages leafy growth at the expense of fruit. Feeding too late means smaller crops.

    What to Use

    Use a liquid tomato fertiliser specifically formulated for fruiting plants. These are high in potassium (the K in N-P-K ratios) which promotes flower and fruit production. Good options available in the UK include:

    • Tomorite — the classic choice, widely available at B&Q, The Range, garden centres
    • Levington Tomorite — concentrated formula, economical for regular use
    • Organic options: Liquid seaweed feed (Maxicrop), comfrey tea, or homemade nettle feed

    Avoid general-purpose plant foods — they are too high in nitrogen and will produce leafy plants with few tomatoes.

    How Often to Feed

    Once a week throughout the fruiting season, from first flowers until the plants finish cropping. In grow bags, which hold limited nutrients, you might feed twice weekly during peak harvest (July-August).

    How to Apply

    Follow the dilution instructions on the bottle — usually around one capful per watering can. Apply to the compost around the roots, not over the foliage. Water the plants first if the compost is dry, then apply the feed. This prevents root damage from concentrated fertiliser on dry soil.

    A Warning on Overfeeding

    More is not better. Overfed plants produce dark green leaves but fewer flowers. Stick to the weekly schedule and the manufacturer’s recommended dilution. If leaves become very dark and curled, cut back on feeding.

    Best Tomato Varieties for Beginners

    With hundreds of varieties available, choosing can feel overwhelming. These five are proven winners for UK beginners — reliable, productive, and widely available.

    Variety Type Fruit Size Best For Why Beginners Love It
    Gardener’s Delight Cordon Small (cherry) Outdoors or greenhouse Reliable, prolific, sweet flavour, grows well even in mediocre summers
    Shirley Cordon Medium Greenhouse Excellent disease resistance, early cropping, smooth skin, heavy yields
    Tumbling Tom Bush Small Hanging baskets, containers No staking or pinching required. Cascading habit, masses of fruit
    Crimson Cherry (F1) Cordon Small Blight-prone areas Blight resistant — a huge advantage in damp UK summers
    Sungold (F1) Cordon Small (cherry) Flavour priority Exceptionally sweet, golden-orange fruit. Consistently wins taste tests

    Cordon vs Bush: Which Should You Choose?

    Cordon (indeterminate) varieties grow tall and need regular support. They produce side shoots that must be pinched out, and they fruit over a long period. They take more work but give higher yields over the season.

    Bush (determinate) varieties stay compact, need little or no staking, and produce a concentrated crop. They are lower maintenance but finish fruiting earlier.

    For your first year, consider one of each: a cordon like Gardener’s Delight for the greenhouse or a sunny border, and a bush like Tumbling Tom for a patio container or hanging basket.

    Common Problems and Solutions

    Even experienced gardeners lose seedlings occasionally. Here is how to recognise and fix the most common issues.

    Damping Off (Seedlings Collapse)

    Symptoms: Seedlings fall over at the soil line, often with a pinched, discoloured stem. Happens suddenly, usually within days of germination.

    Cause: Fungal disease favoured by cold, wet conditions and poor airflow.

    Prevention: Use clean containers and fresh compost. Do not overwater. Remove covers as soon as seedlings appear. Ensure good air circulation.

    Treatment: None. Affected seedlings die. Start again with fresh compost and better hygiene.

    Leggy Seedlings

    Symptoms: Tall, thin stems with large gaps between leaves. Seedlings lean toward the light source.

    Cause: Insufficient light. Over-warm nights can also contribute.

    Fix: Move to a much brighter spot immediately. When potting on, bury the stem deeply — tomatoes will root from the buried portion. Consider a grow light for future sowings.

    Poor Germination

    Possible causes:

    • Temperature too low (below 15°C)
    • Compost dried out during germination
    • Seeds too old (viability drops after 3-5 years)
    • Seeds planted too deep

    Fix: Check your propagator temperature with a thermometer. Keep compost consistently damp. Buy fresh seed if yours is old.

    Yellowing Leaves

    On seedlings: Usually overwatering or cold roots. Let the compost dry slightly between waterings and ensure temperatures stay above 10°C.

    On mature plants: Lower leaves yellowing is normal as plants age. Widespread yellowing suggests nutrient deficiency — start feeding with tomato fertiliser when the first fruits set.

    Pests

    The most common greenhouse pests are whitefly and aphids. On outdoor plants, slugs can be problematic when plants are young. For comprehensive pest and disease advice, see our guide to common tomato problems in the UK.

    Month-by-Month Tomato Calendar

    Month Key Tasks
    February Sow greenhouse varieties if you have a heated propagator
    March Main sowing month. Greenhouse: early March. Outdoor: late March
    April Second sowing for staggered harvest. Pot on seedlings into 9cm pots
    May Harden off plants. Plant out after last frost (late May in south)
    June First flowers appear. Start weekly feeding with tomato fertiliser
    July First harvests begin (earlier for greenhouse crops)
    August Peak harvest month. Pick regularly to encourage more fruit
    September Continue harvesting. Green fruit can ripen indoors
    October Final harvest. Clear and compost plants. Save seeds if desired

    Frequently Asked Questions

    Can I use seeds from a supermarket tomato?

    Technically yes, but it is not recommended. Most supermarket tomatoes are F1 hybrids, which means their seeds will not produce identical plants — you might get something quite different and usually inferior. There is also a small disease risk. Proper seed packets cost £2-3 and guarantee variety, vigour, and disease-free stock.

    How many seeds should I sow if I want three plants?

    Sow at least six to nine seeds. Not every seed germinates, and not every seedling thrives. Sow two to three seeds per module, then select the strongest seedling from each when potting on. This gives you insurance against failures.

    Do I need a greenhouse to grow tomatoes from seed?

    Absolutely not. A sunny windowsill works perfectly for starting seeds. While a greenhouse helps tomatoes crop earlier and more heavily, many excellent varieties grow perfectly well outdoors in a sunny, sheltered spot. Start them on your kitchen windowsill, harden them off, then plant outside in late May.

    Can I sow tomato seeds directly outside?

    In the UK, direct sowing is not recommended. Our growing season is too short and unpredictable. Seeds sown direct in May might not produce ripe fruit before autumn frosts. Starting indoors gives you a crucial six to eight week head start.

    Why are my seedlings tall and thin?

    They are not getting enough light. Tomato seedlings stretch toward light sources when illumination is insufficient. Move them to a brighter windowsill immediately — ideally south-facing. If that is not possible, invest in a basic LED grow light positioned 10-15cm above the foliage.

    When should I start feeding my tomato plants?

    Not until the first flowers appear, or when you plant them out into their final positions — whichever comes first. Seedlings have all the nutrients they need in the seed itself and then in fresh compost. Early feeding can actually harm young plants.

    How do I know if my seeds are too old?

    Tomato seeds remain viable for three to five years if stored in a cool, dry place. If you are unsure, do a germination test: place ten seeds between damp kitchen paper in a warm spot. If fewer than seven sprout, the seed is past its best.

    What is the lowest temperature tomato seedlings can tolerate?

    Tomato seedlings will survive brief drops to 5-10°C, but growth stops and they become stressed. Prolonged cold leads to stunted growth, purplish colouring, and vulnerability to disease. Aim to keep them consistently above 15°C for best results.

    Conclusion

    Homegrown ripe tomatoes ready for harvest in a UK garden

    Growing tomatoes from seed is one of gardening’s most satisfying achievements. From a tiny speck of seed no larger than a grain of sand, you can nurture a plant that produces dozens of sun-warmed fruits over months of summer.

    It is not complicated. Sow at the right time — late February to April depending on your setup. Keep seeds warm at 18-21°C until they germinate. Give seedlings plenty of light. Pot them on when they outgrow their first home. Harden them off gradually. Plant out after frost.

    Even if you lose a few seedlings to damping off, or your first attempt produces oddly leggy plants, you are learning. Gardening is a craft built on observation and experience. Every mistake teaches you something for next year.

    The key is to start. Check the calendar — if it is February, March, or early April, you are in the sowing window. Gather your supplies, choose a variety that appeals to you, and sow a few seeds. In a matter of weeks, you will have healthy green seedlings on your windowsill, and by midsummer you will be eating tomatoes that taste like nothing you can buy in a shop.

    Ready to plan your growing season? Check our guide to what to plant this month for timely reminders throughout the year.


    This article was written for UK gardeners based on Royal Horticultural Society guidance, BBC Gardeners’ World recommendations, and practical experience. All varieties and products mentioned are available in the UK. You might also like our guide to choosing the best compost for containers.

    About the Author

    John Kitcher is the lead gardening writer at Plants and Gardening. He grew up mucking in on his grandfather’s Devon allotment and has spent the last fifteen years growing fruit, veg and ornamentals across three very different UK gardens — a windy coastal plot in North Cornwall, a shaded London back garden, and now a clay-heavy smallholding in the Midlands. He trials every technique covered here in his own beds and containers before writing about it, cross-references against RHS and Kew guidance, and has a soft spot for heritage tomato cultivars and anything that survives a British winter without complaint.

    Got a question about something we’ve written? Drop a comment — we read every one.

  • Best Grow Bags for Vegetables (UK Buyer’s Guide)

    Best Grow Bags for Vegetables (UK Buyer’s Guide)

    As an Amazon Associate I earn from qualifying purchases.

    Grow bags revolutionised vegetable gardening. What started as a space-saving solution for patio tomatoes has become essential for potatoes, salads, and even root crops. The right grow bag turns any sunny spot into productive growing space.

    This guide covers everything UK gardeners need to choose grow bags — from understanding litre capacity to selecting materials that survive British weather.

    Quick Comparison: Top Vegetable Grow Bags

    Grow Bag Size Material Best For Durability
    Hozelock grow bag Hozelock 35L 35 litres Reinforced plastic Tomatoes, peppers 3+ seasons
    Vigoroot grow bag Vigoroot 20L 20 litres Air-pruning fabric Potatoes, carrots 2 seasons
    Levington peat-free grow bag Levington Peat-Free 33 litres Compost-filled Beginners, tomatoes Single season
    Smart Pot fabric container Smart Pot 15-gal 57 litres Geotextile fabric Large tomatoes, squash 5+ seasons
    Budget grow bag multipack Budget 5-Pack 20 litres Standard plastic Salad crops, annuals 1–2 seasons

    Why Grow Bags Beat Traditional Pots

    Root health: Grow bags encourage better root development through air-pruning. When roots reach the bag edge, they stop rather than circling. This creates a dense, fibrous root ball that absorbs water and nutrients efficiently.

    Potato plants growing tall in a deep fabric grow bag

    Temperature regulation: Black plastic warms quickly in spring, giving tomatoes and peppers the heat they crave. Fabric bags breathe, preventing overheating in summer.

    Drainage: Excess water escapes through fabric or drainage holes, preventing waterlogging that kills container vegetables.

    Space efficiency: Empty bags fold flat for winter storage. Stack filled bags on patios, balconies, or paths without permanent beds.

    Cost: Grow bags cost 30– than equivalent ceramic or terracotta pots.

    Understanding Grow Bag Sizes

    Capacity in Litres

    Size Dimensions (approx) Best For
    10–15L 25×25×20cm Single salad plant, herbs
    20–25L 30×30×25cm 2× tomato plants, potatoes
    30–40L 35×35×30cm Large tomatoes, peppers, aubergines
    50L+ 40×40×35cm Potatoes, squash, multiple plants

    The tomato rule: One tomato plant needs minimum 20L, ideally 30–40L for cordon varieties.

    The potato rule: Early potatoes need 30L, maincrop need 40L+ per bag.

    Shape Matters

    Traditional rectangular: Stack neatly, stable against walls
    Tall cylindrical: Better for deep-rooted crops (potatoes, carrots)
    Wide shallow: Ideal for salads, shallow-rooted crops
    With handles: Easier to move when filled

    Product Deep Dives

    Hozelock 35L Grow Bag

    Best for: Reliable tomatoes season after season

    Specifications:
    – Capacity: 35 litres
    – Material: Reinforced UV-stabilised plastic
    – Dimensions: 35×35×30cm
    – Features: Reinforced handles, drainage holes

    Why it works: The reinforced plastic withstands three seasons of British weather without splitting. Handles make repositioning for maximum sun easy — essential as the season progresses.

    The durability test: Hozelock bags survive winter storage without cracking. Cheaper alternatives often split at the seams after one season.

    Best setup: Fill with Miracle-Gro compost multi-purpose compost mixed 50:50 with horticultural grit horticultural grit. Plant two bush tomatoes or one cordon variety.

    Vigoroot 20L Air-Pruning Fabric Bag

    Best for: Potatoes, carrots, root crops

    Specifications:
    – Capacity: 20 litres (multiple sizes available)
    – Material: Non-woven geotextile fabric
    – Technology: Air-pruning fabric
    – Breathable: Yes

    Why it works: The fabric sides allow air penetration. When roots reach the edge, they stop growing (air-pruning) rather than circling. This creates a dense, efficient root system.

    The potato advantage: Traditional potato bags need hilling (adding soil as plants grow). Vigoroot bags eliminate this — plant at the bottom, roots fill the bag naturally.

    The carrot test: Long-rooted carrots grow straight in fabric bags. Plastic often causes forking as roots hit solid sides.

    Care: Wash and dry thoroughly between seasons. Stores flat.

    Levington Peat-Free Tomato Grow Bag

    Best for: Beginners, single-season convenience

    Specifications:
    – Capacity: 33 litres pre-filled
    – Compost: Peat-free multi-purpose
    – Nutrients: 6-week feed included
    – Ready to use: Yes

    Why it works: No compost purchase needed — cut the bag, plant directly. The peat-free compost quality has improved dramatically and now matches peat performance.

    The beginner advantage: Everything included. No mixing, no adding drainage materials. Cut three holes, plant, water.

    Limitations: Single season use. Compost exhausted after 6 weeks — start feeding with liquid tomato feed tomato fertiliser from July.

    Best for: First-time tomato growers, temporary setups, gifts

    Smart Pot 15-Gallon Fabric Container

    Best for: Serious growers, large plants, long-term investment

    Specifications:
    – Capacity: 57 litres (15 US gallons)
    – Material: Dense geotextile fabric
    – Durability: 5+ seasons
    – Handles: Yes

    Why it works: The original fabric pot company. Dense fabric creates optimal root environment — air-pruning without drying out too quickly.

    The large plant solution: Cordon tomatoes, squash, even dwarf fruit trees thrive in this volume. The 57L capacity matches a 40cm ceramic pot at one-third the cost and weight.

    Temperature regulation: Black fabric absorbs heat for warmth-loving crops, but breathes to prevent overheating. Plants establish faster than in plastic.

    Investment value: At –20, cost-per-season beats replacing cheap plastic bags annually.

    Budget 5-Pack 20L Grow Bags

    Best for: Salad crops, trying grow bags without commitment

    Specifications:
    – Capacity: 20 litres each
    – Quantity: 5 bags
    – Material: Standard plastic
    – Colour: Black

    Why it works: At under per bag, experiment without financial risk. Perfect for lettuces, spring onions, radishes — crops that finish in one season.

    The salad solution: Plant one lettuce per bag. Harvest outer leaves for weeks. When plants bolt in summer, compost the whole bag contents — no cleaning.

    Realistic expectations: Expect 1–2 seasons before seams split. Not for long-term perennials or heavy-feeding tomatoes.

    Best for: Beginners testing grow bags, seasonal salads, children’s gardening projects

    What to Fill Grow Bags With

    Never Use Garden Soil

    Garden soil compacts in bags, drains poorly, and introduces pests. Always use container compost.

    Best Mix for Vegetables

    Base: Multi-purpose compost 70%
    Drainage: horticultural grit Horticultural grit 20%
    Moisture: coconut coir Coconut coir 10%

    Alternative: John Innes No.3 50% + multi-purpose 50% for long-season crops

    Filling Technique

    1. Place bag where it will grow — difficult to move when filled
    2. Fill to 5cm from top — allows watering reservoir
    3. Shake and firm — settles compost without compacting
    4. Water thoroughly before planting — saturates compost fully
    5. Let drain 2–3 hours — prevents waterlogging new plants

    Planting Guide by Crop

    Tomatoes in Grow Bags

    Bag size: 30–40L minimum
    Plants per bag: 2 bush tomatoes OR 1 cordon (indeterminate)
    Planting depth: Deep — bury 10cm of stem for extra rooting
    Support: tomato cage Tomato cage or bamboo canes essential
    Feeding: Weekly liquid tomato feed tomato feed from first flowers

    Potatoes in Grow Bags

    Bag size: 30L for early, 40L+ for maincrop
    Seed potatoes: 3 per 30L bag
    Method: Place seed potatoes on 15cm compost, cover with 10cm more
    Earthing up: Add compost as shoots emerge (traditional) OR plant deeply once (Vigoroot fabric bags)
    Harvest: Tip bag out when flowers fade

    Carrots in Grow Bags

    Bag size: 20–30L
    Depth: 25cm minimum for long varieties, 15cm for stump-rooted
    Compost: 50% sand or grit mixed in for drainage
    Thinning: Essential — crowded carrots fork and twist
    Protection: carrot fly mesh Carrot fly mesh essential

    Salads in Grow Bags

    Bag size: 10–20L per plant
    Succession: Sow new bags every 2 weeks
    Harvest: Cut-and-come-again or full head
    Advantage: Move bags to shade in heat — prevents bolting

    Grow Bag Care Through the Season

    Watering

    Grow bags dry faster than garden soil.

    Mixed salad leaves growing in budget grow bags on a balcony

    Summer schedule: Daily in heat, morning preferred
    Check method: Stick finger 5cm deep — dry at this depth means water
    Technique: Slow soak until water drains from bottom — ensures full saturation

    Feeding

    Bag compost exhausts nutrients by midsummer.

    Liquid feed: Weekly from June for fruiting crops
    Slow-release: Top-dress with slow-release fertiliser granules in July
    Mulch: 5cm organic straw mulch straw mulch reduces watering 30%

    Moving Bags

    Why move: Follow sun as season progresses, shelter from wind, protect from frost
    When: Only when compost is slightly dry — wet bags weigh 15kg+
    How: Two people, lift by base not handles (handles tear on heavy bags)

    Winter Storage and Reuse

    Plastic Bags

    1. Empty compost onto garden beds or compost bin
    2. Brush out debris
    3. Wash with garden hose
    4. Dry thoroughly (prevents mould)
    5. Store flat in shed

    Lifespan: 2–3 seasons for quality bags, 1 season for budget

    Fabric Bags

    1. Empty and brush out
    2. Machine wash or hose thoroughly
    3. Air dry completely
    4. Store dry

    Lifespan: 3–5 seasons depending on fabric weight

    Compost Disposal

    Annual vegetables: Spread on borders as mulch — nutrients depleted but organic matter valuable
    Diseased plants: Hot compost or dispose — don’t spread blight or virus

    Troubleshooting Grow Bag Problems

    Problem: Plants wilt despite watering

    Cause: Compost dried and became hydrophobic (repels water)

    Solution: Stand bag in tray of water for 30 minutes to rehydrate fully. Prevent with water-retaining gel water-retaining gel additive.

    Problem: Compost goes green with algae

    Cause: Overwatering and surface compaction

    Solution: Reduce watering frequency. Add 2cm horticultural grit grit mulch to surface. Improve drainage.

    Problem: Bags split at seams

    Cause: Cheap plastic degrades in UV or overfilled

    Solution: Buy reinforced bags (Hozelock, Smart Pot). Don’t overfill — leave 5cm headroom.

    Problem: Roots grow through drainage holes

    Cause: Plants becoming pot-bound

    Solution: Normal for vigorous plants. Trim roots or transplant to larger container if mid-season.

    Cost Comparison: Grow Bags vs Pots

    Container 30L Capacity Lifespan Cost/Year
    Budget grow bag 1 season
    Quality grow bag 3 seasons
    Fabric Smart Pot 5 seasons
    Plastic pot 10+ seasons
    Terracotta pot 20+ seasons

    Value winner: Quality plastic grow bags for seasonal vegetables. Terracotta for long-term perennials.

    Frequently Asked Questions

    Q: How many tomato plants per grow bag?

    A: Bush (determinate) varieties: 2 plants per 35L bag. Cordon (indeterminate): 1 plant per 35L+ bag.

    Q: Can I reuse grow bag compost?

    A: For annual vegetables, no — nutrients exhausted and potential disease. Mix into borders as soil improver, not for containers.

    Q: Why are my grow bag tomatoes small?

    A: Likely underwatering or nutrient deficiency. Grow bags need daily water in summer and weekly feeding once fruiting.

    Q: Do grow bags need drainage holes?

    A: Plastic bags should have pre-punched holes — add more if water pools. Fabric bags drain naturally through the material.

    Q: Can I grow winter vegetables in grow bags?

    A: Yes — overwintering onions, garlic, broad beans. Move bags to sheltered spot and protect from severe frost.

    Your Grow Bag Buying Checklist

    – [ ] Calculate total litres needed (see size guide above)
    – [ ] Choose material: Plastic (cheap, warms quickly) or fabric (air-pruning, breathable)
    – [ ] Check durability rating for your intended use years
    – [ ] Verify handles are reinforced (not just glued)
    – [ ] Buy compost: 60–70L per 35L bag (allows for settling)
    – [ ] Add drainage: horticultural grit Grit for all bags
    – [ ] Plan feeding: Weekly liquid feed from June

    Ready to grow? See our guides to best vegetables to grow in containers and best compost for container gardening for what to plant and fill with.

    Sources: RHS Growing in Containers, Which? Grow Bag Reviews, Gardening Which?, Allotment and Leisure Gardener You might also like our guide to other container types for beginners.

    Best Crops for Grow Bags

    Grow bags suit shallow-rooted and sprawling crops particularly well. The wide, flat shape gives roots room to spread without the depth (and cost) of large pots.

    Tomatoes

    The classic grow bag crop. Plant 2–3 per standard grow bag. Bush varieties like ‘Tumbling Tom Red’ and ‘Totem’ stay compact and don’t need staking — ideal for patios. For cordon types, ‘Gardener’s Delight’ (RHS Award of Garden Merit) produces heavy trusses of sweet cherry tomatoes and grows well in bags with cane support.

    Courgettes

    One plant per grow bag — they need the space. ‘Patio Star’ is a compact variety bred specifically for containers. ‘Black Beauty’ is a reliable open-pollinated variety that crops heavily from July to October.

    Peppers and Chillies

    Two to three plants per bag. ‘Gypsy’ (sweet pepper, RHS AGM) produces thick-walled fruits that ripen reliably outdoors in southern England. For chillies, ‘Apache’ stays compact at 30–40cm and fruits prolifically.

    Salad Leaves and Herbs

    Cut-and-come-again lettuce mixes, rocket, and spinach thrive in grow bags. Sow directly into the bag surface. ‘Little Gem’ hearts take about 10 weeks from sowing. Basil (‘Genovese’) and parsley (‘Moss Curled’) also do well in the sheltered microclimate of a grow bag on a warm patio.

    Potatoes

    First and second earlies work best. ‘Charlotte’ (waxy salad potato, RHS AGM) and ‘Rocket’ (very early, ready in 10–12 weeks) are both well-suited to bags. Plant 3–4 seed potatoes per large grow bag, covering with 10cm of compost and earthing up as shoots emerge.

    Where to Buy

    Grow bags, seeds, and all the supplies mentioned above are available from these UK retailers.

    Grow Bags and Growing Supplies

    • Crocus — stocks fabric grow bags, traditional grow bags, and premium composts. Fabric grow bags from £5–£15 depending on size. Also a good source for tomato support frames and plant feeds.
    • B&Q and The Range — stock standard grow bags (around £3–£5 each) and multi-purpose compost. Useful for same-day purchases.

    Seeds and Plug Plants

    • Thompson & Morgan — search for ‘patio’ or ‘container’ varieties to find cultivars bred for grow bag growing. Tomato seed from £2–£3.50 per packet.
    • You Garden — strong plug plant range for tomatoes, peppers, and courgettes. Plug plants arrive ready to plant out — no seed-sowing required.
    • Suttons — good selection of heritage and modern vegetable seeds. Their vegetable growing collections include varieties well-suited to container and grow bag growing.

    About the Author

    John Kitcher is the lead gardening writer at Plants and Gardening. He grew up mucking in on his grandfather’s Devon allotment and has spent the last fifteen years growing fruit, veg and ornamentals across three very different UK gardens — a windy coastal plot in North Cornwall, a shaded London back garden, and now a clay-heavy smallholding in the Midlands. He trials every technique covered here in his own beds and containers before writing about it, cross-references against RHS and Kew guidance, and has a soft spot for heritage tomato cultivars and anything that survives a British winter without complaint.

    Got a question about something we’ve written? Drop a comment — we read every one.

  • 15 Best Vegetables to Grow in Containers (UK Beginner’s Guide)

    15 Best Vegetables to Grow in Containers (UK Beginner’s Guide)

    As an Amazon Associate I earn from qualifying purchases.

    No garden? No problem. If you have a patio, balcony, or sunny doorstep, you can grow fresh vegetables in containers.

    Colourful vegetable containers arranged on a UK patio garden
    A thriving container vegetable garden on a patio

    Container gardening works because you control everything: the soil, the drainage, and the position for maximum sun. There are no weeds to battle, and you can move pots to catch the light. For beginners, containers are often more successful than traditional beds — and there’s genuine satisfaction in snipping fresh lettuce from a pot by your back door.

    This guide covers 15 vegetables that thrive in pots, chosen for reliability and UK conditions. Each includes specific container sizes, realistic harvest times, and practical care tips. If you’re completely new to growing food, you might want to start with our guide on starting your first vegetable garden from scratch.

    What You Need to Get Started

    Essential container gardening supplies: pots, compost and tools
    Essential supplies for container vegetable gardening

    Essential supplies: (See our complete starter guide for a more detailed shopping list)

    • Containers in various sizes (specifics below)
    • Multi-purpose compost mixed with John Innes
    • Liquid feed for hungry crops
    • Watering can with rose
    • Optional: slow-release fertiliser, saucers, plant supports

    Choosing containers:
    Size matters more than material. A tomato in a 15cm pot will struggle; in a 30cm pot, it will feed you for months (see how to grow tomatoes in pots). When uncertain, go bigger — extra compost holds moisture and nutrients.

    Materials compared:

    • Plastic: Light, affordable, retains moisture
    • Terracotta: Attractive but dries quickly; line with plastic
    • Fabric grow bags: Excellent drainage, stores flat
    • Glazed ceramic: Heavy and stable for top-heavy plants

    Essential: drainage holes. Stagnant water kills roots faster than dryness.

    The 15 Best Container Vegetables

    1. Cherry Tomatoes

    Container: 30cm diameter (12 litres) | Sun: Full sun (6+ hours) | Harvest: 60–80 days | Difficulty: Easy

    Cherry tomatoes ripening on the vine in a large container pot
    Cherry tomatoes 'Gardeners Delight' growing in container
    Cherry tomatoes thriving in a 30cm container

    The reward-per-effort champion. One well-fed plant produces pints of fruit from July until first frost.

    Best varieties: ‘Tumbling Tom’ for hanging baskets, ‘Gardeners Delight’ for pots, ‘Balconi Red’ for compact spaces.

    Key care: Feed weekly with tomato fertiliser once flowering. Water consistently — irregular watering causes blossom end rot. Support with a cane or cage.

    2. Lettuce and Mixed Leaves

    Container: 15cm (3 litres) | Sun: Partial shade OK | Harvest: 6–8 weeks | Difficulty: Very Easy

    The fastest route to harvesting your own food. Cut-and-come-again varieties let you snip outer leaves while the plant keeps producing.

    Best approach: Sow successionally every two weeks for continuous salad. ‘Salad Bowl’, ‘Lollo Rossa’, and oriental mixes all perform well.

    Key care: Keep soil moist — lettuce turns bitter when stressed. Sow thinly to avoid overcrowding.

    3. Radishes

    Container: 15cm (3 litres) | Sun: Partial shade OK | Harvest: 4–6 weeks | Difficulty: Very Easy

    The confidence builder. Sow radishes and you’ll be eating them before you’ve had time to doubt yourself.

    Best varieties: ‘Cherry Belle’ (classic round red), ‘French Breakfast’ (elongated, milder).

    Key care: Sow thinly — about 2cm apart. Thinning is essential; crowded radishes won’t bulb. Harvest promptly — left too long, they turn woody.

    4. Spring Onions

    Container: 15cm (3 litres) | Sun: Full sun to partial shade | Harvest: 8–10 weeks | Difficulty: Very Easy

    Neat, vertical, and endlessly useful. Spring onions occupy minimal space and ask almost nothing of you.

    Key care: Keep well-watered for milder flavour. Sow every three weeks for continuous supply. No thinning needed — they push each other upright.

    5. Dwarf French Beans

    Container: 25cm (8 litres) | Sun: Full sun | Harvest: 50–60 days | Difficulty: Easy

    Perhaps the most productive crop for the space. A single pot produces handfuls of tender pods every few days for six to eight weeks.

    Best varieties: ‘Maxibel’ (stringless, heavy cropper), ‘Stanley’ (reliable early variety).

    Key care: Pick regularly — the more you pick, the more they produce. Allowing pods to swell stops flowering. Short supports keep pods clean.

    6. Chillies

    Container: 20cm (5 litres) | Sun: Full sun | Harvest: 70–90 days | Difficulty: Medium

    Chillies love containers. Restricted roots seem to concentrate heat in the fruit. They’re also ornamental — colourful fruits look good on sunny windowsills.

    Best varieties: ‘Apache’ (compact, prolific), ‘Hungarian Hot Wax’ (milder), ‘Jalapeño’ (classic).

    Key care: Start early indoors or buy ready plants in May — they need a long season. Feed weekly during fruiting. Overwinter plants indoors for next year’s crop.

    7. Courgettes (Dwarf)

    Container: 40cm (20 litres) | Sun: Full sun | Harvest: 50–60 days | Difficulty: Easy

    Dwarf courgette plant in container
    Dwarf courgettes produce well in large containers

    Standard courgettes need space. Dwarf varieties like ‘Bush Baby’ and ‘All Green Bush’ stay compact yet productive.

    Key care: Keep consistently moist — drought followed by flood causes misshapen fruit. Harvest at 10–15cm; oversized become watery marrows. One plant is plenty for most families.

    8. Carrots (Short Varieties)

    Container: 20cm diameter, 20cm deep (10 litres) | Sun: Full sun | Harvest: 60–80 days | Difficulty: Medium

    Containers solve carrot fly problems — the pest flies low and rarely finds elevated pots. Choose short-rooted varieties.

    Best varieties: ‘Paris Market’ (round, sweet), ‘Atlas’ (round, stores well), ‘Amsterdam Forcing’ (slender, fast).

    Key care: Sow thinly. Thinning is essential — crowded carrots fork and twist. Keep soil moist for germination.

    9. Beetroot

    Container: 20cm (5 litres) | Sun: Full sun to partial shade | Harvest: 50–70 days | Difficulty: Easy

    Dual-purpose: tender roots and edible leaves. Beetroot is unfussy and reliable.

    Best varieties: ‘Boltardy’ (resistant to running to seed), ‘Chioggia’ (striking pink rings).

    Key care: Thin to 5cm spacing. Harvest young for sweetness — older roots become woody. Don’t cut leaves completely; leave 2cm to prevent bleeding.

    10. Spinach

    Container: 15cm (3 litres) | Sun: Partial shade OK | Harvest: 6–8 weeks | Difficulty: Very Easy

    Spinach bolts quickly in hot, dry conditions. Containers let you move pots to shade in midsummer, extending harvest.

    Best varieties: ‘Apollo’ (slow to bolt), ‘Medania’ (hardy).

    Key care: Sow successionally every three weeks. Harvest outer leaves, leaving the centre to continue. Water consistently — dryness triggers bolting.

    11. Peas (Dwarf)

    Container: 25cm (8 litres) | Sun: Full sun to partial shade | Harvest: 60–70 days | Difficulty: Easy

    Fresh peas from the pod are a revelation. Dwarf varieties need only short twiggy supports.

    Best varieties: ‘Kelvedon Wonder’ (reliable), ‘Bingo’ (early, compact).

    Key care: Sow generously — not all germinate. Pick promptly; over-mature peas are starchy.

    12. Kale

    Container: 25cm (8 litres) | Sun: Full sun to partial shade | Harvest: 50–60 days (baby leaves) | Difficulty: Easy

    The cut-and-come-again champion of winter. Kale tolerates cold, shade, and neglect.

    Best varieties: ‘Nero di Toscana’ (tender, dark leaves), ‘Red Russian’ (hardy, frilly).

    Key care: Harvest bottom leaves first. Plants become top-heavy — ensure stable pots. Protect from pigeons with netting.

    13. Pak Choi

    Container: 15cm (3 litres) | Sun: Partial shade OK | Harvest: 30–45 days | Difficulty: Very Easy

    Rapid, attractive, and versatile. Pak choi germinates reliably and reaches harvest in just over a month.

    Key care: Sow successionally. Bolts quickly in hot weather; afternoon shade helps in midsummer.

    14. Patio Aubergine

    Container: 30cm (12 litres) | Sun: Full sun | Harvest: 80–100 days | Difficulty: Medium

    Aubergines demand heat and sun but reward the effort. Modern patio varieties are bred for containers.

    Best varieties: ‘Pot Black’ (compact), ‘Moneymaker’ (reliable in UK).

    Key care: Start indoors or buy plants. Don’t plant out until late May when nights are warm. Feed weekly during fruiting. Support stems — fruit is heavy.

    15. Salad Potatoes (Early)

    Container: 40cm (30 litres) | Sun: Full sun | Harvest: 70–90 days | Difficulty: Easy

    Few harvests match tipping out a pot of home-grown potatoes. Early varieties are fastest and most reliable.

    Best varieties: ‘Charlotte’ (waxy, excellent flavour), ‘Swift’ (very early), ‘Rocket’ (reliable).

    Key care: Plant 3–4 seed potatoes per 40cm pot. Cover stems with compost as they grow. Keep well-watered during tuber formation. Harvest when flowers open.

    Season-by-Season Care Calendar

    Season Key Tasks
    Spring (Mar–May) Sow lettuce, radish, peas, potatoes. Harden off tomato/chilli plants.
    Early Summer (Jun) Main planting. Water well as weather warms. Begin weekly feeding for fruiting crops.
    Mid Summer (Jul–Aug) Daily watering. Harvest beans, tomatoes, courgettes regularly. Succession sow salads.
    Autumn (Sep–Oct) Final harvests. Sow winter salads. Clear spent crops.
    Winter Plan next year. Order seeds. Kale and some herbs may continue.

    Watering and Feeding

    Watering:
    Containers dry faster than ground soil. In hot weather, daily watering is normal. Morning is best — plants enter the day hydrated, and foliage dries before evening.

    For detailed advice, check our guide to growing tomatoes from seed.

    Check moisture by pushing your finger 2cm into compost. If dry, water. Saucers beneath pots act as reservoirs, but don’t let plants sit in water.

    Feeding:
    Compost feeds plants for 4–6 weeks. After that:

    • Leafy crops: Balanced liquid feed every two weeks
    • Fruit crops: High-potash tomato feed weekly once flowering
    • Root crops: Minimal feeding — focus on good initial compost

    Common Mistakes to Avoid

    1. Pots too small
    Root-bound plants produce poor harvests. When in doubt, go bigger.

    2. Irregular watering
    Drought stress followed by overwatering causes split fruit and bitter lettuce. Check daily in summer.

    3. Poor compost choice
    Straight multi-purpose dries too quickly. Mix with John Innes or choose container-specific blends.

    4. Forgetting to feed
    Limited soil means limited nutrients. Fruiting crops especially need regular feeding.

    5. Planting too early
    Tender crops sulk in cold soil. Wait until late May in most UK regions.

    Maximising Your Harvest

    Succession sowing: Sow small batches every 2–3 weeks rather than everything at once. Prevents gluts and gaps. Works for: lettuce, radish, spring onion, spinach, pak choi.

    Lettuce and mixed salad leaves growing in window boxes

    Companion planting: Some combinations work well:

    • Tomatoes with basil at the base
    • Carrots with spring onions (masks scent from pests)
    • Lettuce with radish (radish marks rows, harvested first)

    Vertical space: Use hanging baskets for tumbling tomatoes, wall planters for herbs, tiered stands for salads.

    Troubleshooting

    Problem Cause Solution
    Yellow lower leaves Natural ageing or overwatering Remove; check drainage
    Wilting despite wet soil Root rot Improve drainage
    Leggy seedlings Insufficient light Move to sunnier spot
    No fruit set Cold nights Wait for warmer weather; shake flowers
    Bitter lettuce Heat stress Provide shade, water consistently
    Forked carrots Obstacles in compost Use sifted compost
    Flowers but no beans Too hot Mulch, water deeply

    Quick-Reference Tables

    Minimum Pot Sizes

    Crop Type Diameter Depth
    Leafy salads 15cm 15cm
    Root crops 20cm 20cm
    Bush beans/peas 25cm 25cm
    Compact fruiting 30cm 30cm
    Heavy feeders 40cm+ 40cm+

    Sun Requirements

    Level Hours/Day Crops
    Full sun 6+ Tomatoes, peppers, courgettes, beans
    Partial sun 4–6 Lettuce, spinach, peas, beetroot
    Shade tolerant 2–4 Leafy greens, herbs

    First Container Garden — Week-by-Week

    Weeks 1–2: Setup and early sowing
    – Acquire containers, compost, seeds
    – Sow indoors: tomatoes, chillies, aubergines
    – Sow outdoors: radish, lettuce, spring onion

    Weeks 3–4: Expanding plantings
    – Sow: peas, beetroot, spinach
    – Plant early potatoes in large containers

    Weeks 5–8: Main season
    – Harden off and plant tender crops
    – Sow: dwarf beans, succession salads
    – Begin weekly feeding

    Weeks 9–12: First harvests
    – First radishes (weeks 6–8)
    – First lettuce leaves
    – Continuous picking of beans, courgettes

    Frequently Asked Questions

    What’s the easiest vegetable to grow in a pot?
    Radishes. Four to six weeks from sowing to harvest, minimal care, virtually foolproof.

    Can I grow vegetables indoors on a windowsill?
    Leafy salads, spring onions, and herbs work well. Fruiting crops need more light than most windowsills provide.

    How often should I water?
    Daily in hot weather, every 2–3 days in cooler periods. Check by pushing finger 2cm into compost.

    Do I need special compost?
    Multi-purpose works, but mixing with John Innes improves water retention. Avoid garden soil — it’s too heavy and may contain pests.

    Can I reuse compost?
    Yes, but refresh it. Mix in fresh compost or add slow-release fertiliser.

    Why are my tomatoes flowering but not fruiting?
    Likely cold nights (below 10°C) or poor pollination. Shake plants gently. Warm weather usually solves it.

    Most productive crop for small spaces?
    Dwarf French beans. Weeks of continuous harvest from a single pot.

    Sources: RHS container growing guidance, Garden Organic, Which? Gardening trials, University of Maryland Extension. You might also like our guide to choosing the right containers and pots. You might also like our guide to the best compost for container gardening.

    Where to Buy Seeds and Containers

    Getting started with container vegetables is straightforward once you know where to shop. Here are reliable UK suppliers for seeds, plants, and growing kit.

    Seeds

    • Thompson & Morgan — broad vegetable seed range including many container-friendly varieties. Look for their ‘patio’ and ‘dwarf’ selections specifically bred for pots. Seed packets from £2–£4.
    • Suttons — strong heritage vegetable range with reliable germination rates. Their vegetable seed collections (£8–£15) offer good variety for container growers.
    • You Garden — good value plug plants if you’d rather skip the seed-sowing stage. Vegetable plug plant collections start around £8–£12 for mixed packs.

    Containers, Compost, and Tools

    • Crocus — wide range of pots from budget plastic to premium terracotta and metal. Containers suitable for vegetables start at £5 for basic 30cm pots, up to £25+ for larger decorative options. They also stock quality compost and hand tools.
    • B&Q, The Range, and local garden centres — best for compost (multi-purpose with added John Innes, around £5–£10 for 40–50L) and for seeing container sizes in person before buying.

    Budget Tips

    • Repurpose containers: old buckets, wooden crates lined with landscape fabric, and recycled grow bags all work. Drill drainage holes in the bottom.
    • Buy compost in spring: garden centres often run multi-buy deals (3 bags for the price of 2) in March and April.
    • Seed collections save money: a mixed vegetable seed collection costs less per variety than buying individual packets.

    About the Author

    John Kitcher is the lead gardening writer at Plants and Gardening. He grew up mucking in on his grandfather’s Devon allotment and has spent the last fifteen years growing fruit, veg and ornamentals across three very different UK gardens — a windy coastal plot in North Cornwall, a shaded London back garden, and now a clay-heavy smallholding in the Midlands. He trials every technique covered here in his own beds and containers before writing about it, cross-references against RHS and Kew guidance, and has a soft spot for heritage tomato cultivars and anything that survives a British winter without complaint.

    Got a question about something we’ve written? Drop a comment — we read every one.