Tag: UK gardening

  • How to Get Rid of Slugs in the UK: What Actually Works

    How to Get Rid of Slugs in the UK: What Actually Works

    If slugs are shredding your seedlings overnight, here’s the short version. The methods that genuinely work are biological nematodes, encouraging natural predators, picking slugs off by torchlight, and — only as a last resort — ferric phosphate pellets. The popular barriers most of us were told to use (copper tape, eggshells, grit, wool pellets) were tested by the RHS and made no measurable difference. This guide explains what to do, in the right order, for a typical UK garden.

    It’s worth knowing up front: you will never get rid of every slug, and you don’t need to. Slugs are food for hedgehogs, frogs and birds, and most species barely touch living plants. The goal is to protect the few plants slugs love during the damp months — not to wage all-out war.

    Why slugs thrive in a UK garden

    Britain’s mild, wet climate is close to slug paradise. They feed at night and in wet weather, hide under pots, logs and dense foliage by day, and breed fastest when the soil is warm and damp — which is exactly why June to September is peak slug season. A humid summer evening after rain is when most damage happens.

    They do the most harm to soft, young growth: newly planted seedlings, lettuce and other salad leaves, hostas, courgettes, runner beans, dahlias and strawberries. Established, woody or aromatic plants are usually left alone. If you’re starting a vegetable garden this is the single most common reason beginners lose their first crops.

    Protect the plants most at risk first

    Before reaching for any control, concentrate your effort where it counts. A few simple habits prevent most damage:

    • Raise transplants before planting out. Slugs destroy tiny seedlings fastest. Grow plants on until they’re sturdier, then plant out — bigger plants shrug off light nibbling.
    • Water in the morning, not the evening. RHS research suggests a drier soil surface at night gives slugs less to glide over. Damp soil at dusk is an open invitation.
    • Tidy hiding places near vulnerable plants. Lift old pots, boards and leaf litter from around seedlings so slugs have nowhere cool and damp to shelter by day.
    • Use containers and raised beds for the most tempting crops. Slugs still climb, but a pot on a hard surface is far easier to defend than open ground. Our guides to growing vegetables in containers and choosing pots for beginners are a good place to start.
    Young vegetable seedlings with ragged holes from slug damage

    The methods that actually work

    1. Nematodes — the most effective slug control for most gardens

    If you only do one thing, do this. Nematodes are microscopic worms (the species Phasmarhabditis hermaphrodita) that occur naturally in UK soil. Watered on, they seek out slugs underground and stop them feeding, then kill them within a few days — without harming pets, children, hedgehogs, birds or worms. In the UK they’re sold as a living product, most widely under the name Nemaslug, as a sachet of powder you mix with water.

    They are brilliant — but only if you use them correctly, which is where most beginners come unstuck. The rules that matter:

    • Soil must be 5°C or warmer. Below that the nematodes aren’t active. In practice that means roughly mid-spring through to autumn in most of the UK.
    • Apply in the evening or on a dull day, and water it in. Nematodes are killed by sunlight and dry out easily — the soil needs to be moist before and after applying.
    • Keep the soil damp for the next couple of weeks. Dry soil shuts them down; water during dry spells.
    • It lasts around six weeks, then you reapply. For continuous protection through summer, plan to treat roughly every six weeks from spring onwards rather than as a one-off.
    • It’s a living product. Store the sachet in the fridge and use it before the date on the pack — old or warm nematodes simply won’t work.

    One honest limitation: nematodes target slugs, which spend most of their time in or on the soil. They’re far less effective against snails, which rest off the ground. If snails are your main problem, lean harder on the methods below.

    Watering nematodes into the soil with a watering can at dusk

    2. Encourage natural predators

    The cheapest, most sustainable slug control is a garden full of things that eat slugs: hedgehogs, frogs and toads, ground beetles, slow-worms, song thrushes and ducks. Encourage them and the slug population looks after itself over time. Leave a wild corner, add a small pond or a shallow water dish, cut a hedgehog-sized gap in fences, and avoid disturbing log piles. This fits the RHS’s current emphasis on predators, cultural controls and targeted biological control.

    3. Go on a torchlight slug patrol

    Low-tech but genuinely effective: on a warm, damp evening, head out an hour or two after dusk with a head torch and a tub, and pick slugs off your most vulnerable plants by hand. Do it a few nights running when seedlings are at their most tender and you’ll dramatically cut the local population. Relocate them to a wild area, or dispatch them quickly — whichever you’re comfortable with.

    4. Beer traps (useful, with limits)

    A shallow container sunk to ground level and part-filled with beer will attract and drown slugs. Beer traps do catch slugs, so they help. But they only draw slugs from a small radius, need topping up and emptying every few days, and can catch ground beetles (which are on your side) — so keep them close to vulnerable plants and check them often.

    Popular methods the RHS found don’t work

    Here’s where good advice parts company with most slug articles. The RHS put the popular home remedies to the test: in a trial led by entomologist Dr Hayley Jones, 108 lettuces were grown with and without the usual barriers, and the protected plants were eaten just as much as the unprotected ones (RHS slug and snail research). The beginner-practical version: don’t spend your first £20 on copper tape and wool pellets — put it into protecting seedlings and improving habitat instead. The barriers that didn’t earn their place were:

    • Copper tape
    • Horticultural grit
    • Pine bark mulch
    • Wool pellets
    • Eggshells

    The likely reason is that a slug’s thick protective slime lets it glide straight over sharp or scratchy surfaces, and even change its slime to cope. Eggshells may be worse than useless — slugs can eat them, so they can act as an attractant. Coffee grounds and salt are two more to skip: there’s no good evidence coffee grounds reliably deter slugs, and salt damages soil and your plants. The practical takeaway is that these barriers may waste time and money. If you’ve been ringing your pots with copper tape, that’s the effort to redirect.

    Slug pellets and the law: what’s banned now

    The rules changed and a lot of online advice hasn’t caught up. Metaldehyde slug pellets — the traditional blue pellets — are banned in the UK. The ban took full effect on 1 April 2022: it is now illegal to sell, supply, store or use them, because metaldehyde poses an unacceptable risk to wildlife such as hedgehogs and birds (and to pets). If you have an old tub in the shed, take it to a household hazardous-waste point rather than using it.

    The legal chemical option now is ferric phosphate (sometimes labelled iron phosphate) pellets. These are approved for use, including in organic gardening, and are far less harmful to wildlife. That said, the RHS’s position is that slug pellets “even organic ones” can still have negative effects on wildlife. We’d treat ferric phosphate as a last resort for a prized crop — used sparingly, scattered thinly per the pack instructions, not as your first move.

    A simple slug-control routine for beginners

    Pulling it together into something you can actually follow through the damp season:

    1. Spring: start encouraging predators (water, shelter, hedgehog gaps) and raise seedlings to a decent size before planting out.
    2. When soil is reliably above 5°C: apply nematodes, and reapply roughly every six weeks through summer for plants slugs love.
    3. Through summer: water in the morning, keep hiding places clear of your most vulnerable plants, and do a torchlight patrol after warm, wet evenings.
    4. If something precious is still being eaten: add beer traps close by, and only then consider a thin scatter of ferric phosphate pellets.

    Slugs are at their busiest in the months covered by our seasonal guides to what to plant in June, July and August — worth a read alongside this if you’re sowing now.

    What you’ll need and where to buy it (UK)

    Kept deliberately short and honest — these are the things the evidence actually supports, not the barriers we’ve just questioned:

    • Nematodes (e.g. Nemaslug): the centrepiece for most gardens. Sold by garden centres and online — buy fresh, in season, and store in the fridge until use.
    • A head torch: hands-free slug patrols after dark. Any decent rechargeable head torch does the job.
    • Ferric phosphate pellets: the only legal pellet, for last-resort use on a prized crop.
    • Beer-trap supplies: cheap and DIY — a few sunken tubs and the cheapest beer you can find, or a ready-made trap kit.
    • For predators: a simple hedgehog house, a shallow pond or water dish, and a bird feeder all pay off over time.

    In the UK you’ll find all of these at garden centres and retailers such as B&Q, Crocus, Wilko and Amazon UK. What we won’t be sending you out to buy: copper tape, wool pellets, grit barriers or eggshells — because the research says they won’t protect your plants.

    Frequently asked questions

    What is the fastest way to get rid of slugs?

    For an immediate dent in numbers, a torchlight slug patrol on a warm, damp evening — picking them off by hand for a few nights running — works fastest. For lasting control, apply nematodes once the soil is above 5°C.

    Do slug pellets still work, and are they legal?

    Traditional metaldehyde pellets are banned in the UK (since 1 April 2022) and must not be used. Ferric phosphate pellets are legal and effective, but are best kept as a last resort because even these can affect wildlife.

    Does copper tape keep slugs away?

    In RHS trials it made no measurable difference to plant damage. The same was true of eggshells, grit, bark mulch and wool pellets. Your time and money are better spent on nematodes and encouraging predators.

    Are slugs actually bad for the garden?

    Mostly no. Only a handful of species damage living plants; the rest help recycle dead material and feed hedgehogs, frogs and birds. The aim is to protect vulnerable plants during the damp months, not to eliminate slugs entirely.

    When should I apply nematodes?

    From mid-spring once the soil is reliably 5°C or warmer, applied in the evening or on a dull day and watered in. Reapply about every six weeks through summer for continuous protection.

    Sources

    What to do next

    Start tonight: clear hiding places from around your most vulnerable plants, switch to morning watering, and — if the soil is above 5°C — order nematodes to apply this week. Then build slug-friendly predators into the garden for the long term.

    For more on protecting the crops slugs love most, read our beginner guides to growing courgettes in containers, growing runner beans and growing strawberries in pots, or get the bigger picture in our guide to starting a vegetable garden.

    Found a method that works in your garden — or a slug battle you’re still losing? Tell us in the comments; we read every one and update our guides with what readers find works.
  • Best Strawberry Plants for UK Gardens — 2026 Variety & Supplier Guide

    Best Strawberry Plants for UK Gardens — 2026 Variety & Supplier Guide

    As an Amazon Associate I earn from qualifying purchases.

    Strawberries are a staple in UK gardens, prized for their sweet flavour and versatility in jams, desserts, and fresh eating. With a range of varieties and growing methods, choosing the right strawberry plants can make all the difference in yield and enjoyment. This 2026 guide to the best strawberry plants covers top AGM-approved varieties, the best suppliers, and proven growing techniques tailored to British conditions.

    Understanding Strawberry Types: June-Bearing vs. Everbearing

    June-bearing strawberries produce a single, heavy crop in June and early July, ideal for gardeners seeking a large harvest for jam-making or immediate consumption. These varieties are typically more productive per plant but have a shorter picking window. In contrast, everbearing (or perpetual) types deliver multiple flushes of fruit from June through October, extending the harvest season and offering a steady supply of fresh berries. While yields per flush are smaller, the prolonged cropping period makes everbearing types excellent for continuous harvesting and gardeners with limited space. For maximum yield and convenience, choose June-bearing varieties. For a longer harvest and more frequent picking, everbearing types are the better option.

    Top 6 AGM Strawberry Varieties for UK Gardens (2026)

    The RHS Award of Garden Merit (AGM) recognises varieties that perform reliably under UK conditions. ‘Cambridge Favourite’ (RHS AGM) is a UK-bred, June-bearing classic known for its disease resistance, consistent yields, and excellent flavour — a top choice for home growers. ‘Honeoye’ (RHS AGM), also June-bearing, delivers a heavy early crop with firm, sweet berries that hold well after picking, making it ideal for gardeners who want a strong June punch. ‘Symphony’ (RHS AGM), another June-bearing variety, extends the season with large, dark-red fruits harvested in late June and early July. For everbearing options, ‘Albion’ (RHS AGM) is a standout, producing large, bright fruits from June to October and performing well in both ground beds and containers. ‘Mara des Bois’ (everbearing — not currently RHS AGM but widely sold and prized for its wild-strawberry flavour) ripens in succession with smaller fruits. ‘Fragaria vesca ‘Mignonette” (alpine — not AGM, but a long-established UK favourite) is a compact, no-runner variety with tiny, intensely flavoured berries — perfect for edging or small pots.

    Recommended Varieties by Growing Method

    For container growing, ‘Albion’ excels due to its vigorous growth and extended fruiting period from June to October. It thrives in 30cm pots or dedicated strawberry planters with good drainage. ‘Mignonette’ (alpine) is ideal for edging, hanging baskets, or small pots — it requires no runners and offers a constant supply of tiny, fragrant berries. In ground beds, ‘Cambridge Favourite’ and ‘Mara des Bois’ perform well when planted in full sun with well-drained soil. ‘Cambridge Favourite’ benefits from a light mulch to suppress weeds, while ‘Mara des Bois’ appreciates a slightly acidic soil and consistent moisture. All these varieties respond well to regular feeding and protection from pests when fruiting.

    When to Plant Strawberry Runners in the UK

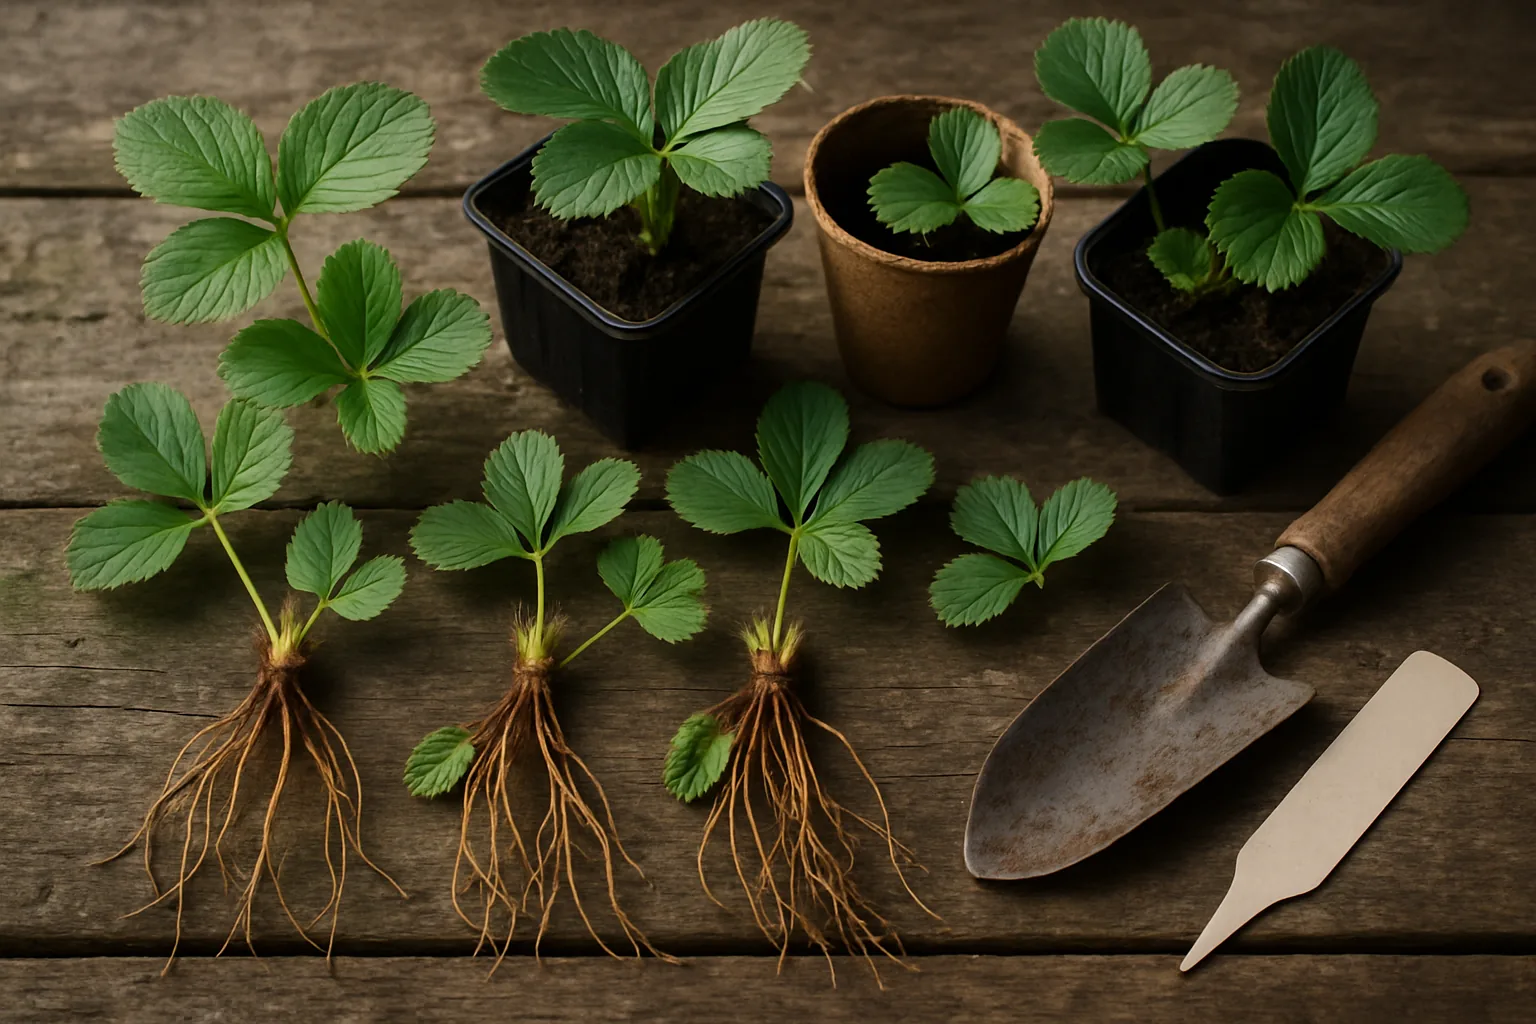
    Plant strawberry runners in August or September for optimal establishment before winter. This timing allows roots to develop strongly over autumn and winter, leading to a full crop the following summer. Spring planting (March–April) is viable for a lighter harvest in the same year, though plants may be less vigorous. Avoid planting in late autumn — frost can damage young roots and reduce overwintering success. Choose healthy, disease-free runners from AGM varieties for the best results. Ensure planting depth is correct: bury the crown just below the soil surface, with roots fully covered but not smothered.

    Growing Strawberries in Containers

    Pots and grow bags are ideal for strawberries, especially where space is tight. For pot sizes, compost, watering, feeding and the full container method, see our dedicated guide to growing strawberries in pots. The varieties recommended above all crop well in containers.

    Equipment & What You Need to Grow Strawberries Successfully

    Essential items include strawberry pots or planters (30cm minimum diameter, allowing 3–5L of compost per plant), loam-based compost (John Innes No 2), coarse grit or perlite for drainage, a watering can with a rose attachment, and a garden fork for soil prep. A garden trowel helps with planting and mulching. Once fruit sets, apply a layer of straw mulch or use a strawberry mat to keep berries off damp soil and reduce slug damage. Install fine-mesh bird netting when fruit begins to colour — blackbirds and thrushes can strip a bed in hours. Secure netting edges with garden pegs or stones to prevent access.

    How to Protect Ripening Strawberries from Birds and Slugs

    Net plants with fine mesh (3mm or less) once fruit begins to colour — this is critical, as blackbirds and starlings will consume unprotected crops rapidly. Secure netting tightly at the base using pegs or stones to prevent birds from slipping underneath. For slugs, use beer traps buried at soil level or apply copper tape around the base of containers — slugs avoid crossing the charged barrier. In damp spring weather, check under mulch and around plant crowns regularly. Straw mulch or dedicated strawberry mats not only reduce slug contact but also maintain soil moisture and prevent fruit from rotting on the ground.

    How Long Do Strawberry Plants Last? When to Replace Them

    Strawberry plants typically crop well for 2–3 years. After this period, yields decline significantly due to reduced vigour and increased disease pressure. Replace strawberry plants every 3 years with fresh runners from healthy AGM varieties to maintain productivity. This practice also reduces the risk of soil-borne pathogens like verticillium wilt. Take runners from strong, disease-free plants in summer, grow them on in small pots, and plant out in August–September for the next cycle. This ensures a continuous supply of vigorous, high-performing plants.

    Best Suppliers for Strawberry Plants in the UK (2026)

    Several UK suppliers offer reliable, high-quality strawberry plants. Suttons stocks widely available AGM varieties such as ‘Cambridge Favourite’ and ‘Honeoye’ in both runner and potted forms. Thompson & Morgan provides ‘Symphony’ and ‘Albion’, making them a go-to for everbearing and AGM types. You Garden is a top source for ‘Mara des Bois’ and alpine strawberries like ‘Mignonette’, with excellent selection and detailed growing advice. Check planting dates — many suppliers begin selling runners in August for autumn planting. Always verify hardiness ratings (H1–H7) and AGM status when ordering to ensure suitability for your garden zone.

    FAQs: Your Top Strawberry Questions Answered

    • What’s the difference between June-bearing and everbearing strawberries? June-bearing varieties produce one large crop in June and July; everbearing types fruit in multiple flushes from June to October.
    • When should I plant strawberry runners in the UK? Plant in August–September for best results, or March–April for a lighter first-year crop.
    • Which strawberry varieties have the best flavour? ‘Mara des Bois’ and ‘Royal Sovereign’ are consistently rated among the best-flavoured strawberries in the UK.
    • Can strawberries be grown in containers? Yes — use 30cm pots or allow 3–5L of compost per plant with John Innes No 2 and grit; ‘Albion’ and ‘Mignonette’ are ideal.
    • How long do strawberry plants crop for before they need replacing? Most plants perform well for 2–3 years; replace with fresh runners to maintain yield and reduce disease.
    • How do I protect ripening strawberries from birds and slugs? Net with fine mesh once fruit colours; use straw mulch or mats and apply beer traps or copper tape to deter slugs.

    How to Grow Strawberries in Pots UK
    Best Compost for Container Gardening
    Starting a Vegetable Garden for Beginners UK

    Common Mistakes and Troubleshooting

    Overwatering in Containers

    Container-grown strawberries are prone to root rot if overwatered, especially in heavy soils or poorly drained compost. UK autumns can be wet, so ensure pots have adequate drainage holes and avoid leaving them sitting in saucers. Use a moisture meter or check the top 2cm of compost before watering — it should feel dry. Overwatering also encourages fungal diseases like grey mould (Botrytis), which can ruin ripening fruit. Always water at the base, not over the foliage, to reduce humidity around the crown.

    Incorrect Planting Depth

    Planting too deep can cause the crown to rot, while planting too shallow exposes it to drying out and frost damage. The crown — where the leaves meet the roots — must sit level with the soil surface. A common error is burying it under compost, which can suffocate the plant. Use a trowel to gently firm soil around the roots without compacting, and check the depth after planting to ensure the crown is not buried.

    Ignoring Runner Management

    While runners help propagate new plants, allowing too many to grow on fruiting plants can reduce yield. For June-bearing varieties, remove most runners to focus energy on fruiting. For everbearing types like ‘Albion’, let a few runners develop for future plants but pinch back excess growth. Alpine varieties like ‘Mignonette’ should have all runners removed to maintain compact growth and consistent fruiting.

    Using the Wrong Compost

    Avoid peat-based composts for strawberries — peat extraction is environmentally unsustainable, and peat-free alternatives are now the UK industry standard. Instead, use loam-based John Innes No 2 or No 3, mixed with a third of grit or perlite for drainage. Using lightweight potting composts can lead to rapid drying and poor root development. For garden beds, amend soil with well-rotted garden compost and grit to improve drainage. Suttons offers a range of peat-free, loam-based composts specifically formulated for fruiting plants.

    Delaying Harvest and Drying

    Strawberries should be picked when fully ripe and glossy, not left on the plant to dry. Overripe berries become soft and attract pests. Harvest daily during peak season and store in the fridge, not in a damp place. If you’re drying strawberries for later use, spread them in a single layer on a tray in a warm, dry, well-ventilated area (e.g., a greenhouse or airing cupboard) for 24–48 hours. Avoid direct sunlight to preserve colour and flavour.

    What Next?

    Have you grown strawberries this year? Share your tips, challenges, or harvest photos in the comments below — we love hearing from fellow UK gardeners. For more inspiration, explore these essential guides: How to Grow Strawberries in Pots UK shows how to maximise space with container gardening. Best Compost for Container Gardening helps you choose the right mix for healthy, productive plants. And if you’re new to growing, Starting a Vegetable Garden for Beginners UK walks you through the first steps with proven, easy-to-follow advice.

  • What to Plant in November: Complete UK Monthly Planting Guide

    What to Plant in November: Complete UK Monthly Planting Guide

    November is the quiet gear-change. The vegetable plot is largely cleared, the leaves are down, and the real gardening jobs shift from sowing to planting. This is the month to get garlic in the ground, start the bare-root season for fruit trees and roses, and finish tulip bulbs before the soil locks up. Everything you plant now is paying forward to spring and summer next year.

    Here is what to plant, sow and do in November across the UK, with specific cultivars that handle British winters.

    Gardener's gloved hands planting garlic cloves in prepared soil in autumn

    Vegetables to Plant in November

    Garlic

    November is the best planting month for garlic across most of the UK. Garlic needs a cold spell (around six weeks below 10°C) to split into proper cloves, so planting now gives the bulbs a long, steady winter to establish roots.

    For reliable UK performance, stick to named seed garlic from a supplier rather than supermarket bulbs. ‘Solent Wight’ (RHS AGM, H4) is the classic softneck for British conditions — productive, good storage life, and tolerant of wet winters. ‘Germidour’ (RHS AGM, H4) is another softneck that performs consistently in average UK gardens. For something with more punch on the plate, ‘Cristo’ (RHS AGM, H4) produces medium-large bulbs with strong flavour.

    Plant individual cloves, pointed end up, 15cm apart and 5cm deep in well-drained soil. Heavy clay? Either dig in grit and compost, or grow in deep containers — garlic sitting in winter wet is one of the most common reasons crops fail.

    Broad Beans (Overwintering)

    Early November is the last sensible window for overwintering broad beans. The traditional UK choice is ‘Aquadulce Claudia’ (RHS AGM, H5) — specifically bred for autumn sowing and the hardiest broad bean on the AGM list. It will crop three to four weeks earlier than anything sown in spring.

    Sow seeds 20cm apart and 5cm deep in a sheltered spot. Young plants should be 5–8cm tall before the coldest weather arrives — any smaller and they are vulnerable, any taller and they are wind-rocked. Cover with horticultural fleece if temperatures drop below minus 5°C.

    Onions and Shallots (Overwintering Sets)

    Japanese-type overwintering onion sets can still go in during early November in milder parts of the country. They sit through winter and give you harvestable onions in June, ahead of spring-planted crops. Choose sets sold specifically as autumn-planting. Plant sets 10cm apart with the tip just showing above the soil, and expect some losses if winter is severe. For variety choices and supplier tips, see our guide to the best onion sets for autumn planting.

    Winter Salads Under Cover

    Cold frames, polytunnels, and unheated greenhouses keep producing right through winter with the right varieties. ‘Winter Density’ (RHS AGM, H2) is the standout winter lettuce — a cos-butterhead cross that stays crisp through frost. Sow thinly into modules now for transplanting in December. ‘Ishikura’ (RHS AGM, H5) salad onions also go in now under cover for spring pulling.

    Tulip bulbs being planted in a garden border with a hand trowel and drainage grit

    Fruit to Plant in November

    The bare-root season starts this month and runs through to March. Bare-root stock is cheaper than potted, establishes faster (the roots go straight into living soil rather than adjusting from compost), and is how most UK fruit trees and soft fruit have always been planted.

    Fruit Trees

    Apples, pears, plums, and cherries all go in as bare-root trees from November onwards. Order from a specialist nursery and plant as soon as they arrive — roots should not dry out. Dig a square hole roughly 60cm wide, the depth of the roots, and loosen the base. Plant to the soil mark on the stem (not deeper), firm in gently, stake if exposed, and water well even if rain is forecast.

    For container growing, look for trees on dwarfing rootstocks (M27 or M9 for apples, Quince C for pears, Pixy for plums). A 40cm pot minimum, topped up with loam-based compost, will carry a tree for six to eight years before it needs potting on or planting out.

    Soft Fruit

    Bare-root raspberry canes, blackcurrants, gooseberries, and redcurrants go in now. For raspberries, ‘Glen Ample’ (RHS AGM, H6) is the reliable summer-fruiting choice — heavy cropping and thornless. For autumn-fruiting, ‘Polka’ (RHS AGM, H6) picks from August right into the first frosts. Plant canes 40cm apart in rows, with 1.8m between rows, and cut canes back to 25cm above soil level after planting.

    Gooseberries to look for: ‘Invicta’ (RHS AGM, H6) is the classic cooker with good mildew resistance. ‘Careless’ (RHS AGM, H6) is another mildew-resistant choice that eats well ripe. For blackcurrants, ‘Ben Connan’ (RHS AGM, H6) crops heavily on compact bushes and is a good choice for smaller gardens.

    Strawberries

    New strawberry beds can still go in early November if the soil is workable and not waterlogged. ‘Cambridge Favourite’ (RHS AGM, H6) is the dependable main-season cropper. ‘Honeoye’ (RHS AGM, H6) is early and acidic-sharp in flavour. Plant runners 30cm apart in rows 75cm apart, with the crown sitting at soil level — buried crowns rot, exposed crowns dry out.

    Rhubarb

    November through March is rhubarb-crown planting season. ‘Timperley Early’ (RHS AGM, H5) is the variety to choose if you want to force an early crop — it is naturally earlier than most and responds well to covering. ‘Raspberry Red’ (RHS AGM, H5) is a newer AGM with particularly bright stems and good flavour. Plant crowns with the top just at soil level, in a spot you are willing to commit to for at least five years.

    Bulbs and Ornamentals

    Tulips

    This is the month for tulips. Planting now — six weeks later than daffodils and crocuses — reduces the risk of tulip fire (a fungal disease that attacks bulbs in warm, damp soil). Plant tulip bulbs three times their own depth, pointed end up, in free-draining soil or containers. In heavy soil, sit each bulb on a handful of grit to keep its base dry.

    Bare-root Roses

    Bare-root roses arrive this month and through winter. They establish faster and cost a fraction of potted roses. Plant with the graft union (the knobbly bit where the stems join the roots) at soil level, in a spot with at least six hours of direct sun.

    Spring Bedding

    Wallflowers, forget-me-nots, and sweet williams can still be planted out in early November for a spring display. Buy as small plugs or bare-root from garden centres.

    Tasks for November

    Clearing and Composting

    • Pull up spent bean, pea, and courgette plants. Shred tough stems before adding to the compost heap.
    • Remove yellowing leaves from brassicas to reduce slug and whitefly hideouts over winter.
    • Collect fallen leaves into a separate leaf-mould bin — a wire cage or a bin bag with holes both work. Leaf mould takes 18–24 months to break down but produces superb seed compost. Clearing leaves off the lawn promptly matters too — see our autumn lawn maintenance routine.

    Protecting Overwintering Crops

    • Cover winter lettuces, oriental greens, and overwintering brassicas with horticultural fleece once temperatures regularly drop below 2°C at night.
    • Earth up the stems of Brussels sprouts and purple sprouting broccoli to stop them rocking in the wind.
    • Mulch around rhubarb crowns, strawberry plants, and perennial herbs with a 5cm layer of compost or well-rotted manure.

    Infrastructure Jobs

    • Clean and sharpen tools before storing. A rub of oil on blades prevents rust over winter.
    • Drain and pack away hosepipes, irrigation timers, and outside taps before the first hard frost.
    • Check greenhouse glazing, shed roofs, and cold-frame hinges — winter winds will find any weakness.
    • Prune apple and pear trees any time from late November to late February while dormant. Stone fruit (plums, cherries) should wait until summer to avoid silver leaf disease.

    Frequently Asked Questions

    Is it too late to plant garlic in November?

    No — November is the best month for garlic across most of the UK. You can plant up to late November in southern England and into December in very mild areas, though results drop off the later you leave it. The cloves need time to establish roots before winter cold stalls them.

    Can I still sow anything outdoors in November?

    Only overwintering broad beans (‘Aquadulce Claudia’) and autumn-sowing onion sets. Everything else waits until spring. Under cover (cold frame, polytunnel), you can still sow winter lettuce, spinach, and oriental greens.

    Should I prune my fruit trees in November?

    Apples and pears, yes — any time between leaf-fall in November and bud-break in February. Avoid pruning plums, cherries, and other stone fruit until summer, as winter cuts leave them open to silver leaf disease.

    Do I need to lift my dahlias before planting tulips?

    In most of the UK, yes — dahlia tubers rot in cold, wet winter soil. Lift after the first frost blackens the foliage, cut stems back to 10cm, dry the tubers for a week, and store somewhere frost-free until spring. The same bed can then take tulip bulbs straight away.

    Is it too late to plant strawberry runners?

    Early November is the last practical window for autumn planting. Any later and the crowns struggle to root before winter sets in. If you miss November, wait until March for spring planting — you will lose one season’s cropping but the plants will be stronger.

    What bare-root plants are cheapest this month?

    Bare-root hedge whips (hawthorn, blackthorn, hornbeam, beech) are the biggest bargain — often 50–70% cheaper than potted equivalents. Order from a specialist hedge supplier in units of 25 or 50 plants.

    What Next?

    Pick one job from this month’s list and actually get it done this week — bare-root stock waits for no one, and tulip bulbs still sitting in the shed will not flower next spring. If you are planning a bigger overhaul, work out your crop rotation before ordering seeds in January, and start a notebook for what worked and what flopped this season. Future-you will thank present-you.

    Have a question about something on this list, or want to share what you are planting this month? Drop a comment below — we read every one and answer as many as we can.

    For the full UK bulb-planting calendar and authoritative cultivar guidance, the Royal Horticultural Society remains the best reference for British growers.

    Related Guides

  • How to Grow Runner Beans: Complete UK Beginner’s Guide

    How to Grow Runner Beans: Complete UK Beginner’s Guide

    Quick Answer: Growing Runner Beans in the UK

    • Best varieties: ‘Enorma’ (Enorma Elite), ‘White Lady’, ‘Achievement’, ‘Firestorm’, ‘Moonlight’, ‘Liberty’ — all RHS AGM holders
    • Sow indoors: Late April to May
    • Sow outdoors: Late May to early June (after last frost)
    • Spacing: 15 cm apart, rows 60 cm apart
    • Support height: 2.4 m (8 ft) minimum
    • Harvest period: July to October
    • Expected yield: Up to 2 kg per plant in a good season

    Runner beans (Phaseolus coccineus) are one of the most productive and rewarding crops you can grow in a UK garden. A single row of plants will produce kilograms of tender pods from midsummer well into autumn, the scarlet or white flowers attract pollinators, and the climbing habit means you get a huge harvest from a small footprint. Here is everything you need to know to grow them successfully, from seed selection through to storing your surplus.

    Why Grow Runner Beans

    Runner beans deliver one of the highest yields per square metre of any UK vegetable. A well-tended row of ten plants can produce 15–20 kg of pods across the season. Beyond sheer productivity, there are several compelling reasons to give them space:

    • Beginner-friendly. Large seeds are easy to handle and germinate reliably in warm soil. There is very little that can go wrong at the sowing stage.
    • Decorative value. The vivid scarlet, white, or bicolour flowers make runner beans attractive enough for a front garden or mixed border. They were originally introduced to Britain as ornamental plants in the 17th century.
    • Soil improver. Like all legumes, runner beans fix atmospheric nitrogen through root nodules. After harvest, cut the stems at ground level and leave the roots in place to release nitrogen for the following crop.
    • Long harvest window. Regular picking keeps plants productive from July right through to the first frosts in October, giving you fresh beans for three months or more.
    • Cost saving. A £2 packet of seed replaces dozens of supermarket packs across the season.

    Best Varieties for UK Gardens

    Choose an RHS Award of Garden Merit (AGM) variety for tested reliability in UK growing conditions. The following six varieties all hold current AGM status:

    ‘Enorma’ AGM (sold as Enorma Elite)

    The classic heavy cropper. ‘Enorma’ produces long, straight, smooth pods up to 35 cm and sets reliably even in cooler summers. It is the go-to choice for allotment growers who want maximum yield from every plant. Scarlet flowers.

    ‘White Lady’ AGM

    A stringless variety with white flowers that set more readily in hot weather than red-flowered types. The pods stay tender even when slightly larger, making ‘White Lady’ forgiving if you miss a picking session. An excellent choice for beginners.

    ‘Achievement’ AGM

    The exhibition grower’s favourite. ‘Achievement’ produces exceptionally long, straight pods with a fine flavour. If you want to enter produce at your local show, this is the variety to grow. Scarlet flowers.

    ‘Firestorm’ AGM

    Bred specifically for reliable pod set, even during heatwaves. ‘Firestorm’ performs consistently across variable British summers. Red flowers. A strong choice if you have a south-facing, sun-baked plot.

    ‘Moonlight’ AGM

    Another white-flowered variety with superb pod set in warm conditions. ‘Moonlight’ produces tender, well-flavoured beans on vigorous plants. Its white flowers make it a good partner for cottage-garden planting schemes.

    ‘Liberty’ AGM

    A dependable all-rounder that crops heavily over a long season. ‘Liberty’ is well suited to the typical UK garden and performs consistently across different regions.

    Tip: White-flowered varieties (‘White Lady’, ‘Moonlight’) tend to set pods more reliably during hot, dry spells because their flowers are more attractive to pollinators in high temperatures.

    When to Sow Runner Beans

    Sow indoors from late April, or direct into the ground from late May once the risk of frost has passed. Runner beans are frost-tender and will not survive temperatures below 0°C.

    Indoor Sowing (Late April – May)

    Starting seeds indoors gives you a head start of two to three weeks. Sow one seed per 9 cm pot, 5 cm deep, in multipurpose compost. Place on a warm windowsill or in an unheated greenhouse at 12–18°C. Seeds germinate in 7–14 days. Harden off plants for a week before planting out after the last expected frost.

    Outdoor Direct Sowing (Late May – Early June)

    Direct sowing is simpler and avoids transplant shock. Wait until soil temperature is consistently above 12°C. In most of England and Wales, this means late May; in Scotland and northern England, early June is safer.

    Regional Timing

    Region Sow Indoors Plant Out / Direct Sow
    South-east England Mid–late April Mid May onwards
    Midlands & South-west Late April Late May
    Northern England & Wales Early May Late May – early June
    Scotland Mid May Early–mid June

    How to Build a Bean Support

    Runner beans climb to 2.4–3 m, so sturdy support is essential. Build your structure before sowing or planting so the supports are ready when the plants need them.

    Wigwam (Tepee) Method

    Push 6–8 bamboo canes (2.4 m / 8 ft length) into the ground in a circle roughly 60 cm across. Angle each cane inward and tie them together at the top with strong garden twine. Sow or plant one bean at the base of each cane. Wigwams fit neatly into borders and make an attractive garden feature.

    A-Frame (Row) Method

    For maximum yield, set up a double row. Push pairs of 2.4 m canes into the ground 30 cm apart, angling each pair toward each other and crossing them about 15 cm from the top. Lay a horizontal cane along the V-shaped junction and lash everything together with twine. Space each pair of canes 30 cm apart along the row. Sow one bean at the base of each cane.

    Materials

    • Bamboo canes: 2.4 m (8 ft) is the standard length. Thicker canes (16–18 mm diameter) are more stable in wind.
    • Garden twine: Natural jute or synthetic — either works. Tie firmly at the top and add horizontal strings at 30 cm intervals to help young plants find the canes.
    • Alternatives: Hazel poles, bean netting on a frame, or a permanent metal obelisk all work well.

    Sowing and Planting

    Sow seeds 5 cm deep and 15 cm apart, with rows spaced 60 cm apart. These spacings apply whether you are sowing directly or planting out indoor-raised seedlings.

    Direct Sowing Steps

    1. Prepare the ground by digging in well-rotted manure or garden compost to a spade’s depth. Runner beans are hungry plants and perform best in rich, moisture-retentive soil.
    2. Sow two seeds at the base of each cane, 5 cm deep. Once seedlings emerge, thin to one per station by removing the weaker plant.
    3. Water the drill well before sowing if the soil is dry.
    4. Cover with cloches or fleece if a late cold snap is forecast.

    Planting Out Indoor-Raised Seedlings

    1. Begin hardening off when seedlings have two true leaves, approximately two weeks before the planned planting date.
    2. Place pots outside during the day, bringing them in at night, for 7–10 days.
    3. Plant out at the same depth as the pot. Firm the soil gently around each stem and water well.
    4. Loosely tie the stem to the cane with soft twine. The plants will begin to climb within a few days.

    Growing Care

    Consistent watering once flowering begins is the single most important factor in getting a good crop. Beyond that, runner beans need little intervention.

    Watering

    Water deeply and regularly once flowers appear. A thorough soak every two to three days is better than a light sprinkle every evening. Dry conditions at flowering cause the most common problem growers face: flower drop without pod set. Aim for at least 10 litres per metre of row at each watering. Mulching around the base retains soil moisture and reduces watering frequency.

    Feeding

    Apply a high-potash liquid feed (tomato feed is ideal) once a fortnight from the start of flowering. The potassium encourages flower and pod development. There is no need to add nitrogen feed — the plants fix their own through root nodules.

    Pinching Out

    When plants reach the top of their support, pinch out the growing tips. This redirects energy into pod production rather than upward growth and prevents the top of the wigwam or row becoming a tangled mass.

    Mulching

    Apply a 5–8 cm layer of garden compost, well-rotted manure, or straw around the base of the plants once they are established. This conserves moisture, suppresses weeds, and feeds the soil as it decomposes.

    Common Problems and Solutions

    Flower Drop (No Pods Forming)

    The most frequent complaint. Runner bean flowers drop without setting pods when the plants are too dry or temperatures are too high. Water consistently and heavily during flowering. White-flowered varieties (‘White Lady’, ‘Moonlight’) are less affected by heat-related flower drop. Misting the flowers with water on hot afternoons can also help.

    Black Bean Aphid

    Dense colonies of black aphids cluster on shoot tips and the undersides of young leaves, stunting growth and distorting pods. Pinch out heavily infested shoot tips and dispose of them. Encourage natural predators — ladybirds, hoverfly larvae, and lacewings. For severe infestations, spray with a soap-based insecticide approved for edible crops.

    Slugs and Snails

    Young plants are most vulnerable. Protect seedlings with copper tape around pots, organic slug pellets (ferric phosphate), or beer traps. Transplanting sturdy, well-hardened plants rather than relying on direct sowing reduces slug damage significantly.

    Halo Blight

    A bacterial disease causing water-soaked spots on leaves surrounded by a yellow halo. Infected pods develop greasy-looking patches. There is no chemical treatment. Remove and destroy affected plants promptly. Avoid overhead watering, rotate bean crops on a three- to four-year cycle, and buy certified disease-free seed.

    Harvesting Runner Beans

    Pick pods when they are 15–20 cm long, before the seeds inside become visible as bumps along the pod. At this stage, the beans are tender, stringless, and at their best for eating.

    • Frequency: Harvest every two to three days during peak production. Leaving mature pods on the plant signals it to stop producing new flowers.
    • Technique: Hold the stem with one hand and pull the pod downward with the other to avoid snapping the brittle stems.
    • Extending the harvest: Regular picking is the single best way to prolong cropping. A well-picked row will produce from July through to the first autumn frosts in October.
    • Overgrown pods: If any pods grow past 25 cm and become stringy, remove them. Shell out the beans inside for drying, or add them to stews — but remove these pods promptly so the plant keeps cropping.

    Container Growing

    Runner beans grow well in large containers provided you give them adequate root volume, water, and support.

    • Container size: Use a pot or trough with a minimum capacity of 40 litres. Larger is better — a half-barrel or 60-litre planter gives the roots more space and dries out less quickly.
    • Compost: Fill with a good-quality multipurpose or peat-free compost mixed with 20% perlite for drainage.
    • Support: Insert a wigwam of three to four canes directly into the container, or position the container against a wall-mounted trellis or obelisk.
    • Dwarf varieties: If space is tight, look for dwarf runner beans such as ‘Hestia’ (a compact bicolour-flowered variety reaching around 45 cm). Dwarf types do not need canes but produce smaller yields.
    • Watering: Containers dry out rapidly in summer. Water daily — sometimes twice daily in hot weather. A saucer beneath the pot helps retain moisture.
    • Feeding: Start liquid feeding with tomato feed from flowering, every 7–10 days.

    Storing and Preserving

    Freezing

    Freezing is the best way to preserve a glut of runner beans. Prepare them as you would for cooking: top and tail, remove any strings, and slice into 2–3 cm pieces. Blanch in boiling water for two minutes, plunge into ice water for two minutes, drain thoroughly, then spread on a tray and freeze. Once frozen solid, transfer to labelled freezer bags. Properly blanched and frozen beans keep for up to 12 months.

    Saving Seed for Next Year

    At the end of the season, leave a few pods on the plant until they turn brown and papery. Shell out the dried beans and store in a paper envelope in a cool, dry place over winter. These seeds are viable for two to three years. Seed saving works reliably with open-pollinated varieties but not with F1 hybrids.

    Month-by-Month Calendar

    Month Tasks
    April Sow seeds indoors in 9 cm pots. Prepare the growing site by digging in compost or well-rotted manure. Build supports.
    May Continue indoor sowing early in the month. Harden off earlier-sown plants. Direct sow outdoors from late May (southern England). Plant out indoor-raised seedlings after the last frost.
    June Direct sow outdoors in northern regions. Tie in young plants to supports. Mulch around the base. Water if dry.
    July First flowers appear. Begin regular deep watering. Start fortnightly liquid feeding with tomato feed. Watch for black bean aphid on shoot tips. First pods ready to harvest by late July.
    August Peak harvest. Pick every 2–3 days. Continue watering and feeding. Pinch out growing tips that have reached the top of supports. Freeze any surplus.
    September Harvest continues. Reduce feeding to once a fortnight. Leave a few pods to mature for seed saving if desired.
    October Final harvest before the first frosts. Collect dried seed pods. Cut plants at ground level, leaving roots in the soil to release nitrogen. Compost the top growth. Remove and store canes for next year.

    Frequently Asked Questions

    Do runner beans need full sun?

    Runner beans crop best in a sheltered spot that receives at least six hours of direct sunlight daily. They tolerate light partial shade but yield and pod quality will be reduced. Avoid exposed, windy sites — the tall plants act as a sail and the brittle stems snap easily.

    Can I grow runner beans without supports?

    Standard climbing varieties need 2.4 m supports. However, dwarf varieties such as ‘Hestia’ grow as compact bushes to around 45 cm and need no support. Yields are smaller than climbing types, but they are convenient for containers, raised beds, and small gardens.

    Why are my runner beans stringy?

    Pods become stringy when left on the plant too long. Harvest when pods are 15–20 cm long, before the seeds inside start to swell. If your pods are consistently stringy at a small size, the weather may be too hot or the plants too dry. Try ‘White Lady’, which is naturally stringless.

    How many runner bean plants do I need?

    For a family of four, 12–20 plants provide a steady supply through summer with enough surplus for freezing. A single wigwam of 8 plants makes a good starting point for a first attempt.

    Can I sow runner beans in September for an autumn crop?

    No. Runner beans need approximately 12 weeks of warm growing conditions from sowing to harvest. September sowings in the UK will not have enough warmth or daylight to produce a crop before winter. The latest viable sowing date is mid-June in southern England.

    Are runner bean flowers edible?

    Yes. The scarlet and white flowers are edible and make an attractive garnish for salads. Picking flowers does reduce pod production, so only harvest a few at a time.

    What Next?

    Ready to expand your vegetable patch? These guides will help:

    Growing runner beans for the first time? Drop a comment below and let us know how you get on — we love seeing your harvests.

    Sources: RHS — Grow runner beans; RHS AGM plant listings.

    About the Author

    John Kitcher is the lead gardening writer at Plants and Gardening. He grew up mucking in on his grandfather’s Devon allotment and has spent the last fifteen years growing fruit, veg and ornamentals across three very different UK gardens — a windy coastal plot in North Cornwall, a shaded London back garden, and now a clay-heavy smallholding in the Midlands. He trials every technique covered here in his own beds and containers before writing about it, cross-references against RHS and Kew guidance, and has a soft spot for heritage tomato cultivars and anything that survives a British winter without complaint.

    Got a question about something we’ve written? Drop a comment — we read every one.

  • Best Father’s Day Gifts for Gardeners UK 2026

    Best Father’s Day Gifts for Gardeners UK 2026

    Best Father’s Day Gifts for Gardeners UK 2026

    Last updated: 7 April 2026 • Father’s Day UK 2026: Sunday 21 June

    Affiliate Disclosure: This article contains affiliate links to UK retailers. If you purchase through these links, we may earn a small commission at no extra cost to you. We only recommend products we genuinely believe offer good value. All prices are correct at time of writing and may vary.

    As an Amazon Associate I earn from qualifying purchases.

    Best Father’s Day gifts for gardeners at every budget:

    • Under £20: Spear & Jackson Kew Gardens secateurs — a genuinely useful tool he’ll reach for every day
    • Under £50: Burgon & Ball hand tool set — premium Sheffield-made tools that last decades
    • Over £50: RHS annual membership (~£68) — free entry to RHS gardens, discounts, and The Garden magazine every month

    Buying a gift for a gardener when you’re not one yourself can feel daunting. Gardeners are practical people, and the gifts they value most are tools they’ll actually use, experiences that inspire them, or supplies that save them money in the long run.

    We’ve organised this guide by budget so you can skip straight to the section that suits you. Every product listed is available from UK retailers, and we’ve included specific brand names so you know exactly what to search for.

    Quick Comparison Table

    Gift Price Range Best For Where to Buy
    Spear & Jackson Kew Gardens Secateurs £12–£18 Any gardener — essential everyday tool Amazon.co.uk, B&Q
    Thompson & Morgan Seed Gift Collection £10–£15 Veg growers, allotment holders Thompson & Morgan
    Briers All-Rounder Gardening Gloves £8–£14 Practical stocking-filler gift Amazon.co.uk, Wilko
    Burgon & Ball Hand Trowel & Fork Set £25–£40 Gardeners who appreciate quality tools Crocus, RHS Shop
    Wooden Cold Frame £35–£50 Veg growers, seed starters B&Q, Amazon.co.uk
    Garden Centre Gift Voucher £20–£50 Hard-to-buy-for gardeners You Garden, Crocus
    RHS Annual Membership ~£68 Garden visitors, keen growers RHS Shop
    Haws Heritage Watering Can (1 litre) £30–£45 Greenhouse gardeners, plant collectors Crocus, Amazon.co.uk
    Herb Growing Kit £12–£20 Kitchen gardeners, beginners Suttons, Thompson & Morgan
    Personalised Engraved Trowel £20–£35 Sentimental gift with a personal touch Amazon.co.uk
    Bulldog Premier Wheelbarrow £70–£100 Allotment holders, heavy-duty gardeners Screwfix, B&Q
    Chilli Growing Kit £15–£25 Gardeners who love a challenge Suttons, Amazon.co.uk

    Budget Gifts Under £20

    Don’t underestimate gifts in this range. Gardeners get through consumables and small tools constantly, and a well-chosen item under £20 often gets more daily use than an expensive gadget gathering dust in the shed.

    Quality Secateurs

    £12–£18

    A sharp pair of bypass secateurs is the single most-used tool in any gardener’s kit. The Spear & Jackson Kew Gardens Collection bypass secateurs offer excellent cutting action at a sensible price. For something slightly more compact, the Darlac Compact Pruner fits smaller hands well and has replaceable blades — a thoughtful detail that extends the tool’s life for years.

    Available from Amazon.co.uk, B&Q, Wilko

    Seed Collections and Gift Sets

    £10–£15

    Thompson & Morgan and Suttons both sell curated seed gift collections, from heritage tomato selections (‘Gardener’s Delight’, ‘Black Russian’, ‘Tigerella’) to mixed flower borders. For a veg-growing dad, a selection of unusual salad leaves or chilli varieties makes a gift he wouldn’t normally buy for himself. Father’s Day falls perfectly for sowing many warm-season crops, so timing is spot on.

    Available from Thompson & Morgan, Suttons, You Garden

    Gardening Gloves

    £8–£14

    Gloves wear out, so gardeners always need replacements. Briers make excellent all-round gloves with reinforced fingertips. Town & Country offer good value leather-palmed gloves for heavier work like pruning thorny roses or shifting gravel. Buy a size larger than you think — gardeners prefer a slightly loose fit for dexterity.

    Available from Amazon.co.uk, Wilko, B&Q

    Kneeling Pad

    £8–£15

    A thick, waterproof kneeling pad makes weeding and planting far more comfortable, especially on heavy clay soil. Look for memory-foam options that are at least 4cm thick. It’s the kind of practical gift that shows you understand what gardening actually involves day-to-day.

    Available from B&Q, Amazon.co.uk

    Plant Labels and Markers

    £6–£12

    Slate plant markers or copper labels last far longer than plastic ones and look handsome in any border or raised bed. A set of 10–20 with a waterproof marker pen is a small but genuinely useful gift, especially for anyone growing multiple cultivars from seed.

    Available from Amazon.co.uk, Crocus

    RHS Pocket Diary or Gardening Book

    £8–£15

    The RHS Gardener’s Pocket Diary (published annually) includes week-by-week tasks and is genuinely useful for planning. For books, RHS How to Garden When You’re New to Gardening suits beginners, while The Vegetable Gardener’s Bible by Edward C. Smith is a solid reference for veg growers.

    Available from RHS Shop, Amazon.co.uk

    Mid-Range Gifts £20–£50

    This is the sweet spot for Father’s Day. Enough to buy a genuinely premium tool or useful piece of kit, without breaking the bank.

    Premium Hand Tool Set

    £25–£45

    Burgon & Ball are based in Sheffield and have been making garden tools since 1730. Their stainless-steel trowel and fork sets are beautifully weighted, resist rust, and come with a genuine lifetime feel. The Spear & Jackson Kew Gardens range is another excellent option at a slightly lower price point. For something more specialist, Wolf-Garten multi-change tools let you swap heads on a single handle — ideal for gardeners with limited shed space.

    Available from Crocus, RHS Shop, Amazon.co.uk

    Cold Frame or Mini Greenhouse

    £35–£50

    A cold frame extends the growing season by weeks at either end — invaluable in the UK climate. Wooden-framed cold frames with polycarbonate lids are sturdy and attractive. Mini greenhouses (the tall, narrow shelving type with a plastic cover) suit patios and small gardens. Either gift tells a gardener you take their hobby seriously. If you’re also considering grow lights for indoor seed starting, see our guide to the best LED grow lights.

    Available from B&Q, Amazon.co.uk, Wilko

    Compost Bin

    £25–£45

    Every gardener needs compost, and making your own is satisfying, thrifty, and better for the garden than anything in bags. A 300-litre compost bin fits most gardens, and tumbler-style bins speed up decomposition. Check out our guide to the best compost for container gardening for more on why good compost matters.

    Available from B&Q, Amazon.co.uk, Screwfix

    Raised Bed Kit

    £30–£50

    Flat-pack raised bed kits in treated timber or galvanised steel are easy to assemble and transform a patch of lawn into productive growing space. A 1.2m × 0.6m bed is a manageable size. Pair it with a bag of quality topsoil and you’ve given the gift of a whole new growing area. For ideas on what to grow, point him towards our beginner’s vegetable garden guide.

    Available from B&Q, Amazon.co.uk, You Garden

    Subscription Seed Box

    £25–£40 for 3 months

    Monthly seed subscription boxes deliver seasonal seeds with growing instructions straight to his door. It’s the gift that keeps giving beyond Father’s Day itself. Several UK companies offer these, including seasonal selections tailored to what should be sown that month.

    Available from Amazon.co.uk, Thompson & Morgan

    Garden Centre Gift Voucher

    £20–£50

    If you genuinely don’t know what to buy, a gift voucher for a garden centre is never wasted. You Garden, Crocus, and Thompson & Morgan all offer online gift vouchers that can be emailed on the day. For a local touch, check whether your nearest independent garden centre offers their own.

    Available from You Garden, Crocus, Thompson & Morgan

    Premium Gifts Over £50

    These are the gifts that make a real statement. Worth pooling resources with siblings or other family members if budget is a concern.

    RHS Membership

    ~£68 per year

    An RHS annual membership is arguably the best-value gift for any UK gardener. It includes free entry to all five RHS gardens (Wisley, Harlow Carr, Hyde Hall, Rosemoor, and Bridgewater), free access to over 200 RHS partner gardens, The Garden magazine monthly, members’ seed scheme, and discounts at RHS shops and plant centres. For a dad who enjoys a garden day out, this pays for itself after two or three visits.

    Available from RHS Shop

    Quality Wheelbarrow

    £70–£120

    A Bulldog or similar heavy-duty wheelbarrow built with a galvanised body and pneumatic tyre will outlast any budget alternative. The difference is immediately obvious — better balance, smoother rolling, and far greater durability. Essential for allotment holders and anyone who shifts compost, soil, or gravel regularly.

    Available from Screwfix, B&Q, Amazon.co.uk

    Premium Tool Collection

    £60–£100

    A matched set of Burgon & Ball stainless-steel tools (trowel, fork, transplanter, and weeder) in a canvas roll is a gift that lasts a lifetime. For pruning enthusiasts, a pair of Felco No. 2 secateurs (~£55) is the gold standard — Swiss-made, fully serviceable with replacement parts, and the benchmark by which all other secateurs are measured.

    Available from RHS Shop, Crocus, Amazon.co.uk

    Greenhouse

    £80–£200+

    A small aluminium-framed greenhouse (6ft × 4ft) opens up an entirely new dimension of gardening: tomatoes (‘Sungold’, ‘Moneymaker’), cucumbers, aubergines, and overwintering tender plants. Even in a modest garden, a compact greenhouse transforms what’s possible. This is a big gift but one that genuinely changes someone’s gardening life.

    Available from B&Q, Amazon.co.uk, Screwfix

    Personalised Premium Tool Set

    £50–£80

    Several UK retailers offer laser-engraved trowels, forks, and dibbers in gift boxes. A personalised set combines the quality of premium tools with a sentimental touch that makes it unmistakably a gift rather than a purchase.

    Available from Amazon.co.uk, Crocus

    Experience Gifts

    For the dad who already has a shed full of tools, experience gifts are memorable and clutter-free.

    RHS Garden Entry Passes

    £14–£18 per visit

    If a full RHS membership feels like too much commitment, individual entry tickets to RHS Wisley, RHS Harlow Carr, or any of the RHS gardens make a lovely day out. Book online for a specific date and pair it with lunch at the on-site restaurant for a complete Father’s Day experience.

    Available from RHS Shop

    Garden Centre Day Out Vouchers

    £20–£50

    A generous gift card for a garden centre covers plants, tools, and usually a cafe lunch as well. Large centres like Dobbies, British Garden Centres, or local independents all sell gift vouchers. The joy is in the browsing and choosing.

    Available from local garden centres and You Garden

    Allotment Starter Kit

    £30–£50

    If your dad has recently taken on an allotment (or is thinking about it), put together a starter bundle: a digging spade, a hand fork, seed potatoes, a ball of garden twine, and a packet of broad bean seeds. Everything he needs for the first weekend. For container alternatives, see our grow bags guide.

    Available from B&Q, Thompson & Morgan, Suttons

    Online Gardening Courses

    £20–£50

    The RHS offers online learning courses covering everything from pruning to plant identification. Other platforms offer courses on permaculture, organic vegetable growing, and garden design. For a gardener who wants to deepen their knowledge, this is a thoughtful choice.

    Available from RHS Shop

    Gift Sets and Bundles

    Pre-assembled kits take the guesswork out of gift-buying and give your dad a complete project to dive into.

    Herb Growing Kits

    £12–£20

    Kits typically include pots, compost pellets, and seeds for basil, coriander, parsley, and chives. Perfect for a kitchen windowsill. Thompson & Morgan and Suttons both sell well-packaged versions that look like proper gifts rather than loose packets of seeds.

    Available from Suttons, Thompson & Morgan, Amazon.co.uk

    Chilli Growing Kits

    £15–£25

    For the competitive dad, a chilli kit with varieties like ‘Carolina Reaper’, ‘Scotch Bonnet’, and ‘Habanero’ adds a fun challenge. Most kits include propagation pots, labels, and full growing instructions. June is still within the sowing window for chillis if started indoors, so the timing works well.

    Available from Amazon.co.uk, Suttons

    Seed and Tool Bundles

    £20–£35

    Several UK retailers sell gift-boxed bundles combining a trowel, secateurs, a packet of seeds, and often garden twine or plant labels. These are excellent for dads who are just getting into gardening or expanding from houseplants to the garden. Have a look at our best tools for beginners guide for more recommendations.

    Available from Thompson & Morgan, You Garden, Amazon.co.uk

    “Start Gardening” Beginner Bundles

    £25–£40

    If your dad has mentioned wanting to start gardening, assemble a custom bundle: a pair of Briers gloves, a Spear & Jackson trowel, a kneeling pad, three packets of easy-to-grow seeds (sunflowers, courgettes, and lettuce), and a copy of an RHS beginner’s guide. You can buy everything separately and wrap it as one gift for less than £40. Our containers and pots guide covers the best options for getting started.

    Available from B&Q, Amazon.co.uk, Wilko

    Personalised Gifts

    A personalised touch turns a practical tool into a keepsake. These gifts work particularly well when you want something meaningful beyond a standard shop purchase.

    Engraved Trowels and Forks

    £20–£35

    Laser-engraved stainless-steel trowels with a name, date, or short message (“Dad’s Garden”, “Head Gardener”) combine sentimentality with genuine usefulness. They also solve the perennial allotment problem of tools going walkabout — nobody accidentally takes home a trowel with someone else’s name on it.

    Available from Amazon.co.uk

    Custom Plant Markers

    £12–£25 for a set

    Hand-stamped copper or slate plant markers engraved with herb or vegetable names look beautiful in the garden and last indefinitely. You can order them with specific plant names to match what your dad actually grows.

    Available from Amazon.co.uk

    Personalised Garden Signs

    £15–£30

    Slate or oak signs reading “Dad’s Allotment”, “Grandad’s Potting Shed”, or a custom message of your choice add character to any outdoor space. Weatherproof options last for years. These make excellent gifts from younger children who can help choose the wording.

    Available from Amazon.co.uk

    Embroidered Gardening Aprons

    £18–£30

    A heavy-duty canvas gardening apron with pockets for secateurs, twine, and seed packets, embroidered with his name or “Head Gardener”, is both practical and personal. The good ones have reinforced pockets and an adjustable neck strap.

    Available from Amazon.co.uk

    How to Choose the Right Gift (Tips for Non-Gardeners)

    Not sure which category your dad falls into? Here’s a quick decision guide:

    If he’s a complete beginner: Start with a seed and tool bundle or a “start gardening” kit. Avoid anything too specialist — he’ll work out his preferences as he goes. Our starting a vegetable garden guide might help you understand what he’ll need.

    If he already gardens regularly: Consumables and replacements are always welcome — gloves, seeds, compost, and plant food. Alternatively, upgrade one of his existing tools to a premium brand. He probably has a tatty old trowel he’d never replace himself.

    If he has everything: Experiences (RHS membership, garden visits) or personalised gifts are the way to go. You can’t have a duplicate of a trowel with your name on it.

    If you have no idea what he grows: A garden centre gift voucher is genuinely appreciated, not a cop-out. Gardeners love browsing garden centres the way some people love bookshops.

    General rules:

    • Quality over quantity — one good tool outlasts five cheap ones
    • Stainless steel resists rust far better than carbon steel
    • Check the returns policy — wrong-sized gloves are easily exchanged
    • If in doubt about specifics, ask what brand he already uses and match it
    • Order by early June to allow plenty of time for delivery before 21 June

    Frequently Asked Questions

    What do gardeners actually want as gifts?

    Gardeners overwhelmingly prefer practical items they’ll use regularly. Top of most wish lists: quality secateurs, good gloves, seeds for next season, and premium hand tools. Garden centre vouchers rank highly because they let the recipient choose exactly what they need. Novelty items (comedy garden gnomes, joke aprons) tend to end up unused — stick to proper tools and supplies.

    What’s the best budget gift under £10?

    A pair of Briers all-rounder gardening gloves (£8–£10) or a packet of premium seeds from Thompson & Morgan (£3–£5 per packet — buy two or three varieties). Slate plant markers at around £8 for a set also hit this price point and look genuinely thoughtful.

    Is an RHS membership worth it as a gift?

    At roughly £68 per year, it pays for itself after three or four visits to RHS gardens (standard entry is £14–£18). Beyond entry, members receive The Garden magazine monthly, access to the RHS seed scheme, gardening advice, and discounts. If your dad enjoys visiting gardens or would benefit from expert growing advice, it’s excellent value.

    Are garden centre vouchers a good Father’s Day gift?

    Yes. Gardeners are particular about plant varieties, pot sizes, and tool brands. A voucher lets them choose exactly what they want, and the trip to the garden centre is part of the experience. It’s not lazy — it’s practical and respectful of their expertise.

    When is Father’s Day UK 2026?

    Father’s Day in the UK falls on Sunday 21 June 2026. It’s the third Sunday in June every year. Order gifts by early June to ensure delivery in time, or buy a digital gift voucher or RHS membership for instant delivery if you’ve left it late.

    What Next

    Looking for more gardening inspiration? Whether you’re buying for a seasoned gardener or a complete beginner, these guides will help:

    Affiliate Disclosure: This article contains affiliate links to UK retailers. If you purchase through these links, we may earn a small commission at no extra cost to you. We only recommend products we genuinely believe offer good value. All prices are correct at time of writing and may vary.

    About the Author

    John Kitcher is the lead gardening writer at Plants and Gardening. He grew up mucking in on his grandfather’s Devon allotment and has spent the last fifteen years growing fruit, veg and ornamentals across three very different UK gardens — a windy coastal plot in North Cornwall, a shaded London back garden, and now a clay-heavy smallholding in the Midlands. He trials every technique covered here in his own beds and containers before writing about it, cross-references against RHS and Kew guidance, and has a soft spot for heritage tomato cultivars and anything that survives a British winter without complaint.

    Got a question about something we’ve written? Drop a comment — we read every one.

  • Best Cold Frame Greenhouses for Small Gardens UK (2026 Buyer’s Guide)

    Best Cold Frame Greenhouses for Small Gardens UK (2026 Buyer’s Guide)


    Best Cold Frame Greenhouses for Small Gardens UK (2026 Buyer’s Guide)

    Last updated: 7 April 2026 · By the plantsandgardening.com team

    Affiliate disclosure: This article contains links to UK retailers. If you purchase through our links, we may earn a small commission at no extra cost to you. This helps us keep plantsandgardening.com running. We only recommend products available from trusted UK garden retailers.

    As an Amazon Associate I earn from qualifying purchases.

    Quick Answer:

    For most UK small gardens, a polycarbonate-glazed aluminium cold frame (around 120 cm × 60 cm) offers the best balance of frost protection, durability, and value. Expect to pay £50–£120 for a reliable model. If space is extremely tight, a mini greenhouse shelving unit with a fleece or PVC cover works well on patios and balconies. For year-round growing, consider a wooden cold frame with twin-wall polycarbonate lids—the extra insulation extends your season by up to eight weeks in either direction.

    1. What Is a Cold Frame & Why Do UK Gardeners Need One?

    A cold frame is a low, unheated structure with a transparent lid that traps solar warmth and shields plants from wind, frost, and heavy rain. Think of it as a miniature greenhouse that sits directly on the ground or on a raised bed.

    In the UK, where late spring frosts can strike well into May and autumn arrives by mid-October, a cold frame is one of the most cost-effective ways to extend your growing season. The Royal Horticultural Society recommends cold frames as essential kit for hardening off seedlings started indoors, overwintering tender herbs, and growing salad crops almost year-round.

    For small gardens, patios, and balconies, cold frames are particularly valuable because they deliver genuine growing-season extension without the footprint, cost, or planning-permission headaches of a full-sized greenhouse. Even a single cold frame measuring 90 cm × 60 cm gives you enough space to harden off dozens of seedlings or keep a winter salad patch producing through to March.

    If you’re just getting started, our guide to starting a vegetable garden in the UK covers the fundamentals before you invest in any structures.

    2. Types of Cold Frame Greenhouse

    The term “cold frame greenhouse” covers several distinct designs. Choosing the right type depends on your space, budget, and what you plan to grow.

    Traditional Cold Frame

    A rectangular box with a sloped, hinged transparent lid. Usually sits on the ground or on top of a raised bed. Available in wood, aluminium, or recycled plastic frames with glass or polycarbonate glazing. This is the classic design the RHS uses in its own trial gardens, and it remains the best all-round choice for most gardeners.

    Mini Greenhouse (Shelving Unit)

    A tall, narrow shelved unit covered with a zip-up PVC or reinforced fleece cover. Ideal for patios, balconies, and tiny courtyards. They hold many pots vertically in a very small footprint. The trade-off: less insulation than a solid cold frame, so they’re better suited to spring/summer use than serious frost protection.

    Walk-In Mini Greenhouse

    Larger framed structures (typically 140–200 cm tall) with a door, covered in polythene or polycarbonate panels. Good if you have a spare corner of the garden and want to stand inside to work. Still much smaller and cheaper than a permanent greenhouse.

    Lean-To Cold Frame

    Designed to sit flush against a south-facing house wall or fence. The wall acts as a thermal mass, absorbing heat during the day and releasing it at night. This design squeezes useful growing space out of otherwise dead areas alongside the house.

    Cloche Tunnel / Low Polytunnel

    A series of hoops covered with polythene or fleece, placed directly over a garden bed. Extremely affordable and easy to move. Best for protecting rows of salad crops, carrots, and low-growing vegetables. Less effective against hard frosts than rigid-sided cold frames.

    3. Cold Frame Types at a Glance

    Type Best For Typical Size Frost Protection Price Range Durability
    Traditional cold frame Hardening off, overwintering, salads 90–120 cm × 60 cm Good (–5 °C) £40–£180 High
    Mini greenhouse (shelving) Patios, balconies, seed starting 60 cm × 40 cm × 130 cm Moderate (–2 °C) £20–£70 Low–Medium
    Walk-in mini greenhouse Larger collections, tomatoes, peppers 140–200 cm tall, 120 cm+ wide Moderate (–3 °C) £50–£200 Medium
    Lean-to cold frame Side passages, south-facing walls 120 cm × 60 cm Good (–5 °C with wall mass) £60–£200 High
    Cloche tunnel Row crops, salads, temporary cover 3–5 m long × 45 cm wide Low (–1 °C) £10–£40 Low

    Frost protection ratings are approximate and assume no additional insulation (e.g., fleece liners or bubble wrap).

    4. Key Buying Criteria

    Size & Footprint

    Measure your available space before you shop. A standard cold frame of 120 cm × 60 cm fits neatly against a fence or at the end of a raised bed. For balconies, a mini greenhouse shelving unit with a 60 cm × 40 cm footprint is more practical. Remember to leave enough clearance to open the lid fully—most cold frames need at least 30 cm of space behind the hinge.

    Frame Material

    • Aluminium: Lightweight, rust-proof, and virtually maintenance-free. The most popular choice for UK cold frames. Look for powder-coated finishes for extra durability.
    • Timber: Better insulation than metal. Hardwood (cedar, larch) lasts 15–20 years; softwood needs treating every couple of years. Heavier, which is an advantage in windy gardens.
    • Recycled plastic / composite: Rot-proof and surprisingly sturdy. Increasingly available from UK retailers. A solid middle ground between aluminium and wood.

    Glazing Material

    • Twin-wall polycarbonate: The best all-rounder. Lightweight, shatterproof, and provides good insulation thanks to the air gap between layers. The RHS recommends polycarbonate for gardens with children or pets.
    • Single-wall polycarbonate: Cheaper but less insulating. Fine for spring and summer use.
    • Horticultural glass: Excellent light transmission. Heavier and breakable, but gives a traditional appearance. Best for sheltered spots.
    • Polythene / PVC covers: Budget option. Expect to replace covers every 1–3 seasons depending on UV exposure.

    Ventilation

    Overheating is a bigger killer than frost for plants in cold frames. A lid that props open at multiple angles is essential. Automatic vent openers (wax-cylinder type, around £15–£25) are a worthwhile upgrade—they open the lid when the temperature rises and close it again as it cools, even when you’re not home.

    Assembly & Portability

    Check reviews for assembly difficulty before buying. Bolt-together aluminium frames typically take 20–40 minutes. Wooden cold frames may arrive flat-packed or fully assembled. If you rent your home or like to rearrange your garden, choose a design you can move without dismantling.

    For more on equipping your growing space, see our guide to the best gardening tools for beginners.

    5. Budget Guide: What to Expect at Every Price Point

    £20–£50: Starter Tier

    At this price you’ll find mini greenhouse shelving units with PVC covers and basic cloche tunnels. Perfectly functional for hardening off seedlings in spring and protecting salads into autumn. Expect to replace PVC covers every couple of years. Available widely from B&Q, Wilko, and Amazon UK.

    £50–£100: Best Value

    This is the sweet spot for most small-garden growers. You can get a solid aluminium cold frame with polycarbonate glazing (single or twin-wall) in a useful 120 cm × 60 cm size. Many models include adjustable lid props. Check Thompson & Morgan, You Garden, and Suttons for seasonal offers in this range.

    £100–£200+: Premium

    Expect hardwood-framed cold frames with twin-wall polycarbonate lids, larger double-bay designs, or walk-in mini greenhouses with polycarbonate panels. Worth the investment if you plan to grow year-round or want a structure that will last a decade or more without maintenance. Crocus and Harrod Horticultural carry premium options.

    Whatever your budget, pair your cold frame with quality growing media. Our guide to the best compost for container gardening covers what works for seed starting and potting up.

    6. How to Use a Cold Frame Through the Seasons

    Spring (March–May)

    This is peak cold frame season. Use it to harden off seedlings started indoors or under LED grow lights. Place tender seedlings inside during the day with the lid propped open, then close it at night. Gradually increase ventilation over 7–14 days before transplanting outdoors. Direct-sow salad crops and radishes inside the cold frame from March for early harvests.

    Check our April planting guide for crops that benefit from cold frame protection this month.

    Summer (June–August)

    Ventilation is critical. Keep the lid fully open on warm days or remove it entirely. Use the cold frame to grow heat-loving crops like melons, aubergines, and peppers that struggle in open UK gardens. The trapped warmth and wind protection can make the difference between a decent harvest and none at all.

    Autumn (September–November)

    As temperatures drop, close the lid progressively. Sow winter salad crops (lamb’s lettuce, winter purslane, land cress) directly in the cold frame from September. Move tender herbs like basil indoors, but hardier herbs (parsley, coriander, chervil) will thrive under cover well into November.

    Winter (December–February)

    Line the inside of the cold frame with bubble wrap for extra insulation on the coldest nights. Protect overwintering crops (broad beans, garlic, spring cabbage) and keep pots of alpines or tender perennials safe from waterlogging. On mild days, crack the lid open to prevent fungal problems from stagnant, humid air.

    For a full calendar of seasonal tasks, see our seasonal gardening hub.

    7. What to Grow in a Cold Frame

    A cold frame extends your sowing and harvesting windows by four to eight weeks in either direction. Here are the best candidates:

    Salad Leaves (Almost Year-Round)

    Lettuce varieties like ‘Little Gem’ and ‘Winter Density’ are ideal for cold frame growing from early spring through late autumn. Sow in succession every 2–3 weeks for continuous harvests. Add spinach ‘Lazio’, rocket, and lamb’s lettuce for variety.

    Herbs

    Parsley, coriander, and chervil grow well under cold frame cover from autumn through spring. In summer, use the cold frame for basil, which demands the extra warmth UK conditions rarely provide outdoors.

    Seedlings for Transplanting

    Start courgettes, squash, sweetcorn, and French beans in pots inside the cold frame from mid-April. They’ll be ready to transplant after the last frost (typically mid-May in most of England, later in Scotland).

    Root Vegetables

    Quick-maturing carrots like ‘Nairobi’ can be sown directly in a deep cold frame from February for harvests six to eight weeks earlier than outdoor sowings. Radishes are even faster—ready in 25–30 days.

    Overwintering

    Protect autumn-planted garlic and broad beans. Overwinter tender perennials in pots. Keep strawberry runners frost-free for early spring planting.

    For container-based growing, our guide to pots and containers for beginners pairs well with cold frame gardening.

    8. Where to Position Your Cold Frame

    Position makes a genuine difference to performance. Follow these principles:

    • Face south or south-west. Maximum sun exposure in the UK means pointing the glazed lid towards the south. The sloped lid should face the sun, with the higher back edge to the north.
    • Shelter from prevailing wind. A fence, wall, or hedge on the north and west sides reduces heat loss dramatically. A lean-to design against a south-facing brick wall is the warmest possible arrangement.
    • Level ground with good drainage. Standing water under a cold frame causes root rot. If your soil is heavy clay, place the frame on a gravel pad or on top of a raised bed.
    • Within reach of a water source. Cold frames dry out faster than open ground because rain doesn’t reach the soil inside. You’ll need to water regularly, especially in summer.
    • Avoid overhanging trees. Falling branches risk breaking glazing, and shade reduces the warming effect. Dripping sap also fouls polycarbonate panels.

    9. Maintenance & Common Mistakes

    Routine Care

    • Clean glazing in early spring and autumn. Dirty panels reduce light transmission by up to 30%. Warm soapy water and a soft cloth are all you need.
    • Check hinges and props before each season. Replace worn-out gas struts or wooden props—a lid that slams shut in a gust will damage plants and glazing.
    • Treat timber frames annually with a plant-safe wood preservative. Avoid creosote near edible crops.
    • Clear debris from around the base. Slugs and snails shelter in leaf litter against cold frame walls.

    Common Mistakes to Avoid

    • Forgetting to ventilate. On a sunny April day, temperatures inside a closed cold frame can exceed 40 °C within an hour. Seedlings cook. Prop the lid open or fit an automatic opener.
    • Overwatering in winter. Cold, damp conditions cause damping off and botrytis. Water sparingly and ventilate on dry days.
    • Ignoring pests. Slugs love the warm, moist microclimate. Check under the frame and around the edges regularly. Copper tape around the base helps.
    • Placing on bare, wet soil without drainage. Raise the frame on bricks or a gravel layer if drainage is poor.

    10. Frequently Asked Questions

    Do I need planning permission for a cold frame or mini greenhouse in the UK?

    No. Cold frames and small greenhouse structures fall under permitted development for most residential properties. They’re classed as temporary garden structures. However, if you live in a listed building, conservation area, or have specific covenants on your property, check with your local planning authority first.

    Can a cold frame replace a greenhouse?

    For many small-garden growers, yes. A cold frame handles the three most common greenhouse tasks: hardening off seedlings, extending the growing season, and overwintering tender plants. Where it falls short is for tall crops (tomatoes, cucumbers) that need headroom, and for mid-winter seed starting, which really requires supplemental heating. If you grow mainly salads, herbs, and compact veg, a cold frame is more than sufficient.

    Is polycarbonate or glass better for a cold frame?

    Polycarbonate is the better choice for most UK gardens. Twin-wall polycarbonate insulates better than single-pane glass, is virtually shatterproof (important if you have children or pets), and weighs less. Glass transmits fractionally more light and looks more traditional, but the practical advantages of polycarbonate outweigh this for most people. The RHS uses polycarbonate in many of its own growing structures.

    How much warmer is it inside a cold frame than outside?

    On a sunny day, a closed cold frame can be 10–20 °C warmer than the ambient temperature. At night, the difference narrows to about 3–5 °C above outside temperatures. Adding bubble wrap insulation to the inside walls can improve nighttime heat retention by a further 2–3 °C. This is typically enough to protect hardy salads and overwintering crops down to about –5 °C outside.

    Where is the best place to buy a cold frame in the UK?

    For the widest selection, Amazon UK carries dozens of models at every price point. Specialist garden retailers like Thompson & Morgan, Suttons, and You Garden stock curated ranges with good buyer support. For budget options, B&Q, Wilko, and Screwfix are worth checking, especially during spring promotions. Crocus and Harrod Horticultural carry premium wooden and aluminium models if you’re willing to invest more.

    What Next?

    A cold frame is one of the smartest investments you can make for a small UK garden. Whether you choose a £25 mini greenhouse for your balcony or a £150 hardwood cold frame for your allotment, you’ll be harvesting fresh salads weeks earlier in spring and weeks later into autumn than your neighbours.

    Pair your cold frame with the right soil, containers, and tools:

    Affiliate disclosure: plantsandgardening.com is reader-supported. When you buy through links on this page, we may earn a small affiliate commission from UK retailers including Amazon UK, Thompson & Morgan, and others. This never influences our recommendations and costs you nothing extra. See our full affiliate disclosure for details.

    About the Author

    John Kitcher is the lead gardening writer at Plants and Gardening. He grew up mucking in on his grandfather’s Devon allotment and has spent the last fifteen years growing fruit, veg and ornamentals across three very different UK gardens — a windy coastal plot in North Cornwall, a shaded London back garden, and now a clay-heavy smallholding in the Midlands. He trials every technique covered here in his own beds and containers before writing about it, cross-references against RHS and Kew guidance, and has a soft spot for heritage tomato cultivars and anything that survives a British winter without complaint.

    Got a question about something we’ve written? Drop a comment — we read every one.

  • Starting a Vegetable Garden for Beginners — UK Guide

    Starting a Vegetable Garden for Beginners — UK Guide

    This article contains affiliate links. If you buy through these links, we may earn a small commission at no extra cost to you.

    A few square metres of soil, a free weekend, and seven packets of seeds — that’s genuinely all you need to start growing your own vegetables in the UK. You don’t need an allotment, a greenhouse, or a decade of experience. Thousands of first-time growers start every spring with nothing more than a raised bed on a patio or a cleared patch of lawn.

    This guide walks you through everything: where to put your veg patch, how to prepare the soil, which crops typically produce a harvest in your first year, and exactly when to plant them. Every recommendation is UK-specific — the right sowing dates for our climate, varieties tested in British conditions, and tools you can pick up at B&Q, The Range, or your local garden centre this weekend.

    If you’re looking for more beginner gardening resources, our beginner gardening hub has guides on everything from tools to containers.

    Choose the Right Spot

    Most vegetables need at least six hours of direct sunlight per day. South-facing or west-facing spots are ideal in the UK, though east-facing works for salad crops and leafy greens that tolerate some shade. The RHS beginner’s guide to vegetables confirms that sun exposure is the single most important factor in choosing a site.

    Pick a spot that’s:

    • Sunny — six hours minimum, more is better for fruiting crops like tomatoes and courgettes
    • Sheltered from wind — a fence, wall, or hedge nearby helps protect young plants
    • Close to a water source — you’ll water frequently in summer, so a nearby tap or water butt saves time
    • Reasonably level — sloped ground drains too quickly and makes raised beds awkward

    No garden at all? You can grow a surprising amount in containers on a patio, balcony, or doorstep. Our guide to the best vegetables to grow in containers covers exactly what works in pots.

    Decide How to Grow — Raised Beds, In-Ground, or Containers

    There are three main options, and each suits different situations.

    Raised Beds (Best for Most Beginners)

    Raised beds are the most popular choice for first-time vegetable growers, and for good reason. You control the soil quality, they drain well, and you don’t need to dig into potentially poor ground underneath.

    The RHS recommends a maximum width of 1.2 metres (4 feet) so you can reach the centre from either side without stepping on the soil. A 1.2m × 2.4m bed (4ft × 8ft) gives you plenty of space for a first crop. Height of 15–30cm is enough for most vegetables — go deeper (45cm+) if you want to grow root crops like carrots and parsnips.

    Fill raised beds with a mix of topsoil, garden compost, and composted bark. Timber, galvanised steel, or recycled plastic edging all work — timber is cheapest and widely available at B&Q and garden centres.

    In-Ground (Cheapest Option)

    If you already have reasonable soil, you can dig a veg patch directly into the lawn or a border. Clear the turf, remove weeds, fork the soil over, and add compost. This costs almost nothing but requires decent existing soil.

    Containers (No Garden Needed)

    Large pots, grow bags, and even old compost bags work for many vegetables. Potatoes, tomatoes, salad leaves, and herbs all thrive in containers. You’ll need to water more frequently — typically daily in summer. See our guide to compost for container gardening for what to fill them with.

    Prepare Your Soil

    Good soil is the single biggest factor in a successful vegetable garden. Spend an hour preparing it properly and everything else becomes easier.

    1. Clear weeds thoroughly. Dig out perennial weeds like couch grass, bindweed, and dandelion roots. Leave the soil for two to three weeks, then hoe off any new seedlings that appear.
    2. Test your pH. Most vegetables prefer neutral soil (pH 6.5–7.0). Simple test kits cost a few pounds at garden centres. If your soil is very acidic, add garden lime; if alkaline, add sulphur chips.
    3. Add organic matter. Spread a 5–10cm layer of garden compost or well-rotted manure over the surface and fork it in. This improves drainage in clay soil and moisture retention in sandy soil.
    4. Feed your soil. If you’re working with poor or newly cleared ground, rake in a general-purpose fertiliser such as Growmore (about £4 for 1.5kg at B&Q) before planting. For established beds, a top-dressing of compost each spring is usually enough — the RHS recommends this as the simplest way to maintain fertility year on year.
    5. Rake level. A smooth, level surface makes sowing seeds in straight rows much easier.

    Clay soil tip: Clay is slow to warm in spring. Cover your bed with a cloche or clear polythene for two weeks before sowing to raise the soil temperature — BBC Gardeners’ World recommends this for earlier harvests.

    What to Grow — 7 Easy Vegetables for Your First Year

    These seven crops are the most reliable choices for UK beginners. Every one has earned the RHS Award of Garden Merit (AGM), meaning it’s been trialled at RHS gardens and proven to perform well in British conditions.

    Seed packets for radishes, lettuce, courgettes, runner beans, and beetroot laid out on a wooden surface
    Seed packets for beginner-friendly vegetables — all available at UK garden centres for under £3 each.
    Vegetable Recommended Cultivar (AGM) Sow Harvest Notes
    Radishes ‘French Breakfast’ March–September (outdoors) 3–4 weeks after sowing Fastest crop. Sow a short row every 2 weeks for continuous harvests.
    Salad leaves ‘Little Gem’ (lettuce) March–September (outdoors) 6–10 weeks Cut-and-come-again — harvest outer leaves and the plant keeps growing.
    Courgettes ‘Defender’ F1 April indoors, plant out late May July–October Hugely productive. One or two plants is enough for most families.
    Runner beans ‘Lady Di’ May (outdoors, after last frost) July–October Grow up a wigwam of canes. Long cropping season, pick regularly.
    Potatoes ‘Charlotte’ (second early) Plant tubers March–April June–July Grow in the ground or in bags. Earth up when shoots reach 15cm.
    Beetroot ‘Boltardy’ March–July (outdoors) 11–12 weeks after sowing Bolt-resistant, pest-resistant, and tolerates cool weather.
    Peas ‘Kelvedon Wonder’ March–June (outdoors) 12–14 weeks Sow direct. Support with sticks, twigs, or pea netting.

    All of these cultivars are widely available from Thompson & Morgan, Wilko, and most UK garden centres. A packet of seeds typically costs £1.50–£3.00.

    Already keen on tomatoes? Our detailed guide to growing tomatoes from seed in the UK covers everything from sowing to harvest.

    What NOT to Grow (Yet)

    Some vegetables look tempting in the seed catalogue but are genuinely difficult for beginners. Save these for your second or third year once you’ve built confidence.

    • Brassicas (cabbage, cauliflower, Brussels sprouts) — slow to mature, magnets for caterpillars, pigeons, and clubroot. They need netting and typically occupy the ground for six months or more.
    • Sweetcorn — needs block planting (not rows) for pollination, takes up significant space, and cropping is unreliable in cooler UK summers.
    • Celery — fussy about consistent moisture, prone to bolting in fluctuating temperatures, and slug-prone.
    • Asparagus — you’ll wait two to three years before your first harvest. Rewarding eventually, but not a beginner crop.
    • Aubergines — need sustained warmth that’s difficult to provide outdoors in most of the UK.

    None of these are impossible, but they’ll frustrate a first-time grower. Stick with the seven reliable crops above for Year 1.

    Your First-Year Planting Calendar

    This calendar covers what to sow and plant each month in your first year. Dates are based on average conditions in England and Wales — if you’re in Scotland or northern England, shift outdoor sowing by two to three weeks later. For a more detailed month-by-month breakdown, see our what to plant this month guide.

    UK vegetable planting calendar showing what to sow from March to September
    A simple planting calendar helps you stay on track through your first growing season.
    Month Sow Indoors Sow/Plant Outdoors Other Tasks
    March Courgettes (late March) Radishes, peas, lettuce, beetroot, broad beans Prepare beds, add compost, chit seed potatoes
    April Courgettes, runner beans (late April) Radishes, peas, lettuce, beetroot. Plant potatoes. Harden off indoor-sown seedlings gradually
    May Runner beans (after last frost, mid-May). Continue radishes, lettuce, beetroot. Plant out courgettes after last frost. Water regularly.
    June Radishes, lettuce, beetroot (successional sowing) Harvest first radishes and lettuce. Earth up potatoes.
    July Radishes, lettuce (last sowings) Harvest potatoes, early beetroot, peas. Pick courgettes and beans regularly.
    August Main harvest month. Keep picking beans and courgettes to encourage more.
    September Final harvests. Clear spent crops. Add compost to empty beds for next year.

    Key date: The last frost in most of England and Wales falls in mid-May. Don’t plant tender crops (courgettes, runner beans) outdoors before this date. Check your local last frost date — northern areas and higher ground may need to wait until late May or even early June.

    Essential Tools and What They Cost

    You don’t need a shed full of equipment. These basics are enough to get started, and you can pick them all up at B&Q, Wilko, or your local garden centre.

    Tool What It’s For Approximate Cost
    Digging spade Turning soil, digging beds £12–£20
    Garden fork Breaking up compacted soil, mixing in compost £12–£20
    Hand trowel Planting seedlings, weeding £3–£8
    Watering can (10L) Watering beds and pots £5–£8
    Seed trays (3-pack) Starting seeds indoors £2–£4
    Seeds (7 packets) Your first crops £10–£20

    Budget total: £44–£80. The lower end is achievable if you buy B&Q’s own-brand Verve range or Wilko basics. You can cut costs further by borrowing a spade and fork, using yoghurt pots instead of seed trays, and buying seeds from supermarkets (Aldi and Lidl sell packets for as little as 50p in spring).

    For more detailed recommendations, see our best gardening tools for beginners guide.

    5 Common Beginner Mistakes

    1. Planting too much at once. Start with three to five crops, not fifteen. You’ll learn more from growing a few things well than failing at many.
    2. Ignoring the last frost date. Planting tender crops outdoors before mid-May in most of England risks losing everything to a late frost. Check your local date and be patient.
    3. Watering inconsistently. Vegetables need steady moisture, especially in containers. A deep soak every two to three days is better than a light sprinkle daily. Water at the base of plants, not over the leaves.
    4. Skipping soil preparation. Twenty minutes of weeding and adding compost before you plant saves hours of problems later. Poor soil produces poor crops — it’s that simple.
    5. Sowing seeds too deep. Most vegetable seeds need to be sown at twice their own depth — no more. Tiny seeds like lettuce and carrots barely need covering. Check the packet instructions.

    Your First Weekend Action Plan

    Ready to start? Here’s exactly what to do this weekend.

    Saturday morning:

    1. Choose your sunny spot and measure it.
    2. Go to B&Q, Wilko, or your local garden centre. Buy: a bag of multi-purpose compost (around £5–£7), seed packets for radishes, lettuce, and one other crop from the table above, and a hand trowel if you don’t own one.
    3. If using a raised bed, buy or build one. A basic 1.2m × 2.4m timber kit costs £20–£40.

    Saturday afternoon:

    1. Clear the area. Remove weeds, stones, and debris.
    2. If growing in-ground, fork over the soil and mix in compost. If using a raised bed, fill it with your soil/compost mix.
    3. Rake the surface level.

    Sunday morning:

    1. Sow your first seeds. Follow the packet spacing. Water gently with a fine rose on your watering can.
    2. Label your rows — you will forget what you planted where.
    3. Take a photo. In four weeks, when your first radishes are ready to pull, you’ll want to see how far you’ve come.

    Three crops, one weekend, under £50. That’s all it takes to start your first vegetable garden. Pick your spot, get your hands in the soil, and grow something you can eat.

    We’d love to hear what you’re growing this year — let us know in the comments below.

    What Next?

    For more beginner guides, visit our beginner gardening section.

    About the Author

    John Kitcher is the lead gardening writer at Plants and Gardening. He grew up mucking in on his grandfather’s Devon allotment and has spent the last fifteen years growing fruit, veg and ornamentals across three very different UK gardens — a windy coastal plot in North Cornwall, a shaded London back garden, and now a clay-heavy smallholding in the Midlands. He trials every technique covered here in his own beds and containers before writing about it, cross-references against RHS and Kew guidance, and has a soft spot for heritage tomato cultivars and anything that survives a British winter without complaint.

    Got a question about something we’ve written? Drop a comment — we read every one.

  • Best Gardening Tools for Beginners (UK Buyer’s Guide)

    Best Gardening Tools for Beginners (UK Buyer’s Guide)

    As an Amazon Associate I earn from qualifying purchases.

    The right tools transform gardening from chore to pleasure. Attempting to dig with a cheap trowel that bends in heavy soil or prune with blunt secateurs that crush stems rather than cut them turns satisfying work into frustration.

    This guide covers essential tools for UK beginner gardeners — the 10 items that handle garden tasks without breaking the bank or requiring shed storage.

    Quick Comparison: Essential Tool Kit

    Tool Purpose Budget Pick Quality Pick
    Hand trowel Planting, weeding Spear & Jackson Basic S&J Stainless –15
    Fork Soil prep, weeding Wilkinson Sword S&J Neverbend –25
    Secateurs Pruning, deadheading Draper Bypass Felco 2 –45
    Watering can Gentle watering Haws Indoor Haws Professional –40
    Garden gloves Protection Showa Floreo Goldleaf Dry Touch –25
    Kneeler Comfort, protection Basic Foldable Burgon & Ball –30
    Hand fork Weeding, cultivating S&J Elements Wolf-Garten –20
    Pruning saw Thick branches pruningsaw-draper Draper 180mm Silky Gomtaro –45
    Garden line Straight sowing line-basic Simple Line Burgon & Ball –15
    Tool maintenance Cleaning, sharpening Basic Brush/Oil Draper Kit –20

    The Essential 10: Tools You Actually Need

    1. Hand Trowel

    What it does: Transplant seedlings, dig planting holes, scoop compost, weed between plants

    Hand trowel digging into rich dark compost in a garden pot

    Why quality matters: Cheap trowels bend in heavy soil, snap at the handle join, rust within a season. A good trowel lasts decades.

    What to look for:
    – Stainless steel blade (doesn’t rust)
    – Hardwood or fibreglass handle (won’t split)
    – Tang extending into handle (strength)
    – Comfortable grip for extended use

    Budget choice: Spear & Jackson Elements — , perfectly adequate for occasional use

    Investment choice: Spear & Jackson Stainless Steel — , lasts 20+ years

    Avoid: Plastic trowels (flex, snap) and painted mild steel (rusts)

    2. Garden Fork (Border Fork)

    What it does: Loosen soil, lift weeds, break clods, aerate compost, dig up potatoes

    Why beginners need it: Digging with a trowel is exhausting. A fork multiplies your effort and saves your wrists.

    Border fork vs digging fork:
    Border fork: Smaller, lighter, easier for beginners — handles tasks
    Digging fork: Larger, heavier — for serious vegetable plots

    What to look for:
    – Socket construction (handle joins socket, not tang)
    – Forged steel head (strength)
    – Ash or fibreglass shaft
    – D-grip handle (ergonomic)

    Recommendation: Spear & Jackson Neverbend Professional — , lifetime tool

    Maintenance: Clean after use, oil wooden handle annually, sharpen tines if blunted

    3. Secateurs (Pruning Shears)

    What it does: Cut stems up to finger thickness, deadhead flowers, harvest vegetables, shape shrubs

    Bypass vs anvil:
    Bypass: Scissor action — clean cuts on living plants
    Anvil: Crushing action — only for dead wood

    Beginners need bypass. Anvil secateurs damage living tissue.

    What to look for:
    – Bypass blade design
    – Replaceable blade (Felco standard)
    – Spare parts availability
    – Comfortable hand size fit

    Budget choice: Draper Carbon Steel Bypass — , sharpens easily

    Investment choice: Felco Model 2 — , professional standard, 20+ year lifespan

    Maintenance: Clean after use, oil pivot weekly, sharpen monthly during growing season

    4. Watering Can

    What it does: Water plants gently without washing away soil or damaging seedlings

    Rose attachment: The perforated “rose” on the spout breaks water into fine droplets — essential for seedlings and delicate plants.

    Size matters:
    1–2 litres: Indoor plants, seedlings, conservatory
    5 litres: General garden use, patio containers
    9 litres: Large gardens, fewer refills

    Material choice:
    Plastic: Lightweight, affordable, won’t dent
    Metal (galvanised): Traditional, durable, heavy when full
    Haws (plastic or metal): The gold standard, balanced, precise rose

    Recommendation: Haws Professional 5L — , precise watering, lasts decades

    Budget alternative: Haws Indoor 1L for seedlings + cheap 5L plastic for general use

    5. Garden Gloves

    What they do: Protect hands from thorns, blisters, soil-borne bacteria, and keep nails clean

    Types for different tasks:

    Type Best For Features
    Nitrile-coated General gardening Dexterity, grip, water-resistant
    Leather Pruning roses, brambles Thorn protection, durability
    Cotton Light weeding, sowing Breathable, inexpensive
    Gauntlet Rose pruning Extended wrist/arm protection

    The beginner’s choice: Showa Floreo 370 — , nitrile-coated, dexterity for fine tasks, machine washable

    Premium option: Goldleaf Dry Touch — , leather palm, breathable back, professional quality

    Buy multiple pairs: Gloves get wet, muddy, lost. Having 3–4 pairs means you always have dry ones ready.

    6. Kneeler or Kneeling Pad

    What it does: Protects knees from hard ground, stones, and damp. Prevents back strain from bending.

    Types:

    Kneeling pad:
    – Simple foam or gel cushion
    – –15
    – Light, portable, hangs on shed hook

    Kneeler seat:
    – Flips from kneeler to seat
    – Handles for standing assistance
    – –35
    – Ideal for bad knees or back

    Recommendation: Burgon & Ball Kneeler — , flips to seat, handles, worth the investment for anyone over 40

    Budget choice: Basic foam kneeler — , perfectly adequate

    Your knees will thank you: Gardening without knee protection causes cumulative damage. Protect them from your first day.

    7. Hand Fork (Cultivator)

    What it does: Weed between plants, break soil crust, aerate surface, mix in fertiliser

    Why you need it: The fork handles soil between plants where a border fork won’t fit. Essential for weeding and soil maintenance.

    What to look for:
    – Three strong tines
    – Comfortable handle
    – Stainless or carbon steel

    Recommendation: Spear & Jackson Elements — , matches their trowel for consistent quality

    Alternative: Wolf-Garten multi-change — , interchangeable heads, ergonomic handle

    8. Pruning Saw

    What it does: Cut branches too thick for secateurs (over 2cm diameter)

    Why beginners need one: Even small gardens have overgrown shrubs, dead branches, or thick stems that need removal.

    Folding vs fixed:
    Folding: Safe storage, portable — –30
    Fixed blade: Faster cutting, professional use — –50

    Tooth design:
    Curved blade: Faster cutting on living wood
    Straight blade: Better for tight spaces

    Recommendation: Silky Gomtaro 210mm — , Japanese precision, cuts like a dream

    Budget choice: pruningsaw-draper Draper Folding Pruning Saw — , adequate for occasional use

    Safety: Always fold closed immediately after use. These blades are razor-sharp.

    9. Garden Line (Marking String)

    What it does: Mark straight rows for sowing vegetables, edging lawns, lining up hedges

    Why precision matters: Straight rows:
    – Look professional
    – Maximise space efficiency
    – Make weeding easier (you know where seedlings should be)
    – Improve air circulation between plants

    Types:
    Simple line: String on two sticks — , basic but functional
    Winding line: Retractable string in handle — , convenient
    Professional: Metal posts with sliding line — , most accurate

    Recommendation: Burgon & Ball Line and Pins — , traditional design, accurate, satisfying to use

    Alternative: Make your own with bamboo canes and garden twine —

    10. Tool Maintenance Kit

    What it does: Clean, sharpen, and protect your tools — extending life from years to decades

    Basic kit ():
    – Wire brush (cleaning soil off)
    – Linseed oil (wooden handles)
    – Multi-purpose oil (metal, mechanisms)
    – Old towel or rag

    Complete kit ():
    – Draper Sharpening Kit — stone, file, oil
    – Wire brush
    – Linseed oil
    – Multi-purpose oil
    – Camellia oil (premium blade protection)
    – Tool roll or rack

    The 5-minute rule: Spend 5 minutes cleaning and oiling tools after each use. They’ll last 20 years instead of 2.

    Tool Storage Solutions

    For Small Spaces (Balcony, Patio)

    Tool bag or bucket: –25
    – Keeps tools organised
    – Portable — take to planting spot
    – Protects from weather

    For Gardens with Shed

    Wall-mounted tool rack: –40
    – Tools visible and accessible
    – Air circulation prevents rust
    – Saves floor space

    Rail system (Gerdmans, etc.): –60
    – Flexible, expandable
    – Hooks for every tool type
    – Professional appearance

    Where to Buy: Shop Recommendations

    Garden centres (Dobbies, British Garden Centres, etc.):
    – Handle tools before buying
    – Check weight and balance
    – Immediate purchase
    – Higher prices but expert advice

    Bypass secateurs making a clean angled cut on a plant stem

    Online (Amazon, etc.):
    – Best prices, especially sets
    – Read reviews for quality issues
    – Can’t handle before buying
    – Easy returns if unsuitable

    Direct from manufacturers:
    – Burgon & Ball, Felco, Haws
    – Full range available
    – Expert customer service
    – Premium pricing

    Charity shops/car boot sales:
    – Vintage tools often better quality
    – Requires knowledge to assess condition
    – May need restoration
    – Bargain prices possible

    Budget Tool Kit (–70)

    The essentials without luxury:
    – Spear & Jackson trowel —
    – Wilkinson Sword border fork —
    – Draper secateurs —
    – Haws 1L + plastic 5L —
    – Showa gloves (3 pairs) —
    – Basic kneeler —
    – S&J hand fork —

    Total: for quality basics that last 5+ years

    Add later as budget allows: Pruning saw, kneeler seat, premium secateurs

    Frequently Asked Questions

    Q: Can I buy tool sets to save money?

    A: Often false economy. Sets include tools you’ll never use while omitting essentials. Buy individual quality pieces as needed.

    Q: Should I buy stainless steel or carbon steel?

    A: Stainless for casual gardeners (no rust). Carbon steel for serious use (holds edge better, easier to sharpen).

    Q: How do I know if a tool is good quality?

    A: Check weight (quality steel is heavy), look for forged not stamped construction, check country of manufacture (UK, Germany, Japan, Sweden for premium).

    Q: Can I share tools with neighbours?

    A: Yes, but mark them clearly. Tools have a habit of “walking” between gardens.

    Q: What tools can I skip as a beginner?

    A: Spade (use fork), hoe (hand weed instead), wheelbarrow (bags for small gardens), lawn mower (no lawn in containers).

    Your Tool Buying Checklist

    – [ ] Prioritise: Trowel, fork, secateurs, watering can first
    – [ ] Set budget: –100 for basics, + for premium kit
    – [ ] Check ergonomics: Handle tools in shop if possible
    – [ ] Plan storage: Where will they live? Shed, garage, balcony box?
    – [ ] Buy maintenance kit: investment saves s in replacements
    – [ ] Consider gifts: Quality tools make excellent presents for new homeowners

    Ready to start gardening? See our guides to starting your first vegetable garden and best containers for beginners for what to fill with your new tools.

    Sources: RHS Tool Reviews, Which? Garden Tools, Gardening Which?, Royal Horticultural Society Tool Maintenance Guides You might also like our guide to the best compost for container gardening.

    About the Author

    John Kitcher is the lead gardening writer at Plants and Gardening. He grew up mucking in on his grandfather’s Devon allotment and has spent the last fifteen years growing fruit, veg and ornamentals across three very different UK gardens — a windy coastal plot in North Cornwall, a shaded London back garden, and now a clay-heavy smallholding in the Midlands. He trials every technique covered here in his own beds and containers before writing about it, cross-references against RHS and Kew guidance, and has a soft spot for heritage tomato cultivars and anything that survives a British winter without complaint.

    Got a question about something we’ve written? Drop a comment — we read every one.

  • Best Herbs to Grow in Containers for Beginners (UK Guide)

    Best Herbs to Grow in Containers for Beginners (UK Guide)

    As an Amazon Associate I earn from qualifying purchases.


    Fresh herbs transform everyday cooking — and they’re among the easiest plants for beginner gardeners. Whether you have a patio, balcony, or sunny windowsill, growing herbs in containers puts flavour at your fingertips without the need for a garden bed.

    Quick tip: Containers dry out faster than garden beds in summer and stay wetter in winter — check moisture levels regularly rather than sticking to a rigid schedule.

    This guide covers ten reliable herbs that thrive in UK conditions, with specific pot sizes, seasonal guidance, and practical harvest tips. It pairs perfectly with our guide to vegetables to grow in containers — together they cover everything for your patio garden.

    What You Need to Get Started

    Essential Supplies

    Terracotta pots, compost, and gardening supplies for container herb gardening
    Essential supplies for starting your container herb garden
    • Containers (15–30cm depending on herb — specifics below)
    • Multi-purpose compost with horticultural grit for drainage
    • Horticultural grit (25% by volume for Mediterranean herbs)
    • Watering can with rose
    • Plant markers (herbs look similar when young)

    Important: Give the living herb pots sold in supermarkets a miss. They’re forced along quickly in commercial greenhouses, which leaves them soft and sappy, so they tend to struggle the moment they go outdoors. For herbs that settle in and last, start them from seed or pick up a healthy plant from a nursery or garden centre.

    Container Considerations for Herbs

    Drainage is critical. Herbs hate wet feet, especially Mediterranean varieties. Ensure every pot has drainage holes.

    Terracotta is ideal. The porous material prevents overwatering — perfect for herbs that prefer drier conditions.

    Group by water needs:

    • Mediterranean herbs (rosemary, thyme, oregano, sage): prefer drier conditions
    • Leafy herbs (basil, parsley, coriander, mint): prefer consistent moisture

    Mint warning: Always grow mint in its own pot. Its roots spread aggressively and will quickly overpower other herbs.

    The 10 Best Container Herbs for Beginners

    # Herb Container Size Sun Needs Best For Difficulty
    1 Basil 15cm (2–3L) Full sun Cooking, pesto Very Easy
    2 Parsley 20cm (3–5L) Partial shade Garnish, cooking Very Easy
    3 Mint 25cm (5L+) — dedicated pot Partial shade Tea, drinks Easy
    4 Chives 15cm (2–3L) Full sun to partial Garnish, eggs Very Easy
    5 Rosemary 30cm (12L+) Full sun Roasts, oils Easy
    6 Thyme 15cm (2–3L) Full sun Cooking, drying Very Easy
    7 Oregano 20cm (3–5L) Full sun Pizza, pasta Very Easy
    8 Coriander 20cm (3–5L) Partial shade Asian cooking Easy
    9 Sage 25cm (5–8L) Full sun Stuffing, butter Easy
    10 Dill 20cm (3–5L) Full sun Fish, pickles Easy

    Deep Dive — Top Herbs

    Basil — The Beginner’s Best Friend

    Basil is the quintessential container herb. Fast-growing, fragrant, and endlessly useful — it’s the perfect starting point for new gardeners.

    For detailed advice, check our guide to growing basil in a pot.

    Best varieties: ‘Sweet Genovese’ (classic Italian), ‘Greek’ (compact, smaller leaves), ‘Thai’ (aniseed notes, spicy)

    Growing: Sow every three weeks for continuous supply. Basil germinates quickly indoors on a warm windowsill.

    Care: Likes consistent moisture — don’t let it dry out completely. Pinch out growing tips regularly to encourage bushy growth. Remove flower buds immediately — flowering turns leaves bitter.

    Basil companion planted with tomatoes in a container
    Basil thrives when planted with tomatoes in containers

    Harvest: Pick from the top, leaving at least two sets of leaves on the stem. This encourages branching.

    Mint — Contain or Regret

    Mint is delicious and useful — but it’s a garden thug. Containers aren’t just convenient for mint; they’re essential. See our full guide on how to grow mint in containers for variety choices, potting advice and overwintering tips.

    Fresh mint growing vigorously in a dedicated container

    Best varieties: Spearmint (cooking, mint sauce), Peppermint (tea), Chocolate mint (desserts, subtle cocoa notes)

    Why dedicated pots matter: Mint roots spread aggressively underground. In open ground, it takes over. In a container, you control it completely.

    Mint growing in its own dedicated container
    Always grow mint in its own pot to prevent spreading

    Care: Mint prefers moist, fertile soil and partial shade — an east-facing spot is ideal. When it looks straggly, lift the root ball, divide it, and repot fresh pieces into rich compost.

    Harvest: Cut stems to ground level — it’ll resprout vigorously.

    Rosemary — The Permanent Resident

    Rosemary is a long-term investment. Given the right conditions, a single plant provides harvests for seven to eight years. For full growing details, see our guide to growing rosemary in pots.

    Critical pot size: Rosemary needs a minimum 30cm (1ft) wide and deep pot. Smaller containers lead to poor establishment and winter vulnerability.

    Care: Full sun is essential. Drought-tolerant once established — water sparingly. Rosemary hates soggy roots, especially in winter. Use gritty compost with 25% horticultural grit mixed in.

    Rosemary growing in a large terracotta container
    Rosemary needs a large pot — minimum 30cm diameter

    Position: Sunny and sheltered from harsh winds.

    Harvest: Snip sprigs as needed year-round. The soft new growth in late spring has the best flavour.

    Winter protection: Container rosemary is vulnerable to freezing. If temperatures below -8°C are forecast, wrap the pot in bubble wrap or move to a sheltered spot near a wall. Cold, wet compost kills roots faster than cold air.

    Parsley — The Reliable Workhorse

    Parsley is biennial — it lives two years, then flowers and dies. For continuous supply, sow fresh each year.

    Types: Flat-leaf (better flavour, preferred by cooks), Curly (better garnish, holds shape when chopped)

    Sowing: Parsley is slow to germinate — three to four weeks. If impatient, buy young plants from garden centres.

    Care: Likes consistent moisture and tolerates partial shade better than most herbs. Add garden compost or slow-release fertiliser to the potting mix — parsley prefers richer conditions than Mediterranean herbs.

    Harvest: Pick outer leaves first, leaving the centre to continue producing. One plant keeps going for months.

    Thyme and Oregano — The Mediterranean Pair

    These two share identical preferences: sun, drainage, and minimal fuss.

    Care: Both demand full sun and excellent drainage. Add plenty of grit to compost — up to 25% by volume. They’re drought-tolerant and forgiving if you forget to water occasionally.

    Harvest: Best flavour is just before flowering. Regular harvesting keeps plants compact and bushy.

    Perennial bonus: Both survive UK winters in containers. Established plants tolerate temperatures down to -8°C. Container plants benefit from grouping pots together or wrapping in bubble wrap during extreme cold.

    Coriander — The Fast-Bolter

    Coriander is delicious but temperamental. Heat and long days trigger it to flower and set seed quickly.

    Care: Prefers partial shade in midsummer — afternoon shade prevents premature bolting. Sow successionally every three weeks for continuous leaves.

    Dual-purpose: If it does bolt, the seeds are useful too — green seeds have a fresh citrus flavour; dried seeds are the spice.

    Harvest: Pick leaves young for best flavour. Once flowering begins, leaves turn feathery and less tasty.

    Herb-Vegetable Companion Pairings

    Herbs and vegetables grown together benefit each other. Here are proven combinations:

    Herb Pairs With Benefit Container Arrangement
    Basil Tomatoes Improves flavour, repels whiteflies and aphids Same large pot (tomato centre, basil at base) or nearby containers
    Chives Tomatoes Repels aphids, antifungal properties Nearby pots or around base
    Rosemary Beans General pest deterrence Nearby pots
    Mint Brassicas (cabbage family) Deters cabbage white butterfly Dedicated separate pot — never plant together
    Dill Courgettes Attracts beneficial insects Nearby pots

    Space-saving tip: If you’re short on space, basil and tomatoes make the best container-sharing pair. Use a pot at least 30cm diameter for both.

    Season-by-Season Herb Calendar

    Season Key Tasks
    Spring (Mar–May) Sow tender herbs indoors: basil, coriander, dill. Plant hardy herb plants. Divide and repot mint.
    Early Summer (Jun) Harden off tender seedlings. Plant out after last frost. Start harvesting first basil. Begin feeding container herbs every 2–3 weeks.
    Mid Summer (Jul–Aug) Peak harvest season. Succession sow coriander. Take cuttings from thyme and rosemary. Provide afternoon shade for coriander.
    Autumn (Sep–Oct) Harvest and dry herbs for winter. Pot up divisions of mint and chives. Move tender herbs indoors or to sheltered spots.
    Winter Minimal watering. Protect Mediterranean herbs from waterlogging. Basil needs warm windowsill indoors. Plan next year’s herbs.

    Harvesting and Preserving

    Fresh Harvest Tips

    • Morning harvesting = best flavour (essential oils at peak)
    • Cut, don’t pull — clean cuts heal faster
    • Regular harvesting encourages bushier growth — even if you don’t need herbs, trim to maintain shape

    Hands harvesting fresh herbs with garden scissors
    Harvest herbs in the morning when essential oils are at their peak

    Preserving Methods

    Drying:

    • Hang small bunches upside down in warm, dark, well-ventilated place
    • When crisp, strip leaves and store in airtight jars
    • Best for: rosemary, thyme, oregano, sage

    Freezing:

    • Chop leaves and freeze in ice cube trays with water or olive oil
    • Best for: basil, parsley, coriander, chives

    Herb Butters:

    • Mix finely chopped herbs with softened butter
    • Roll into log, wrap, freeze
    • Slice as needed

    Common Herb Growing Mistakes

    Mistake #1: Overwatering Mediterranean Herbs

    Rosemary, thyme, oregano, and sage come from hot, dry climates. They want “dry feet.”

    Rosemary plant growing in a terracotta pot in a sunny garden

    Solution: Add 25% horticultural grit to compost, use terracotta pots, water only when soil is dry.

    Mistake #2: Letting Basil Flower

    Once basil flowers, leaves turn bitter and production slows.

    Solution: Pinch out flower buds as soon as they appear. Sow successionally for continuous supply.

    Mistake #3: Planting Mint With Other Herbs

    Mint roots spread underground and takeover.

    Solution: Always grow mint in its own dedicated pot. Never plant in open ground unless you want a mint lawn.

    Mistake #4: Pots Too Small for Rosemary

    Rosemary in a small pot becomes stressed, produces poorly, and dies in winter.

    Solution: Minimum 30cm diameter and depth. This is non-negotiable for success.

    Mistake #5: Wrong Sun Exposure

    • Basil in shade = leggy, weak, prone to disease
    • Mint in full sun = scorched, crispy leaves

    Solution: Match herb to position. Mediterranean herbs need 6+ hours sun. Leafy herbs tolerate partial shade.

    Troubleshooting

    Problem Likely Cause Solution
    Yellow leaves Overwatering Reduce watering, check drainage holes aren’t blocked
    Leggy, weak growth Insufficient light Move to sunnier spot; south-facing for Mediterranean herbs
    Basil turns black Cold damage Basil is tender below 10°C; bring indoors
    Coriander flowers quickly Heat/light stress Provide afternoon shade; succession sow every 3 weeks
    Woody, bare stems (thyme/rosemary) Lack of pruning Prune after flowering to encourage new growth
    White fuzzy mould Poor air circulation Space pots apart; reduce watering; remove affected leaves
    Mint looks straggly Needs repotting Lift, divide roots, repot fresh pieces into rich compost

    Quick-Reference Tables

    Minimum Pot Sizes by Herb Type

    Herb Type Minimum Pot Compost Notes
    Annual herbs (basil, coriander, dill) 15cm (2–3L) Standard multi-purpose
    Perennial herbs (thyme, chives, oregano) 15–20cm (3–5L) Add grit for Mediterranean types
    Woody herbs (rosemary, sage) 30cm+ (12L+) Gritty mix essential; John Innes No 3 for long-term
    Invasive herbs (mint) 25cm (5L+) Rich, moist compost; dedicated pot essential

    Sun vs Shade Herbs

    Sun Level Hours/Day Herbs
    Full sun 6+ hours Basil, rosemary, thyme, oregano, sage, chives, dill
    Partial sun 3–5 hours Parsley, mint, coriander

    Water Requirements

    Water Needs Herbs Care
    Low (drought-tolerant) Rosemary, thyme, oregano, sage Water when soil dry; terracotta ideal
    Medium (consistent moisture) Basil, parsley, chives, coriander Don’t let dry out completely
    High (moist soil) Mint Keep consistently damp; repot frequently

    Your First Herb Garden — Week-by-Week

    Weeks 1–2: Setup

    • Acquire: 4–5 terracotta pots, multi-purpose compost, horticultural grit
    • Buy plants: rosemary, thyme (slow from seed — buy established plants)
    • Sow indoors: basil, coriander in small pots on warm windowsill

    Weeks 3–6: First Growth

    • Thin seedlings to strongest plant per pot
    • Pot on basil when 10cm tall
    • Start light harvesting from bought plants

    Weeks 7–12: Peak Harvest

    • Regular weekly harvesting established
    • Succession sow more basil and coriander
    • Begin feeding container herbs every 2–3 weeks with liquid feed

    Ongoing: Maintenance

    • Weekly harvest in season
    • Liquid feed every 2–3 weeks during growing season
    • Winter protection: wrap pots or move to shelter
    • Annual replacement: basil (treat as annual), parsley (biennial)

    Frequently Asked Questions

    Q: What’s the easiest herb to grow in a pot?

    A: Chives. Practically indestructible, tolerate shade or sun, and come back every year with zero fuss.

    Q: Can I grow herbs indoors on a windowsill?

    A: Absolutely. Basil, parsley, and chives do well indoors. South-facing windows are best. Supplement with grow lights in winter if needed. Windowsill herb kits make starting easy.

    Q: How often should I water container herbs?

    A: Mediterranean herbs (rosemary, thyme, oregano, sage) — when soil is dry to touch. Leafy herbs (basil, parsley, coriander, mint) — keep evenly moist. Check by pushing finger 2cm into compost.

    Q: Can I plant different herbs in the same pot?

    A: Yes, but group by water needs. Basil + parsley work together (both like moisture). Rosemary + thyme + oregano work together (all Mediterranean, dry-loving). Never plant mint with anything.

    Q: Why does my coriander keep bolting?

    A: Heat and long daylight hours trigger flowering. Sow successionally every three weeks, provide afternoon shade in summer, and harvest leaves young.

    Q: Should I feed container herbs?

    A: Lightly. Herbs prefer poorer soil than vegetables. A weak liquid feed every 2–3 weeks during growing season is plenty. Avoid high-potash feeds — they promote flowering over leaf growth.

    Q: How do I overwinter container herbs?

    A: Mediterranean herbs — move to sheltered spot, reduce watering, wrap pots if very cold forecast. Tender herbs (basil) — bring indoors to sunny windowsill or treat as annual and resow in spring.

    Q: Why did my supermarket herb die when I put it outside?

    A: Those pots are raised in warm, sheltered nursery conditions, so the growth is soft and hasn’t toughened up — dropped straight outside, it rarely copes. For anything you’ll keep in an outdoor container, sow your own or buy a garden-centre plant that’s been grown harder.

    What to Plant Now

    Not sure where to start? Here’s your no-fail starter pack:

    1. Chives — Buy one pot, harvest forever
    2. Basil — Sow seeds indoors now for summer harvests
    3. Rosemary — Buy an established plant in a large pot
    4. Mint — In its own dedicated container

    With these four, you’ll have fresh herbs for every meal and the confidence to expand your collection.

    Herbs and vegetables growing together in patio containers
    Companion planting herbs and vegetables in containers

    Ready to grow vegetables too? Pair your herb garden with our guide to the best vegetables to grow in containers for a complete patio harvest.


    Sources: RHS Growing Herbs in Containers, RHS Rosemary Growing Guide, RHS Mediterranean Herbs Container Guide, Haxnicks UK Companion Planting Guide, The English Garden You might also like our guide to the best containers and pots for beginners.

    About the Author

    John Kitcher is the lead gardening writer at Plants and Gardening. He grew up mucking in on his grandfather’s Devon allotment and has spent the last fifteen years growing fruit, veg and ornamentals across three very different UK gardens — a windy coastal plot in North Cornwall, a shaded London back garden, and now a clay-heavy smallholding in the Midlands. He trials every technique covered here in his own beds and containers before writing about it, cross-references against RHS and Kew guidance, and has a soft spot for heritage tomato cultivars and anything that survives a British winter without complaint.

    Got a question about something we’ve written? Drop a comment — we read every one.

  • 15 Best Vegetables to Grow in Containers (UK Beginner’s Guide)

    15 Best Vegetables to Grow in Containers (UK Beginner’s Guide)

    As an Amazon Associate I earn from qualifying purchases.

    No garden? No problem. If you have a patio, balcony, or sunny doorstep, you can grow fresh vegetables in containers.

    Colourful vegetable containers arranged on a UK patio garden
    A thriving container vegetable garden on a patio

    Container gardening works because you control everything: the soil, the drainage, and the position for maximum sun. There are no weeds to battle, and you can move pots to catch the light. For beginners, containers are often more successful than traditional beds — and there’s genuine satisfaction in snipping fresh lettuce from a pot by your back door.

    This guide covers 15 vegetables that thrive in pots, chosen for reliability and UK conditions. Each includes specific container sizes, realistic harvest times, and practical care tips. If you’re completely new to growing food, you might want to start with our guide on starting your first vegetable garden from scratch.

    What You Need to Get Started

    Essential container gardening supplies: pots, compost and tools
    Essential supplies for container vegetable gardening

    Essential supplies: (See our complete starter guide for a more detailed shopping list)

    • Containers in various sizes (specifics below)
    • Multi-purpose compost mixed with John Innes
    • Liquid feed for hungry crops
    • Watering can with rose
    • Optional: slow-release fertiliser, saucers, plant supports

    Choosing containers:
    Size matters more than material. A tomato in a 15cm pot will struggle; in a 30cm pot, it will feed you for months (see how to grow tomatoes in pots). When uncertain, go bigger — extra compost holds moisture and nutrients.

    Materials compared:

    • Plastic: Light, affordable, retains moisture
    • Terracotta: Attractive but dries quickly; line with plastic
    • Fabric grow bags: Excellent drainage, stores flat
    • Glazed ceramic: Heavy and stable for top-heavy plants

    Essential: drainage holes. Stagnant water kills roots faster than dryness.

    The 15 Best Container Vegetables

    1. Cherry Tomatoes

    Container: 30cm diameter (12 litres) | Sun: Full sun (6+ hours) | Harvest: 60–80 days | Difficulty: Easy

    Cherry tomatoes ripening on the vine in a large container pot
    Cherry tomatoes 'Gardeners Delight' growing in container
    Cherry tomatoes thriving in a 30cm container

    The reward-per-effort champion. One well-fed plant produces pints of fruit from July until first frost.

    Best varieties: ‘Tumbling Tom’ for hanging baskets, ‘Gardeners Delight’ for pots, ‘Balconi Red’ for compact spaces.

    Key care: Feed weekly with tomato fertiliser once flowering. Water consistently — irregular watering causes blossom end rot. Support with a cane or cage.

    2. Lettuce and Mixed Leaves

    Container: 15cm (3 litres) | Sun: Partial shade OK | Harvest: 6–8 weeks | Difficulty: Very Easy

    The fastest route to harvesting your own food. Cut-and-come-again varieties let you snip outer leaves while the plant keeps producing.

    Best approach: Sow successionally every two weeks for continuous salad. ‘Salad Bowl’, ‘Lollo Rossa’, and oriental mixes all perform well.

    Key care: Keep soil moist — lettuce turns bitter when stressed. Sow thinly to avoid overcrowding.

    3. Radishes

    Container: 15cm (3 litres) | Sun: Partial shade OK | Harvest: 4–6 weeks | Difficulty: Very Easy

    The confidence builder. Sow radishes and you’ll be eating them before you’ve had time to doubt yourself.

    Best varieties: ‘Cherry Belle’ (classic round red), ‘French Breakfast’ (elongated, milder).

    Key care: Sow thinly — about 2cm apart. Thinning is essential; crowded radishes won’t bulb. Harvest promptly — left too long, they turn woody.

    4. Spring Onions

    Container: 15cm (3 litres) | Sun: Full sun to partial shade | Harvest: 8–10 weeks | Difficulty: Very Easy

    Neat, vertical, and endlessly useful. Spring onions occupy minimal space and ask almost nothing of you.

    Key care: Keep well-watered for milder flavour. Sow every three weeks for continuous supply. No thinning needed — they push each other upright.

    5. Dwarf French Beans

    Container: 25cm (8 litres) | Sun: Full sun | Harvest: 50–60 days | Difficulty: Easy

    Perhaps the most productive crop for the space. A single pot produces handfuls of tender pods every few days for six to eight weeks.

    Best varieties: ‘Maxibel’ (stringless, heavy cropper), ‘Stanley’ (reliable early variety).

    Key care: Pick regularly — the more you pick, the more they produce. Allowing pods to swell stops flowering. Short supports keep pods clean.

    6. Chillies

    Container: 20cm (5 litres) | Sun: Full sun | Harvest: 70–90 days | Difficulty: Medium

    Chillies love containers. Restricted roots seem to concentrate heat in the fruit. They’re also ornamental — colourful fruits look good on sunny windowsills.

    Best varieties: ‘Apache’ (compact, prolific), ‘Hungarian Hot Wax’ (milder), ‘Jalapeño’ (classic).

    Key care: Start early indoors or buy ready plants in May — they need a long season. Feed weekly during fruiting. Overwinter plants indoors for next year’s crop.

    7. Courgettes (Dwarf)

    Container: 40cm (20 litres) | Sun: Full sun | Harvest: 50–60 days | Difficulty: Easy

    Dwarf courgette plant in container
    Dwarf courgettes produce well in large containers

    Standard courgettes need space. Dwarf varieties like ‘Bush Baby’ and ‘All Green Bush’ stay compact yet productive.

    Key care: Keep consistently moist — drought followed by flood causes misshapen fruit. Harvest at 10–15cm; oversized become watery marrows. One plant is plenty for most families.

    8. Carrots (Short Varieties)

    Container: 20cm diameter, 20cm deep (10 litres) | Sun: Full sun | Harvest: 60–80 days | Difficulty: Medium

    Containers solve carrot fly problems — the pest flies low and rarely finds elevated pots. Choose short-rooted varieties.

    Best varieties: ‘Paris Market’ (round, sweet), ‘Atlas’ (round, stores well), ‘Amsterdam Forcing’ (slender, fast).

    Key care: Sow thinly. Thinning is essential — crowded carrots fork and twist. Keep soil moist for germination.

    9. Beetroot

    Container: 20cm (5 litres) | Sun: Full sun to partial shade | Harvest: 50–70 days | Difficulty: Easy

    Dual-purpose: tender roots and edible leaves. Beetroot is unfussy and reliable.

    Best varieties: ‘Boltardy’ (resistant to running to seed), ‘Chioggia’ (striking pink rings).

    Key care: Thin to 5cm spacing. Harvest young for sweetness — older roots become woody. Don’t cut leaves completely; leave 2cm to prevent bleeding.

    10. Spinach

    Container: 15cm (3 litres) | Sun: Partial shade OK | Harvest: 6–8 weeks | Difficulty: Very Easy

    Spinach bolts quickly in hot, dry conditions. Containers let you move pots to shade in midsummer, extending harvest.

    Best varieties: ‘Apollo’ (slow to bolt), ‘Medania’ (hardy).

    Key care: Sow successionally every three weeks. Harvest outer leaves, leaving the centre to continue. Water consistently — dryness triggers bolting.

    11. Peas (Dwarf)

    Container: 25cm (8 litres) | Sun: Full sun to partial shade | Harvest: 60–70 days | Difficulty: Easy

    Fresh peas from the pod are a revelation. Dwarf varieties need only short twiggy supports.

    Best varieties: ‘Kelvedon Wonder’ (reliable), ‘Bingo’ (early, compact).

    Key care: Sow generously — not all germinate. Pick promptly; over-mature peas are starchy.

    12. Kale

    Container: 25cm (8 litres) | Sun: Full sun to partial shade | Harvest: 50–60 days (baby leaves) | Difficulty: Easy

    The cut-and-come-again champion of winter. Kale tolerates cold, shade, and neglect.

    Best varieties: ‘Nero di Toscana’ (tender, dark leaves), ‘Red Russian’ (hardy, frilly).

    Key care: Harvest bottom leaves first. Plants become top-heavy — ensure stable pots. Protect from pigeons with netting.

    13. Pak Choi

    Container: 15cm (3 litres) | Sun: Partial shade OK | Harvest: 30–45 days | Difficulty: Very Easy

    Rapid, attractive, and versatile. Pak choi germinates reliably and reaches harvest in just over a month.

    Key care: Sow successionally. Bolts quickly in hot weather; afternoon shade helps in midsummer.

    14. Patio Aubergine

    Container: 30cm (12 litres) | Sun: Full sun | Harvest: 80–100 days | Difficulty: Medium

    Aubergines demand heat and sun but reward the effort. Modern patio varieties are bred for containers.

    Best varieties: ‘Pot Black’ (compact), ‘Moneymaker’ (reliable in UK).

    Key care: Start indoors or buy plants. Don’t plant out until late May when nights are warm. Feed weekly during fruiting. Support stems — fruit is heavy.

    15. Salad Potatoes (Early)

    Container: 40cm (30 litres) | Sun: Full sun | Harvest: 70–90 days | Difficulty: Easy

    Few harvests match tipping out a pot of home-grown potatoes. Early varieties are fastest and most reliable.

    Best varieties: ‘Charlotte’ (waxy, excellent flavour), ‘Swift’ (very early), ‘Rocket’ (reliable).

    Key care: Plant 3–4 seed potatoes per 40cm pot. Cover stems with compost as they grow. Keep well-watered during tuber formation. Harvest when flowers open.

    Season-by-Season Care Calendar

    Season Key Tasks
    Spring (Mar–May) Sow lettuce, radish, peas, potatoes. Harden off tomato/chilli plants.
    Early Summer (Jun) Main planting. Water well as weather warms. Begin weekly feeding for fruiting crops.
    Mid Summer (Jul–Aug) Daily watering. Harvest beans, tomatoes, courgettes regularly. Succession sow salads.
    Autumn (Sep–Oct) Final harvests. Sow winter salads. Clear spent crops.
    Winter Plan next year. Order seeds. Kale and some herbs may continue.

    Watering and Feeding

    Watering:
    Containers dry faster than ground soil. In hot weather, daily watering is normal. Morning is best — plants enter the day hydrated, and foliage dries before evening.

    For detailed advice, check our guide to growing tomatoes from seed.

    Check moisture by pushing your finger 2cm into compost. If dry, water. Saucers beneath pots act as reservoirs, but don’t let plants sit in water.

    Feeding:
    Compost feeds plants for 4–6 weeks. After that:

    • Leafy crops: Balanced liquid feed every two weeks
    • Fruit crops: High-potash tomato feed weekly once flowering
    • Root crops: Minimal feeding — focus on good initial compost

    Common Mistakes to Avoid

    1. Pots too small
    Root-bound plants produce poor harvests. When in doubt, go bigger.

    2. Irregular watering
    Drought stress followed by overwatering causes split fruit and bitter lettuce. Check daily in summer.

    3. Poor compost choice
    Straight multi-purpose dries too quickly. Mix with John Innes or choose container-specific blends.

    4. Forgetting to feed
    Limited soil means limited nutrients. Fruiting crops especially need regular feeding.

    5. Planting too early
    Tender crops sulk in cold soil. Wait until late May in most UK regions.

    Maximising Your Harvest

    Succession sowing: Sow small batches every 2–3 weeks rather than everything at once. Prevents gluts and gaps. Works for: lettuce, radish, spring onion, spinach, pak choi.

    Lettuce and mixed salad leaves growing in window boxes

    Companion planting: Some combinations work well:

    • Tomatoes with basil at the base
    • Carrots with spring onions (masks scent from pests)
    • Lettuce with radish (radish marks rows, harvested first)

    Vertical space: Use hanging baskets for tumbling tomatoes, wall planters for herbs, tiered stands for salads.

    Troubleshooting

    Problem Cause Solution
    Yellow lower leaves Natural ageing or overwatering Remove; check drainage
    Wilting despite wet soil Root rot Improve drainage
    Leggy seedlings Insufficient light Move to sunnier spot
    No fruit set Cold nights Wait for warmer weather; shake flowers
    Bitter lettuce Heat stress Provide shade, water consistently
    Forked carrots Obstacles in compost Use sifted compost
    Flowers but no beans Too hot Mulch, water deeply

    Quick-Reference Tables

    Minimum Pot Sizes

    Crop Type Diameter Depth
    Leafy salads 15cm 15cm
    Root crops 20cm 20cm
    Bush beans/peas 25cm 25cm
    Compact fruiting 30cm 30cm
    Heavy feeders 40cm+ 40cm+

    Sun Requirements

    Level Hours/Day Crops
    Full sun 6+ Tomatoes, peppers, courgettes, beans
    Partial sun 4–6 Lettuce, spinach, peas, beetroot
    Shade tolerant 2–4 Leafy greens, herbs

    First Container Garden — Week-by-Week

    Weeks 1–2: Setup and early sowing
    – Acquire containers, compost, seeds
    – Sow indoors: tomatoes, chillies, aubergines
    – Sow outdoors: radish, lettuce, spring onion

    Weeks 3–4: Expanding plantings
    – Sow: peas, beetroot, spinach
    – Plant early potatoes in large containers

    Weeks 5–8: Main season
    – Harden off and plant tender crops
    – Sow: dwarf beans, succession salads
    – Begin weekly feeding

    Weeks 9–12: First harvests
    – First radishes (weeks 6–8)
    – First lettuce leaves
    – Continuous picking of beans, courgettes

    Frequently Asked Questions

    What’s the easiest vegetable to grow in a pot?
    Radishes. Four to six weeks from sowing to harvest, minimal care, virtually foolproof.

    Can I grow vegetables indoors on a windowsill?
    Leafy salads, spring onions, and herbs work well. Fruiting crops need more light than most windowsills provide.

    How often should I water?
    Daily in hot weather, every 2–3 days in cooler periods. Check by pushing finger 2cm into compost.

    Do I need special compost?
    Multi-purpose works, but mixing with John Innes improves water retention. Avoid garden soil — it’s too heavy and may contain pests.

    Can I reuse compost?
    Yes, but refresh it. Mix in fresh compost or add slow-release fertiliser.

    Why are my tomatoes flowering but not fruiting?
    Likely cold nights (below 10°C) or poor pollination. Shake plants gently. Warm weather usually solves it.

    Most productive crop for small spaces?
    Dwarf French beans. Weeks of continuous harvest from a single pot.

    Sources: RHS container growing guidance, Garden Organic, Which? Gardening trials, University of Maryland Extension. You might also like our guide to choosing the right containers and pots. You might also like our guide to the best compost for container gardening.

    Where to Buy Seeds and Containers

    Getting started with container vegetables is straightforward once you know where to shop. Here are reliable UK suppliers for seeds, plants, and growing kit.

    Seeds

    • Thompson & Morgan — broad vegetable seed range including many container-friendly varieties. Look for their ‘patio’ and ‘dwarf’ selections specifically bred for pots. Seed packets from £2–£4.
    • Suttons — strong heritage vegetable range with reliable germination rates. Their vegetable seed collections (£8–£15) offer good variety for container growers.
    • You Garden — good value plug plants if you’d rather skip the seed-sowing stage. Vegetable plug plant collections start around £8–£12 for mixed packs.

    Containers, Compost, and Tools

    • Crocus — wide range of pots from budget plastic to premium terracotta and metal. Containers suitable for vegetables start at £5 for basic 30cm pots, up to £25+ for larger decorative options. They also stock quality compost and hand tools.
    • B&Q, The Range, and local garden centres — best for compost (multi-purpose with added John Innes, around £5–£10 for 40–50L) and for seeing container sizes in person before buying.

    Budget Tips

    • Repurpose containers: old buckets, wooden crates lined with landscape fabric, and recycled grow bags all work. Drill drainage holes in the bottom.
    • Buy compost in spring: garden centres often run multi-buy deals (3 bags for the price of 2) in March and April.
    • Seed collections save money: a mixed vegetable seed collection costs less per variety than buying individual packets.

    About the Author

    John Kitcher is the lead gardening writer at Plants and Gardening. He grew up mucking in on his grandfather’s Devon allotment and has spent the last fifteen years growing fruit, veg and ornamentals across three very different UK gardens — a windy coastal plot in North Cornwall, a shaded London back garden, and now a clay-heavy smallholding in the Midlands. He trials every technique covered here in his own beds and containers before writing about it, cross-references against RHS and Kew guidance, and has a soft spot for heritage tomato cultivars and anything that survives a British winter without complaint.

    Got a question about something we’ve written? Drop a comment — we read every one.